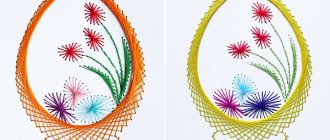
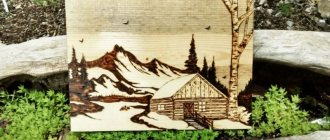
Thread painting is a technique also called thread drawing. It is based on the sequential filling of the contours of selected images using laces or thick threads. The history of this type of art originated during the existence of the ancient Indian Huichol people, living in the west and center of Mexico. Their main activities were weaving, embroidery, patterned weaving, and beadwork. Interesting paintings made using wool yarn became widespread. These were round or square planks with a hole in the middle. On both sides of such a base, glue was applied, which was based on beeswax and pine resin, on top of which wool threads in different color combinations were glued.
Modern paintings created using this method are distinguished by soft, voluminous forms. Nitography is often used in the form of educational activities in kindergarten for children and preschoolers, which allows them to develop their imagination, calms them down and attracts them to the interesting world of arts and crafts.
What is nitcography
Thread painting is the technique of drawing with threads. It makes it possible to create unusual drawings and even entire paintings without the help of brushes and paints. For this activity you need wool threads and glue.
There are several ways to create this type of drawing. Threads soaked in paint are passed over paper, they are used to fill various parts of the appliqué, or they are used to make stamps.
The technique of thread printing came to us from Mexico. Masters created real masterpieces using only thick woolen threads. They impregnated them with a special mixture made from pine resin and wax.
Creating paintings using thread that has been dipped in paint (usually gouache) is called thread painting. This is one of the types of nitcography. It differs in that it does not require the use of glue.
This kind of “drawing” promotes the development of motor skills in children, so it is practiced in kindergarten in middle and senior groups among pupils 4-6 years old. According to experts, nitography helps develop abstract thinking and helps achieve beautiful handwriting when studying at school.
What threads are used to create paintings?
Any thread will find its application when creating thread paintings, but each technique has its own preferences. For embroidery, silk and floss are most often used; knitted patterns are created from the remains of wool and synthetic yarn. For thread printing, thick textured threads are preferred; woolen yarn will be simply ideal; with its help you can not only “color” the drawing, but also give the picture volume.
Such works will definitely be unique and inimitable.
String-art does not require special threads - you can use any, depending on the idea. It will be easier for a beginner to work with thick threads. Thin threads require skill and craftsmanship, but with them you can create more complex and detailed designs and even achieve smooth color transitions. If you decide to work using the filumik technique, any thread will suit you, just use your imagination.
String Art is a fairly popular and unusual art that allows you to combine seemingly incompatible things: soft threads and hard nails.
Goals and objectives of using nitcography
So, what are the benefits of thread printing and thread writing techniques?
- Children get acquainted with new drawing methods that are just gaining popularity.
- Babies develop visual perception. They constantly have to look at individual objects and think about how to assemble them into a single picture or diagram. In addition, they improve the eye. They have to select those threads that are ideal in size for their design.
- Preschool children develop fine motor skills. This is very important especially in our time, when parents are trying to simplify their child’s life in any way, for example, buying clothes with zippers and shoes with Velcro instead of laces.
- Thanks to nitcography, creative thinking and imagination improves. For some children, a blank sheet of paper is an insurmountable barrier. They are unsure of themselves and are afraid to start something new. Nitography helps them to relax.
Plus, such techniques teach children perseverance and concentration both on the lesson as a whole and on individual details of the drawing.
Portraits woven from threads and nails
The technique of weaving String Art fascinates many people, they begin to do it professionally: they make products for sale, perform huge works with which they participate in competitions and exhibitions. Of course, such skill is very difficult to achieve, but it is this scale, this scope that is especially impressive!
Do you recognize the portraits of idols?!)
Marilyn Monroe
Leonardo DiCaprio
Yury Nikulin
Vladimir Putin
Yuri Gagarin
Using the example of Justin Timberlake's portrait, you can see how such grandiose works are made (video from the wearts ru channel):
The directions of String Art creativity are very diverse; this technique is even used in weaving icons:
Materials for practicing nitcography
Nitography combines the use of rather unusual combinations of materials and tools. You will need:
- Working surface. This is the basis. It is desirable that it be rough. There are no restrictions when it comes to color. Choose what you like. You can take cardboard or any other thick paper, fiberboard, a piece of flannel fabric, a piece of plain carpet, etc. An A5 size base is sufficient. For variety, make templates for future drawings in advance.
- Wool, acrylic or cotton thread with a diameter of at least 2 mm. For kids in the middle group of kindergarten, you can take a nylon cord with a thickness of about 4 mm. The main thing is that it should not slide. Pre-cut the threads into pieces of the required length. Older preschoolers can do this on their own.
- PVA glue with a brush.
- Napkins, oilcloth, scissors.
- For thread printing, you will also need toothpicks or thin sticks, with which the child will align the drawing.
If necessary, you can take pencils, markers and other additional devices.
If you decide to start thread painting, prepare an A5 landscape sheet, threads about 45 cm long, multi-colored gouache, brushes and jars in which you will dilute paints with water.
Where to find a drawing or diagram for a painting
For some techniques, for example, embroidery or string-art, you can buy ready-made kits for creating a picture from threads; you just need to select the proposed designs. If you have your own idea, you can find a suitable drawing on the Internet or make a sketch yourself. To work in the philumics technique, you don’t need a drawing for the base - you only need an idea and imagination, which can be fueled by a picture you like.
Paintings made from threads - threadography - is a type of fine art that uses lines and strokes as the main means of representation.
Nitography techniques
Most often, thread painting, drawing with stamps and appliqué are used in classes. Let's look at each technique in more detail.
Drawing with threads
The thread plays the role of a brush. The process looks like this:
- Dip the thread into paint of the chosen color.
- Once it is well soaked, place it between two sheets of paper. Can be laid in a zigzag. This will make the picture unusual.
- Lightly squeezing the paper and pull the thread out.
An interesting mark will remain on the sheets. It is either supplemented with details, or cut out and used as appliqué.
To make multi-colored prints, you need to take several different paints. Pour them in strips into a flat, low container. Saturate all the threads at the same time.
Drawing with stamps
First you need to make the stamp itself. To do this, you will need a base made of wood, foam plastic, thick cardboard or, for example, plasticine. Also take thick woolen threads, PVA glue, brushes and paints.
Apply glue to the base so as to repeat the intended pattern. It could be anything: a star, a flower, an animal, etc. Then carefully lay out the thread. Let the stamp dry. Then saturate the thread with dye. Attach it to a piece of paper and leave an imprint.
There is no need to make a stamp. If you wish, you can make do with a regular ball of yarn. Also saturate it with paint and leave an imprint on the paper.
Applications
In order to make an applique using thread printing, multi-colored threads need to be glued onto paper with pre-prepared contours. Perform a series of actions sequentially:
- Download and print the diagram from the Internet or draw it yourself using a simple pencil.
- Apply glue along the drawn contours.
- Carefully glue the threads. If there is excess, trim it off with scissors.
- Fill the middle of the design with threads. To do this, apply glue to the paper again. Lay the threads from the edge to the center along the perimeter. Another option is to chop up the threads and just sprinkle them on top.
For more information about this technique of thread printing, see the video below. There is a master class on creating the “Cherry” applique.
Features of weaving from nails and threads
When making products using the String Art technique, we would like to draw your attention to the following points.
How to drive nails deep
The nails must be carefully driven in along the perimeter of the pattern to the length of the nail at which it will be convenient for you to wind the threads.
The more multi-layered and voluminous the pattern, the higher the hammered nails should stick out. The height of the nails may vary depending on the intended design.
In order to drive nails to the same length, you can use pliers, that is, hold the nail you are driving with them. So the fingers will be intact and the nails will be driven in the same way.
It is more advisable to use pliers when driving nails
Whether or not to drive the nails in deeper after the pattern has already been wound depends on your aesthetic perception of the panel.
How to change thread color
When starting to wind threads on nails, tie the first thread to the first nail and begin winding work. When you need to change this thread to a different color, be sure to tie a knot on a nail, thereby securing the design you have made. Next, do the same with the new thread: a knot at the beginning of the work, a knot at the end. At the end of the work, do not forget to carefully trim and hide all excess. All this is clearly presented in the MK:
Methods for filling a pattern with threads
Using the same template, you can make completely different paintings from nails and threads.
Template LOVE
When the nails are already placed on the base, i.e. you have a dotted pattern ready, you can wind the threads, filling the pattern itself with them:
Filling out the drawing...
Or you can fill the background with threads, as if enveloping the drawing itself.
...or the background around
The third option could be to fill both the background and the pattern with threads of different colors. A combination of contrasting threads will look especially impressive.
An example of reverse and traditional pattern winding
Methods for winding threads onto a heart pattern can be as follows:
Filled the space between two hearts
Heart inside the weave
Thin sewing threads in spools can be used in the work, then the picture turns out incredibly elegant and light:
If you take thick threads like Iris and wind them in a dense layer, you can achieve the effect of full volume:
Edging the picture
The main design can be decorated with edging. The edging should be done after filling the “body” of the design, winding threads of the same or a different color in a “snake” pattern along the contour of the design. In this case, the yellow border adorns the blue letters:
How to make a picture using different colors of thread, and then complement it with edging in a contrasting color, can be seen in this MK:
The sequence of creating multilayer compositions
Let's look at how to make a complex pattern using several colors of thread using this red fox as an example.
To weave it you will need three colors: red, white and blue. The sequence of winding threads is as follows. First we weave a fox body from red and white threads. We braid the outline of the fox with red threads, we also braid the white cheeks on top with red color. We braid the outline of the white tip of the tail with white threads on top. At the end we weave blue eyes, which we also braid on top with blue threads. Lisa is ready!
These little animals are made using the same principle:
Using multi-layered threading, you can make such a seahorse. First fill in the “body” of the skate, then overlapping the top you can make a pattern like this on it.
Continuing to play with threads, you can make the following intricate color transitions:
Nautilus
Colorful waves
Threads and nails can do a lot!
You can make a multi-layer painting from threads and nails without a base, but using a wooden frame or frame. In this case, a nail gun will help make your work easier. Let's watch MK:
Tips for Beginners
Even for beginners, there is nothing difficult in thread printing. Just follow a few simple tips:
- Choose thicker glue. The liquid will be absorbed into the base of the drawing.
- Apply glue only to a piece of paper (or other material), not to threads.
- Even scraps of thread or parts of unraveled knitted items are suitable for the job. Just straighten them.
- Use threads of different thicknesses and you will create a three-dimensional image.
- If you are a beginner, do not use curly or shaggy threads. It will be difficult for you to work with them. Give preference to smooth ones.
- It is recommended to draw the outlines of the future picture with a simple pencil. But some needlewomen do this with acrylic paints. They also sketch the middle of the picture. This helps avoid the appearance of gaps.
- You need to fill in the parts only after the thread has been glued along the entire contour.
- Try to keep the coils as evenly as possible and as close to each other as possible. If necessary, straighten them with a toothpick or a thin knitting needle.
- If you need to fill a round element, move in a spiral, and if you need to fill a long element, move from right to left.
- Once the painting is ready, iron it with a hot iron through wet gauze or cloth. This will help align the image and make it smooth.
And, perhaps, the main advice is to start with simple drawings. Move on to more complex images only when you learn how to form coils.
