Who said playing with food is not good?! In this article we want to offer you an excellent set of felt food for creative games, which will teach your kids the culture of eating and its preparation.
Using step-by-step instructions for making felt food and patterns, you can make your own play set of bright and beautiful felt food.
Felt products can also be excellent decorative elements and props for decorating themed parties, holidays, and theatrical productions.
Felt carrots
To make such delicious carrots and ripe tomatoes, you will first need to print a ready-made template (pattern).
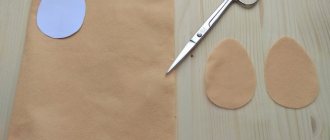
Then cut out 2 carrots from orange felt.
Sew the two carrot pieces together and turn them inside out.
Stuff the carrots with cotton wool.
Now cut out the carrot stems from the green felt. Each carrot requires two stem pieces.
Sew the two stem pieces together and stitch around the leaf pattern.
Place the end of the stem inside the carrot and sew with a closed top stitch.
Add top stitches on the carrot itself to make it look realistic.
Making a Potato Costume
If you know how to use a sewing machine, you can easily sew your own potato suit.
Our potato costume will be a sundress-cape. Determine how much fabric you will need based on your child's height and shoulder width. The bottom of the suit should be 1.5 times wider than the width of the shoulders.
Fold the piece of fabric in half so that there is room on the fold for the head.
Outline the outline of the suit - the neckline and side lines and fasten them with pins.
Using sharp scissors, cut out the neckline and make an incision in the back so that the child can put the suit on over his head.
Measure the distance for the arms from the fold line along the side edge of the suit.
Use a sewing machine to sew the edges of the suit - the potato sundress is almost ready.
Fold the bottom edge of the suit from the wrong side and sew it with a hidden seam in a circle, leaving the stitching unfinished - we thread an elastic band into the resulting “pocket”, which will give shape to the outfit.
Insert the elastic into the hemmed section using a safety pin.
Sew Velcro onto the slit near the neckline.
Hooray! – all that remains is to glue the muzzle. From felt, cut out details for the potato's face: white and black circles for the eyes, red lips. If your potato is a girl, make eyelashes for her, and a mustache for a boy.
Place the potato face on the front of the costume and machine sew the appliqué pieces or glue them in place with a glue gun.
All that remains is to tighten the elastic band of the bottom edge a little and round the sundress - the potatoes are ready.
The second way is to style the suit as a sack of potatoes.
By analogy with the previous method, make a sundress-cape from burlap. The outfit should look like a sack of potatoes. Therefore, expansion to the bottom is not needed. Make slits for the head and arms.
Next, let's start making potatoes.
Cut the tights into squares with a side of approximately 10 cm. Next, the task is to collect all the edges with a needle and thread so that the square turns into a bag, which we will fill with padding polyester.
Felt tomato
To create felt tomatoes, print out a ready-made template. Then transfer it to red felt. For one tomato you will need one circle.
Sew the circle around the edge using a basting stitch and pull together to create a pouch. Fill the bag with cotton and tighten.
Cut out a leaf from green felt and use a hot glue gun to attach it to the top of the tomato.
For realism, you can add a stem made of chenille wire.
Sample of a simple educational book
Page Layout
- 6 pages + 2 functional covers;
- plots and educational elements:
- first cover with letters and a funny lamb;
- a page with a flower and ladybugs on magnetic buttons (we learn colors and counting - there are from 1 to 5 circles on multi-colored ladybugs);
- a page with a large ladybug (the wings are connected by a zipper, under the wings there is a pocket for small ladybugs from the first page, the legs are made from a hat elastic band and wooden beads);
- a page with a tree and elements on Velcro (we study the seasons: flowers for spring, apples for summer);
- a page with a hedgehog and mushrooms on Velcro (you can also attach apples from the previous page to these Velcro);
- a sorter page with sea inhabitants on regular buttons (we study the shadows of objects);
- a page with a soft jellyfish, multi-colored ribbons, beads on a hat elastic band and a “sea” in which the heroes of the previous page can hide;
- cover with a pyramid with Velcro and a zippered pocket for storing all the elements.
- The pages are held together with strips of felt.
Patterns
The elements are quite simple, so the patterns can be drawn by hand. Another option is to find it on the Internet. You don’t have to search for “felt book patterns.” It is enough to choose the simplest children's coloring books and adapt them to the patterns. Give free rein to your imagination and it will suggest the optimal solution.
What materials will be needed for an educational felt book?
- felt. In this particular case, 11 sheets of 20 * 20 cm were used for the pages, and 20 sheets of 15 * 15 cm were used for the elements. The calculations are approximate, so it is better to have extra material;
- pins, needle and thread for sewing to match the color of pages and elements;
- magnetic buttons: 5 pieces;
- wooden decorative buttons (butterflies and birds): 10 pieces;
- wooden beads: 6 black and 6 white;
- plastic flat buttons: 2 white and 6 black;
- hat elastic: 1 m black and 1 m purple;
- Velcro tape (hook and loop): 50 cm black by 50 cm white;
- regular buttons: 4 pieces;
- holofiber filler - 20 g;
- regular grosgrain ribbon: 15 cm;
- zigzag rep ribbon 1 m white, 1 m blue, 1 m blue and 1 m light blue;
- zippers: 15 cm and 20 cm *
* The quantities and types of materials that were used in the sample book are given. They are easy to change depending on desire or availability in stores. Be creative!
Article on the topic: DIY Christmas tree made of pine cones. Three master classes for parents and children.
Felt bread
Now it's time to prepare the baked goods. And let's make a delicious sweet donut and fragrant bread (aka toast). Print out the finished template and transfer the details onto colored felt.
Sew two slices of bread together, leaving a small hole through which to fill the bread with cotton wool.
Do the same procedure with the donut parts. Fill it with cotton wool.
Cut out the donut icing from colored felt and glue it on with glue.
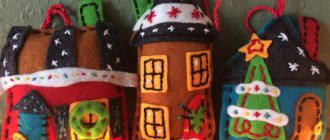
Christmas felt toys for the New Year 2022
When the time comes for the New Year's Eve, everyone will immediately start creating, so here are some small ideas for you.
Craft in the form of a deer.
House with a white snow cover.
Beautiful Christmas tree.
Gingerbread men.
Heart.
The symbol of this year is a dog, so you can make one for the Christmas tree; below I will present you with even more patterns with different breeds of puppies.
Felt baked goods
To make chocolate cookies, cut out two pieces of brown felt in the shape of a circle and one piece of padding polyester. Connect the parts together so that the padding polyester is in the center.
Sew along the edge.
Cut chocolate chips from dark brown felt and glue them to the cookies.
DIY felt pizza
Print out the finished template for the future pizza and transfer it to colored felt. Cut two pizza crusts from brown felt, and make the central layer from padding polyester.
Sew the parts together and be sure to sew an additional decorative seam that will imitate the edge of the pizza.
Cut out sauce from red felt. Then the yellow felt cheese.
From pieces of felt of other colors we cut out greens, onions, tomatoes and olives.
We connect all the parts together using a hot glue gun.
We will be glad if, thanks to this wonderful felt food set, your child decides to become a famous chef.
DIY felt pizza
Volumetric cutting
A voluminous felt set will allow you to study the shape of plants. You can create a whole vegetable garden with a garden at home; your child will be happy to plant and harvest.
They can be made in the same way as flat ones, but first leave a small hole for stuffing. Some people prefer natural six as a filler, considering it more environmentally friendly. But parents of allergy sufferers are recommended to use synthetic hypoallergenic material.
To make even more natural vegetables and fruits from felt, use the following patterns: It turns out very realistic, the child will definitely like this variety and will captivate him for more than one day.
MORE ABOUT: How to make temari with your own hands step by step (photo).
[custom_ads_shortcode3]
[custom_ads_shortcode1]
