Rating: 4.73/5 (44)
Today, bead weaving is not only an interesting and exciting activity, but also a way to earn extra money. In order to start earning money, you need to get the hang of working with these small beads. The best way to practice is to make small animal figures from beads , and we will show you weaving patterns for beginners. And even if you don’t succeed the first time, your children will still be delighted.
Materials and tools
The main material is beads, but in addition to it you will definitely need other components and tools. Stock up on scissors, beaded threads and needles, pliers and round nose pliers.
Types of beads
- Beads are small round beads. Typically, beads are sold packaged with the approximate quantity or weight indicated on the packaging. They are not exactly the same in thickness and degree of polishing. Another thing is expensive calibrated beads. Here the package contains almost identical beads. But they are used only for making complex things.
- Chopped beads are small beads in the form of a cylinder., and its length is usually equal to the diameter of the hole. Cylinders can be round or faceted.
- Bugles are long chopped beads (from 3 to 25 mm). It can be straight or twisted.
- Other small beads are usually called beads, having a variety of shapes.
Additional materials
- To create a durable product, it is best suited nylon thread, but it is not elastic and slides. Therefore, it is better for beginners to use thread made from natural fibers.
- To give the desired shape, apply copper wire.
- The elasticity of products (for example, beaded strands) will be ensured by fishing line.
- Needles Specific ones are also used: beaded ones. Not every household needle, and even one with a thread, will fit into such a small hole. And beaded - freely and several times.
What do you need for bead weaving?
To make your work as comfortable as possible and not cause irritation, you need to take care of the following important points:
- Convenient work place - beads tend to roll, so it is better to place them in special containers-cells. It is better to work at a table so that all tools are within reach.
- Beads - for beginners it is better to choose a good and high-quality material so that the weaving is even and proportional. Preference is given to Czech beads of various shapes.
- Thread - for beginners it is better to take a special fishing line for weaving or mono-thread. You can also try working with nylon if the fishing line causes difficulties.
- Needle – you should choose a special needle for beading, since it, together with the thread, passes perfectly through the small hole of the bead. Regular needles used for sewing are not suitable.
- Scissors - special scissors carefully cut the edge without deforming the edge of the thread. It will be easier for you to insert the thread into the needle and also work with it in the future.
- Diagram – if you have difficulty with schematic images, then you need to carefully read the description of them. This way, a complete picture will form in your head, which your hands will bring to life.
Each scheme usually specifies what materials will be used. If you need rigidity of the product, you will need copper wire, if flexibility and lightness, then nylon thread. Recommendations regarding the type of beads and their sizes are also given. Beads of different sizes will not allow you to get an even and beautiful pattern, and the fabric will be deformed.
When all the necessary elements are prepared, you can begin. Take only the simplest diagrams, and when they can already be obtained without graphic hints, then you can take more complex ones. Don't expect to master all the techniques in a couple of hours. It is better to work out each of them to the smallest detail, so as not to make gross mistakes in the future that will ruin the entire product and force you to start over.
Technique options
1. To create a canvas, they use the mosaic technique: with rows arranged in a checkerboard pattern. For beginners, 10 pieces of beads will be enough to learn mosaic weaving. First you need to string them all on a thread, and then alternately thread the thread through the new and already strung beads. You can weave rose petals using this technique.
2. An analogue and, if necessary, a replacement for mosaic stitching is the brick stitch technique . It provides greater flexibility to the product than mosaic due to the looped connection of the rows.
From the step-by-step photo for beginners, you can see that in the first row of brick weaving, the beads are firmly connected by double threading. The further density of all work depends on this.
3. If a product requires a direct arrangement of beads in vertical and horizontal rows (like cells in a notebook), then resort to hand weaving . Using this bead weaving technique, even for beginners it will not be difficult to create a picture from a photo or cross stitch pattern. First, the entire amount of the first row is strung on a thread, and in the next row, each upper bead is located above the corresponding lower one and is fixed by additional threading. The hand weaving technique is convenient for creating orchid petals.
4. To make three-dimensional models or “beaded fur”, needle weaving is used . Birch and willow trees, toys and decorations are made using this technique. The most justified frame material for such products is wire. With it you can model any figure. Especially if bead weaving patterns are intended not just for beginners, but for children.
5. Three-dimensional toys are also created using weaving in a circle. A simple circular weave with the same number of beads in a row is a beaded rope. But if you increase or decrease the row by several beads, you will get a figured cylinder, which will be the basis of the toy, a flower bud or the body of an insect. For beginners, patterns for weaving small toys from large beads are best suited.
6. Parallel weaving also allows you to add volume to any product: be it a toy or decoration. The frame material here is wire, which can be bent in any direction.
You may be wondering how to weave beads using thread, but first, work with wire.
Tips for organizing your workspace
Image 22. Workbench for beading
- Beads are best stored in clear plastic containers with tight-fitting lids.
- To save space, organize supplies on wall shelves attached above your desk or shelving. Designate a special storage box for work tools. Keep skeins of fishing line and thread in a visible place so that at any time you can cut off the desired piece of base for your beaded jewelry.
- Try to keep your work area clean and tidy. When finished, put the excess beads back in their places.
- Restrict access to your office (image 22) to your young children!!! Beads are very small material, a child can accidentally swallow them!!!
Snowflake
This is the simplest product that will help you fill your hand.
To make a snowflake from beads you will need: beads of different sizes, beads, glass beads, wire, our weaving patterns for beginners.
Such snowflakes can be hung on a Christmas tree, made into earrings or a pendant, or combined with other beaded decorations.
Would you like to make a more complex snowflake? Stock up on colorful beads of different sizes and shapes and watch the video:
Butterfly
Making a butterfly is also quick and easy. It will look more attractive if you use multi-colored beads.
To make a butterfly from beads you will need:
- beads for wings (88 pcs.);
- beads for eyes (2 pcs.);
- beads for the body (7 pcs.);
- mustache beads (2 pcs.);
- wire (80 cm);
- scissors;
- weaving pattern for beginners.
To make it easier for you to learn the technique of weaving a butterfly, we suggest watching the video:
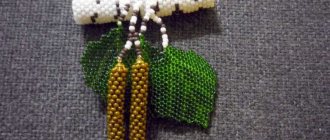
Dragonfly
The dragonfly will also be easy to make. You can make the wings in the form of loops or use the brick weaving technique with transparent beads.
To make a simple dragonfly from beads:
- beads for wings (76 pcs.);
- beads for the body (51 pcs.);
- beads for eyes (2 pcs.);
- thin wire (50-60 cm);
- scissors;
- weaving pattern for beginners.
You can watch the process of making a dragonfly more clearly in the video:
Beading as a home business: markets
- Wedding ateliers and evening fashion salons. Today this is the most profitable clientele for those involved in weaving and beadwork. Wedding and evening dresses, shoes, elegant accessories in the form of handbags and handbags - bead embroidery will turn any of these things into a real, expensive exclusive.
- Private clientele. This market for products can be provided by... your relatives, acquaintances and friends. Word of mouth is the cheapest and at the same time very effective way to convey information about your product to potential buyers.
- Souvenir shops. With the revival of interest in ethnic themes, products with folk motifs are increasingly in demand in souvenir boutiques. Shirts embroidered with traditional patterns, ethnic jewelry (necklaces, bracelets, headdresses) - all this can bring a good income to the craftswoman.
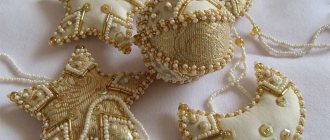
- Church shops. High-quality bead embroidery of traditional Orthodox icons will allow you to offer your work to church shops at churches. Such icons are valued quite highly - after all, it takes a lot of time and material to create them.
- Internet bulletin boards, specialized sites. Some websites for needlewomen and craftsmen today have special sections “Gallery of Works”, where any craftsman can put up his work for sale and successfully sell it. Here are just a few options for such sites:
Free notice boards:Websites selling handmade products:
- Annual holiday and specialized fairs. The fair is a great way to find like-minded people, and, possibly, future business partners. In addition, fairs are always visited by many people, which means they are the most suitable place to attract potential clients.
Lizard
You have learned how to make a dragonfly, now move on to a more complex product. First weave the lizard in one color.
To make a lizard from beads you will need:
- green beads (65 pcs.);
- black beads for eyes, legs and back (26 pcs.);
- wire (100 cm);
- weaving pattern for beginners.
The weaving pattern is unclear - watch the video.
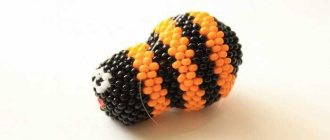
Spider
Here you can show your imagination and use different beads and all kinds of colors.
To make a spider from beads you will need:
- bugles (24 pcs.);
- round beads (87 pcs.);
- wire (60 cm);
- weaving pattern for beginners.
Find out how to weave a three-dimensional spider using the parallel weaving technique from the video:
Flowers
Beaded flowers can be made using a variety of weaving techniques. Children who have mastered parallel weaving can be asked to make a bouquet of forget-me-nots.
Required material:
- thin copper wire;
- round large beads of green, blue and yellow colors.
Step by step execution:
- They begin work by weaving flowers. Cut 10 cm of wire. I put 1 yellow and 5 blue beads on it. Move them to one end, leaving about 3 cm of wire after the yellow bead.
- The working end of the wire coming out of the blue bead must be passed through the 2nd, 3rd, 4th and 1st (yellow) bead. Carefully place a yellow bead in the center of the flower and twist both ends of the wire under it.
- For the leaf, cut off another 20 cm of wire and put on 1 green bead.
- Then 2 pieces are strung on one end, and the other is passed through both holes towards each other.
- Using the parallel weaving technique, they continue to form a leaf, collecting 3 beads in the 3rd row, 4 pieces in the 4th and 5th rows
- In the 6th row they begin to reduce the number by stringing 3 pieces.
- In the final 7th row there are 2 beads, and the ends of the wire are twisted.
- Fix the leaf on the stem of a pre-made flower.
You can attach several flowers and leaves to one stem or form a bouquet of single buds. The child will be able to implement a variety of options.
Herringbone
- You can string beads onto wire and then make a pyramidal spiral.
- You can also weave a flat Christmas tree.
- But the most interesting option would be a product made using the needle technique. Follow this pattern for weaving a beaded Christmas tree for beginners, making 4-5 branches in each row. Twist the finished product along the axis of the trunk, arranging the branches in a checkerboard pattern.
How to make a Christmas tree from glass beads, watch the video:
Let's weave a crocodile with a child
- Based on the size of the beads, measure the length of the fishing line (from 1 to 2 m).
- String the beads in parallel on the first and second rows together.
- Then pull one edge of the fishing line through the beads of the opposite row in the opposite direction and tighten tightly.
- String the beads for the next rows in the same way, fixing the other end of the fishing line with a counter step.
Tourniquet
It will additionally require end caps, a fastener and filler (for example, cotton wool or thin pieces of padding polyester).
- You can use the brick technique or hand weaving, weave a strip of the desired length and width, sew it along the edges, gradually filling the strand with filler.
- Or use the weaving technique in a circle and fill the product every 5-6 cm.
- You may find it easier to sew beads onto the fabric (see how to embroider with beads) and then form a rope.
Thin strands do not require the use of fillers, as they themselves hold their shape perfectly. We offer a pattern for weaving a thin round rope of beads for beginners.
We offer a video with a lesson on weaving a rope of beads for beginners:
If a rope seems like a very rough product to you, try weaving a necklace out of beads.
We hope our recommendations were clear to you and helped you understand the intricacies of beading. Tell us in the comments what you did.
How to make a bracelet
It’s not difficult to assemble a simple paper bracelet if the child’s parents help. To begin with, just choose a model, and only then collect the necessary materials and tools. You can use your imagination to improve the model.
Required materials and tools
To make your own paper bracelet, you need to collect the following tools and materials:
- colored and white paper;
- scissors;
- glue stick or PVA;
- felt-tip pens, colored pencils, pens and pencils;
- any decorations and little things: rhinestones, beads, sparkles, fabric bows, etc.
Even if a model is chosen, it is better to take additional elements into the work. Children need to be allowed to express their imagination.
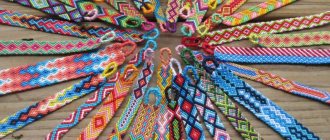
Step-by-step assembly of a friendship bracelet
The usual friendship bracelet is made from thread, but you can make an alternative from paper. Several options are offered as examples.
The first option is simple - making beads from paper, which are then simply strung on a thread. It is tied in a knot. If the thread breaks in the future, you can make new homemade beads.
To do this, follow the sequence:
- You need to make paper blanks - cut out elongated triangles.
- Take a knitting needle or a toothpick, a wooden skewer. Place it on the wide side and start twisting. Glue the narrow part with glue to make a blank.
- String beads onto a thread of a suitable color.
Friendship bracelets can be made from colored paper into more complex ones where adult help is required. We are talking about weaving when threads replace paper ribbons. A preschooler will not cope with the task on his own. To make a craft, you must follow the following sequence:
- It is necessary to prepare ribbons from colored A4 sheets, which can be connected together with tape.
- Next, start weaving in the middle.
- Continue braiding the braid with four “strands”. Guided by the scheme.
It turns out to be an interesting bracelet that any girl will like. It's much more interesting when she does it herself.
Video master class
You can make any paper accessory if you have a video with a master class before your eyes. As an example, we offer simple weaving for study. To work, you need to prepare colored elongated and narrow ribbons. They are used instead of threads, with which it is more common to weave famous baubles.
BRACELET BOOKMARK made of paper | Back to school
Watch this video on YouTube
Origami with a simple diagram
An interesting accessory is made using the origami technique. Here you can give several examples, each of which has its own complexity of weaving and style.
One bracelet is presented as a summer version. Girls are always interested in wearing such accessories in the summer, since only on warm days do they spend a long time walking and chatting with friends. You can watch the making of a summer bracelet in the video with the master class.
Origami Bracelet/Bright Summer Paper Bracelet
Watch this video on YouTube
The second bracelet is presented in black and white. It is more suitable for business girls and just older girls. A do-it-yourself origami paper bracelet is made step by step according to the instructions presented in the video.
Origami Paper Bracelet / Origami Bracelet
Watch this video on YouTube