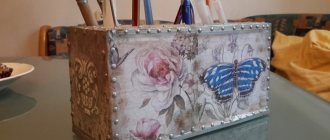
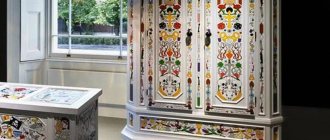
You can refresh the visual appeal of many items using the decoupage technique, which is very popular among creativity lovers. In this way, it is easy to make a new one out of an old cutting board and give it a second life, but in the form of a decorative element.
In addition, handmade products are in demand and original. However, not everyone is familiar with this technique and does not know how to decoupage boards with their own hands.
Information for Beginners
Mastering the technology of creating decoupage is not at all difficult, especially in our age of the Internet. You can use the advice and recommendations of professionals, or get many ideas posted on websites. At the same time, it’s worth trying once, and you will be able to decorate various household items with decorative works or give gifts to loved ones and friends.
Before you start doing creative work, study our master class and photos of decoupage boards.Types of design
If you like this design option, then, first of all, you will need to decide on the type of equipment used. You can choose:
| Classic way | consists in the fact that drawings are glued to the outside and covered with varnish. To obtain a perfectly smooth surface, it is grinded. Nowadays, finding drawings for kitchen decoration is not a problem. |
| Reverse method | can only be used in relation to transparent pieces of furniture, because decorative elements must be glued from the inside |
| Artistic way | if the surface of the furniture or wall is not monochromatic, then the drawings are selected in such a way as to create a whole work of art |
| Decopatch | Decoupage of an old kitchen is carried out using many small elements closely located to each other. The result is an imitation of the texture of natural material. |
| Volume | Using different techniques, a three-dimensional drawing is created |
This can be gilding, when additional processing is carried out with some kind of metallic paint. If you do everything correctly, you can create an imitation of precious coating. Using colored paints you can tint. But the effect of antiquity is achieved by treating the outside of the object with wax and then painting it. After complete drying, all this is rubbed down with sandpaper.
There is also a technology for forming individual cracks. Its essence lies in the fact that strokes of varnish are applied between two layers of paint. After drying, small cracks appear on the surface. They will give your furniture a special touch.
The decoupage technique is not very complicated, but there are techniques that require certain skills and abilities.
Basic Steps
Decoupage technology is not complicated and consists of several basic steps:
- sanding the surface of the product;
- primer;
- painting with white acrylic paint;
- drawing an image;
- varnish coating;
- sanding layers of varnish after it has dried.
Note! Modern decor for the facade: technology and features of the use of modern materials and the best design ideas (125 photos)
Making a blank
There is always a favorite board in the kitchen that you hate to part with, so let’s decoupage the old board. Select the side on which the drawing will be located. Sand the surface with sandpaper and remove dust with a napkin. Using a brush, apply the primer evenly over the entire surface of the board and let it dry thoroughly.
Each stage of decoupage boards with napkins ends with thorough drying - this is the main guarantee of an excellent result of the finished work. Sand the board again, remove dirt with a napkin and apply a second layer of primer, dry. Make sure your brush is always clean and dry.
To finish the workpiece, use a sponge to paint it with white acrylic paint. Apply the paint with jerky movements, pressing and lifting the sponge from the surface.
Try not to smear the paint on the board. After the workpiece has dried, lightly sand it and wipe with a napkin. The workpiece is ready.
Necessary materials
When working you will need:
- PVA glue or special for decoupage;
- acrylic: varnish, white paint and paints for artistic works;
- napkins with a pattern for decoupage;
- sandpaper of different fractions.
This set of materials is considered basic for decoupage.
French decoupage with image implantation into the surface
Hello dear friends, today we will introduce you to decoupage in the style of decorating the French provinces in monochrome. This is a very interesting and simple technique, having mastered which you will not be able to stop at one decorated item? Perhaps someone will not learn anything new, but I hope this master class will be useful for many.
decoupage with implantation of an image into the surface
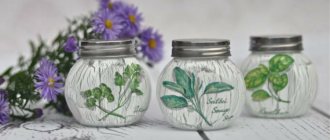
Materials for work: - blank for decoration - jar - image for implantation into the surface - acrylic paint white and black; -brush or sponge - acrylic varnish - candle and sandpaper
First, let's decide on the workpiece; it can be absolutely anything: glass, wood, metal, plastic, etc. In this case, we will take an original jar for bulk plywood.
Then we’ll choose an image for our unique French style in monochrome; it’s quite difficult to find something like this on sale, but the Internet is replete with pictures of this kind, so go for it. It should be remembered that the image must be printed on a laser printer (printed on an inkjet printer will bleed), and we need it in a mirror image (if it is an inscription, like ours), this can be achieved in the simplest graphics program.
Now let's start preparing the base itself. First, we will carefully process the jar using the shabby chic technique, that is, we will make characteristic monochrome abrasions.
It is not necessary to prime the workpiece, but the primer will provide reliability. Let's paint the jar black, it will show through in the abrasions and dry it thoroughly, you can use a hairdryer.
apply black paint for gaps
Coating paint can be applied with a brush, sponge or even spray.
apply black paint for gaps
and don't forget about the lid...
We also decided to make a perpetual calendar using this technique. Therefore, we do all the same actions with the calendar)
Popular articles White roses
apply black paint to the calendar
apply black paint to the calendar
Then we rub a candle in the places where we want to see the wear and tear of time; there the top paint will come off very well.
And paint the jar well with white paint. Let's dry it well again, otherwise there will be dirt.
paint the blanks with white paint
After this, we will process our product with medium-hard sandpaper. Black abrasions will become visible, until they reach the desired condition.
using sandpaper we create “scuffs” of time..
You need to work with sandpaper carefully so as not to tear off too much.
Now let's start implanting the image itself. The image must be printed only on a laser printer (powder printers and others are not suitable)
Please note that the picture is printed as a mirror image.
We crop the pre-selected and printed image in the required size close to the contours. This is easy to do, but you need to act very carefully and slowly. To begin, apply a thick layer of acrylic varnish to the jar blank in place of the image and carefully smooth our picture onto it with the front part.
apply varnish in a thick layer
Absolutely any acrylic varnish is suitable for implantation, but NOT PVA! ?
place the front side on the jar
we go well over the entire surface
Let's wait until the paper dries, or dry it with a hairdryer to speed up the process a little. After this, using water, roll up the paper little by little from the center to the edges.
dip your fingers in the water
You can do this with the rough part of the sponge, but I do it with my fingers, so it’s easier for me to control the process, because you can accidentally erase the layer with the image? It doesn’t matter if a piece of the picture is removed somewhere; it’s not at all scary for aging. We thin out the image to the edges; if it doesn’t quite come out, you can then sand it further and cover it with varnish. Then, if necessary, we sand it a little, and again cover it with the same acrylic varnish, and we also cover the entire product with it. I decided to complement the decor on the jar by spraying it with black paint (dry brush). Well, our wonderful jar is ready, you can also add a tray and spice jars to it
decoupage with implantation
Also, can you decorate small jars for a complete set?
Good luck to you in your creativity and bold endeavors! Author of the master class: NM Studio designer Yulia Mikhalyuk The master class was created specifically for the NM Studio store; copying without placing an active link to the source is prohibited.
Instructions for decoupage boards
Beautiful decoupage of boards is done both on used and new surfaces. Wooden products are best suited for this.
The ornament of the future masterpiece is chosen independently or selected from examples or photos. Mostly they prefer flowers, geometry, world map, chess pieces, icons, etc.
First you need to master skills such as sanding, sanding and painting. To fully use the board, you need to coat the surface with a varnish of increased strength and moisture resistance. Yacht varnish or parquet varnish is suitable for this, as it has suitable properties. For decorative items, light varnishing is sufficient.
How to make it yourself
Once you have decided on the design technique, you can move on to preparing everything you need. You will need scissors, a stationery knife, glue (preferably special). You cannot do without a foam roller, with which you will remove wrinkles, and you also need a sponge to remove excess glue.
For your information! If you plan to use napkins, you can get by with PVA glue, but for thick paper you will need a special adhesive mixture.
Materials you may need for work
In order to level the surface, you will need an aerosol varnish, you can also use acrylic, the main thing is that it is of high quality. Newspaper/magazine clippings and bright napkins can be used as decorative elements. These could even be pictures simply printed on a printer. In a word, you can use any material to create a decorative panel for the kitchen.
Sequence of work
The decoupage technique is carried out in the following sequence:
- Prepare the surface by sanding it with sandpaper and sanding it.
- choose a thin napkin with the desired pattern. Cut it out using nail scissors.
- prime the area prepared for the drawing. Let the primer dry slightly.
- separate the layer with the pattern from the rest, since the work requires the thinnest piece of napkin. – stick the design onto the surface using an adhesive composition, which is applied gradually with a brush. The napkin is applied from top to bottom and covered with glue. Avoid bubbles and creases.
- secure the drawing with acrylic varnish using foam rubber and let it dry.
- decorate the edges of the board with a corresponding ornament, using paints with mother-of-pearl of a suitable color.
- Apply another layer of varnish and leave to dry.Choice of decoupage theme.
Selecting the right topic is quite simple. For this purpose, newspaper clippings, magazine pages, book illustrations, gift paper wrapping, lace and fabrics are used. It is better to cut out designs using sharp nail scissors or razor blades.
An ideal theme for decorating kitchen boards is the image of vegetables, fruits or kitchen appliances.
You can make the image even and smooth with a mini roller, spoon or rolling pin. Be sure to remove excess glue using a brush, sponge or paper.
Decoupage the board with napkins
By following the instructions for decoupaging a cutting board, you will be able to get a high-quality original piece of furniture. For decoupage, you can choose any multi-layer napkins. Only the top thin layer should be transferred to the board.
So, the decoupage process begins with preparing the board. A smooth wooden product is covered with the first layer of acrylic paint with a brush along the grain. If during the process the wood fibers begin to separate from the moisture, then after drying they must be sanded.
After the first layer has dried, apply a second one, but with a sponge so that no streaks are visible. Everything dries well again. To speed up the process, you can connect a hot air hair dryer.
When the product is completely dry (about 24 hours), you can proceed to applying a fragment of a napkin with a pattern. Before doing this, the desired pattern should be carefully torn out of the napkin. You can transfer the napkin to the surface of the board in several ways (wet, dry), the main thing is that no folds or air bubbles remain.
For beginners, the dry method is suitable: the prepared fragment is applied to the board and, using a brush dipped in an adhesive solution, begins to carefully stick. You should not rush to do this, so as not to tear the napkin.
If wrinkles do form, you can smooth them out with a regular spoon or a rubberized roller. After removing all wrinkles and bubbles, you can leave the product to dry.
After drying the workpiece, it is time to draw the contours of the image. You can also create blurred edges using colored acrylic paints and a sponge. To do this, apply paint with a sponge using wet movements to the desired places.
The “spray” on the surface looks very impressive, as in the photo of a decoupage cutting board. To create this effect, an ordinary toothbrush is dipped in paint of the desired shade and, by running your finger over it, droplets scatter across the surface.
As soon as the paint has dried, the process of varnishing the product begins. The selected varnish is applied to the entire surface of the board in several layers, and each of them must dry well. Now the cutting board is completely ready for use as a full-fledged kitchen item.
Decoupage is considered a very budget-friendly form of creativity. You can purchase all the necessary materials and tools in specialized handicraft departments, in regular construction stores, and in online purchases. The main thing is to love what you do and enjoy the creative process.
Original effects and types of decoupage
If you want your picture to look more natural and alive, the technique of “implanting a napkin into wood” will help you. And the most important thing is to be patient and carefully watch master classes on this issue. In this complex technique, the effect is achieved using special wax.
Boards using volumetric decoupage look original, when small details stand out above the entire surface, which is achieved by repeatedly overlapping layers of the same patterns on top of each other.
Smoky decoupage, in which the boundaries between the main surface and the glued picture are erased, is a very artistic and charming technique.
The “aging” technique is very relevant in decor now, which can also be used in decoupage boards with your own hands. There is a huge variety of features and techniques for achieving this effect: from “scuffing” with a candle to craquelure and crackle.
There is an incredibly stylish and beautiful technique for decoupaging a cheese board. The process of its execution is very complex and requires certain skills and mastery in the decorative arts. But the result is simply stunning.
NOTE!
Decoupage of boxes - step-by-step instructions and recommendations for choosing ideas for decorating various types of boxes (100 photos)- Paper for decoupage - basic requirements, characteristics and tips for use (105 photos)
- Volumetric decoupage - modern techniques and application features. Master class on creation and best decoration ideas (140 photos)
In addition to the variety of types, decoupage is rich and interesting to creative people with spectacular, bright styles: elegant French Provence, slightly shabby shabby chic with blooming roses, birds and palaces, “newspaper” simple city, luxurious, rich Victorian style.
A rich imagination, a sense of style, and most importantly a desire to create - these are the most necessary things to work in the decoupage technique, a technique that opens up enormous opportunities for creativity!
Surface preparation
The wooden base must be prepared. To do this, remove any remnants of old paint, varnish or other coating. The surface must be cleaned of dust and dirt, treated with a grinding machine or emery cloth.
An ideal result can only be obtained when working with a clean and smooth surface.
- A piece of wood or a board for decoupage should have a minimum number of knots and cracks.
- For convenience, a piece of furniture can be disassembled into parts.
Why board?
Using the decoupage technique, you can decorate many household items, from a small box to pieces of furniture.
If you decide to try your hand at decoupage painting, a flat cutting board is the best “canvas” for your painting.
In addition, an unusually decorated board will be a wonderful gift and an exclusive decoration for any kitchen.
Advantages of the decoupage technique
In addition to its technological simplicity, which makes it possible for everyone to decorate the interior, the decoupage method has a number of additional advantages.
- Decorating objects with various decorative images gives them a second life. This allows you to update the interior with minimal financial costs.
- The necessary varnish coating extends the life of interior items.
- The technology of decorating surfaces using decoupage does not require the purchase of expensive tools and consumables.
- A creative approach allows you to get unique interior items.
Decoupage is a full-fledged decorative technique, representing a combination of different techniques and design styles. It’s easy to explain in a nutshell what decoupage is. This is the decoration of a surface by implanting various images into it on a paper or fabric basis using dyeing and varnishing.
To begin with, beginners are recommended to take on simple products to better understand decorative technology and gain some experience.
Dry method
It is simpler and recommended for beginners. First, you need to very carefully cut out the image so that there are no burrs at the edges. After this, you can proceed to applying it to the surface.
The image is glued to the board using glue, which is carefully applied with a brush.
The drawing should lie flat on the board without forming folds. If the latter do occur, you can remove them with a rubberized roller or spoon.
We recommend reading:
Door decor - 130 photos of exclusive ideas and options. Instructions on how to make decor with your own hands (video + master class)- Beautiful DIY kitchen decor - a review of the best ideas. Original and modern design TOP-150 photos
- DIY wall decor - a review of the best and original ideas. 135 photos of ready-made solutions, all implementation features + instructions
