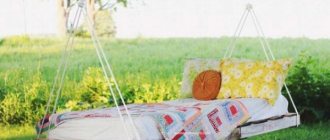
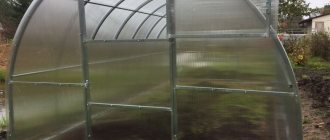
When children appear in a family, the house is transformed. It contains children's high chairs, tables, walkers, wall alphabet books, various toys and everything that kids need for development and play. Changes also occur in the garden or country house. Here comes a sandbox and an inflatable pool. It's time for the swing. But such “childhood joys” are not cheap at all. The solution would be to create a swing from a tire with your own hands. Making them is not at all difficult, the cost of their production is low. If you wish, you can make not just one swing, but an entire playground.
Materials for production
For a standard hanging swing, the main element will, of course, be an old unnecessary car tire. Finding her will not be difficult. R15 is best. Before starting work, tires should be washed thoroughly.
To make the swing bright and the children delighted with it, the tire needs to be painted. You can get creative and decorate it funny. Spray paint is best, but regular paint will stick well. In addition to a beautiful appearance, painting will help get rid of the unpleasant and persistent smell of rubber.
Fastenings require weight or U-bolts. They should be secured with large nuts. The tire will need to hang on strong ropes, ropes or chains.
It is also important what the swing will hang on. This can be either a tree branch in the garden or a structure with a crossbar made of wood or metal. Such structures require strong timber or pipes.
Having prepared these necessary materials, you can easily make a hanging swing in a few hours.
Safety
When starting to build a swing, you should think about how to make such a swing safe. The tire is thoroughly washed with detergent. When installing, follow basic safety rules. When attaching the swing to the S-shaped hooks, tighten them (the hooks) well and make sure that clothing cannot be caught on them later.
In the “fall zone,” which extends 180 cm in all directions from the hanging swing, there should be no fences, stones or other similar objects so that the child does not get injured if he suddenly falls. When making figured rockers, you need to make sure that there are no holes where the child’s head could get stuck (holes from 9 to 23 cm are considered as such). Paints should be chosen that are safe for children.
In terms of safety, tire swings are more harmless than metal or even wooden ones. If it falls, the swinging part may hit the child on the head. Rubber in this case is safer than wood and metal. Children's clothes or laces will not get caught on the tire. There are no sharp burrs or chips on them.
Although wooden swings still remain leaders in popularity. And if the wood is properly processed, then they are also quite safe for children.
It will be useful to read:
Making homemade swings for children Garden swings are great fun, leisure time and casual play. There is always a lot of joy and children's laughter around them...
Product support
When making a hanging swing, special attention should be paid to the strength and durability of its support.
If the swing will hang on a tree, then the branch must be strong, at least 15 cm in diameter. It should be located at a height of 2-3 m and be as level as possible. If this option is not suitable, then you need to make a U-shaped, strong structure.
Related article: DIY wire products for beginners with photo diagrams
Or make a support, which consists of two vertical triangles without a base from beams connected at the top by a crossbar.
Pre-dig holes at least half a meter deep. Place crushed stone at the bottom. Insert vertical beams into the holes and fill the voids with crushed stone. Or fill the holes with cement. Secure the beams on top with a crossbar.
The horizontal crossbar is secured with large screws. You need to screw metal brackets or screws with loops into it, into which chains or ropes will be threaded. For a metal structure, the manufacturing principle is the same, but you only need to fasten the metal pipes using a welding machine.
The support must be really strong and stable, because we are talking about the safety of children.
Tire preparation
An old tire is dirty and leaves black marks on clothing when it comes in contact with it. Tires are often stained with machine oil and asphalt tar. All these pollutants are washed off with detergents. You can even paint the tire yourself. In this form, it will definitely not stain the child’s clothes and will look more attractive.
Perforating the tire is a prerequisite for making swings
No matter what position the wheel is in, when it rains, water accumulates inside it. If a child rides such an attraction, he will get wet. The problem is solved by perforating the tire on the side that is located towards the ground. Rainwater will drain through the holes.
Hanging option
The most favorite swing for most children is the hanging swing, on which they can swing for a very long time. The first step is to choose a place where the swing will be located. Take into account the distance necessary so that the child can swing freely and nothing restricts this process. A step-by-step description will help you make such a swing.
You will need:
- old tire;
- 4 eye bolts or 4 U bolts;
- 6 nuts;
- metal chain, rope or strong rope;
- prepared support for a swing;
- drill.
The tire on the swing will be positioned horizontally. Therefore, in its side part you need to make holes with a drill and attach four bolts.
We thread rope or chain links into the loops. We strengthen it well. Determine the length of the rope or chain. It depends on the height of the support and the height of the child. It is necessary to take into account that children will have to climb on it themselves.
We hang the swing from the support. The crossbar must have fastenings with loops attached. We thread chains or ropes through the loops and secure them well. The hanging swing is ready.
The tire can be used to form different seats and make the swing more comfortable and interesting. For example, weave and secure the straps on top. Then the child will not fall into the hole in the tire. Or cut the side part of half the tire and bend the whole part, and this will form a comfortable seat with a backrest. A great idea would be to cut a horse out of a tire. The photo below clearly shows how to do this.
Related article: DIY cardboard box: master class with diagrams and video
Pros and cons of tire swings
If carefully analyzed, children's entertainment made from wheels has many advantages:
- Rubber wheels are a durable material. Such a swing is almost impossible to break or deform.
- Different wheel sizes make swings for all ages. You can make it fun for adults, teenagers, children and even a cradle for a small child.
- If you show your imagination, find it on the Internet or come up with an unusual pattern, then from the cut tire you will get an original swing seat.
- Wheels are not afraid of heat, frost, rain and other natural phenomena. The swing will remain outdoors all year round, and this will not reduce its service life.
- A big plus is the fact that you can create a swing from old tires with your own hands for free. Wheels are found in a landfill. All that remains is to attach the material available at home to them: chains, rope, log or board.
- Primitive swings are considered less dangerous in terms of injury. If a child accidentally collides with a rocking seat, the rubber will soften the impact. In extreme cases, you can get away with a slight bruise.
- The swing is so easy to make that even a person whose arms grow out of the wrong place can make them.
Among the minuses, two points can be noted. Firstly, rubber gives off an unpleasant toxic odor in the heat. Secondly, large wheels have an impressive weight. Reinforced support will be required so that the swing does not break off.
Rocking swing
You can also make a swing from tires. They can be for one child or for two. The only difference is the number of places and handles you need to hold on to. The single swing is reminiscent of children's favorite rocking horses.
To make a rocking chair you will need a tire. It needs to be cut into two parts. Choose a board whose length will be equal to the diameter of the tire. Insert a board into the cut of the tire and attach with screws. Screw a long board on top of it. The top board should be well sanded and smooth so that children do not rot the splinters.
Having measured the places for children to sit, attach the handles. These can be long door handles, you can make them from rope or make them from wood in the form of a steering wheel. It would be a good idea to attach cushions to the seating areas. The advantage of such a swing is that it can be moved to any convenient place or stored indoors in winter.
Recommendations
One of the disadvantages of tire swings is the weak durability of the rubber. The tire gradually ages and releases microdust, which remains on the hands and clothes of children. Therefore, after completing the work, the finished chair or seat must be washed with soapy water and thoroughly dried in the shade for several days.
Before installation, the tire must be painted with any plastic paint; acrylic and furniture varnishes are not suitable; it is best to use polyurethane or latex paints and varnishes; they do not slip, are practically not subject to abrasion and do not collect dust.
Construction of a stationary firewood rack for a bathhouse
An outdoor structure for storing firewood can be free-standing or attached. Most often, it is installed near the bathhouse to make it convenient and efficient to carry firewood. Even a beginner can build such a structure on his own site.
Preparatory work for the construction of a woodpile near the bathhouse
A stationary firewood box must meet the following requirements: protect the logs from precipitation and be well ventilated to protect them from rotting.
First you need to choose a place for it. Often, a firewood shed for a steam room is installed immediately next to the bathhouse. It is advisable that it be located close to the door. It should be located at a slight slope, which will facilitate the unhindered flow of water.
Traditionally, a firewood rack for a bath is installed in a style that matches the steam room
It is important that all buildings on the site are harmonized with each other. For a frame-panel bathhouse or log house, it is better to build a wooden structure
For a brick bathhouse, you can make a metal structure. Building a brick firewood shed is unreasonably expensive and makes no sense.
Construction of a foundation for a stationary firewood shed for a bathhouse
The best option is a columnar foundation. To arrange a small woodpile measuring 1.5 * 2 meters, six pillars will be enough.
We make the base in the following sequence:
- We drive four pegs in the corners and two in the middle of opposite sides.
We check with laces the evenness and identity of the diagonals.
We dig holes to the depth of soil freezing.
We install square formwork made of slats around each recess.
Using a level, we level the plane in which the formwork is placed. This is necessary so that all foundation pillars are at the same height.
We lower a sheet of roofing material into each hole to protect the solution from moisture.
We make a solution of cement, sand and crushed stone in a ratio of 1:4:4 and pour it into each hole.
We insert reinforcement with a 12 mm thread into each hole filled with concrete. The pin should protrude 9 cm above the concrete column.
Installation of a frame for an outdoor woodpile near the bathhouse
We will construct the structure itself from wood. For these purposes, you can use raw materials of any species. It is better to use galvanized parts as fasteners. They are highly resistant to corrosion.
We start the work from the bottom trim and carry out it in this order:
- We cut the timber with a section of 10*10 cm along the length of the walls. There should be five of them in total: four around the perimeter and one in the middle.
We drill holes along the edges of each element using a 13mm long feather drill.
We put longitudinal bars on the studs, install transverse ones above them and mark the intersection points for the cutout.
We tie half the tree. We file the cuts along the edges and chop off the excess using a chisel.
We lay a layer of roofing material, longitudinal elements and then transverse ones, having previously treated them with machine oil or rubber-bitumen mastic.
We screw the nuts onto the studs, enlarging the hole at the top using a router. This is necessary to secure each bar.
We reinforce the floor with joists and screw 2 cm thick slats with self-tapping screws.
We nail boards along the side perimeter to cover the strapping bars.
We cut the timber with a section of 5*5 cm. The length of the segments should correspond to the height of the front and rear pillars.
We prepare two 15-centimeter boards with a thickness of 3 cm. Their length will be equal to the width of the structure.
We sand all the parts using an electric planer.
We cut notches on both boards, one for each support.
We fasten the racks to the boards with self-tapping screws and to the floor using mounting angles.
We strengthen the supports with spacers and check the evenness and parallelism with a hydraulic level.
We stuff two-centimeter slats in a horizontal position with a gap of 2 cm, forming peculiar walls. The gaps between the slats are necessary for ventilation.
Construction of a roof for a firewood shed near a bathhouse on the street
We complete the construction of a firewood shed for a bathhouse with our own hands by installing the roof. The best option for this design is a pitched roof.
We arrange it in this order:
- We install 10-centimeter boards with a thickness of 3 cm over the building with an overlap on both sides; they will serve as rafters. We use metal corners as fasteners.
We screw 2 cm thick slats to the boards in 0.5 meter increments. This is a lathing for installing roofing material.
We fasten the metal profile sheet with construction screws.
We fix a wind strip at the ends of the roof to protect the structure from slanting rains.