What kind of miracle?
The traditional piñata is a structure made of papier-mâché with sweets inside. On the outside it is covered with multi-colored paper fringe.
The first surprise toys were made in the shape of a star. The pinata is made in such a way that when hit with a special stick, the structure breaks and gifts fall out of it.
Modern analogues can be made in absolutely any form. You can also fill the product not only with sweets, but inside you can put light toys (keychains or soft ones), stationery and whatever else you want.
The main thing is that the filling weight should not exceed half a kilogram. You can add glitter or confetti to the filling, then when you break the show it will be even more colorful.
How to make a Kinder Surprise piñata
Of course, you can’t do without a ball and papier-mâché. Well, how else can you make an ovaloid?
- So, we inflate the balloon and lubricate it with cream to make it easier to remove later. The first layer on the water is to glue pieces of paper or newspaper. We glue the second layer using PVA or paste (see how to prepare it below).
- Then, when the second layer has dried, we make the third again with glue. When the base dries well, pierce the ball, holding it by the tail, take it out and fill it with candies or toys.
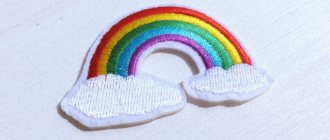
- We cover the hole with paper and paint it with a basic white color.
- Then we draw a wavy line and paint the lower part with red acrylic or gouache.
- You can glue on the eyes and mouth and leave it that way, but a fluffy piñata will look more beautiful. To do this, cut a strip from a roll of crepe paper without unrolling it. And we also make the cuts without turning them around to get a fringe. We cover the egg in a spiral with white fringe from the top and red fringe from below.
- We make eyes, a mouth and a cap out of paper.
Author MK
The cap can be made using the origami technique from paper, as in the video.
Or glue it from paper according to a template.
Of course, increase the template to the size you need.
Classic star
A standard piñata is made using the papier-mâché technique. Do you remember how in elementary school they tore pieces of paper from newspaper, dipped them in glue and pasted them over a mold in several layers? So, this toy is made in exactly the same way.
Most shapes can be made from a ball. For example, the Mexican star is made from a ball to which cones are attached. By the way, this form is also good because filler can be added not only to the central part, but also to each ray.
The finished product is covered with crepe paper fringe. If you don’t have it on hand, you can simply glue multi-colored pieces of paper overlapping each other to make the craft “fluffy.”
General technology for creating crafts
When planning a themed holiday, you can choose a Mexican style and make wide-brimmed sombreros from paper.
Cacti, photographs of llamas and alpacas are used to decorate the festive location; delicious and simple treats from traditional cuisine can be served as treats.
But the greatest sensation at such a celebration will be made by a thematic and voluminous piñata made using the papier-mâché technique.
To do this, use a base of suitable shape, which is smeared with rich cream and gradually pasted over with small pieces of newspaper or loose paper.
After drying the next layer, the next one is applied and this process is repeated until the layers become strong enough.
After preparing the base, it is carefully cut into two identical halves and the frame product is removed, and a sweet treat is placed inside.
The seams should be carefully aligned; they can be sealed with pieces of paper or masking tape, maintaining the shape of the craft.
The final stage is decorating the craft; for this you can use all kinds of decorations that help give the product an original and most unique appearance.
Design selection
A beautiful craft will turn out if you choose the right project, manufacturing materials and thematic, accent decor.
A piñata for children's parties is distinguished by a bright and original design that repeats the shape of familiar objects and objects that can be of different sizes.
You can truly transform a children's party with products in the shape of a large candy, a huge heart or a certain number.
Most often, themed crafts are made that suit the taste of the birthday person or hero of the occasion and are decorated in the appropriate style.
Suitable shape
A piñata is a good surprise and great entertainment for everyone present, but such a product is not cheap to order.
That is why parents strive to make crafts on their own, and for this they will need not only paper and glue, but also choose an interesting and unusual shape.
Considering that to implement the papier-mâché technique you will need a base for pasting, it is best to use an oval or round shape.
In this case, an inflated balloon is used as the finished base, and after cutting the top layer it is easy to remove it from the product.
What to fill with
To fill the interior of the craft, you can choose various small elements that will please the guests and the hero of the occasion. These can be small sweet treats, wrapped candies or small toys and pleasant surprises, confetti and notes with wishes.
It is better not to use heavy sweets and multi-colored dragees; if the former can injure those present, then the latter is very unhygienic to collect from the floor and then eat.
Sphere
The simplest and most accessible form for making a piñata is an ordinary balloon. You can inflate it completely and make a Kinder Surprise piñata from an oval, or you can inflate it to the shape of a sphere and use it to make many crafts.
A do-it-yourself piñata at home begins with the fact that, in addition to the ball, you need to prepare the usual set for a school labor lesson:
- Old newspaper or magazine
- PVA glue or paste (whichever you prefer)
- Scissors
Next we proceed according to the standard:
- Tear or cut the press into pieces
- We glue the first layer to the ball with just water (to be sure, you can wrap the ball with cling film, so it will definitely come away from the papier-mâché)
- Subsequent layers are glued with glue
- Each subsequent layer is applied after the previous one has completely dried.
- After the craft has completely dried, pierce the ball and throw it away.
The finished craft can be painted with white gouache or acrylic paint so that the pieces of newspaper do not show through from under the colored decoration. You can also make the last layer of papier-mâché from white paper, then it is not necessary to paint our semi-finished product.
What is the best and easiest way to make a piñata?
There are two simple, common ways to make a piñata; ideas for creating a real masterpiece involve using the simplest materials, such as balloons and old newspapers with glue.
When making complex geometric shapes, you can use pre-prepared blanks from loose cardboard; it can easily be broken with a stick or bat, according to an ancient tradition, and sweet gifts can be removed.
More complex shapes
The beauty of a piñata is that it can look like anything you want. Beginning craftsmen can make it from a ball or in the shape of a “hat box”.
- Cut out two circles with a diameter the size of the finished craft.
- Cut strips of thick cardboard as wide as you want the depth of the craft to be.
- Make notches along the connecting strips
- Glue two circles together with pieces of tape, placing stripes between them
- Don't forget to leave a hole where you can add candy.
If you suddenly fail to build a structure, you can always watch the corresponding video on the Internet on the topic “do-it-yourself piñata video.”
Note!
- Do-it-yourself easel - types of designs, choice of materials for creation + step-by-step instructions and simple diagrams for beginners
- DIY wedding glasses: a detailed master class for DIY decoration, selection of decorative elements and materials (photo + video)
DIY phone stand | Dimensions, features and beautiful options for telephone stands
Based on such a round box, a piñata can be made with your own hands at home in a variety of themes. Cover the box with paper and place a portrait of your favorite cartoon character on a circle, draw a cute face and glue a cone on the edge of the structure and get a unicorn, and a bunch of other things.
Using the same technology, you can create entertainment for a holiday of absolutely any form. It is enough to cut out the main outline from thick cardboard in two copies and connect them with strips of the required width.
For the laziest
If you don’t have the desire or time to bother with cutting out shapes, you can take a ready-made cardboard box. A piñata can be made from any box you have at home. It is enough to put the gifts inside, tie the boxes crosswise with a rope (don’t forget to leave a loop for hanging) and cover the craft with colored paper.
And so that no one finds out that the piñata was made at the last moment, design it as if the square shape was conceived from the very beginning. Boys will certainly appreciate the “punching boxes” in the shape of Minecraft heroes. And what? Everything there is square, even a person, even a sword.
DIY festive piñata
I decided to share with you the technology for making a piñata with your own hands. A piñata will decorate any holiday and delight your children, and it can also become an original gift for someone.
For a simple piñata we will need:
- an inflated balloon;
- water;
- flour;
- paper or newspaper;
- decorations for piñata;
- filling (sweets, tinsel, confetti, small gifts, etc.).
It is best to use the paper for the piñata that is sold with the shoes. It is thin and without a pattern. But you can use any one you find. We cut the paper into strips of any length and a width of about 3 cm. The inflated ball must be tied with a long thread, so that later it will be convenient to dry the piñata by hanging it not with this thread.
Place the inflated ball on some base (jar or saucepan). Glue the first layer of paper onto the ball. We apply the strips crosswise, it’s more convenient. We do not seal the part with the tied end. Attention! We glue the first layer using plain water - we dip strips of paper in water and place them on the ball. If you make this layer with paste, it will stick to the ball.
Leave the layer to dry completely. Don't be alarmed if the dry paper is uneven.
We will glue all other layers of the piñata using paste. There are many recipes for the latter, I used my grandmother’s recipe: mix 1/4 cup of wheat flour with 1 water. Meanwhile, pour 5 glasses of water into a saucepan and put it on the fire to boil. When the flour is well mixed with water, pour this flour mixture into a saucepan with water and cook over low heat, stirring, for 3 minutes. The finished paste should be cooled completely.
We dip the strips of paper into the paste and glue them in the same way as the layer with water. We also do not seal the part with the tip of the ball. A total of 4-5 layers with paste are needed. Each layer must dry well. If the paper is thin, you can apply 2 layers at once. Over time, the paste loses its adhesive properties; it lasts for a maximum of 2 days. So it’s better to prepare a new batch of paste after 2 days.
When our piñata is dry, cut off the tip of the ball, letting out the air, and take out the ball.
You can leave the piñata as is, or you can decorate its bottom. For this, I bought ribbons that are used to tie bouquets in flower shops. Several ribbons need to be folded together and their ends secured with tape, forming a tube. Make a hole in the bottom of the piñata with an awl or thin scissors and insert ribbons into it. We secure the hole with small squares of paper. The paper can be smeared with the remaining paste or just PVA glue.
Through the top hole, where the tip of the ball used to stick out, we pour the filling into the piñata. For us these are gold chocolate coins. The piñata was made for my daughter Ulyana’s birthday, so the treats were the same, so that there would be no offense among the invited children. And also there is no tinsel and confetti, because... the children's center asked not to litter too much. You can also put small gifts inside the piñata - hairpins, bracelets, stickers, cars, notes with wishes, etc. After the filling is filled in, we make holes in the walls of the piñata and thread the ribbon through them several times for strength . The piñata will hang on this ribbon. Next, we seal the tapes and holes with squares of paper coated with PVA glue.
Then comes the most creative part of the job - decorating the piñata. For example, you can simply paint it with the main color and then glue images of the characters or paint it or write something. Because My daughter is a devoted fan of the movie “Frozen,” so the piñata had to be with the characters of this cartoon. We painted the piñata with acrylic paints (white mixed with blue).
After the paint had dried, images of Anna and Elsa cut out of paper napkins (using the “decoupage” method) were pasted onto the piñata on both sides.
The piñata is ready!
Usually a hanging piñata is broken with a stick. If you don’t have a suitable stick or bat at home, you can take a small, medium-thick stick from the forest or park. At home, you need to wash it, peel it from the bark and paint it or wrap it with leftover tape or colored paper using double-sided tape.
Children at the holiday usually very joyfully rush to collect the treats spilled out of the piñata.
And now some nuances! If you are making a piñata for a small child, then this piñata will not be very suitable for him. It is quite difficult to break; it sways in the air. In addition, wielding a stick can be dangerous for the child himself and for the children around him. This type of piñata is suitable for older children who have the strength to break the piñata on the fly. But for younger children it is better to make a piñata according to the second option:
So, after all the layers of the piñata have completely dried, we cut out a pocket in its bottom, as in the photo, and pour the filling inside through it.
Next, we make a hole in the wall of this pocket and insert ribbons into it, as in the first option. Next, at the end of the ribbons (at the end that will be inside the piñata), using tape and paper, we form a ball like this, “bombOhu,” as my Ulyana says. Then we seal the cut lines of the pocket with pieces of paper and then proceed in the same way as in the first option. (color the piñata). The point of all this is that the child will pull the ribbons at the bottom of the piñata and rip out that cut-out flap thanks to the “bombOha”.
That's all! By the way, it’s nice to jump on an empty piñata and crush it later
Filling the piñata
You can fill the piñata with candies in bright wrappers, nuts, fruits, kinder surprises, small toys, and small stationery. Add something shiny to the filling. These can be store-bought sparkles or circle stripes cut from foil or candy wrappers.
Nowadays, parties where future parents find out the sex of the child have become popular. Often at such events they use a cake whose filling is colored blue or pink, balloons with colored smoke, and smoke bombs.
A piñata in the shape of a pacifier, bottle or stroller can also be used for these purposes. You can fill it with pink or blue confetti and give expectant parents and party guests a surprise.
For Christmas and New Year
For such holidays, it is worth making a piñata that displays the New Year's attribute. It can be in the form of Christmas tree balls with bright confetti inside, snowflakes, in the shape of a snowman, or a unicorn. The filling is made with predictions; small gifts for the whole family and guests, holiday cards are also suitable. Try to convey the festive mood in every detail.
It will take about a day to dry, after which the product is ready for decoration.
For a New Year's piñata, you will need materials identical to the usual one, the only condition is that the decoration must be made in accordance with the theme. It is better to take an oblong ball. When all the papier-mâché layers are dry, remove the ball. Cover the top part with colored foil and tie ribbon bows on top. Then use corrugated paper to make decor - snowflakes.
Depending on the purpose, it can be supplemented with eyes, buttons, scarves.
Space for imagination
Do-it-yourself piñata at home, the manufacturing instructions for which are given above, can be made in absolutely any form. It all depends on your imagination and skills.
If you used the balloon method, think about which characters might be round in shape. Children will surely love a live kinder, a smesharik or one of the angry birds. Don't want cartoons? You can always make a star, a sun, or even all seven planets of our solar system.
If you decide to use a cardboard structure, you can make a piñata of any shape, from a dinosaur to a kitten. The main thing is that the birthday person likes the form.
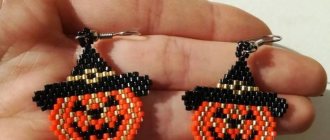
Halloween pinata
It's hard to imagine planning a fun Halloween without some fun. You can make a piñata in the shape of a pumpkin or a bat, and a small figurine of a ghost will add a special atmosphere. To make a bat you will need two balls, glue, tape, and black paper. The first step is to inflate the balloons, one should be small, it will serve as the head. Then secure them with tape. Then glue layers of paper on them, letting each one dry well.
The idea of such fun entertainment belongs to Mexico, although, according to some sources, the piñata is the prototype of Chinese lanterns.
Once you have achieved the strength of the mouse's body, you can pierce the ball and pull it out. Next, fill the piñata with the necessary elements. To create the wings, use black cardboard. After cutting them out, secure them. Eyes, teeth and ears need to be glued to the head. The finished version can be hung in the room.
The classic decoration option is corrugated or crepe paper. Paste the toy in a circle downwards with fringe, making each strip overlap.
Rules of the game
Typically, breaking the piñata is reserved for the end of the birthday party. It is better to take the birthday person away from the place of entertainment and hang up the form with gifts to arrange a surprise.
You can do the opposite, hang the piñata from the very beginning to feed the curiosity of the guests. But this option is not suitable for the little ones; most likely the toy simply will not survive until the end of the party.
It is also worth considering the physical shape of the guests. The game involves participants taking turns taking a stick and hitting the piñata until it breaks.
If among the guests there are people of different ages and sizes, the weaker ones should try their hand first. Otherwise, not everyone will be able to try their hand.
In Mexico, people traditionally try to break a piñata with their eyes closed. If the event is open-age and the participants are old enough, you can blindfold them with a scarf. It’s better not to take risks indoors and leave guests’ eyes open so as not to accidentally damage furniture and valuable items.
How to break a piñata
Having chosen a suitable place for the piñata, hang it. Gather the guests in a circle around her. The hero of the occasion is invited to the center; if desired, you can be blindfolded. He is given a stick, then spin him around. Amid loud singing, applause, and prompts, your hand must hit the piñata to break it. If unsuccessful, another child can try his hand. The game lasts until someone manages to break the toy. After which everyone begins to collect sweets or gifts that fell outside.
The right to strike first is given to the smallest participant, because due to his height, he is unlikely to be able to immediately break the toy.