Fine Jewelry
Using miniature fabric flowers, craftswomen create hairpins and headbands, bracelets and brooches, necklaces and other jewelry that elegantly complement an outfit or serve as a worthy gift for a beloved friend.
Using thin fabric, you can repeat the ideal shape of a flower and make stylish and luxurious jewelry or accessories.
Making fabric flowers with your own hands brings a lot of pleasure and emphasizes the individuality of the craftswoman. To make original gizmos you will need a little fabric, but the result will exceed all expectations.
A simple knitted hat for a child
It is not necessary to spend many days and nights on production. There is a way to quickly complete all the steps to please your baby with a new thing.
Making a hat pattern
The pattern is built according to the following instructions.
- Draw a diagram of the product on paper. Rectangle measuring 24 by 25 cm.
- At the top you need to draw 4 identical 6x6 wedges.
- To do this, draw a line at the top at a distance of 6 cm and divide it with vertical stripes into 4 equal squares.
- Place dots in the middle of the top of each square and connect them to the edges with smooth, curved lines.
- It turns out to be a kind of “fence”.
How to sew a simple knitted hat for a child
Transfer the diagram to the fabric folded in half and cut along the contours. You can sew the details:
- Turn the material right side up.
- Start stitching the side lines of the wedges.
- After this, connect all the wedges in the center one by one using a seam.
- Stitch the side line and close the piece to give it the final look.
The single-layer simple hat is ready. For other models you can use this type of base pattern.
An exciting activity or a magical hobby
People began to create things similar to the creations of nature a long time ago. The hands of the craftswomen tried many methods and manufacturing techniques to achieve similarity with natural flowers.
To make the petals convex, they used starch, gelatin, and squeezed them out with special tools, giving them the desired shape.
The easiest and fastest way to make fabric flowers with your own hands for beginners is to create buds by sewing strips of fabric or ribbons together.
Dress design
For the suit, you can choose any reddish, cherry, raspberry, red and white dress from your baby’s wardrobe and create a “cherry” applique on it: cut it out of reddish fabric (The structure of tissues of living organisms is studied by the science of histology)
, the color of which contrasts with the color of the dress, several circles, 3-4 cm in diameter. Using non-woven fabric, attach the circles to the dress in several places. Sew them along the edge using a machine zigzag stitch or by hand (satin stitch, roller stitch or buttonhole stitch). Threads can be chosen to match or contrast. Embroider the “tail” of berries and leaves with greenish threads. Finish the dress with a shiny rain: in the neck area, along the waist, at the bottom.
DIY crown on the head for a suit Cherry
The next step is making a crown on the head for our Cherry. Take a thick sheet of snow-white paper or cardboard. Draw 1-2 cherries with a diameter of 10 cm on it, add a tail 15 cm long and greenish leaves along the edges. When the paint is dry, cut out the crown along the contour. Do not cut the cherries on the crown together in the center, otherwise they will move apart when you put it on your head. Make slits along the edges of the berries, through which stretch an elastic band of a suitable length so that the mask on the baby’s head fits perfectly and does not put pressure.
Fabric strip rose
A long strip of any material folded in half is rolled into a tight roll. The petals are formed by turning the tape along the bias guide of the fabric. For 1 row you need to fold the tape 3-5 times. To get a lush bud you need to increase the rows.
With each subsequent row of revolutions you will need more. Carefully straighten the resulting petals and fix them with a needle and thread or a glue gun. When you receive a flower of the desired size, grease the end of the tape with glue and glue it to the underside of the rose.
Advice from experienced craftswomen on how to sew a knitted hat
To make your work easier and save your effort, money and time, we will share some experience and give some useful tips:
- When sewing on machines, use a slow speed to avoid damaging the material.
- An important rule is that the thinner the fabric you take, the narrower the needle should be to avoid the formation of snags and tears.
- Do not use a pencil to make marks; chalk or a sharpened piece of soap is best suited for these purposes.
- If the material crumbles a lot, then make more allowance for the seam than usual. This will keep the item from wearing out quickly.
- There are special needles for knitwear. Ask your nearest sewing store and buy this particular set.
This is not all the advice you will need for your work. Everything comes with experience, don’t be afraid of mistakes, try, and soon you will be able to make masterpieces yourself and give advice to others.
What is a backpack?
Pattern and sewing of a beret
Modern manufacturing techniques
Over time, new directions for creating fabric flowers have appeared, one of which is the Japanese Kanzashi technique - folding petals from squares of fabric or satin ribbons.
Flowers made of synthetic textiles, made by the “hot method” - by treating the edges of the petals with a burning candle - look as if they were alive. The petals, melted at the edges, curl up and take on a curved shape.
You can create your own flowers from fabric using the method of crimping, stitching and gluing petals. Needlewomen learn the art of creating flowers using instructions, recommendations, and videos that help them learn the intricacies of this type of creativity.
Children's hat made of jersey with lining
For lower temperatures, the thin version is no longer suitable. It is necessary to insulate yourself, and for this you should make a hat with a lining.
Making a pattern for a hat with lining
There are no differences in construction from the previous version. Do everything strictly according to the instructions. Only now this operation will have to be repeated twice: on the knitted material and on the lining fabric (you can choose warmer cotton).
Sew a hat with lining
Now we sew together the details of the outer and inner parts. After preparing both parts, you need to sew them together. To do this, place the pieces next to each other and stitch, leaving a small gap at the top. Bend the product outward with the side that will be on top. Sew the remaining window all the way down.
Flowers of different types
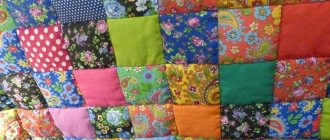
Textile decor is becoming one of the original and stylish ways of decoration. Flowers can be flat, voluminous, collected in a bouquet, wreath, composition or panel.
Products can be created from felt, burlap, denim. They are suitable for decorating large objects. And cute creations made from nylon, organza, fine knitwear, chiffon look elegant, delicate and close in appearance to the original.
The choice of fabric for the product depends on the purpose of the decorative element - a flower on a stem, an element of wall decoration, clothing or a wedding wreath.
Note!
DIY satin ribbon bows: photos of original design ideas, step-by-step DIY master class- DIY hair bands - ideas for decorating homemade rubber bands + step-by-step instructions for making them yourself
- DIY shadow theater: step by step how to do it at home! 175 real photos
Having mastered the technique of work, you can reproduce flowers from the fabric of leading masters, guided by master classes, or create an original product, emphasizing your individual style.
How to make a life-size knitted hat pattern
The main thing you need to do for sewing is creating the correct pattern. All future actions and the final result of the work depend on this. Here's what you need to know to build a pattern and a step-by-step plan for making it.
- Taking measurements correctly.
- Creating a drawing on special graph paper.
- Choice of fabric and number of layers. For cool weather use two layers.
- Transferring drawing lines to the material.
- Cutting fabrics and creating blanks.
IMPORTANT! When using dense fabric, you should slightly increase the width of the workpiece so that it does not cause inconvenience and discomfort.
How to take measurements for a hat
A very important question is to take the correct measurements and construct the drawing. There is nothing complicated, but you still need to be careful. To do this, take a centimeter and measure the circumference of your head. This will be the main size. In order to find out the size of the future hat, you need to subtract 4 cm from the main one (approximate values, depending on the density of the material). To build a workpiece you need to know the width. Just divide the resulting hat size by 2. Further work will be based on these dimensions.
What you will need to create a pattern and sew a knitted hat
In order to sew a knitted hat yourself, you do not need any special devices or tools. Everything you need can be found at home: threads with needles, knitted fabric for a piece measuring approximately 40x80 cm (it’s better to take extra), a centimeter, chalk for notes. There is no difficulty in acquiring all these things.
IMPORTANT! If you are going to make a lining, then you need to additionally prepare for this material the same dimensions as the main part.
Good mood for creativity
Good taste, imagination and imagination simply encourage you to engage in this type of creativity. This exciting activity will require accuracy, patience and perseverance.
To work you will need fabric, scissors, a needle and thread, a glue gun, brushes and paints, and most importantly, a good mood! This exciting type of needlework will seem not like work, but like relaxation, which will relieve stress and help you forget about your current problems at least for a while.
To make flowers from fabric, you will need copper, steel or aluminum wire for the stems, fishing line or nylon thread to create decorated fragments from beads and beads, cotton wool to create unopened buds, as well as semolina or crushed coal to imitate stamens and pollen.
Features of working with synthetic fabrics
Considering that artificial fabrics are often chosen for creative activities, you should first familiarize yourself with the main nuances of processing canvases:
- When choosing a fabric, you need to pay attention to the fabric’s ability to stretch, which will give the petal the desired shape and volume.
- It is better to cut all blanks for the inflorescence with scissors at an angle of 45 degrees. This cutting angle will prevent the threads from shedding and subsequently losing the shape of the bud.
- When heat treating edges, use a lower temperature than for natural fabrics.
- All artificial materials do not absorb paint well, and therefore craftsmen will receive a lighter shade of paint.
Before heat treatment, the edges of the cuts should be treated with a thin layer of PVA glue, which, when hardened, becomes transparent and prevents the threads from falling off.
Templates for creating buds
The templates are circles of different diameters. The bottom circle will be the largest. It will be 1 cm larger than the future flower. Cut subsequent circles 0.5 cm smaller than the previous (bottom) one.
The more magnificent the bud, the more circles will be needed. To create a very lush bud you need 3-4 circles of each diameter. Then transfer these template circles onto the fabric and make cuts according to the number of petals.
Usually 4 petals are made. They need to be rounded off with nail scissors and the edges burned over a candle flame. The blanks are fastened together in decreasing order - a blank with larger petals is placed on a blank with a smaller diameter, stitched or glued together.
Leave the middle free for the core or stamens. As a result, the whole process of work consists of cutting out the petals, processing them with a candle, collecting and securing the petals. An affordable and fairly simple option, and the result will surprise you.
Note!
DIY bracelets | Selection of the best models and master class on making beautiful bracelets- DIY bird feeder - interesting ideas on how to make it quickly and easily from scrap materials
- Do-it-yourself cold porcelain: the best options for porcelain products, step-by-step instructions and recipes for making it yourself (photo + video)
Costume base
The cherry suit should be made in bright colors of green and burgundy . Being a prototype of a delicious fruit, the outfit should be associated with a berry, a twig and a couple of leaves.
How to make the basis of a suit from an existing dress
The cherry outfit differs from many suits in that it is based on a red, crimson or red-white dress already in the wardrobe .
It can be of completely different lengths and fluffiness, with or without sleeves.
How to sew the base of Cherry's costume
If you don’t find a suitable dress in your wardrobe, then you should prepare a set consisting of a green turtleneck or T-shirt and a fluffy tutu skirt.
Skirt
It is easy to make within a few hours, following a certain sequence of actions.
- First, you need to cut out pieces of tulle of different colors up to 40 cm wide and a length equal to the length of the future product, multiplied by two. Tulle is available in bobbins, meaning you don’t even have to cut it.
- Next, you need to take an elastic band with a length equal to your waist circumference minus 3–5 cm and stitch it into a ring.
- For further work, the elastic band must be placed on the back of the chair .
- The tulle pieces are joined in half and attached to an elastic band using knots. The more cuts, the fuller the skirt will be.
- You can pass a satin ribbon through the knots of fabric on the belt and tie it beautifully.
IMPORTANT! A tulle tutu skirt is also made multi-tiered. For example, it may be shorter in front than in the back.
Top
You can also sew your own top from green fabric .
To do this, just circle any children's T-shirt and cut off the top . Next, you need to sew two sections on a machine, and decorate the top with an elastic band . This way the top will be easy to put on and will fit well on the child’s body.
A stalk is cut out of brown fabric and adjusted to a top . Next, we add a strap to it, to which we sew several organza leaves.
How to decorate the base to create an image
A dress or T-shirt can be decorated with applique.
To do this, you need to take red material and cut out several circles with a diameter of up to 4 cm. These will be cherries. You can attach them to the dress using non-woven fabric, and then additionally sew them along the edge using a machine or by hand.
It is better to choose threads that match the cherries or contrast.
You can use acrylic paints on fabric and paint a couple of large berries or, conversely, many small ones over the entire area of the dress.
ATTENTION! If the costume is intended for a New Year's celebration, then it is better to decorate the outfit with rain and multi-colored garlands. You can also glue a couple of snowflakes.
Product painting
To make it more like a natural flower, its petals are painted. On dark fabric, the folds are painted with lighter colors. And fabrics of white, pale pink or cream shades of brightness will add color to a tone darker.
To obtain a smooth transition, the fabric must be moistened before painting. Flower painting is an incredible art, once you get acquainted with it, it is impossible to stop the flow of creative inspiration.
Within one petal, you can use several shades of a suitable color, and then the effect will be simply stunning. Such painting will add three-dimensionality and a resemblance to naturalness to the products.
After drying, bend each petal in the desired direction. They can be bent inward and twisted outward - the buds will look like a blossoming or blooming flower. The beautiful curves of the petals are given by fabric that stretches in all directions.
Headdress for Cherry's costume
A cherry-shaped hat will look good on your head.
. It is done in the following way:
- On thick white cardboard, draw 2 cherry berries with a radius of 5 cm in diameter. Also add a couple of leaves and a stalk about 15 cm long.
- Color the resulting drawing with bright colors.
- After the paint has dried, the design must be carefully cut out.
- Make holes on the sides of each berry so you can pass the elastic through them.
- Measure the circumference of the child's head and an elastic band of suitable length.
- Pull the elastic through the holes in the cherries and sew the ends.
A hat is also a good choice as a headdress . It’s better to take a ready-made hat, or you can cut it out of cardboard in the shape of a circle. A tulle drapery sewn to the hat will add mystery to the look.
You can make a beautiful headband . Its base is usually taken from an old headband and wrapped in green cloth. Artificial cherry berries and leaves are sold in flower shops. You can even make berries from plasticine or felt.
For the crown, draw two cherries together so that they touch. When cutting them out, they should not be separated so that they do not move apart when putting them on.
An airy organza masterpiece
Flowers made from organza look elegant and very beautiful. Such products usually complement and decorate the bride's outfit. They are relevant not only for a wedding celebration, but also serve as an excellent decor for other holidays. They decorate banquet halls, cars, they miraculously complement and add charm to a bouquet of living plants.
Original, unfading flowers will decorate the tables of cozy restaurants and cafes, and your home holiday table. Flowers for curtains made with your own hands according to a master class selected from the Internet will add elegance and chic to the interior of the living room.
Sewing a children's model without a pattern
To sew a headdress with your own hands, it is not at all necessary to make a pattern. To do this, you should use simple step-by-step instructions.
The selected canvas is folded in half and applied to an old children's hat. Contours are drawn along it and details of the future product are cut out, while making seam allowances.
The gate element is cut out separately.
The part obtained in this way must be folded in half and inserted inside the main part. After this, the sidewalls are stitched.
All that remains is to iron all the seams and turn the product inside out. This completes the process of making a hat with your own hands.
Flower arrangements
Creating a floral composition is akin to painting: each new element is like an artist’s brush stroke. By selecting harmonious color combinations from buds and leaves, combining different materials, you create not just an interior decoration, but a real work of art. A delicate flower arrangement will decorate your home and become a spectacular gift for a birthday or wedding anniversary of relatives and friends.
Small flowers, such as violets, forget-me-nots, and small roses, can be made from purple, blue and pink silk or woolen fabrics. Leaves are made from leftover green velvet or felt.
The veins are easily marked by pressing with a hot knitting needle. To make the stem, a narrow grass-colored strip is wrapped around the wire. Leaves and petals are cut out from scraps using a bias thread.
Feminine look with floral decorations
Many workshops create flowers from light and airy textiles to decorate holiday outfits. Designer items are quite expensive and may not match the style and color of a certain type of clothing. You can make a fabric flower on a dress with your own hands.
An accessory made by yourself is much more pleasant to wear. A small rose will brighten up a strict black dress, and a lush chrysanthemum will make the dress feminine.
Flowers, which will add tenderness and femininity to the image, are created from very thin fabrics. Additionally decorated with rhinestones or small beads.
Fashionable models of knitted hats
- Nowadays there are many variants of this headdress model in fashion. You can choose for every taste and color according to everyone’s personal preferences. Among the main models that have been popular recently are the following:
- Classic thin hat.
- Option with a visor, unusual and very attractive.
- Thanks to its shape, the sock hat can take on any shape and shape, which makes it popular.
- Caps with a veil add mystery and charm.
- Double-sided model. You immediately purchase 2 products. Can be worn on both sides.
- Among children's models, there are those decorated with ears or pompoms.
- Options with prints from your favorite children's cartoons are also possible.
Exclusive knitted hats
In addition to the classic versions, there are also exclusive ones that amaze with their bright image and make passers-by look after you. If you want to be the center of attention, then these models are just right:
- Ushanka hat made of knitted fabric. Unusual performance for this type.
- A hat with pigtails is also quite an interesting option, given the huge variety of designs.
- A hat in the shape of a helmet. Quite a strong choice. It’s not suitable for everyone, but you definitely won’t be left without attention.