Today, purchasing a landscape lantern is quite simple; the market is saturated with offers and amazes with the uniqueness of their shapes and sizes.
But economical, highly reliable lighting devices have a fairly high cost and therefore not every owner is able to purchase the required quantity on the market to illuminate the entire local area.
Therefore, many home craftsmen make LED lighting with their own hands. How to choose the right design for self-production, purchase consumables and assemble an electrical circuit, all about this in this article.
Skycloud's Diary
- Architecture (120)
- Bodyflex, yoga (57)
- Videos (754)
- All about coffee (492) Sunday coffee with newspaper (45)
- My knitting patterns (7)
- Pancakes (56)
- and talk? (253)
- Interior things (143)
- Cat housing (18)
- Restaurants (45)
- Yellow Brick Road (13)
- My MKs (11)
- Shoes (74)
- Maidan, Ukraine, Crimea (96)
- Interesting places on the planet (88)
- Other materials (126)
- Jewelry (113)
Assemble the body
1. Cut out the glass for the three walls and the door (Fig. 2 and “Detailed view”). Cover the glass on both sides with masking tape. Apply glue to the tenons of the two body crossbars (C). Assemble the crossbars and two posts (B) by inserting a piece of glass into the tongues (Fig. 5). Align the crossbars with the tenon shoulders on the posts.
2 Apply glue to two more crossbars, add glass, a front post and glue these parts to the previously assembled back wall (photo P). In the same way, assemble the remaining crossbars, glass and front pillar. Make sure the bottom and cover (A) fit easily onto the studs of the posts.
3. Assemble the door by gluing the posts (D) to the crossbars (E) and inserting the glass into place.
4. Finish all parts with 220 sandpaper.
5. Glue the lid and bottom to the body.
6. Drill holes in the tenons (photo E) and insert round dowels into them. Apply a clear coat (we used a nitro varnish in an aerosol can, spraying it three times).
Link by topic: DIY decorative lantern-candlestick with stained glass
Garden lanterns made from tin cans. Master Class
I already posted photos with similar candlesticks, and now I found a detailed master class with good tips on how to make it.
The simplest works have their own nuances, and here too. Recycling is the art of giving a second life to things that need to be recycled, the most popular, most sustainable and most promising global trend of everything: fashion, design, industry, and, of course, handmade. In creative and environmentally oriented hands, anything that would normally go in the trash can be repurposed. For example, tin cans. Admit it, have you thrown away a lot of them? But you can make cute garden lanterns from cans, as Michelle Gervais did. Her experience in the form of a master class was published in Fine Gardening magazine. I’m sure the Frenchwoman’s experience will be useful to the Russians.
Such lanterns can be used not only in the garden, but also on countryside outdoor recreation, and on an ordinary city balcony.
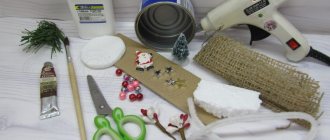
- A variety of leaves with interesting shapes
- Sheets of parchment paper
- Scotch
- Black marker
- Cans
- Sand and water
- Towel
- Hammer and nails
- Spray paints in colors of your choice
- Copper wire
- "Floating" candles
Prepare the jars: fill them with sand, add water almost to the top and place the jars in the freezer. The frozen mass of sand and water will give the surface of the jar elasticity, which will be very necessary when punching holes in the walls of the jar. Otherwise, the walls can easily become deformed. Water expands significantly when frozen and the jar can swell greatly if you use water without sand. Filling the jar first with sand and then with water significantly reduces the amount of water in the jar, minimizing expansion.
To prepare a template for embossing a design on a jar, select leaves that will match the size of the jar and suit your taste. Do not choose leaves that are too large; they should fit on one side of the jar so that their contours are clearly visible when viewed from the front. It is better to make several leaves on all sides on the jar than one large one, which will be difficult to discern. Place transparent paper (tracing paper) on the selected piece of paper and trace the outline of the sheet on it with a black marker. Even if there are many details such as veins on the sheet, you will still be able to knock out only the main ones. If you want, use any other templates to emboss a design on the jars, just print out the outline design you like on the printer and transfer it to parchment paper.
Once the water is completely frozen, remove the jar from the freezer and wrap it tightly in patterned parchment paper. Choose exactly the position of the template on the jar that suits you. Once you find the desired position for the design on the can, secure the paper with tape. You can glue the edges of the paper directly to the walls of the jar for better fixation.
Place the jar on a folded towel to soften the impact and protect your work surface. Using a hammer and a sharp nail, punch holes along the outline of the design. You can change the diameter of the nails depending on what you are knocking out: the outline of the leaves and thick veins - with a large nail, thin veins - with a thin nail. When you have completely knocked out the design, make two large holes opposite each other on the top of the jar, closer to the edge. A wire will be threaded through these holes, from which the cans can be hung.
What is the secret to creating the right lighting?
Truly, garden lighting is akin to art - it can create unprecedented effects that are born from the union of plants and decorative lighting. You just need to bring to life some “educational” ideas for your dacha - with your own hands you can transform your garden so much that from being inconspicuous, no different from many others, it will turn into a fabulous corner that can touch you at any time of the day.
Evening lighting of the dacha will not only give the garden a certain mystery, but will also allow you to move around the site without fear
Your garden house and country landscape will look natural during the day and mysterious in the evening if you successfully combine the functionality of lighting with its decorative effect. What tasks are assigned to lighting a garden plot? Depending on the function and area of placement of external lamps, the following types of dacha lighting can be distinguished:
- home lighting;
- track lighting;
- lighting of stairs;
- accent lighting;
- patio lighting;
- festive lighting;
- security lighting.
An important condition for the correct organization of a dacha lighting system is the preservation of the aesthetics of the garden during the day, that is, lamps for night illumination should not disturb the harmony of the dacha landscape. To fulfill this condition, it is enough to select lighting fixtures with a natural shape and/or made from natural materials. A widely used technique for decorative garden lighting is luminous stones, which absorb solar energy throughout the day and release it at night in the form of a mysterious glow, flowing softly, as if from within a rock.
Original lighting placed in dense vegetation will create a cozy atmosphere in a secluded relaxation area
Aerial butterflies and dragonflies, glowing in the dark, naturally and unobtrusively coexist with garden plants
Or maybe you would prefer a group of bright butterflies on long twigs stuck into the ground, which will enliven the lawn during the day and glow at night? What do you think of a gnome with a lamp suddenly peeking out from behind a bush, or a glowing frog perched under a large leaf? Such original solutions will give your dacha individuality and originality, to your delight and to the good envy of your neighbors.
In addition to the artistic impression, it is necessary to think through the technical side of lighting the dacha. The use of alternative light sources based on solar energy is the most economical option for garden lighting. In addition, this type of lighting will not spoil the appearance of the site with long electrical cords stretching along flower beds and paths, since it consists of an autonomous battery pack and a group of lamps connected to it.
The unusual illumination of trees in the form of luminous wells is so mysterious that you inexorably want to look into this depth
Artificial flowers in the form of solar-powered lamps will harmoniously fit into the landscape design of the garden
It is more logical to place backlights connected to the electrical network closer to the house - to illuminate the facade, entrance lobby, terrace, since these areas require more active light, and laying a short wiring will not require significant labor costs and financial investments.
Where it all started
I wanted to arrange a romantic evening for my husband, bought some scented candles, but only then discovered that there was nowhere to put them. I had to be smart. After surfing various forums, I came across an interesting post about how a woman made lanterns from old tin cans. Judging by the photo, the homemade product turned out to be very attractive, so I decided to repeat it.
I also didn’t want to waste money on expensive flashlights. And making something with your own hands is a good way to exercise your imagination.
Ideas for creating and decorating an antique lantern
It’s worth noting right away that to make an antique lantern with your own hands, you don’t have to weld the metal yourself or glue wooden pieces together. You can take a finished model and try to decorate it like an old one. An excellent option would be to add wooden or openwork metal parts, use paint with the effect of corrosion or antique wood.
An equally good way would be to decorate the lampshade with acrylic paints and turn it into a stained glass window. An unusual method of creating an unusual garden or home lantern would be to decorate it with chains, ropes, or form an unusual base in the style of a knight's and royal castle. A candle inside such a lantern or a wick with oil creates a special atmosphere. It is this detail that sometimes creates the entire ambience of antiquity.
It is worth pointing out that today antique lanterns, complemented by unusual lampshade covers stylized as a Chinese house, an English addition to a veranda, or a Japanese teapot, are especially popular.
Savings and beauty
A great way to save on supplies when making crafts is to use recycled materials. These could be leftovers from previous crafts or items that can be transformed into something new. Newsprint, empty glass jars, cardboard boxes or even tin cans can be used to create wonderful new crafts.
This project uses tin cans. They are usually thrown into the trash. But in a few minutes you can turn a tin can into a beautiful lantern using just a drill, some wire and paint.
I saw a similar candlestick for sale in some catalogue. Their price tag was more than 700 rubles. But spending that amount on an old tin can and a piece of wire is too much.
These lanterns can be made for almost nothing! I used a large jar that once contained tomatoes and an old wire clothes hanger. To decorate, I used plain white spray paint. The cost of a can is about 100 rubles, it is enough to paint a couple of dozen flashlights.
Advantages and disadvantages
Advantages of homemade structures:
- unusual design;
- strength;
- durability, reliability;
- resistance to mechanical stress and temperature changes.
For lighting devices that will be installed outdoors, it is important to take care of an anti-corrosion coating to protect them from rust.
Minuses:
- large mass, which is especially serious for suspended ceilings;
- Welding seams that are formed after connecting individual metal parts must be additionally processed to protect them from rust.
Making a forged metal lamp is quite difficult. To do this, you need to have forging skills and be able to work with hand and power tools.
Power tools (Photo: pixabay.com)
Manufacturing procedure
- Clean jars and remove labels. Print or draw a template and attach it to the jar.
- Using a small nail, mark the points where you will drill the holes.
That's all, now you can put a candle inside the lantern - a romantic mood is guaranteed.
Materials
In the manufacture of lighting devices, the following are most often used:
- Brass. Suitable for structures located inside the house.
- Iron. Used in the manufacture of frames and bases for lamps.
- Cast iron. Most often used for making street lamps.
Copper and bronze are also sometimes used. These alloys are easy to process and have an attractive appearance.
Lantern (Photo: pixabay.com)
DIY garden street lamp
Beautiful lighting plays an important role in the design of a summer cottage. A high-quality lighting system allows you to admire your garden not only during the day, but also in the evening. Moreover, properly designed lighting can transform an evening garden beyond recognition. Of course, you can purchase a street lamp in a store. Fortunately, there is plenty to choose from: the trade offers a huge assortment in different price categories. But making an exclusive street lamp with your own skilled hands is not at all difficult.
Connections and installation
When we have assembled the structure, we need to proceed to the main thing - connection and installation. For this we need:
- VVG cable.
- Corrugated pipe with a diameter of up to 25 mm.
So, first we need to think about what our lamp will be installed on. Below is one of the options:
Street lamp mounting option
Then we immediately run a cable to it; this can be done underground or over the air. Therefore, read the article on how to lay a cable underground, here we have covered all the nuances. By laying the cable underground, you can maintain a beautiful appearance.
The connection looks like this:
- Assembling a lantern for the street.
- We connect all the wires, remember that they need to be constantly insulated. You will also find this article useful: how to connect wires, so you can make a safe installation.
- You also need to think about what kind of lamp you will have installed. We recommend using LED lighting, as such lamps are economical, durable and provide good light.
Remember! Additionally, you can connect a motion sensor. In such a situation, the lantern will light up automatically as soon as people approach it.
What types of street lamps are there?
Before we start manufacturing, let’s figure out what types of street lamps there are.
- Floor lamp, or lamppost. It is a stand on which the lamp is installed. Floor lamps differ from each other not only in shape, but also in height.
- Wall lanterns. The name speaks for itself. These are lighting fixtures that are attached to the wall. As a rule, they are fixed near the front door of the house, veranda or terrace. Can be of various shapes and sizes.
- Ground lamps are installed in the ground. Used to illuminate garden paths, highlight beautiful tree crowns or landscape elements, lawns and artificial ponds.
- Pendant lamps. They are attached to hooks, chains and suspended in an area that requires lighting.
What you can get
A lamp made from a can can have a wide variety of designs and appearance. The following product options can be made from this material:
- candlesticks;
- tabletop instruments;
- shades for chandeliers.
Let's look at each option in more detail.
Note! The methods for making lighting fixtures described below are applicable to all glass products.
Option No. 1. Candlesticks The simplest and easiest to make will be making candlesticks. Here you can use both darkened and transparent small jars. If necessary, you can repaint them with your own hands in the desired color. To make a candlestick, you need to do the following manipulations:
- apply a design to a glass product. To give it volume, simply blend the paint;
- then pour paint inside the jar and also blend it;
- The neck can be additionally wrapped with strong rope and thus form the basis for attaching the candlestick to the wall or ceiling. Instead of rope, you can use wire to install the candlestick;
- Add some sand and water to the bottom. This will protect the glass from heating and cracking;
- Place a lit candle inside.
Ready candlestick
Option No. 2. Tabletop device Here, larger cans (1, 2 and 3 liters) should be used for production. To make such a lamp, you will additionally need glass balls and pieces of glass of different colors. Everything is done with your own hands as follows:
- wash and dry the jar;
- We are deciding on the method of external decoration with glass. You can paste them over the entire glass surface in a chaotic order, or you can lay out a specific pattern (ornament);
- Next, we coat the outer surface with glue and begin laying out the pieces of glass. Try not to make the joints between the pieces of glass large. They should be almost invisible;
Note! Use fast-setting glue so you don't have to wait too long for the glass to attach to the surface of the jar.
Decoration
- we wait for all the pieces of glass to stick properly;
- take a beautiful ribbon and tie it around the neck. This will give the product a festive look;
- pour sand and water inside the jar and place lighted candles on top. It is better to use small and flat candles. They can be replaced with a small portable flashlight.
Ready product
Such a device is suitable for illuminating a picnic in the evening near the house or just gatherings in a gazebo. In addition, it will fit perfectly into the romantic atmosphere of a dinner at home.
Light sources for street lamps
As a light source, you can use incandescent lamps, halogen lamps, LED lamps and strips. Their characteristics:
- Incandescent light bulbs provide bright light but consume a lot of electricity.
- Halogen lamps are quite economical, they have a fairly long service life and bright light. But they get very hot and are sensitive to temperature changes.
- LEDs. The most optimal and modern option. LED lamps have the same advantages: economical, reliable, safe, and have the longest service life. LEDs are not cheap, but the fairly high price is compensated by quality and service life.
Lanterns in the garden are not only illumination, but they can create an atmosphere of celebration, magic, mystery or romance. A little imagination, modern materials and technologies will help create unusual lighting on the site.
You can read my colleague’s article, A Tool that can be very useful to you, here.
Possible difficulties and errors
Technically, making the lantern itself for landscape lighting does not seem difficult; for this it is permissible to use both new parts from the store and those that can be found in any household. To do this you just need to use your imagination.
Difficulties with landscape lighting are caused by power supply schemes, choice of power and number of lighting devices. All 220 V power lines are classified as dangerous, the calculation and installation of which can only be carried out by specialists.
The main mistakes that users make when installing landscape lighting:
- The power, type and number of lamps are incorrectly selected. The installation does not perform its lighting functions or is energy-consuming to operate.
- Violation of underground cable laying standards.
- The cable characteristics do not correspond to the connection power of lighting devices.
- There is no protective grounding and no automatic safety system in the electrical network.
- The connection of lighting devices is made using twists without the use of terminal blocks.
- The cable is laid in the ground without metal hoses.
- The incandescent lamp is hermetically sealed in the lamp; there is no ventilation to cool it.
What best decorates an autumn garden? Cool DIY garden lanterns
You can simply throw away old things, or you can give them new life. It is the manufacture of various useful and decorative items from such things that is a very fashionable trend today. After all, this helps to preserve nature and is an excellent way to save money.
You can make beautiful original decorative elements from the most unexpected things that we usually throw in the trash. Here are some ideas on how you can make lamps for your summer cottage and living space.
From building materials
As you can see, you can make a decorative street lamp with your own hands from any objects, the main thing is to have a great desire for it.
So, sometimes after renovations there are remains of cement and plaster left in the house, let’s try to use them in the direction we need.
Take a bottle with a capacity of 2 liters. Cut off the third part from the edge, and cover the neck hermetically. Now insert a 0.5 liter bottle into the container.
The narrow neck should be pressed against the neck of the large bottle. Fill the empty space between the bottles with cement. After some time, the cement should dry and then you will have a lantern for your flower garden; all that remains is to thread the light bulb with the cord.
Cans
You can easily make beautiful garden lanterns from tin cans. You can make holes in them using nails, which will represent a pattern, and then paint them in the desired color. A candle is placed inside such a lantern, and as a result you get a very beautiful decorative element. To prevent the jar from becoming deformed when making holes, it is recommended to pour sand into it, fill it with water, and then put the jar in the freezer. Nails of different thicknesses can be used to make holes of different diameters.
Make metal fittings
For metal parts, take soft copper sheets with a thickness of 1.6 and 0.7 mm, which can be easily processed with ordinary tools. They can be cut with roofing scissors, sawed using a jigsaw or band saw with a narrow blade with fine teeth. Processing thin metal on a jigsaw will be more successful if you first attach the metal with double-sided tape to a backing made from scrap plywood or hardboard. Lubricate the file from time to time when sawing a regular candle or a piece of paraffin. Finish the edges of the cut piece with a file or sandpaper.
For soldering we used a miniature gas torch, soft solder in the form of a 3mm wire and soldering flux. As with soldering copper pipes, flux improves the wetting of the molten solder into the metal, helping it flow between the hot copper parts.
1. Cut blanks for parts FI and K-M from copper sheets 1.6 and 0.7 mm thick. Make the pipe blank (G) 13 mm longer than indicated.
2. Make a paper copy of the template for the candle tray (F), attach it to a copper blank (Fig. 6) and cut along the outer contour.
3. Fold the edges at a 90° angle along fold lines A and B, then along lines C and D (read the Wizard's Tip below). Remove the paper template and solder the corners of the tray (photo F).
4. Make a 50mm hole in a piece of 19mm plywood to create a pipe shape (G). Bend the pipe blank around the hole saw, then cut off the excess to ensure a snug fit against the sides of the hole and solder the ends together (Photo G).
5. Copy the flange template (H) and attach it to the appropriate workpiece (Fig. 7). Drill 3mm holes and through them attach the workpiece with screws to a piece of board or plywood. Make a hole with a diameter of 50 mm in the center (photo H).
Glass jars
There will be even less hassle with ordinary glass jars. You can hang them on a wire that is wrapped around the neck and bent into the shape of a handle. You can make a whole chandelier out of cans, or you can hang them in the garden as lanterns. A small amount of water and some pebbles or sand are poured into them. And then a floating candle is placed.
If you urgently need to organize lighting in the garden, but there are no candles on hand, you can use a Christmas tree garland.
If regular glass jars seem too boring to you, you can paint them.
Make the lantern parts
1. For the lid and bottom (A), cut out two blanks measuring 16x143x137 mm. Saw 14mm off each edge of the pieces (11mm plus the 3mm kerf) as shown in Photo A. Note: If your saw blade makes a kerf wider or less than 3mm wide, calculate the width of the pieces for pieces A by adding the width to 137mm two cuts. Then saw off 11mm plus the width of one cut from each edge.
2. Make square cutouts in the lid and bottom (Fig. 1, photo B). Glue the sawn parts to the blanks (photo C).
3. Make chamfers on the edges of the bottom and lid. Then use a hole saw on a drilling machine to make a hole with a diameter of 50 mm in the lid. Drill pilot holes for the handle mounting screws.
Garden lamps made from various items
If you find an old lantern in the garage that once hung on the wall, do not rush to throw it away. You can use it to make an original vintage flashlight. Place some dry moss inside, braid it with twigs and attach a handle. Place a candle or battery-powered light bulb inside.
For those who like to make various decorative elements from scraps found at the dacha, the idea of an openwork ball made from cherry twigs is suitable. This lampshade is suitable for lighting in the garden and as a home lamp. You need to prepare a regular inflatable ball and high-quality glue. The balloon is inflated, coated with glue, and then short branches are attached to it.
Old timber will make good Japanese lanterns in a minimalist style. First, a frame is built, then the windows are covered with mesh or glass; the frame can be painted, slightly aged with black strokes.
Where it will come in handy
Many people mistakenly believe that a lamp made from cans is only suitable for a country house. But this is a misconception, since if executed correctly, such a lighting device will look beautiful in any interior of an apartment or private house. Note! Lamps made from glass jars can be styled in any style known today. As decoration you can use:
- hand painted;
- multi-colored pieces of glass;
- various ropes and appliqués;
- colored paper;
- drawings.
Decor option
Using such a simple material as glass and products made from it, you will get unusual Moroccan night lights and other lighting options. At the same time, by making them yourself, you will save a lot by not buying ready-made models in stores.
Lighting in the country
It’s very nice to create decorative elements for a country house yourself. You can use anything as a lamp - pots that you don’t use, baking dishes, teapots.
A great idea is to transform an old wastebasket into a lampshade. To do this, you just need to decorate it beautifully, for example, with fabric ribbons.
The main thing is to show your imagination. If you try, you can turn these unnecessary things into real works of art that will delight you every time you come to your dacha. Your guests will only have to admire and follow your example. By bringing such ideas to life, you will make your site unique and save on the purchase of decorative items.
How to make an antique lamp
We usually don’t notice how many interesting and free materials there are around for making homemade crafts. For example, you can make such an interesting lamp. As the main material, the author used old rotten boards, which no one needs anymore and, as a rule, are not suitable for anything.
The homemade product is easy to assemble; it is advisable to have a miter saw. However, you can do everything with a hacksaw, although it will take longer.
Materials and tools for a homemade lamp: - rotten boards (can be found on old fences, doors, and so on); - a tool that can be used to cut boards; - sandpaper; - glue gun; - wood glue; - cable with light bulb socket; - plywood; - Miter saw; - marker, ruler, etc.
Lamp manufacturing process:
Step one. We cut the blanks
The first thing you will need to do is find suitable boards. They should be such that their bottom edge is rotten. Typically, such destruction of wood occurs on fences, doors and other similar products. The main part of the board must be intact so that the lamp is durable and can be assembled at all. Clean the boards and dry them.
Now you can start cutting the workpieces. You will only need 8 boards to assemble the lamp, but there may be other quantities. If your boards are wide, you can cut them lengthwise with a miter saw. They must be the same width in order to assemble the lamp. As for the length, it can be different; the boards do not have to be the same length.
Step two. Leveling one side of the boards
Having decided on the length of all the boards, you will now need to align them along one edge. Apply a ruler and draw a straight line. Next, you just have to cut off the excess at a right angle, the author does this using a miter saw.
That's all, the lamp can be assembled. Here you will need wood glue. Lubricate the grooves well and assemble the lamp body. You need to wait for the glue to dry completely. After assembling the lamp, it is advisable to tighten it so that the glue sticks everything together well; you can use a belt or the same tape.
Step seven. Processing the lamp
As you already understand, the wood used is old, which means that there will be a lot of dirt on it. Take sandpaper and thoroughly sand the surface of the boards. Your task will be to make them smooth, remove all dirt and other defects.
After sanding and gluing, you will notice that there may be gaps at the joints of the boards. Take wood glue and mix it with sawdust to seal these cracks. As a result, your body should become homogeneous and solid. Well, after drying, sand the body of the lamp again, bringing it to perfection. Sealing the joints will also further strengthen the lamp body.
Step eight. Installing the lamp socket
Decide for yourself how to install the lamp socket. It can be mounted directly into the top cover, or you can drill a hole only for the cable, and secure the cartridge itself separately inside. It should be noted that for such a lamp it is best to use LED or other lamps that do not heat up during operation. Using an incandescent lamp may cause the lamp to catch fire. After preparing the installation site, we remove the cartridge; we still need to paint the wood.
Source
Solar lamp device
First of all, you need to understand what parts the structure consists of and how it works. Garden lamps have a simple design, since they only have what is needed:
- A housing containing parts. Most often this is a plastic casing at the top, and the bottom is made in the form of a post tapering downward so that it can simply be stuck into the ground. The plastic is weather-resistant and impact-resistant, so it is not damaged by ultraviolet radiation and does not crack due to accidental impacts.
- Protective glass. There is a flat element at the top and a diffuser on the side. Most often, the manufacturing material is polymers, so even if broken, there will be no dangerous fragments on the site.
- Solar cell, usually a small cell with an area of about 9 square centimeters. The quality may vary, which is why the lamps work differently. When choosing a finished option, you need to carefully examine the surface of the panel; it should be perfectly smooth, without cracks or damage.
- The battery stores the energy converted by the solar battery to ensure the operation of the lamp in the dark. Capacity and design may vary, it all depends on the price of the product. When purchasing, you can clarify this point, since the battery life directly depends on it.
- LEDs provide good illumination with minimal energy consumption. The quantity depends on the brightness; usually small options are installed that save electricity.
- A photoresistor or light sensor automatically turns on the lighting in the area in the evening. When the amount of light in this node decreases, the resistance changes and the light comes on.
- The control board is a connecting element that connects all nodes and ensures their operation.
Garden lights can make the area much cozier.
This option has many advantages:
- Autonomous: no need to do wiring, make a project, etc. You can simply place the lamp anywhere and it will immediately start working.
- The equipment provides diffuse lighting that does not hurt the eyes, but provides good visibility in the area in the dark.
- No care or maintenance required. It is enough to wipe the dust several times a season so that the solar battery accumulates energy more easily and the light dissipates better.
- The lamps are safe for children and pets. They do not contain any harmful substances or sharp parts.
There are a lot of different models on sale.
Tools and equipment
The tools and equipment for working with metal using cold forging technology are:
Cold forging elements.
- snail;
- gnutik;
- wave;
- flashlight;
- twister
The purpose of most devices is indicated by their name.
- Structural elements that follow the shape of a spiral are created using a snail. The radius of such parts is limited only by the base of the tool, and the profile of the metal workpiece should not exceed 12 mm, otherwise internal and external cracks may form.
- A tool called a bender is used to bend a metal rod at the desired angle. With its help, arcs of various diameters are also made.
- The name of the tool speaks for itself - using a wave, wave-shaped structural elements are created. This equipment is designed to work with metal profiles in the shape of a circle, square, hexagon, as well as with fittings and metal pipes.
- A tool called a flashlight allows you to create shapes from metal rods that resemble baskets or lanterns in their weave.
- Using a twister, a metal rod is twisted along the longitudinal axis. The rod can be in the shape of a square with sides up to 16 mm or a metal strip up to 30 mm wide.
What can be used to make lamps
There are a lot of options; it’s important not to limit your imagination and take into account the design of the site. The most commonly used solutions are:
- Steel products or blanks. This can be either a ready-made container with slots or holes, or forged products or options assembled on your own using rivets or welding.
- Lamps made of wooden slats or natural materials - twigs, branches, etc.
They are good for their ease of processing and accessibility. The simplest lamps are often made from wood. - Aluminum and copper also work well, but finding suitable containers or blanks can be difficult. Metals are easy to work with and are not afraid of heat.
- Plastic is good for its durability, weather resistance and availability. You can select containers of the appropriate size without much difficulty, but only lamps that do not heat up very much can be installed in such lamps.
- Glass containers are a convenient solution that protects the light bulb well and at the same time looks stylish. The main thing is to choose options of the appropriate size and shape.