Gazebo-bed
Below we will present several options for a trestle bed that can be installed in a gazebo. The design of the “room” itself can also differ significantly.
With a light canopy
The trestle bed can be located almost in an open room, the roof of which is a stretched fabric that protects from direct sunlight. This option is common in Arab and other eastern countries with warm climates, where it is practically never cool in the open air.
In the form of a pergola
The design in the form of a pergola is already more similar to a classic gazebo. Instead of a roof, several beams are laid on top, for example, made of 150 by 50 timber, which partially cover the interior from the sun. In most cases, they look very aesthetically pleasing and unusual for Russian dachas.
Hanging idea
Semi-closed structure
The trestle bed can be located inside a classic gazebo with a reliable roof and a massive frame. In this case, the recreation area is completely rebuilt for a sitting and lying format.
I cannot judge how appropriate this option is for a Russian family. However, if you revere Eastern culture and such a vacation is only a joy for you, then you can consider a similar option.
Stages of work on creating a country chaise lounge yourself
It is necessary to prepare the legs of the chaise lounge from bars of the required height. The standard height for the legs of the product is approximately five to ten centimeters, but if necessary, you can use a different height.
At a distance of five to seven centimeters from the edges of the long beams, the legs must be secured with long screws. The rollers should be secured in the center of the legs with smaller screws (about three centimeters).
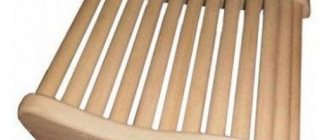
An electric jigsaw should be used to cut parts of the lattice for a country chaise lounge made by yourself. The most suitable size for planks is eight by sixty centimeters. Then you should screw the slats to the frame of the chaise lounge using spacers to obtain the required gaps (from one to two centimeters). Having completed all these steps, the chaise lounge must be sanded and painted. If you decide to make your own chaise longue, which will be folding, then the wood lattice will need to be divided into two parts, then connecting them with hinges for the doors. Moreover, it is necessary to remember about the fastening bar, which must rest on the stand secured with screws.
Manufacturing technology
- Lounge beds are structures made entirely of wood or having a metal or concrete frame with wooden flooring. They are ordinary beds without a headboard. But, if you place such a trestle bed near the facade of a house or a fence, then a wall or a span of fence can serve as a headboard.
- The sofa bed can be built-in or free-standing. It has a headboard and armrests that can be anywhere from half a meter long to the width of the sides. This sofa is designed for several people who can sit on it in a reclining position.
- The trestle bed is a very comfortable couch with a headboard. It can be freely placed both in the garden and just in the yard. Such a bed can have headboards not only on one side, but also on both sides.
Top beds for a summer residence
A trestle bed under an awning can be organized in several ways:
- for a summer residence it is convenient to use removable awnings, since they can be easily removed when leaving;
- Portable canopies - umbrellas - are very convenient. In this case, the trestle bed is not tied to one place; it can be moved if desired;
- If the awning is mounted on high supports, it will protect a large area not only from the sun, but also from rain. It is also best to make them removable so that you can put them indoors for the winter;
- canopies can be made into rigid structures by connecting them to the bases of trestle beds. The structures can be made with openings from branches or reeds and then they will serve only for shading;
- as a trestle bed, they use a quadrangular structure with a roof, which has a raised floor for a mattress;
- Several trestle beds can be placed under a large canopy, thus organizing an outdoor recreation area for the whole family.
- We make the lower harness, which will later be placed on the legs (you can use 100 by 100 timber).
- The harness, fastened into half a tree, is installed on legs, which are inserted into the tree using a tenon connection into the socket.
- Armrests are installed around the perimeter.
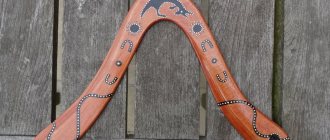
Very often, trestle beds are decorated with wood carvings, the complexity of which is assessed by category. The first is the most difficult and expensive. The third is cheaper and simpler. I suggest you enjoy several photographs above and below this text.
- Size: custom made
- Material: pine, larch
- Coating: 1 layer of tinting and 3 layers of water-based acrylic varnish
Price on request
Medium sized trestle bed. Dimensions are (WxL) – 200cm x 200cm. Seat height – 45cm, backrest height – 25cm.
The trestle bed is perfect for installation in a summer outdoor seating area and under a canopy. When the trestle bed is fully equipped with a table, a ladder for climbing, as well as pillows and a blanket, it is possible to equip specialized halls of cafes and teahouses with it.
The frame design is designed taking into account possible loads. Indeed, unlike other types of furniture, the load on the trestle beds is many times greater. The base consists of four massive carved supports, connected along the perimeter by powerful drawers. There is a massive cross beam in the center to provide greater rigidity.
The high-quality furniture fittings used ensure high reliability of the trestle bed.
All wooden parts have a smooth surface with rounded edges. The wood is processed in a way that allows you to visually highlight the natural texture of the wood fibers.
The surface of the wood is subjected to special treatment, which results in a reliable and beautiful protective and decorative coating. Most often, tinting is used in the color of your choice and coated with clear varnish. A durable varnish coating not only reliably protects the wood from dirt and moisture, but also emphasizes the natural beauty of the wood.
A little history
- plastic bottles;
- scotch;
- scissors;
- glue;
- cardboard;
- foam;
- rope;
- needle;
- threads;
- knife;
- artificial fur.
If the base will be plastic bottles, then you should prepare 72 containers of 1.5 liters each. The tape should be simple and double-sided. When purchasing foam rubber, you should choose one whose thickness is 5 cm.
- bolts;
- bars;
- nuts;
- pine planks;
- washers;
- MDF;
- threaded rods;
- glue;
- Allen key;
- sandpaper;
- stain.
Varieties
There are several types of structure. It is important to understand that, in essence, a trestle bed is an ottoman on a small hill.
- The trestle beds are in the form of sun loungers, as in the photo. The ottoman has a simple design without sides and headboard. It can be made entirely of wood or have supports made of metal or concrete. If you place the structure near a vertical wall of a house, building or fence, you can get a headboard.
- A bed-shaped design is a couch with a headboard. It can be installed both on a personal plot and in a house, if size allows. The headboard is installed on one or both sides.
- A sofa-shaped trestle bed can stand as a free-standing item or be built-in. The dimensions of this structure are such that it can easily accommodate several people in a reclining position.
Lumber
The dimensions and quantity of lumber depend on the dimensions of the bed. When determining them, one must always take into account the standard sizes of mattresses. We built a big bed using the following lumber:
10-20 two-meter boards with a section of 25*75 mm Beam 100*100, 2.6 meters long 6 boards 50*100 mm, 2.6 meters long Beam 50*50 mm, 2.6 meters long.
The materials listed above are intended for the frame. For finishing you will need new materials. Choose the type of wood for finishing at your discretion. If the state budget is small, stop at pine, if funds allow, choose oak, grilled wood or mahogany. We decided to use pine.
2 boards 25*250 mm, 2.6 meters long 1 board 25*250 mm, 2 meters long 4 boards 25*150 mm, 2.6 meters long 1 board 25*100 mm, 2.6 meters long.
The headboard of your bed can be anything you want. We decided not to split hairs and made it from a wooden board 60*240 cm.
How to make a canopy for a trestle bed with your own hands
The option with a canopy is especially suitable for those trestle beds that are planned to be placed on the street. Let's consider several options for installing a canopy on a trestle bed with your own hands:
- A removable awning is perfect for summer residents who use a trestle bed only in the warm season;
- You can stretch an opaque film over the high supports, which will serve as protection for the trestle bed during rains;
- To create a solid trestle bed, a canopy made of corrugated sheets is suitable, which is usually used for canopies in parking lots, roofs of open balconies, etc.;
- Thick fabric or tarpaulin stretched over a wooden frame is a more aesthetically pleasing option, but in this case there will be no protection from moisture and gusts of wind;
- The most original option is to grow climbing plants along a wooden or plastic frame. In just one or two seasons, your trestle bed will become the most picturesque part of the site, and all guests will admire your ingenuity. But in this situation, you will have to suffer with rainwater and insects;
- If you decide to place the trestle bed in a living room or at least in a covered gazebo, then to decorate it you can hang a canopy made of light translucent fabric from the ceiling. In addition, long pieces of material can be thrown over the upper frame of the trestle bed. Such decoration will give it oriental notes, and you will feel like you are in a fairy tale on the trestle bed.
In this simple way you can solve several problems of organizing a recreation area both in an apartment and in a garden at the dacha. We hope that the above options and ideas will help you realize your unique ideas, and your trestle bed will turn out to be comfortable and spacious in a Russian way, and chic in an oriental way.
An easy option for making a trestle bed:
Not every culture has a gazebo as a place for family dinner and relaxation with a glass of tea among friends. For example, in some Eastern countries it is customary to drink tea in a gazebo, and the interior is equipped to match the ceremony. A non-standard option is to equip the relaxation area with a trestle bed, which will be discussed further.
Serves primarily as a place for relaxation and conversation. Additionally, you can equip the “Joza (China, round shape with a diameter of 30-40 cm)” table and eat food.
Carrying out plating
If you decide to make a trestle bed with your own hands, then strips of fur fabric should be glued to the walls that are left without winding. The width of the strips should be 6 cm. To secure the winding, the strips are also glued along the side edges. A flap should be cut out of fur fabric; its size should be slightly larger than the cardboard base on each side. The allowance will be 7 cm.
The corners of the fabric are sewn up and placed on foam rubber. Place a few drops of glue on the cardboard to strengthen the fur seat. At this stage, we can assume that the budget trestle bed is ready.
Construction options
A traditional gazebo always has a base, which is a platform that extends around it, sometimes forming a sort of small deck that frames the gazebo and mimics its shape or the shape of the roof.
This part must be carefully planned and carefully executed because it literally underlies everything else.
Of course, you don't have to build a platform for your gazebo or even include all the other structural elements that a traditional gazebo has. A cool DIY interpretation of a wooden gazebo is shown above and only includes simple frames built around a barbecue with a swing attached to it.
This is a very casual and fun idea to which you can add a gazebo roof or additional features that will make your wooden gazebo more suitable for you and your garden.
Don't let the fact that you have a small backyard discourage you from building your own wooden gazebo. Since this is a DIY project, you can make it as small as you want and adapt the design by adding or removing features depending on your needs.
As well as other creative ideas that can make a gazebo in your garden stand out from other similar projects.
If you plan to use your new gazebo as a cozy retreat where you can read a book, enjoy your morning coffee or socialize with small groups of people while enjoying the beautiful views and breezy weather. Spend some time planning additional design details.
You'll love this particular classic project above. It's a little more complex than the others, with many great additions that we think you might be inspired by. We especially love fresh curtains as they add character to the gazebo and give it a bohemian feel.
A simplified version of a wooden gazebo with a small platform, a cute peaked roof and some basic furniture would do the trick. You can paint the gazebo to make it look more fun.
The level of difficulty encountered when building a gazebo in a garden or patio depends on the type of design, structure and all the different features. Typically, the main steps are creating a sketch and plan, gathering all the necessary materials and tools, and then assembling the gazebo, starting from the base.
While not absolutely necessary, you can add railings to your gazebo if you want to give it a more discreet and authentic look while also giving it extra privacy.
You can add them at the very end once all the other pieces are in place. Feel free to add your own personal touch to the design and add additional features if needed.
There are many different design options and styles you can choose from for your project, so take your time and explore before making your final decision.
Budget gazebo in a couple of days:
Making a to-do list can be helpful at this stage. Figure out what your priorities are and take a step back every now and then to look at the big picture before getting lost in all the details.
You can also use a pergola as inspiration for your project without actually going through all the steps or including all the elements that the structure typically includes. The result will be a hybrid structure uniquely designed to meet your specific needs.
In this case, the goal was to build a protective frame around the outdoor dining area, and while the lattice fence has a gazebo-style look, everything else is fairly neutral.
Building a DIY garden gazebo is very similar to building a tiny hut with less attention to the walls since gazebos are mostly open
Connecting the base and frame is the most important and most time-consuming part of the project, and things can get a little tricky if you go for a more sculptural design rather than something very simple. However, all this can be successfully completed, making this project one of the best “on the block”
Preparation
Before you start building a timber canopy, you need to decide where it will be located. Finding a place on the site for such a structure is not difficult if the area has a sufficient amount of free space. For small areas, experts advise choosing a drawing of a small-sized canopy. To build such a structure, wooden beams and boards are used.
Important! Support posts are the basis of the structure, so it is recommended to choose beams made from durable wood for them. The most affordable option is pine beams. For roof construction, you can purchase metal tiles, which have an attractive price
The classic version of a wooden roof is also quite popular and takes into account the use of edged boards. It is also important to prepare in advance all the necessary lumber that will be required to build a traditional or unique wooden shed at the dacha. Let's look at what tools you will need to make a standard gazebo:
For roof construction, you can purchase metal tiles, which have an attractive price. The classic version of a wooden roof is also quite popular and takes into account the use of edged boards
It is also important to prepare in advance all the necessary lumber that will be required to build a traditional or unique wooden shed at the dacha. Let's look at what tools you will need to make a standard gazebo:
- yardstick;
- building level;
- shovel (bayonet);
- screwdriver;
- jigsaw;
- electric drill;
- axe;
- hammer;
- saw.
To fasten individual wooden elements, metal corners and screws (for wood) are used. To install the supports, you also need to prepare crushed stone and cement mortar in advance.
Types of wooden structures
Homemade garden furniture made of wood can be called one that amazes the imagination with its diversity. Experienced craftsmen are able to create real works of art from metal and wood, which invariably evoke envious sighs from neighbors.
Considering that not all homeowners have carpentry skills, let's look at a few simple designs.
Bench
Benches in a summer cottage are used to organize a place for family recreation. They can be installed separately or in combination with wooden tables. Even a novice craftsman can make a simple wooden bench.
Type of wood for a sun lounger
The choice of tree is based on the following principles:
- material capabilities;
- future owner's preferences:
- garden style;
- available materials.
When choosing future wood for your chaise lounge, you pay attention to the mechanical properties of a particular type of wood. For example, the most durable types of wood are: ash, oak, larch and beech
With them, the design will delight you for many years. Wood is distinguished not only by its durability, but also by its aesthetic component.
In turn, finished products made from noble wood are not the cheapest pleasure for the buyer. Such a thing is not always available to the average consumer who is trying to save every extra penny, because money is never too much. Before assembling the sun lounger with your own hands, look at the drawings of the sun lounger.
What could a trestle bed be like?
As mentioned above, often when making a trestle bed, its simple design was supplemented with various elements such as awnings, canopies, etc. Now, if you have high-quality tools and materials, you can make an ergonomic relaxation area from a simple bed, even on your own.
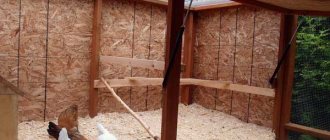
We suggest you familiarize yourself with Ventilation in a rabbitry with your own hands
So, the trestle bed can be:
- Open - that is, it is an ordinary spacious lounger, raised above the ground or floor with the help of legs;
- With a canopy that protects people relaxing on the platform from rain, sun, etc.;
- With a canopy or tent, the fabric of which will also protect the trestle bed from the sun, but will also perform a decorative function especially well;
- With drawers, shelves, a small ladder, seats, a table for meals, etc. - with any additional elements that you have enough imagination for.
In addition, you can make a trestle bed that will be used either as a platform for gatherings with family and friends, or as a sunbathing bed in the garden or as a sofa for a gazebo.
Within the framework of the article, we will dwell in more detail on trestle beds with awnings. There are many options for implementing such an idea, and you can easily choose the one that is suitable for your room, veranda, gazebo or even loggia. But first, let's talk about how to make the design of a simple trestle bed with your own hands.
What is a trestle bed?
The design stands out among similar ones due to its ease of manufacture. It is unlikely that you will be able to assemble a sofa yourself, but anyone can make a trestle bed with their own hands, the drawings of which are drawn up independently.
So, the design has four legs and a bed. All elements are fastened together with decorative inserts. The parameters of the trestle bed depend on its functions. For example, for outdoor recreation, the following design dimensions are sufficient:
- length – 160 cm;
- height – 40-60 cm;
- width – 40-50 cm.
Some types of construction have canopies and backrests that can be dismantled or folded back.
Gazebos with a trestle bed: ideas, photos, making your own
Not every culture has a gazebo as a place for family dinner and relaxation with a glass of tea among friends. For example, in some Eastern countries it is customary to drink tea in a gazebo, and the interior is equipped to match the ceremony. A non-standard option is to equip the relaxation area with a trestle bed, which will be discussed further.
A trestle bed is a bed without a back, instead of which armrests are installed around the perimeter. Came to us from Eastern culture.
Serves primarily as a place for relaxation and conversation. Additionally, you can equip the “Joza (China, round shape with a diameter of 30-40 cm)” table and eat food.
Gazebo-bed
Below we will present several options for a trestle bed that can be installed in a gazebo. The design of the “room” itself can also differ significantly.
With a light canopy
The trestle bed can be located almost in an open room, the roof of which is a stretched fabric that protects from direct sunlight. This option is common in Arab and other eastern countries with warm climates, where it is practically never cool in the open air.
In the form of a pergola
The design in the form of a pergola is already more similar to a classic gazebo. Instead of a roof, several beams are laid on top, for example, made of 150 by 50 timber, which partially cover the interior from the sun. In most cases, they look very aesthetically pleasing and unusual for Russian dachas.
A pergola is a very beautiful structure that will decorate any summer cottage. You can see more photos in the publication about gazebos, terraces and pergolas.
Semi-closed structure
The trestle bed can be located inside a classic gazebo with a reliable roof and a massive frame. In this case, the recreation area is completely rebuilt for a sitting and lying format.
I cannot judge how appropriate this option is for a Russian family. However, if you revere Eastern culture and such a vacation is only a joy for you, then you can consider a similar option.
DIY ideas
The price of a finished trestle bed is approximately 30 thousand rubles. Not everyone will want to pay that kind of money for such a furniture attribute, so many will think about making it themselves. What materials are best to make it from? Of course, real trestle beds are made of wood.
- We make the lower harness, which will later be placed on the legs (you can use 100 by 100 timber).
- The harness, fastened into half a tree, is installed on legs, which are inserted into the tree using a tenon connection into the socket.
- Armrests are installed around the perimeter.
Very often, trestle beds are decorated with wood carvings, the complexity of which is assessed by category. The first is the most difficult and expensive. The third is cheaper and simpler. I suggest you enjoy several photographs above and below this text.
Features of making a trestle bed from chipboard
Before you make a trestle bed for your dacha with your own hands, you need to look at a photo of such a design. The pictures will help you understand which material is best to use. An alternative solution is chipboard, which can be regular or laminated. The dimensions will depend on the area of the room and its layout.
Indicative parameters may be limited to the following dimensions: seat depth 70 cm or less, backrest height 40 cm or more. The covers of the trestle bed are fixed to the rear walls using piano hinges. The soft elements of the back and headboard can be made of polyurethane foam, while the covers are made removable; in this case, zippers are sewn into them.
DIY trestle bed options
To make the simplest version of a country trestle bed you will need:
- seventy-two plastic bottles with a volume of one and a half liters;
- simple and double-sided tape;
- special glue;
- scissors;
- cardboard;
- foam rubber, the thickness of which should be five centimeters;
- a spool of strong rope;
- knife;
- needle and thread;
- artificial fur.
Step-by-step instructions for making a trestle bed
- A link is created from three bottles. To do this, the upper part of two bottles is cut off and thrown away, and the lower parts on both sides are put on the whole bottle. Twenty-four such links should be assembled.
- The three links are folded together and tightly wrapped with tape. There should be eight sections in total.
- All sections are connected and secured with tape on all sides.
- According to the size of the upper plane of the resulting plastic structure, rectangles are cut out of cardboard and foam rubber.
- Cardboard is glued to the top base with special glue and secured with tape.
- Double-sided tape is applied to the sides of the structure, along which the rope is subsequently stretched. It should be laid in dense rows along the entire side of the product. The winding should start from the bottom and end before reaching a little (about five centimeters) to the top.
- Strips of fur fabric are glued onto the walls that are left without winding. The width of such stripes should be six centimeters. To secure the winding, strips of fur are glued along the side edges of the wound rope.
- A flap is cut out of fur fabric, the size of which should be seven centimeters larger than the cardboard base on each side.
- The corners of the fabric are sewn up and the fabric is put on foam rubber.
- A few drops of glue are dripped onto the cardboard and the fur seat is glued. The simplest and most budget-friendly trestle bed for a summer cottage is ready.
Living room trestle bed with drawers for baskets
Step-by-step manufacturing instructions:
- first of all, you should make a drawing of the future sofa, focusing on the existing baskets that will be inserted into the plywood drawers of the sofa;
- to create such a trestle bed from materials you only need plywood, the thickness of which must be at least twelve centimeters;
- Three boxes are made from plywood according to individual scales;
- plywood boxes are painted in a color suitable for the interior of the living room and fastened together;
- Baskets are inserted into the boxes, a mattress and pillows are placed on top. The trestle bed is ready, you can go to rest.
Transformable trestle bed in oriental style
This design is quite difficult to manufacture, but it is multifunctional. From a sleeping place it can easily be converted into a coffee table and vice versa.
Such a piece of furniture will be useful in the country, it will easily fit into a small-sized apartment and will not interfere with the loggia if it is placed there for relaxing in the fresh air.
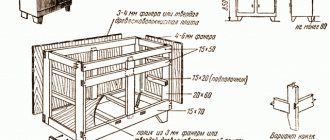
To make a transformer you will need:
- pine beams 175, 58.7 and 17.7 centimeters long;
- bolts and nuts;
- two pine planks 2x4x50 centimeters;
- one sheet of MDF 1.2x32x64;
- extended washers;
- threaded rods;
- Allen key;
- glue;
- stain;
- sandpaper.
Before starting work, you should decide on the size of the trestle bed.
Construction manufacturing technology.
- Pieces of the required length are cut with a saw.
- On the outer bars, drilling locations are marked with an awl.
- Holes are drilled on the front side of the outer beams. They must be deaf and have a depth of three centimeters. Nuts and washers are inserted into the holes.
- Holes are drilled on both sides, the depth of which should be approximately half the block.
- The “table top” is almost ready. Now two 17.5 centimeter bars are glued together.
- Using clamps, the finished legs are fixed to the bars of the “table top”. The result should be a structure tightened by six rods.
- Now the structure should be secured with pairs of beams so that it can support a person. The bars will connect the legs together. To do this, drill each leg with a round drill, lubricate each hole with glue, insert screws into them and press the bars tightly together.
- The surface and legs of the table are sanded. After sanding, the trestle bed is painted and varnished in several layers.
- Now all that remains is to assemble the trestle bed and attach to it the back, made of an MDF sheet and two slats.
The oriental-style trestle table is ready. All that remains is to put pillows on it and place it in a cozy place to rest.
So, without much difficulty, showing a little imagination and spending not much time, you can make a wonderful place to relax with your own hands from almost any materials.
Step-by-step instruction
Before you make a trestle bed with your own hands, you must think about its features. If the base is bottles, then one link can be created from three products. The top part of two bottles is cut off, while the bottom parts are put on the whole bottle. There should be 24 such links. Three are folded together and wrapped with tape. As a result, you should get 8 sections. They are connected to each other and fixed with adhesive tape.
Having measured the top plane of the plastic structure, you must prepare a rectangle of foam rubber and cardboard. Using suitable glue, cardboard is glued to the base and secured with tape. Double-sided tape should be applied to the sides, along which the rope will be stretched. It should be laid in dense rows on the sides. The winding starts from the bottom and ends 5 cm short of the top.
We make trestle beds with our own hands
Since the trestle bed has a very simple design, you don’t need any special materials or tools to make it. Here is a list of what you need to prepare to create a lounger with your own hands:
- Wood - you will need both bars and boards. It is possible to use plywood or chipboard;
- Protective primers and wood compositions, varnish or paint, depending on your preference;
- Saw or jigsaw;
- Drill, screwdriver;
- Fastening elements (screws, self-tapping screws, corners, etc.);
- Tape measure, level, construction angle;
- Sandpaper or sander.
But it is important to remember that the primary condition for obtaining a high-quality result is the presence of at least basic skills in using all the listed tools and working with materials
Decorating your stool
You can decorate your stool depending on the interior items where it will be located. You can apply a design on the surface of the seat with spray paint using a stencil. Then coat the surface with varnish. Or make a bold design move and decorate a retro stool using decoupage. This is labor-intensive, but effective, and you can involve the whole family in this interesting activity. For this we will need PVA stationery glue, beautiful napkins and varnish, preferably acrylic. The result will tell not only about your accuracy, but also reveal your taste. In the end, you can decorate just the seat by laying thin foam for softness. Then decorate it with beautiful fabric and decorate it with accessories to your taste. As they say, everything is in your hands!
vote
Article rating