Surprise everyone around with your unusual and very beautiful DIY steampunk lighter!
It is easy to assemble at home, easy to change the wick, and looks much better and more impressive than regular gasoline lighters (in my humble opinion). It is also about 40% larger than standard lighters. The size of the lighter depends on what kind of body you make for it. This time I’ll tell you how to assemble a lighter even bigger than the first one.
Instead of assembling the wheel holder myself, I simply ordered one from eBay. I made the cap at the end screwable, so that refilling the lighter and changing the wick (which probably no one does at all) became much easier. The lighter is made from materials that are readily available at local stores.
I also decided to use Zippo fuel instead of methylated alcohol. Zipp fuel is easier to light, but produces slightly more smoke than alcohol when burned. Methylated alcohol is called differently - denatured alcohol (USA), methyl hydrate, alcohol (Europe). Methanol is very dangerous, be careful!
Unique DIY lighter
Like any other author, at first he began to print all sorts of trinkets: vases, animals, more vases and animals.
Then he estimated the dimensions and started printing. This printer is incredibly simple, I loaded the print file onto a memory card, stuck it in the printer and pressed a single button.
The case turned out to be quite decent. There is a beautiful design with patterns on the body, but the author never managed to paint it adequately, but oh well, that’s something else another time. Initially, the idea was to make something like Zippo lighters with a hinged lid, but the author did not find the required template, and he does not yet know how to model. For this reason, we will take the most suitable case for these purposes and print the case and a half.
Next is adjustment to our body. And after some suffering, everything is ready. Ugly, sloppy, but it works.
Now the most important thing is the electronics. The case turned out to be quite pocket-sized, quite comfortable and pleasant to the touch. We have to push into it a battery, a system for protecting and charging the battery (we will charge from the USB port), a flashlight, a high-voltage voltage converter to produce a burning arc, and a high-voltage voltage multiplier, which together with the converter forms, although low-power, but still a stun gun . Plus you need a central switch and a button.
If the lid is open, the lighter is removed from the safety lock and the button is pressed, this thing can be used for its intended purpose. If you close the lid and do the same, you get a stun gun.
Let's look at the diagram:
And now in more detail.
It is this part that generates high-frequency voltage; the voltage at the output of the transformer is more than 3000 V. The temperature of the high-voltage arc is very high, and it can easily set fire to flammable materials.
The circuit is a conventional blocking oscillator based on one bipolar transistor. The transformer was taken ready-made, they are sold on Aliexpress, you will find the link in the description under the author’s video (link SOURCE). Of course, you could wind the same transformer yourself, but if you’re lazy, it’s easier to use a ready-made one.
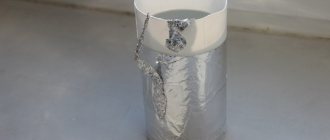
Sectional transformer. It was filled with resin. The transistor hardly heats up during short-term operation, so there is no point in sculpting it onto a radiator.
These are still Soviet-made diodes, but there are plenty of imported analogues. High voltage is supplied to the bayonets, which are located on the lid. The distance between them is only half a centimeter. More is possible, since the discharges stretch to a length of up to 1.5 cm. But in our case, this arrangement of pins is due to the design features of both the multiplier itself and the cover as a whole.
A pair of series-connected resistors are installed parallel to the multiplier output, each with a resistance of 30 mOhm.
These resistors discharge the residual voltage of the multiplier after the shocker is turned off.
OK it's all over Now. Thank you for attention. See you again!
Source
What can you make from an old lighter?
A lighter is such a useful thing, but we stupidly throw it away. Why do this when there are a lot of uses for the rather complex mechanism from which it is made. Watch the videos and some of the ideas will come in handy. Or maybe even a lot.
Idea - what to make from a gas lighter
Roman Ursu made a little thing that can be put into practice. There are not many such developments, and this is an innovation, like other ideas of this master.
An interesting video appeared on the Simple Maker blog, which shows the use of an old, disused lighter, which, together with this method, can get a second life. What can be made from an old lighter that is already unnecessary, but still capable of much?
Craftsmen buy inventions from the best Chinese online store.
The author of the video suggests making it a surprise in the form of a water pistol. To make this toy, we need a simple, cheap lighter that costs a few rubles. It needs to be completely disassembled.
To begin, remove the wheel, take out the spring, and also separate the rest of the equipment. Next, unscrew the plug that holds the gas inside; you need to let him out.
If you are using a lighter that contains gas, such as a new one, you should not do it indoors. The gas is harmful to health and even in small quantities it is not worth the risk.
Take a small piece of ballpoint pen refill and expand it at one end. You can use a heated nail for this.
After this, insert the rod into the lighter and tighten the plug. Next, separate the needle from the syringe nozzle. We collect 3 cubes of water and 2 cubes of air. We press the trigger of the lighter and squeeze out a mixture of air and water. We return the lever to its place.
DIY electronics in a Chinese store.
As a result of all actions, we get a lighter, inside of which water and air are under pressure. If you press the lever, under the influence of compressed air there will be a sharp release of water outward.
By the way, you can use the lighter valve for other containers, the dimensions of which will allow you to accumulate a larger amount of water and compressed air. You just need to come up with an adapter for it.
To be able to use the lighter trigger, you just need to make an adapter between the body of the lighter and, for example, a plastic bottle. I wonder to what pressure you can pump such a container with a syringe with water and air?
Source: https://izobreteniya.net/chto-mozhno-sdelat-iz-staroy-zazhigalki/
Making a gasoline lighter
Hello! In this article we will talk about a lighter, the special advantage of which is that the fuel is stored in it for a long time and does not evaporate.
Video on how to make a gasoline lighter with your own hands
Materials and tools: - 2 pumps from the Shmel primus stove; - cheap Zippo lighter; — nipple from a truck camera; — brass lever key (butterfly); - solder tin; - soldering iron; - soldering flux or soldering acid; - gasoline or gas burner; - fine-grained sandpaper; - needle file; - flint and wick;
We remove all irregularities and burrs by processing them with a needle file, and at the same time adjust the height of the tube to the height of the valve.
The bottom cap, the one for refueling, can be made smaller. To do this, screw the valve into the lower part of the lighter, also attach the second tube, and mark it. Only now at the level of the side hole of the valve.
Having cut off the part, cut off the valve at the same level and process it with a needle file in the same way as the top cap.
From what is left of the second tube you need to cut off two parts. The first is a 15 mm long tube. A little later we will use it to make a windscreen, which will also serve as a guide for conveniently screwing on the top cap.
The second is the plate. Clamping it in a vice, you need to saw the tube lengthwise and straighten the plate out of it, carefully tapping it with a mallet.
Next, having screwed on the valve and installed the body in a vertical position, you need to place the tube evenly on it, and the plate on top with the tinned sides facing each other.
After heating the structure evenly with a burner, we solder all three parts together into one.
After soldering, cool the part and, using a little force, unscrew the cap. It's almost ready. All that remains is to cut off the excess with scissors and process the irregularities and burrs with a needle file.
We perform the same operation with the parts of the top cap, only before we start soldering, in order to avoid fuel leakage in the future, we need to plug the top and side holes of the valve.
After this, having fixed the roller for a while, we attach the mechanism to the lighter body, placing a rod from a brass key between them, and try it on. The distance between the roller and the housing should be about two mm. The diameter of the rod is a little large and the distance is large.
By the way, you should pay attention to the fact that the gap for striking sparks, the one under the roller should be 1-2 mm above the top point of the threaded element. There will be a wick in that place and the sparks produced by the roller should fall exactly on this wick.
The lighter is almost ready, only a little remains, namely the wind protection. In the previously prepared tube, on the front part, using a 3-point drill in a checkerboard pattern, we make 8 holes at a distance of approximately 7 mm from each other.
We make a cut on the reverse side and cut off 13 mm of the tube wall.
After this, you need to reduce the internal diameter of the part by tapping it with a mallet and having previously installed an 11 mm drill into it.
We select a nail according to the diameter of the hole in the spark mechanism and, with gentle blows of a hammer, flare it and finally fix the roller.
In this case, you should pay attention to the direction of the roller teeth; it is important not to make a mistake.
Having installed the flint, we place the wick.
To do this, we unwind a little copper wire from the same transformer coil and use it to make a knot at one end of the wick. Having aligned the ends of the wire, we pass it into the upper hole of the lighter and remove it from the lower one. Then we pull the wire until almost the entire wick is laid.
Now, whether you are hiking or fishing, you can be sure that your backpack has a reliable source of fire that will not let you down in any weather.
If anything in the article seems unclear to the reader, write your questions in the comments, or I suggest you watch the video at the beginning of the article.
Source
Disassembling the lighter
So, we have two gas lighters in front of us. How to disassemble them carefully so as not to damage third-party parts? We proceed according to the following instructions:
- We take the lighter in one hand, use the nail of the index finger of the other hand to bend the steel fireproof casing to the side. It will straighten out easily, after which the grooves in the walls will come out of their grooves and you can simply remove it.
- We do not pay attention to the other structure of the lighter. Here we only need a wheel that simultaneously presses the cream column and serves to strike sparks from it, through which the gas supplied when the release/locking valve is pressed with the thumb is ignited. The wheel, as we see, is located in the grooves of the plastic stands. We bend one of the racks to the right, using the nail of the other hand we move the wheel in the opposite direction.
- You need to be prepared for the fact that as soon as the wheel is removed, the spring pushing the flint upward will immediately straighten and fly out of its groove-hole. So that you don’t have to look for it for a long time, crawling on the floor on all fours (you’ll quickly find the spring, it’s long enough, and it also magnetizes when you search, but you’ll have to tinker with finding the cream), it’s best to remove the wheel above the table and under a towel (napkin).
All. If the flint is replaced, there is no need to disassemble anything else. Now we disassemble the second lighter in the same way.
Lighter from a cartridge case
You don't have to be a smoker to use lighters. We are not talking about simple lighters that can be bought in any store. They won't surprise anyone. It’s another matter if the lighter is a beautiful souvenir item, especially if it is made by yourself. A striking example of this is a lighter made from old metal things, for example, from a cartridge case. This craft can be used every day or given as an original gift. A lighter from a cartridge case can be made in different ways, the best of which will be described in this article.
Types of lighters
By fuel type, devices can be divided into:
- gasoline;
- gas;
- USB lighters (coil) are like a car cigarette lighter, where electricity is used as a heating source for the coil.
According to the ignition device:
- silicon;
- piezo lighters;
- with an electrical circuit that provides ignition.
Gasoline lighters are made only with a silicon mechanism. Gas engines are produced with different ignition mechanisms; there are also turbocharged models.
In order to better understand all the pros and cons of gasoline lighters, let’s compare them with gas ones.
Features of trench creativity
Trench creativity of World War II
Note! If possible, the soldiers drilled a small bottom in the sleeve, into which a filler plug was installed to add fuel. But in most cases, gasoline was added to the lighter through the top.
The flint with a spring was soldered together with a small copper tube to the case body. To make the wheel, a round file was used, in which a hole was made for the screw. Regular gasoline was used as a refill for such lighters, since it was almost always at hand. Of course, due to the rapid evaporation of fuel, the product had to be refueled regularly , but the result is worth it. The lighter worked, and anyone could make it.
Soldier's lighter made from a cartridge case
But if at that time lighters were made for the purpose of survival, now they are more of a souvenir that you can show off to your friends. In addition, now such products are created in different styles, for example, in the steampunk .
Cases were often used from Mauser (the brass there is better quality)
How to remove a primer from a case
If you want to make a lighter from a cartridge case yourself, then first you will need to learn how to remove the primer from the cartridge case. The step-by-step instructions below are suitable for different calibers, for example, 5.45x39 and 7.62x39 mm.
Step 1. Light the inside of the cartridge case with a flashlight or other device to see exactly how the capsule is positioned.
Consider how the capsule is positioned
Step 2. Insert a strong spoke into the case, being careful to get the end into the small hole in the capsule. A long nail may work if it fits into the sleeve itself.
The spoke is inserted into the sleeve
Step 3. Place the sleeve with the inserted spoke on the anvil, which serves as a small bearing. You need to insert it so that the capsule is in the bearing hole.
A small bearing is used as an anvil
Step 4: Gently tap the inserted spoke with a hammer to dislodge the primer. It should fall out after the first hit.
Knocking out the primer with a hammer
Step 5. Remove the primer so it is out of the way. Repeat the procedure with other sleeves. If they are of a larger caliber, it does not change anything. You just need to choose a long knitting needle that would reach the primer in the inside of the case.
Done, now the capsule can be removed
DIY flower pots
In our new article you will find the best options for making flower pots with your own hands! Step-by-step instructions, tips and more can be found at this link.
Pros and cons of gas models
For the purity of the experiment, we will compare silicon devices running on gasoline and on a mixture of propane and butane:
- Price. Varies greatly depending on the manufacturer, appearance, brand recognition and quality. It can cost 10 rubles, or 50, or 1000. A gas lighter from Dunhill can cost several thousand dollars.
- Reliability. If we talk about silicon gas devices, they are not very reliable. The flame goes out in the wind, ignites poorly and burns at sub-zero temperatures. Cheap plastic models often fall apart right in your hands.
- Durability. Expensive products are durable, can survive many refills and preserve their working life. The lifespan of budget options is very short.
- Easy to refill. Refilling the device with a new portion of isopropane or a mixture of butane and propane is very simple. Insert the gas cylinder into the hole, press lightly and that’s it: the device is ready for use.
- Maintenance cost. The fuel is enough for a week even for a very active smoker, and the price of one refill will be low. One cylinder is enough for several refills.
Option #1. Lighter "Star"
To work, you will need a star from a soldier's cap from the times of the USSR. It is not difficult to find it, because similar products are often found in markets. If you wish, you can buy such a star online. You will also need to prepare paraffin, a soldering kit, a cartridge case, some cotton wool and brass parts to create the body of the future lighter. In this case, eyepieces from old Soviet binoculars are used. Next you need to follow the instructions.
Step 1. Attach the star to a pre-prepared plate cut from a beer can.
First, the star must be fixed to the plate
Step 2. Make impressions for the sides of the lighter. For this purpose, it is advisable to use candle paraffin.
Candle paraffin is used for work.
Step 3. Prepare current-carrying contacts for the lighter, which will later need to be anodized in a galvanic bath. Cover them with graphite (a small layer is enough).
Next, you will find a long and tedious galvanization process. After placing the manufactured molds, you need to connect the contacts of the cathode to the anode. The recommended tightening time is 5 hours and the current is 1.5 A. Immediately after tightening the cathode, the current should be reduced to approximately 300 mA. Then the molds await 7 days of electrolysis.
Galvanization process
Step 4. Using brass binocular eyepieces or other similar shaped parts, make a lighter body. This stage requires metal soldering skills. The body can be made during galvanization to avoid wasting time.
Making the lighter body
Step 5. Solder the flint to the sleeve, and the sleeve itself to the lighter body. Next you need to install the wick and fill the entire space with cotton wool.
The entire space must be filled with cotton wool
Step 6. Firmly solder the sleeve with flint so that it does not break during use of the lighter. Carefully polish all resulting seams.
The seams need to be carefully polished
Step 7. Attach the special cap covering the wick using the same brass chain if you have one. Such a lighter will look more impressive. Just don't forget to fill it up.
A cap is attached to the wick with a chain.
That's all. A gasoline lighter made from a cartridge case and an army star is ready. Now you can add it to your collection or give it to a loved one. The finished product will look something like this.
What to do with a lighter that still has a lot of gas in it, but the flint has come out?
Through the transparent walls one can see that the tank is still full of gas, and the flint has already flown out for various reasons. Maybe the machine from the factory inserted a defective (broken) flint into the groove of the lighter, maybe there was a hidden defect in the flint itself (cracks or foreign inclusions), which caused the flint to fly out of the lighter prematurely. Thrifty people do not throw away such lighters, but simply put them in reserve. No matter the hour, you might stumble upon a lighter without gas, but with a working flint. Then, in a few minutes, from a pair of non-working ones you can assemble one that is fully capable.
Option #2. "Three-sleeve" lighter
Few people will be surprised by ordinary lighters made from cartridge cases, but here you can go further by making an unusual design from three cartridges at once. One sleeve serves as a reservoir for cotton wool, and the rest are spare containers.
"Three-sleeve" lighter
But how to make a “three-sleeve” lighter? More on this below.
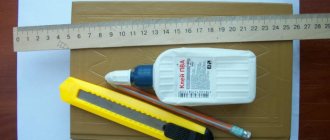
Set of tools
Tools
Work should begin by preparing everything you need. First of all, gather the following tools:
On a note! Making a three-sleeve lighter requires working with small parts, so if you have vision problems, you may need a special magnifying glass or other magnifying device.
Materials
It is also necessary to prepare some materials for working with sleeves:
Once you have everything you need ready, you can get to work. Of course, the procedure will take quite a lot of time, so it is recommended to start on the weekend so that nothing distracts from the process.
Instructions
Step 1. Make small holes in the sleeves and solder the partitions cut from brass tubes. This is necessary to attach the tanks to each other.
Holes are made in the sleeves
Step 2. Solder all three sleeves, thereby creating one solid structure.
Step 3. Drill out the end part of the liners for further installation of the filler neck. All primers must be removed before starting work.
The end parts of the sleeves need to be drilled out
Step 4. Turn the valve, cap and burner on a lathe. The details should look similar to the photo.
Valve, cap and burner
Step 5: Remake the post on the lathe by turning a small ball for later mounting of the flint.
A small ball is needed to install the flint
Step 6. You should end up with a stand like this. The length of the rod with the spring is exactly this, since it will pass through the second tank of the manufactured structure.
Step 7: Grind the needle valve if necessary. It was already mentioned earlier that this part is made of steel, although you can use other options.
The needle valve can be ground if necessary.
Step 8. Turn out the valve cover and make the same holes in it as in the photo.
Step 9: Solder the special loop to the top of the valve cap. The loop here is needed to secure the rocker arm of the cap.
The loop here is needed to secure the rocker arm of the cap.
Step 10. Once you have soldered the wheel stand, reinforce the entire structure with an additional rim.
The structure is reinforced with an additional rim
Step 11. Make such a rocker with a special valve. The surface of the valve can be smooth, so to make it, cut a small piece of brass tube.
Rocker arm with valve
Step 12. Perform a test installation of parts to identify possible defects.
Test installation of lighter parts
Lighter pistol: main stages of work
To make the first part, you will need a piece of thick-walled tube 10 cm long. We process the workpiece on a lathe. Then we make the front and rear “plugs” from a steel blank. In the first one you need to make a hole (to imitate the barrel of a pistol), and the second one will have a hemispherical shape for better ergonomics of the product.
At the next stage, it is necessary to press the front and rear “plugs” into a thick-walled tube using a press or a regular stud with a nut (the old-fashioned method). Between them there will be a spring-loaded lid, which will not allow dirt to get inside, and will also imitate the shutter of a pistol lighter.
Next, we drill several holes in the thick-walled pipe and make long grooves on top and assembly. Then you need to make a handle from a sheet of duralumin (the work is best done on a milling machine) and assemble a lighter-pistol. For a detailed process of making a souvenir product, watch the video on our website.
Rate this post
Source: https://sdelairukami.ru/kak-sdelat-zazhigalku-pistolet-svoimi-rukami/
Option #3. Lighter "Trench"
Another option for making a homemade lighter, the main element of which is the sleeve. The process is simple if you strictly follow the step-by-step instructions given below. So, let's go.
Step 1. Prepare everything you need for work. All parts must be made of non-ferrous metals: brass tubes, rods, rods, etc. are suitable.
Materials for making a lighter
Step 2. Drill out the primer socket in the cartridge case, and then begin to tap the threads in the resulting hole.
Step 3. Make a wick socket from a brass blank. To grind a part, it can be fixed in the chuck of an electric drill.
Fitting socket for wick
Step 4. Make several indentations in the sleeve, or rather, at the base of its barrel. To do this, use a center punch or dowel.
Recesses on the sleeve
Step 5. Press the machined socket into the cartridge case mouth. It is advisable to use a vice for this.
The socket needs to be pressed into the cartridge case Another photo of the process
Step 6. Place a washer or small nut under the seat of the press-in wick to drive it even deeper (much like in the photo).
The wick needs to be driven even deeper
Step 7: Solder the two pieces together for a more secure fit.
Two parts need to be soldered
Step 8: Empty the bullet until only the core remains. This step must be performed with extreme caution.
Only the bullet core should remain
Step 9. Cut off the spout of the core and its lower part so that the part can fit into the sleeve itself.
Core after trimming
Step 10. Connect the sleeve to the cut core.
The sleeve is connected to the core
Step 11: Find an old lighter wheel and a small rectangular piece of brass.
A piece of brass and a lighter wheel
Step 12 Bend a piece of brass into a “P” shape. This element will act as a holder for the wheel.
Brass bent into a "P" shape
Step 13: Cut a small piece of tubing. You need a brass tube whose diameter matches the size of the flint you will use in your design.
Piece of brass tube
Step 14. Drill holes in the U-shaped element to install the wheel, and then connect this element to the tube. Solder these parts to each other.
The tube is connected to a U-shaped element
Step 15. Perform a test assembly of all elements to check their functionality.
Test assembly of elements
Step 16. Trim off any excess and grind down the solder areas so that the structure looks solid.
The structure should look solid
Step 17. Make two copper or brass loops to secure the sleeve with the spark striking unit.
Step 18. Install the manufactured loops onto the tube. The dimensions of the loops must match the dimensions of the tube. Solder the elements for reliability.
Loops are attached to the tube
Step 19. Carefully bend the antennae from the soldered loops.
Loop antennae are bent
Step 20. Connect the finished structure with the sleeve and solder the bent antennae to the body of the future tank.
The structure is connected to the sleeve
Step 21. Give the assembled structure a more presentable appearance. Polish its entire surface, paying special attention to the solder areas.
The lighter needs to be thoroughly polished. The product after polishing
Step 22. Make a plug for the bottom of the sleeve. In this case, part of the bolt and a copper cap are used to make it.
Plug for the bottom of the sleeve
Step 23: Place the wick in the lighter and stuff the cotton through the bottom of the lighter.
The wick is placed in the lighter
Step 24. Connect the cap to the lighter body using a chain so as not to lose it. Now you can test the lighter!
How to refill a lighter correctly
Before refilling the lighter, you need to sit comfortably in a well-ventilated area. Having the skills will help you do everything right.
You should take into account all safety parameters, know where you can buy a quality product and what you can refill it with.
You can buy the simplest can of gas or gasoline for refilling lighters, for example, from, S&B, etc.
By the way, it is useful for beginners to know how to understand that their favorite lighter is refilled. To do this, you should listen carefully while refueling. When the hissing and quiet whistle stop, this is a sign that the tank is filled with gas.
How to refill a lighter with gas without a can?
The time of disposable lighters has passed, and the time has come for modern devices with the possibility of secondary refilling. The main problem remains the quality of fuel and the availability of skills. It is worth obtaining information in advance about what raw materials are used for filling and where you can buy it.
The gas lighter is used to the end; before refueling, you need to make sure that all excess air is released.
The main difference between turbo lighters is that the spiral is heated, and as a result, a flame is produced. During refueling, you should hold the cylinder vertically and press firmly, listening to the sound.
The lighter pistol can be refilled. There is a small hole at the bottom of the handle through which gas is replenished.
By the way, experts have prepared a special mixture - propane-butane, which is better for replenishing fuel in pocket lighters.
How to refill a Cricket lighter?
When purchasing Cricket, many people wonder whether it is possible to refill with disposable gas?
Option number 4. Lighter from the game "Metro 2033"
Don't know what to surprise your gamer friend for his birthday? Make him a unique lighter in the style of the acclaimed game about the post-apocalyptic world “Metro 2033”. Below are step-by-step instructions for this process.
Step 1. Prepare the case by removing the primer and cleaning the surface of any dirt.
Prepared sleeve
Step 2. Make cheeks for the wheel of the future lighter. For this you will need a brass tube. Of course, you can use an old lighter wheel, but it won't fit well with the rest of the design.
Make cheeks for the wheel of the future lighter
Step 3. Cut out two thin wheels. Do this carefully so that the parts are smooth and uniform.
Wheels are cut out
Step 4. Cut a couple of mandrels to press on the second piece. To make them, use a steel rod.
Mandrels are cut from the rod
Step 5. Press all the parts into one piece so that you end up with a full-fledged lighter wheel.
Step 6: Secure the sleeve in a vise and drill through the bottom using a drill.
Drilling the bottom of the sleeve
Step 7. A small threaded bushing made of brass must be soldered into the resulting hole.
Brass bushing with thread The bushing must be soldered into the hole
Step 8. Make the central element of the burner. It should also be threaded.
Making the central element of the burner
Step 9. Now complete the wrist part of the burner, which will protect the fire from the wind. This element is called “wind protection”.
Next you need to make a “wind protection” Almost finished “wind protection” That’s it, the part is machined
Step 10. This is what the windbreak will look like in the end.
Ready-made “wind protection”
Step 11: Solder the inside of the windbreak.
The internal part needs to be soldered. The result of the work done
Step 12: Use an internal thread tap. The thread is needed at the cap.
Internal thread being cut
Step 13. Try on the manufactured parts, placing them together. This is necessary to see how everything will look in the end.
Trying on finished parts
Step 14: Grind out the lighter cap so that the top is shaped like a bullet.
Next, you need to grind out the cap for the lighter. Turning out the cap. The upper part of the cap should resemble a bullet.
Step 15. Having replaced the cutter with a drill, make many holes in a circle in the cap. This is not necessary, since such holes do not perform any functions - they are for beauty.
Small holes are drilled in a circle
Step 16: Make the bottom fill plug.
Then you need to make a lower filling plug Bottom plug
Step 17 Once the spring and flint tube is ready, test fit the element.
Test fitting of the tube
Step 18. Machine a small spacer post.
Remote stand
Step 19. Solder the stand to the previously made tube so as not to lose this small part.
Option #5. Lighter based on the game “Bioshock” (Big Daddy)
Everyone remember the asshole who wandered around in the first part of the Bioshock game with a big and scary drill? Of course, this game has delighted many people thanks to its unusual storyline, breakthrough graphics and atmospheric locations. People inspired by this game can make a custom lighter using an old cartridge case, parts from a non-working lighter, and other scrap parts.
Lighter based on the game “Bioshock” (Big Daddy)
This is what a lighter looks like, made under the impressions of seeing the underwater city of Rapture in the game “Bioshock”.
A spark will ignite a flame: what to use as tinder
The flame that lights a cigarette comes from a spark when it hits something flammable. Therefore, in any case, tinder will be required. It could be:
At least half of this will always be found in the forest and in the backpack of everyone who solves the problem of how to light a cigarette without a lighter and matches. Therefore, you first need to put together a small wigwam from available material, and then try to ignite it.
Option number 6. Souvenir lighter
Of course, there are many different ways to make a lighter from a cartridge case on the Internet, but if you are initially making a product for a gift, then it needs to be well decorated. A souvenir lighter decorated with copper ornaments is a great way to please a friend or loved one, even if he does not smoke.
Souvenir lighter This lighter will be an excellent gift.
Tools and materials
Before starting the work process, you need to prepare everything you need to make a lighter:
Once everything you need is prepared, you can begin making the lighter. This is a rather complex process that requires a lot of time and effort.
Not working lighter on the part
Instructions
Step 1. Remove the primer from the cartridge, and make an internal thread in the resulting hole.
Internal thread in the resulting hole
Step 2: Prepare a small copper plate. It can be made from a copper tube, which must be cut lengthwise and leveled.
Small copper plate
Step 3. Clean the finished plate from dirt, and cover one side with self-adhesive vinyl.
One side of the plate must be glued with vinyl self-adhesive
Step 4: Apply the stencil to the other side of the plate using paint markers. Choose a drawing at your discretion.
A stencil is applied to the plate
Step 5. Etch the plate in a ferric chloride solution brought to a boil. Once the thickness of the plate is reduced by approximately 40%, stop the chemical process.
Plate etched
Step 6. Carefully trim off the unnecessary edges of the plate and bend it to the shape of the sleeve.
Plate bent to fit the shape of the sleeve
Step 7. Carve out the neck of the lighter, and bleach the resulting part in a special lemon solution.
Finished lighter neck
Step 8. Solder the pad to the body of the future lighter. To prevent the pad from sliding on the slippery surface of the sleeve, wrap it with wire.
For reliability, the cover is tied with wire
Step 9. Sand the lighter body with the soldered plate using fine-grit sandpaper.
Lighter body after cleaning
Step 10. Cut the chair mount from the brass plate. The holes should be 5.5 and 10 mm.
Step 11. Twist thin wire onto a nail and cut rings for the chain. Then connect all the cut out elements and solder the cut points.
Rings for chain
Step 12. Try on all the assembled parts. This will help you find out if the items are suitable. Otherwise, they will need to be sharpened.
Trying on parts of a souvenir lighter
Step 13. Polish the lighter parts and complete the final assembly of the structure.
After polishing, final assembly is carried out
Step 14: Install the wick and then fill the sleeve with cotton.
The sleeve is filled with cotton wool
Step 15. Once the product is ready, fill it with fuel and test it. Below are photos of the finished souvenir lighter.
Finished souvenir lighter Photo of the souvenir lighter Another photo of the product
Option No. 7. Lighter "Three-bolt helmet"
You can make a lighter from a cartridge case with a diving theme. To do this, you will need the sleeve itself, materials and tools for soldering. The manufacturing process cannot be called simple, because it requires electrolysis, so people with experience in this matter need to start creating the “Three-bolt helmet” lighter.
Lighter "Three-bolt helmet"
Step 1. Prepare the base for the future structure using hydrolysis. For this you will need a tennis ball.
The base will be made by hydrolysis The base for the lighter is being created Another photo of the creation process
Step 2: Solder the main parts to the helmet. These are portholes and handles that are made of brass.
The main parts are soldered to the helmet
Step 3. Install the bottom for the lighter, made of brass plate. Carefully solder it and sand the soldering areas with sandpaper.
The bottom is made of brass plate The bottom is attached to the helmet
Step 4: Place the shell without primer into the finished helmet, then install the wick and fill the reservoir with cotton wool.
The sleeve is inserted into the helmet
Step 5. Make a lid and a chain to hold the lid on. How to make a chain was mentioned earlier.
Step 6. Polish the body of the lighter, bringing the surface to a shine.
The lighter body needs to be polished to a shine.
Step 7. Fuel the lighter and test it. Works? Great! Now you can use your diving-themed lighter everywhere.
Checking the functionality of the lighter Photo of the “Three-bolt helmet” lighter This is what the finished “Three-bolt helmet” lighter looks like
If desired, you can re-sand the lighter with sandpaper, changing the grit from coarse to finer. But you should understand that trench creativity does not require perfect condition , so many craftsmen leave small scratches or darkening on their creations. This is a “combat” lighter, so its appearance should be appropriate.
how to make a lighter
https://www.rb.ru/article/reklama-na-zajigalke/6903317.html
Advertising on a lighter. Blasphemy, but as a motivation to quit smoking
Advertising on a lighter. Blasphemy, but as a motivation to quit smoking
How to make a treasure map 1
Take a sheet of wrapping paper (...)
How to make a treasure map 1 Take a sheet of wrapping paper of the desired size. If the paper is white, it is better to tint it “antique”. To do this, you need to make the background light brown. Let dry. 2 Draw on a piece of paper a map of the area where the treasure has already been hidden or will be hidden.
For example, draw a plan of a yard or summer cottage: buildings, paths, trees. Mark the place where the treasure is buried with a symbol. If you wish, you can encrypt the map - for example, instead of a picture of a house, draw a rebus in which the word “house” will be encrypted.
3 Carefully burn the sheet on which the map is drawn along the edges on all sides. Fold the card several times. Ready! Which of us didn't play pirates as a child? Who hasn't dreamed of finding treasure? Everything is in your hands: hide your treasures, draw a map.
Well, let the finder have a prize! - wrapping paper - gouache - brush - matches or lighter
— felt-tip pens If you have a large card, for example, the size of a sheet of Whatman paper, it will be more convenient to tint it not with a brush, but with a dishwashing sponge. The sponge, of course, must be clean.
bar lighter
bar lighter
https://www.shopbop.com/brass-lighter-ring-monserat-lucca/vp/v=1/845524441901153.htm?folderID=2534374302024617&fm=other-shopbysize&colorId=11739
lighter ring)
lighter ring)
https://www.kupivip.ru/shop/directory/?activityId=27585&filter=HOME
stylish lighter for a stylish girl..
stylish lighter for a stylish girl..
https://cs7001.userapi.com/c7002/v7002746/1e25/sKBjfBRDle4.jpg
Macro photographs of a lighter from Chuck Anderson
Macro photographs of a lighter from Chuck Anderson
https://www.ellf.ru/creative/28879-chto-mozhno-sdelat-iz-dvux-prostyx-zazhigalok-14.html
What can be made from two simple lighters? (14 photos)
What can be made from two simple lighters? (14 photos)
https://ahuli.name/net-deneg-na-original-kupi-poddelku-brenda.html
Every year, 12 million original Zippo lighters are produced in the American city of Bradford. And the same amount, according to (...)
Every year, 12 million original Zippo lighters are produced in the American city of Bradford. And the same amount, according to the Zippo Manufacturing Company, goes on sale of counterfeits of the brand, manufactured in factories in China. Contraband Zippo lighters are popularly nicknamed Rippy, and prices start at $2, while the cheapest real Zippo starts at $14.95.
Source: https://www.pinme.ru/u/engel/kak-sdelat-zazhigalku/