Types of children's beds
A children's bed must satisfy three basic requirements: durability, safety and attractiveness. If everything is clear with the first two, then the latter leads to ambiguity, especially when it comes to going to the store. On the one hand, there is no point in overpaying for unnecessary decor and design, and on the other hand, it is worth taking into account the fact that children should find it interesting. Always!
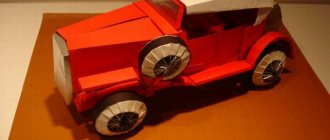
A children's bed should not only be comfortable, but also interesting for the child.
Taking this into account, we can consider the main types of children's beds:
- Regular. The most common option is the most practical and equally uninteresting.
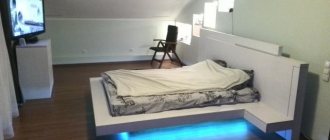
- Two-tier. It is attractive because it is possible to sleep on the upper tier.
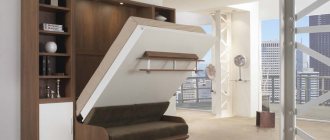
- Combined. A compromise option between, in fact, a bed and a table, wardrobe, nightstand. Good too.
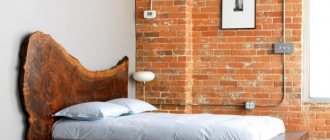
- Homemade, stylized. For girls, these are butterflies, clouds or fairy-tale animals. For boys, of course, cars: sports cars, trucks, as well as buses and planes. The most interesting solution!
Note! If we talk about making it by hand, then it is the option with a machine that is most often found in modern homes.
Making the sides
Step 1
On a 19 mm thick MDF sheet, draw the outline of a racing car (Figure 1 of the Appendix). Using straight lines, sketch out the main elements of the car: rear and front bumpers, trunk, rear window, roof, windshield, hood.
Step 2
Starting with the rear bumper, give the straight lines of the sketch a smooth, graceful curve. If necessary, to draw curves, use objects with a round base of various diameters.
Step 3
To draw a smooth line for the hood, hold a thin, easy-to-bend piece of wood at the front of the car with a clamp and bend it. Draw a pencil line along the resulting arc.
Step 4
Using a jigsaw, cut out the outline of the car. Try to keep the jigsaw blade 1.5-2 mm above the drawn line at all times (photo 3). Sand the edges of the workpiece.
Note: there is no need to strive hard for accuracy at this stage; small deviations from the line are in the order of things - the main thing is that the contour lines of the workpiece are smooth.
Step 5
To process the cut lines you will need a grinder and a file. For straight areas and raised curves, use an orbital sander with 80-grit sandpaper (Photo 4).
Step 6
For concave curves and tight spaces, use a file (photo 5). Finally, sand all edges with 120 grit sandpaper.
Step 7
When one side of the car is ready, lay it on the next sheet of MDF and trace the outline. Cut out the second side using a jigsaw.
How to make a baby bed in the shape of a car with your own hands
You need to start with an idea. You should not take models with complex shapes and an abundance of small details as a basis. The contours of the future bed should be as simple as possible, with smooth contours, without sharp transitions and sharp corners. It is necessary to exclude options with volumetric surfaces, especially those with curvature along all three axes - this is impossible to make at home.
The model should not be too complex to implement.
As an optimal option, they most often settle on the idea of styling them as sports cars. Firstly, boys love racing and everything connected with it, and secondly, sports cars have laconic lines and have a good balance between attractive appearance and functionality. For example, the spoiler can be turned into a shelf, and the hood into a drawer for clothes.
DIY children's beds for boys: schematic diagram
Finding a suitable design is not difficult these days. Moreover, on the Internet you can find completely finished drawings, with assembly and cutting diagrams. Here, the main thing is not to miss an important point - the size and dimensions of the bed will be determined by the mattress. Therefore, you should proceed from what is available or, if you plan to do everything “from scratch,” you can rely on the standard children’s size: 140x70cm.
There are many drawings of children's bed cars on the Internet.
The next step should be the preparation of drawings. Ideally, it is desirable to have at least basic skills in working in CAD and CAM systems, but you can make drawings manually. This is really important, since the depth of drawing and the accuracy of the dimensions will determine what kind of children's bed in the form of a car you make yourself will turn out to be. Therefore, it is necessary to think through everything thoroughly, down to the smallest details.
If desired, you can draw the diagram yourself according to individual parameters.
Tools and materials
To make a bed, you should divide the required tools into two categories (this will make it easier to understand what else you will need):
- The usual: hacksaw, screwdrivers, wrenches, breadboard and carving knives, a set of hex keys (for confirmations), sandpaper, markers, brushes and brushes.
- Special: jigsaw, grinder, grinder, hair dryer, level, spray bottle (airbrush).
You will need tools for woodworking.
It is assumed that a do-it-yourself car bed for a boy will be made only from wood. Plastic or metal should be used more for decoration. In general, the best option might be:
- Chipboard (chipboard). It is characterized by low cost, ease of processing and a wide range. Afraid of mechanical damage and moisture.
- Laminated chipboard (LDSP). The same chipboard, but with a so-called laminate - a coating that gives it color, texture and pattern. Less susceptible to harmful factors.
- Fiberboard (not to be confused with fiberboard - MDF from the English. Medium-Density Fiberboard). Durable, well processed. The structure is closest to ordinary wood.
Manufacturing
The ease and simplicity of manufacturing directly depends on the thoughtfulness of the concept and the accuracy of the drawings. Of course, a fair share of success depends on the “curvature” of the hands, however, the desire to surprise your child or the desire to bring everything to the end at all costs will help here too.
The speed of production depends on your skill and desire.
Cutting blanks
For simple parts, an ordinary hacksaw is enough, but since you can’t make a car bed with your own hands without interesting decor, the biggest difficulty will be the sides.
Firstly, it is difficult to make such a drawing without special equipment on a 1:1 scale: you can try the coordinate grid method or print the outline in parts on a printer, and draw them directly on the surface of the sheet.
The hardest part is sawing out the sides.
Secondly, curved lines are labor-intensive to manufacture and process, and also require the ability to work with a jigsaw.
If there is such an opportunity, the best option would be to cut the sidewalls at a company that provides such services - the result of a milling machine cannot be compared with sawing by hand.
It is better to cut the sidewalls using the services of the company.
Important! When making sidewalls from a sheet with laminate, you should select the appropriate operating mode and type of jigsaw blade so that when cutting you get smooth edges without chips.
DIY bed for a boy: frame
When designing bedroom furniture, two frame options are usually considered:
- Frame. The frame is the main strength element, as it bears the entire load. In this case, the sidewalls can be made from a thin sheet of chipboard, no more than 16-18mm thick. It is advisable to take thicker timber: usually a section of 50x70 is sufficient.
- Carrier. Here the sidewalls themselves will play the role of strength elements and support the entire load - they are made of chipboard or MDF, with a thickness of 18 to 22mm. In this case, it is necessary to consider additional fastenings of the sidewalls to each other if the panels are not solid, but have cutouts.
Assembly
Assembly is recommended to be carried out in two stages. The first, rough or trial, is carried out after the manufacture of all the frame parts and is intended for adjusting the connections, as well as correcting flaws in the design - since it is impossible to make a children's bed in the form of a car with your own hands the first time without errors.
The second stage is considered finishing or final. It is already being produced at the final stage. Usually by this time all the parts have a finished look: painted and decorated accordingly. As a rule, the “last” assembly takes place on site, directly in the nursery.
Laying the mattress
The mattress must be placed on a ready-assembled bed. However, you should take care of the type of substrate in advance. It also comes in two versions:
- Lamellar or on slats. In this case, the “bottom” of the bed is a series of slats of a fixed width, fixed at a certain interval.
- Solid. A mattress base is simply a piece of sheet metal (usually chipboard), either solid or with a number of holes to improve ventilation.
The mattress is laid when the bed is ready.
Final touches
After installation, the bed can be further decorated with overhead elements, for example, by installing wheels on the sides or attaching a spoiler at the headboard, which will simultaneously serve as a shelf for small items.
Also, if you have the necessary skills, you can organize lighting around the perimeter of the bottom using an LED cord. In addition, LED spotlights will come in handy to imitate headlights, otherwise what kind of car is this - a do-it-yourself bed for a boy!
You can organize lighting in the form of headlights.
Operating procedure
Attention! After cutting out the edges of all parts from plywood or MDF, carefully sand them with sandpaper. All parts of the bed, especially those with which the child may come into contact, must be safe.
- First we construct the base for the mattress. We saw the 50x50 mm timber into the required sections: 2 x 1600 mm, 2 x 700 mm, 5 x 225 mm.
- We assemble a frame 1600x700 mm. We secure the joints with glue and also with 80 mm self-tapping screws.
- We place the assembled frame on 5 supports 50x50x225 mm, also made of timber. The front part of the bed will be subject to greater load, so it has 3 supports, the remaining 2 support the rear part of the car bed.
- Assembling a toy box. Guided by the prepared drawing, you need to cut out the necessary parts from MDF or order the necessary parts at the place of purchase of the material: 2 side walls, 1 front, 1 back wall, bottom and cover.
- First of all, we connect the bottom of the drawer and its back wall using glue and furniture screws (confirmats, or euroscrews). Then we fix the side walls in the same way. We install the front wall so that the entire rounded edge of the bottom part protrudes. Then we attach the lid to the edge of the back wall using a piano hinge.
- Using a method convenient for you, transfer the outlines of the sides onto a sheet of MDF or thick plywood (16 mm). Be careful, the bottom drawer will only slide out on one side, so one of the sides has a cutout for it. Depending on the convenience and location of the car bed, you can change the side of the drawer. Use an electric jigsaw to cut out these parts.
- We attach the sides to the frame: we need to make sure that the bottom edge is 13 mm from the floor. To make it easier to navigate, we place the assembled toy box against the front of the base frame. We fasten the sides to the frame with European screws using a drill. We ensure that the connection angles are 90 degrees.
- Attach the toy box. To do this, we screw Euroscrews from the inside of the box into the frame beam and into the sides of the bed-machine.
- We are making a niche for another drawer, which will be located under the mattress. First, let's prepare 2 identical racks that form a niche. Draw 700x262 mm rectangles on the plywood; at the upper corners of each you need to make 50x50 mm cutouts into which the timber will fit. At the same level with the cutout for rolling out the box on the side, we attach the racks.
- Installing the headboard. Cut out a part measuring 700x348 mm, and the upper part should be made radius. Aligning it along the upper level with the side parts, we attach the headboard to the frame using 4 furniture screws.
- For the roll-out box, we will prepare the details: bottom – 169x639 mm, 2 sides 169x520 mm, 2 sides 169x639 mm and front 606x208 mm. We assemble the box using screws. We screw the facade so that its lower edge and the edge of the facade form one line. The gap between the front and the edge of the side cutout should be approximately 2 mm.
- The box will move on linear rollers (attached to the bottom). The guides can be similar rollers on the niche racks (2 for each). Inside the niche at the opposite side you need to install a limiter (can be from a piece of timber).
Installing a children's bed: what you need to know?
Even at the planning stage, you should consider not only the design features, but also how such a bed will fit into the interior of the nursery. If repairs are not expected in the foreseeable future, you will have to develop a machine design that best suits the style of the room.
In addition, the children's bed must be stable in itself. Do not allow a child to be injured as a result of it tipping over or moving out of place. It is also not advisable for the furniture to be in direct sunlight most of the day - this can damage the paintwork.
You should carefully consider the place where the product will stand.
Drawings and diagrams
To make a machine bed with your own hands, you will need a detailed drawing, on the basis of which the parts will be created. The design of the bed can include not only a sleeping place, but also additional drawers, shelves, ladders, other details and decorative elements. It is also possible to update the interior of the children's room so that it is more consistent with the changed environment - for example, a rug, a rug with a pattern depicting a road, or photo wallpaper with road signs.
Having decided on the model, you can select similar ready-made drawings on the Internet, or make the calculations yourself by drawing the layout manually, or in any convenient design program.
Drawing of a simple machine bed that you can make yourself.
DIY drawing of a crib 155*70.
Drawing of a design option for a baby crib-car for a boy. Drawing of a car bed with a convenient drawer.
Another version of the drawing of a machine bed.
One of the techniques is to preliminary draw a template for the future bed on cardboard or paper, so that later you can easily transfer the projection of the details onto the material chosen for the base. A do-it-yourself car bed, the drawings of which have been properly calculated in advance, is much easier to assemble than a creative product made from scratch.
Do-it-yourself car bed for a boy: care rules
In general, caring for a handmade bed is not much different from caring for the same one, but bought in a store:
- Do not allow the humidity level in the room to exceed.
- Regular dusting and wet cleaning.
- The bed should not be placed near heating radiators.
- Don't forget to change your bed linen.
Caring for a homemade car bed is the same as caring for a regular bed.
As you can see, making a children’s bed yourself is a completely feasible task. Of course, a lot depends on both the idea and the possibilities (including material ones). However, if you really want to, then a sudden idea of how to make a car bed with your own hands can find a completely real embodiment. Moreover, if it gives the child joy and healthy sleep.
Tools
To make furniture at home, you need to prepare supplies and tools. The tools you will need during the work process are:
electric jigsaw;- Sander;
- screwdriver;
- drill;
- sandpaper;
- tassels;
- building level;
- Screwdriver Set.
Materials you will need :
- laminated chipboard;
- beam;
- plywood;
- pencil and ruler;
- screws and fasteners;
- non-toxic paints and varnishes.