Interesting fact! Did you know that you can make a garden labyrinth with your own hands? If you want to know more, read this article.
Brief historical excursion
Sundials gained particular popularity in the 17th-18th centuries and were used primarily in classical-style gardens - first in regular gardens, and soon in landscape gardens. They first gained popularity as part of palace ensembles, but their widespread popularity is associated with the transformation of clocks into an independent element of decorative gardens, which, by the way, were made in a wide variety of styles.
It is often said that Europe is not a suitable place to create a sundial on a site, they say, this is just another attempt to stand out among other summer residents, and an unsuccessful one. And they say this because our climate is not suitable for this, since there are many cloudy days. You will be surprised, but all this is just another misconception! For example, in England, with its frequent fogs, rare classical gardens do without this decorative element.
On the role of the element in the landscape
Usually the sundial is located in the center of the flower bed and is the dominant element, as it is located on a pedestal or other elevated surface. We also note that the pedestal is an important element of this composition, which is sometimes made in the form of a column.
Sundials are designed to attract attention, for this reason their size is directly related to the size of a particular area. If the area is small, then it is advisable to install the clock on a path, next to a lawn or a small but bright flower bed. But in a landscape or forest garden it is better to surround them with flowers so that they, invisible from afar, suddenly appear before your eyes when approaching. In addition, in small gardens, sundials are often installed in the form of decorative figurines.
Thanks to the huge variety of materials and shapes used to create a clock, you can get a design that takes into account the characteristics of the garden where it is created. So, if the garden is in an avant-garde style, but when creating a sundial, the most insignificant details should be taken into account. Here the clock can become part of a recreation area, a playground or even a gazebo. Moreover, they can effectively decorate a garden pond or fountain.
There is a concept of “live clock”. This is another option on how to make a sundial with your own hands , but using flowering living plants, which will serve as the material for forming the dial and hands.
Note to the master
So we have sorted out all the practical instructions. In conclusion, we would also like to present you with practical recommendations:
- The sundial “works” as long as our main luminary is visible in the sky. Therefore, you should not put the time on the dial after sunset or before dawn - this is extra work.
- The expression “works like a clock” does not quite apply to our invention. Due to the nature of fluctuating daylight hours, time will rush on them in the spring and lag behind in the fall. Therefore, there is no need to make the design monumental in order to be able to adjust the clock divisions in accordance with the season.
Making your own sundial is fun, easy and educational. This is not only an educational toy for children, but also an excellent decoration for a summer cottage!
Sundial design
Any sundial is based on two elements:
- frame is a flat surface on which the corresponding markings (dial) are applied;
- The gnomon is a rod that is attached to this surface.
Any material that is resistant to atmospheric factors can be used to make watches. It could be stone, cement, iron, wood, plastic or even gravel. It is desirable that the dial be light (it can be white marble, limestone, etc.): this way the shadow from the gnomon will be more noticeable. And the gnomon itself, by the way, can be made from long nails, plastic pins or knitting needles.
Note! The length of the pointer should slightly exceed the circumference of the dial.
Such watches can decorate and enliven any landscape. Especially if live plants not exceeding 50 centimeters in height were used for it. For example, calendula flowers bloom at about six o'clock in the morning and close at four in the evening (even if the day is cloudy).
Following the sun
To make not just a decorative element, but a truly working clock, you need to know some features:
- We will determine the angle of inclination using the formula: 90° - the angle of your latitude;
- the gnomon must be long to cast a shadow;
- every hour is approximately 15°;
- clock construction is best done on the longest day of the year;
- You can decorate a sundial with stone, beads, tiles, driftwood, bricks, glass, and forged elements.
A little advice: before modeling a complex structure - a sundial, practice on pocket versions. For this it is better to use plywood or cardboard. And only after honing your skills, begin to create a real miracle of nature.
Main types of watches
Historically, there are three types of sundials. Let's get acquainted with each of them.
- Vertical elements are installed mainly on the walls of buildings, pillars or fences. The frame in them “looks” exclusively to the south, at an acute angle (or at an angle of 90 degrees) relative to the noon line. It is also important that the gnomon is located slightly above the core of the dial - it should be deflected to the south, approximately 90 degrees from the vertical line (the geographic latitude of the region is subtracted).
- A distinctive feature of horizontal clocks is that they are able to show time all year round, although their indicators in winter and autumn are not entirely reliable. In such designs, the gnomon is located at an angle relative to the horizontal, equal to the geographic latitude of a particular region. A horizontal clock can be installed in the middle of a lawn, flower bed or garden pond. In addition, stones or stumps can be used for digital divisions.
- Equatorial clocks have one significant drawback: they accurately show time only during certain periods of the year. For example, for the northern regions the “exact” period is the period of time between March 22 and September 22. But if you consider that the summer season lasts from late spring to early autumn, this will be quite enough.
Good advice on installing a sundial
Now let's talk about the features of the installation process itself. In principle, it is already shown in the image below, but the dial in this case was actually made for solar time, that is, for those regions where noon occurs exactly at twelve o'clock, in fact, as it should be.
But, unfortunately, in different places noon occurs at different times - far from 12 o'clock. Therefore, if your plans include seeing local time on the dial, then it (the dial) will have to be slightly modernized. To do this, the numbers on it must be shifted around the axis so that the shortest shadow (namely, it will be observed at noon) moves exactly along the noon line (north/south).
But the procedure for finding the noon line is a separate story, but you need to learn about it before making a sundial with your own hands . So, a compass is unlikely to help in this case, since the magnetic and geographic poles of the planet do not coincide: for St. Petersburg this is, for example, about 8 degrees - that is, the “gap” is on average 30 minutes, which is not so little . The most primitive method is the following: take a sheet of plywood, insert a screw or nail into it at an angle of 90 degrees, then place the plywood on a horizontal surface and note the movement of the shadow from the pin every fifteen minutes. After this, connecting all the points with a line in 3 hours, determine the smallest shadow - it will be that same noon line.
Note! Another practical tip that will help you when making according to the instructions presented below: before you start using stone or metal, it is advisable to practice with plywood. If you mess it up, nothing bad will happen, but you will gain practical experience.
And one last important point. If we are talking about a really good equatorial sundial with a flat frame, then it should have two dials at once - on the lower and on the upper planes. The first will work from autumn to spring, the second - from spring to autumn. Although, as noted above, this does not play a special role for a summer cottage, since people live there mainly in the summer, therefore, one dial will be enough.
Converting astronomical time to local time
In order to find out “earthly” time, knowing the astronomical time determined by a sundial, you need to take into account two main points: the longitude of the area where time is measured, and the equation of time. We talked about why this is important and how it affects the difference in time readings on regular and sundials here.
In order to correct for the first moment associated with longitude, you need to remember that the Earth rotates around its axis at an angular speed of approximately 15 degrees per hour. Thus, it is possible to determine the difference between astronomical time in this area and astronomical time in the prime meridian, that is, Greenwich.
To take into account the correction associated with the equation of time, you need to have a table or graph of the equation of time. It is convenient to apply it directly to the sundial in a place where it will not interfere with other measurements.
This graph shows how much earlier or later than 12 “earthly” hours on a given day the Sun will be at its zenith, that is, it shows the difference in astronomical and “earthly” time on a given day at the “average” longitude by which the time zone is determined.
By correcting for longitude and the equation of time, you can get Greenwich “earthly” time. And knowing Greenwich time and your time zone, it’s easy to calculate the local “earthly” time.
Of course, you can go the other way, without trying to calculate Greenwich time, but then you will have to focus on time zones, which do not always clearly correspond to astronomical readings due to the political component, and therefore the explanation will be more confusing.
In this regard, let’s look at the previously mentioned algorithm using an example.
The measurements are carried out on an area with a longitude of 32 degrees 30 minutes east longitude. The date on the calendar is February 20. The reading on the sundial is 16 o'clock. It is necessary to determine the average “terrestrial” time.
The solution looks like this:
- The difference with Greenwich time is calculated: 32°30′ / 15 = 2 hours 9 minutes. Since the longitude is eastern, this means that the clock in the prime meridian, compared to the clock in the given area, will be behind by 2 hours 9 minutes.
- A correction is made for the equation of time. Using the equation of time table for February 20, the indicator is found - it corresponds to +13.9. That is, astronomical time on this day lags behind “earthly” by 13.9 minutes, which corresponds to 13 minutes 54 seconds. This means that “earthly” time (but not averaged over the time zone) will currently correspond to 16 hours + 13 minutes 54 seconds = 16 hours 13 minutes 54 seconds. Rounded to the nearest minute - it turns out to be 16 hours 14 minutes.
- Knowing the “earthly” (not average) time in a given area and the difference in hours with the prime meridian, Greenwich time is determined: 16 hours 14 minutes – 2 hours 9 minutes = 14 hours 5 minutes.
- Knowing the time zone of the area (+2) in which the measurements are taken, the average “earthly” time in this area is determined: 14 hours 5 minutes + 2 hours = 16 hours 5 minutes.
If the sundial is not planned to be moved to an area with a different longitude, the correction for longitude can be written on the clock itself so as not to recalculate it every time.
It is also important when converting astronomical time to “terrestrial time” not to forget that in some regions clocks are set to summer time. If this is not done, the error may be 1 hour.
Making a Sundial: Other Important Tips
Before starting work, you should decide on the location. It is advisable to install them on a flower bed or lawn, where sunlight will be available throughout the day. What is typical is that the clock can be placed on both a flat and an inclined surface (although in the second option it should be remembered that in order to obtain a shadow of the same length throughout the day, the required angle of inclination must be correctly determined). To calculate it, a special formula is used: 90 degrees are taken and the latitude of the region where your summer cottage is located is subtracted from it. But in the case of a flat surface, the length of the shadow falling from the gnomon will change throughout the day.
Of course, a shadow of constant length will look more impressive, although this is not important for the simple reason that the length of the shadow from the gnomon can be increased mentally.
Manufacturing process
Anyone can make a horizontal, vertical or equatorial clock on their own. To do this, you need to prepare the required materials in advance and study all the intricacies of the work.
Horizontal design
This is the simplest watch that can be made in a minimum amount of time. During the summer season (from March to September) they will accurately show the time. However, they need to be adjusted already in October.
The manufacturing process consists of the following stages:
- The first step is to take a sheet of plywood or plastic and apply the outline of a triangular gnomon onto it. In this case, one of the angles must be straight, and the other must correspond to the latitude of the region.
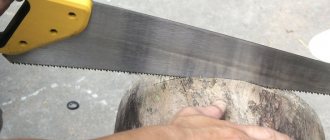
- The main part of the structure is cut out using a manual or electric jigsaw.
- Using a compass or a special mobile application, the manufactured gnomon is installed. It is positioned so that the acute angle is directed north.
- At the next stage, the production of the frame begins. It is better to cut this part out of metal or wood.
- The base of the structure is coated with moisture-repellent compounds that will protect the material from the negative effects of rain and snow.
- Marking begins with the line corresponding to 6 and 18 o'clock. It is placed horizontally and perpendicular to the gnomon.
- Then they take an alarm clock and every hour make notes on the dial in those places where the shadow of the gnomon is located.
- At the very end, the finished product is decorated, trying to harmoniously fit it into the environment.
Vertical fixture
Making this device with your own hands takes quite a lot of time. In this case, the master will need to take into account many nuances that will help to correctly position and mark the clock.
Step-by-step instruction:
- Work begins with cutting out the frame. For vertical clocks, it is better to use lighter materials, which, when mounted on the wall, will not require the creation of additional structures.
- Using various measuring instruments, the location of the center of the dial is determined.
- They move a few centimeters up from it and mark the location of the gnomon.
- From this point, a plumb line (some kind of weight on a long rope or fishing line) is lowered, along which a line is drawn corresponding to noon.
- A hole for attaching the gnomon is drilled in a predetermined place.
- The part of this part that will be located in the wall is flattened with a hammer. This will avoid accidental turning.
- After this, attach the gnomon, trying to rotate it so that it is perpendicular to the wall.
- Using a chronometer, the location of the shadow is noted every hour.
- The finished vertical clock is decorated and coated with a transparent protective composition.
Equatorial clock
This device is distinguished by good accuracy and ease of manufacture. Even a teenager can make it with his own hands. To do this you will need to perform the following steps:
- A square base is cut out of plastic or plywood.
- Using a protractor, divisions are applied to it every 15 degrees.
- A metal rod is attached to the middle of the dial. Its size is selected depending on the size of the watch.
- After this, the frame is installed on a special stand, which allows you to select the correct tilt.
- Then the position of the dial is adjusted, ensuring that the gnomon is directed to the north.
- Every hour they monitor the movement of the shadow and make the necessary marks on the dial.
Video - Sundial in the landscape
After choosing a location, you can start creating your watch face. Its shape, let’s say right away, can be different, but in most cases preference is given to the good old classics - a circle or a square - since these are the easiest shapes to recreate. And if you don’t know how to make a sundial with your own hands and from what, we answer: a variety of materials can be used for this. Among them we highlight:
- stone;
- driftwood of unusual shapes;
- coniferous perennial plants;
- bright flowering plants, etc.
All this can be used to form hour divisions on the frame. But how to divide the area into these divisions? Take a watch (electronic or mechanical - it doesn’t matter) and, based on its readings, every hour mark the position of the shadow cast by the gnomon during the day.
It is advisable to do this on the day that is characterized by the longest duration. Mark each number with a peg - this way you will get different angular readings between the marks.
Note! If we talk about the gnomon itself, then it is the main element of the structure, since the shadow cast by it is a kind of clock hand indicating the exact time.
The final stage will be the design of the watch. First, think about how you will arrange the hour markers so that the crops planted next to each number are provided with everything necessary for normal development and growth. To do this, for example, you can indicate even numbers on the outer circle of the frame, and odd numbers on the inner circle. The diameter of these circles should be approximately 4 meters and 1.5 meters, respectively. It is also important that the plants used for the composition do not grow higher than 50 centimeters, otherwise the shadow of the gnomon will cover them.
Now - straight to work!
Preparatory activities
Before starting work, it is necessary to carry out several preparatory activities. They will help you carefully consider the design of the product and reduce the likelihood of making any errors.
Selection of materials
The most difficult part of the preparation is choosing the material from which the homemade watch will be made. When performing this work, you need to take into account various factors that will influence the attractiveness of the product and its characteristics (strength, resistance to precipitation, frost resistance, and others).
It is recommended to choose the following materials for the frame:
It is important that this design detail is light. Otherwise, it will be difficult to see the shadow cast on it.
As another main element of the clock (gnomon), you can use:
- plastic pins;
- knitting needles;
- long nails;
- metal rods.
Location determination
The most interesting preparatory stage is choosing the location where the homemade device will be located. In this work, you need to take into account standard recommendations that are suitable for each type of sundial.
Basic Rules:
- You need to place the homemade device in open areas where the sun's rays will always fall.
- There should be enough free space to accommodate a dial with a diameter of at least 4 m.
- There should be no tall trees, bushes or grasses around the product that will cast their shadow on the dial.
- When choosing a place for the clock, you should make sure that there are no overhanging wires. Otherwise, they will cast a shadow and make it difficult to determine the time.
- The vertical clock should be placed on the south wall of the building.
Instructions for making a sundial
The simplest clock design is horizontal, so you can even make it together with your child.
In fact, they can even be created on earth. To do this, draw an even circle and stick a stick into the center - it will serve as a gnomon for you. Draw a straight line north from the center of the circle - this will be noon according to astronomical time. After this, divide the circle into twenty-four equal sectors. Tilt the stick in the north direction at an angle corresponding to the latitude of your particular area. As a result, each sector will correspond to 15 degrees.
Note! Such a sundial will not show the same time as an ordinary clock. After all, solar time, as you know, is not the same as the time of earthly time zones.
Now let’s look at how to make a sundial with your own hands , but of a portable type. To do this, you will need a small cardboard box (necessarily flat), which you can cover with paper to match the color of the wood for effect.
If we are talking about a suburban area, then you can use an even round cut of wood or a flat boulder and install it at the intersection of garden paths. Draw a rectangular dial on the surface (if the surface is round, then draw a circle). Draw a line in the center and cut it to secure the gnomon. The main part of the structure is ready!
Now make the gnomon itself, for which you will need to determine the latitude of the area where you live. To make it, you can use either plastic or thick cardboard. To set your watch correctly, take a compass. Point the sharp part of the gnomon to the south, while the north direction will correspond to noon. Insert the gnomon into the slot, seal the joints with glue.
To create divisions, mark the location of the falling shadow every hour. If you divide the surface into twenty-four parts, the clock will show solar time. That's all, good luck with your work!
Clock made from a compass and a stick
This product is made with a compass and a stick. It can be replaced with a match or toothpick.
Instructions:
- Place the compass on a flat surface, then determine the direction of the cardinal direction NORTH, place the compass panel so that the arrow points to the north and 180 degrees azimuth to the compass number.
- Place a toothpick directly in the center of the dial. That's it, the sundial is ready. To determine the time, you just need to watch the shadow of the toothpick. The longer the shadow, the more time.
- When the shadow shows 180 degrees on the dial, it is equal to 12 o'clock in the afternoon, if at 270 degrees, then it is equal to 18 o'clock, and at 90 degrees, it is equal to 6 am. That is, one hour of time is equal to 15 degrees on the compass.
- To correctly determine the time, it is necessary that the sun's rays fall directly on the toothpick and the compass panel.
Clock made from a compass and a stick