Step-by-step master class on making a piano from candy
Before moving on to the step-by-step process of creating an original gift, we list the necessary materials and “ingredients”:
- foam sheet 2 cm thick;
- 3 small bottles of Rastishka or other yoghurts;
- corrugated cardboard (any color);
- braid, lace or other decorative elements;
- a piece of guipure;
- 3 wooden skewers;
- black and white paper;
- Double-sided tape;
- glue;
- scissors;
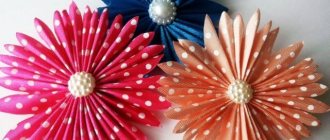
- paper flowers (if you have time and desire, you can make them yourself);
- of course, a variety of sweets.
Step-by-step master class on making a piano from candy
Before moving on to the step-by-step process of creating an original gift, we list the necessary materials and “ingredients”:
- foam sheet 2 cm thick;
- 3 small bottles of Rastishka or other yoghurts;
- corrugated cardboard (any color);
- braid, lace or other decorative elements;
- a piece of guipure;
- 3 wooden skewers;
- black and white paper;
- Double-sided tape;
- glue;
- scissors;
- paper flowers (if you have time and desire, you can make them yourself);
- of course, a variety of sweets.
Let's start making a candy gift:
- We cut out the base from penoplex. You can draw the shape yourself or find a sample on the Internet. The optimal size is approximately 30x35 centimeters, but this depends on the size of the candies that will serve as keys.
Making the base of our piano
We will need side walls and other elements
LiveInternetLiveInternet
Author::
https://vedyniya.gallery.ru/Vedunya
Master class on making an original gift.
Piano made of candies. So we need:
1. penoplex 2 cm thick 2. ceiling tiles 2 pcs - 9 pcs per pack, smooth only not ribbed or without a pattern. 3. the smallest bottles from under the plant are 3 pcs. for piano legs. 4. smooth self-adhesive film of any color, plain. 5. The electrical tape is the same color as the film - it will come out almost intact. I had a red one. I think red is the most effective color. 6. small cloves. 7. gold corrugation for pedals and legs. 8. stick for the piano lid. 9. The keys themselves are printed from the Internet. Don’t repeat my mistake - laminate them right away. 10. double-sided tape. 11. Put in whatever candy you want. 12. corrugation for the flowers themselves of the desired color - I have white and other additions to the flowers. So the process itself: First, draw the desired shape and size; for me, height is 32 cm and length is 28 cm.
We cut out these shapes, one from penoplex and 2 pieces from ceiling tiles (one for the lid and the bottom for candies). Cut out 4 pieces from the film (1 is the largest back side of the piano, 2 pieces for the lid on both sides and 1 piece for the bottom for candies)
For ceiling tiles, the base itself is 6 cm shorter - leaving space for the keys.
We prepare the bottles - we wrap the bottom of each with gold corrugation and secure it with tape. We insert it into the base itself, where we cut holes of the appropriate diameter.
We are preparing the base for the pedals - it’s more convenient, otherwise I made them closer to the end - not very convenient.
We cut out a rectangle either from polystyrene foam or from the remaining ceiling tiles (I assembled from 4 pieces and fixed it with electrical tape). First we wrap it with electrical tape and then cover it with film.
And for a long time I thought about the pedals, but everything ingenious is simple, thanks to the duckling Irina, I remembered her tangerines. And I decided to make the pedals themselves in the same way. Cut out a small piece of penoplex. a knife each. Then treat it with sandpaper and wrap it with gold corrugation very carefully. In this case, the sides remain bare; we separately cut out the corresponding shapes from the corrugation and glue them with double-sided tape. Then glue it to the sides.
We insert about 1/3 of a toothpick into each pedal and place it on the glue. We cover each toothpick with film and insert it into the base itself. First you need to make holes with an awl or a thick needle. And again on the glue. Done - now you need to insert the base with pedals into the base of the piano and onto the glue.
And we begin to build our piano. From the ceiling tiles we cut out a long strip approximately 6 cm high along the entire length of the piano. These are our sides of the piano. I did without glue. These sides were secured with small nails, then on top with electrical tape. We cover the edges wherever they are with electrical tape.
We cut out the front panel from the ceiling slab and immediately make a small stand for the music. Cover everything with film and tape the edges. We also cover the piano itself.
on the bottles - we put our legs on penoplex and glue. This is to raise the candy bottom, which should be on top of the music stand.
the candies with glue . Our keys must be laminated (otherwise I didn’t realize this right away and it was already too late), we glue them on double-sided tape. We attach the front panel with glue. And the lid itself too. Wrap the stick with electrical tape and glue. That's it, the piano is ready. We arrange candies and make flowers - whatever you want - I have mini roses.
Step-by-step instruction
So, to make a candy piano, you will need:
- Actually, the candies themselves. For keys, oblong candies in white and black packages will be good. It’s great if there is an element of gold on the candy wrappers, then the festive piano will look more luxurious.
- For the base of the piano you need polystyrene foam (you can take regular polystyrene foam), superglue, thick and loose cardboard, self-adhesive paper (Oracal), or better yet, double-sided tape.
- Empty Actimel yogurt jars are best for piano legs.
- As additional decorations, you can give free rein to your imagination. Anything goes: flowers (real or artificial), ruffles, printed miniature notes.
What can you make from an old piano?
You are all creative, talented people, maybe you know what can be made from an old piano.
Once upon a time I graduated from music school. Times change, so do objects, including music. Now I have a new modern instrument that takes up little space. And this old polished black Soviet-made piano, which can no longer be sold, cannot be tuned, I want to disassemble and take it to the dacha, and there my husband will do something useful for the household.
Maybe you can provide a link to see if there is anything on the Internet on this topic. And here I saw, for example, strings are needed for the handles of hand-made bags. What else can be made from piano parts?
Piano made from candies for the New Year
The time is approaching the New Year, and many have probably already installed a festive tree and decorated their apartment. Inviting friends over, playing the piano can be a great way to spend time with like-minded people. But what to do if there is no piano in the house? It's no secret that a beautiful piano also serves as a luxurious decorative element. If you don’t have enough space in your apartment for such an instrument, I offer an elegant solution - a piano made of candy. Of course, you won’t be able to play on it, but it’s easy to surprise your friends!
In addition, such a delicious chocolate piano will be a wonderful gift for a person whose life is connected with music. On the eve of the holidays, the problem of original gifts comes to the fore. You can spend a lot of money on a gift that turns out to be unnecessary. Or you can make a gift with your own hands. Such a surprise will definitely be bright and will remain in the memory, because attention is something that has been valued at all times!
The size of such a piano will be about 40 x 40 cm. This piano can be made in different colors, depending on who you are going to present it to.
Step-by-step instruction
So, to make a candy piano, you will need:
- Actually, the candies themselves. For keys, oblong candies in white and black packages will be good. It’s great if there is an element of gold on the candy wrappers, then the festive piano will look more luxurious.
- For the base of the piano you need polystyrene foam (you can take regular polystyrene foam), superglue, thick and loose cardboard, self-adhesive paper (Oracal), or better yet, double-sided tape.
- Empty Actimel yogurt jars are best for piano legs.
- As additional decorations, you can give free rein to your imagination. Anything goes: flowers (real or artificial), ruffles, printed miniature notes.
When getting started, you first need to glue the base on which the candies will be held. To do this, we cut out the necessary parts from penoplex/foam plastic.
Then we put together all the parts of the base and secure them with superglue. Don't be afraid if the body turns out to be uneven - the candies will hide all the flaws. If there are still large recesses, you can carefully cover them with loose cardboard.
We carefully cut out holes for the legs equal to the diameter of the neck of the yogurt bottle. We insert the bottles there, securing them with superglue.
We paste the resulting blank with oracal of any color. Classic options - white and black - are always in use. We paint the legs of the piano.
When creating the keys, we first lay out another strip of white candies so that in the end the black ones are shorter. Candies must be glued with double-sided tape.
After the keys are ready, you need to paste over the body of the piano in the same way.
When the main work is done, cut out the lid from thick cardboard, cover it with oracal to match the piano and secure it with any thin tube. Under the lid you can decorate with flowers, ruffles, beads or other beautiful little things. By the way, flowers can also be made yourself if you are determined to complete a homemade gift from start to finish. If inspiration strikes you and you decide to be realistic in the details, you can glue miniature notes to the music stand.
Natalya Petskus showed how to make such a candy piano. Thanks to her for the wonderful idea brought to life!
This gift is universal in that it is suitable not only for musicians, but also for those with a sweet tooth. But you must admit: there are very few people in the world who don’t like chocolate!
I also recommend looking at another option on how to make a piano out of candy with your own hands!
MK piano box made of paper
Author: Svetlana (Wife of Drakula):
Good day, my Cookies and just guests of my diary! I am posting MK for the Butterfly Scrap Studio and at your request. Finally I found the time to tell you how to make a piano box out of paper. Get ready, there will be a lot of photos. I tried to film in as much detail as possible, so that even a beginner could make a piano. Now you will see how simply and quickly you can create such an interior element.
https://blog.art-prosvet.ru/2011/10/blog-post_18.html
So. Actually, for the piano we need a minimum of materials: Thick cardboard, at least 220 g/cm, size A2, a pencil (I usually don’t use it, this is for clarity), a ruler of at least 30 cm, paper glue (I used moment crystal), stationery or a breadboard knife (not a necessary element at all, you can get by with scissors). You will decorate the piano according to your own wishes. I used a white Mr. Painter stamp pad, dies, and a homemade flower. One more recommendation. First, try your hand at regular notebook sheets, this will help you get better and adjust this model to suit you. It’s much easier to take apart a notebook template and then trace it, and besides, it will remain as a keepsake for you 
Let's get started! We draw such a template with a width of 13 cm without allowances. The shape of the piano lid, as well as its length (everything after the number 5.5), is taken arbitrarily.
We crease the lines and bend them as I did, and also cut out triangles at the allowances at the bend points for convenience. Next, we cut out the side wall of the piano and the base for the lid. The height of the side wall is 3 cm. Don’t be surprised that my sidewall “sticks out”. My notebook template was altered during the modeling process. Subsequently, I carefully cut off these 0.5 cm with a breadboard knife.
Glue the side wall leaving a small allowance. We will need it to form a beautiful side wall. Once glued it should look something like this:
Let's move on to the lid. I didn’t specifically indicate the dimensions; everyone will have a different shape for the bottom of the piano. We just outline the bottom with a small margin. There should be 2 such details.
Please note that on the lid, which will be below. I made a small groove. This is so that our lid covers the piano tightly and without gaps. (On my base for the lid there is a fold visible, which was left over from “other sizes”; you shouldn’t have it).
At this stage our piano looks like this. If you want to decorate it with stamps from the inside, then this is the time. We will close the side wall, so you can try different stamping options on it, but be careful with the bottom of the box. We will not make an additional tab.
Even though the lid has been cut now, we will glue it together at the last moment. This is for ease of use. Cut out the inner side. in my case it is size 3x46cm. I recommend that you take the measurements yourself. Decorate with stamps before gluing. One secret. If you use the same ink as me (Mr. Paynter), you will definitely encounter the fact that it will start to smudge. Therefore, fix the prints with regular hairspray.
Let's move on to the keys. We take a sheet of white thick paper (watercolor, for drawing, for pastels, etc.) and beat the future keys, what size they will be is up to you! At first I made approximate marks, but in the end I still did it by eye. The width of the keyboard should be 13 cm. I have fewer keys than in the original, because... for me this is not important. Doesn't the unassembled keyboard look really nice? I immediately wanted to create some kind of postcard with keys like these. Music stand. Everything is simple to the point of banality. I took a strip of paper, played with hole punches (first the dream, then the corner), and then bent it in three places.
This is what the assembled keyboard looks like. I placed the keys on a glue stick and covered them with liquid glass for shine. Of course, a glossy accent would look much better, but I don’t have one yet :). By the way, I had a problem with one key, so I looked at it 
Legs for a “musical horse”. I did everything by eye. A piece of cardboard 5.5 cm high was divided into edges as in the picture, punched, bent and glued. After gluing, I trimmed the excess edges from the bottom so that it was parallel to the floor.
The openwork “knickers” turned out like this. Using a corner hole puncher, I made 3 elements, left allowances for bending and gluing, and bent them so that I got 3 edges. This is what two elements of one leg look like. Glue both elements together. Please note that the finished legs must all be the same height! Next we glue the legs to the piano. For the wheels you will need beads. I took wooden ones, about 5mm in diameter. Pour a little glue into the square hole of the leg and put a bead there. We wait until the glue dries so that the beads do not sag under the weight of our cardboard box.
I don’t have a single photo of a rack with pedals, but it’s outrageously simple! A rectangular cardboard box, in my case decorated with stamps, is glued to the bottom of the piano box. I cut out the pedals separately from thick paper, covered them with gold acrylic paint, and glued them to the stand. Then, I covered it with liquid glass to add volume. And the last thing. The support for the lid was a part of a skewer covered with white acrylic. It is not attached in any way, it is simply placed in a small groove at the junction of the walls, and rests against the lid of the piano. I couldn't think of anything better. If you have any thoughts on this matter, please share. Author: Svetlana (Wife of Drakula): Well, that’s all, actually! I hope my experience will be useful to someone, and the MK is clear, if anything, ask questions. Girls, if you follow my MK, please indicate the source, and add links to your works in the comments below. I will be SOOO HAPPY to look at your creativity! One more point concerning the residents of my city (Sarapul, UR, Russia). I ask you not to carry out MK on “my” piano here. There are reasons for this. Thanks for your attention and good luck to everyone!
Sarapul,,Russia
"Autumn Blues" Bouquet of sweets (master class)
Marina Kolomicheva
"Autumn Blues" Bouquet of sweets (master class)
I would like to offer you a master class on making a piano for a bouquet of candies, which I called “ Autumn Blues ,” such a bouquet can be presented to a vocal teacher, music teacher for Teacher’s Day, or to any musician. my bouquet of sweets not only with sweets , but also with fresh flowers. To make a piano, we will need a sheet of thin foam plastic - this is the one that is used to cover ceilings, a self-adhesive film, I took red, 3 actimel bottles for the legs, gold corrugated paper, gold cord for decorating, candy , wire, gold spray paint, wooden kebab stick, plain and double-sided tape, glue gun. And so we begin to make a piano for a bouquet of sweets “ Autumn Blues ”
We cut out the parts from foam plastic, having previously made a pattern of the parts from paper, the size of the piano can be different, I made it small, so that it would fit on a box of chocolates .
We glue the parts with self-adhesive tape, also by making patterns first.
Using a glue gun, we begin to glue the parts of the piano together.
We cut the actimel bottles and make legs from the halves, paint them with gold spray paint and glue them to our piano
We'll get something like this:
We begin to decorate our piano using corrugated paper and decorative cord, pre-print the keyboard according to the size of the piano and glue it with wide tape, this is how you can make sheet music
We decorate a kebab stick that will hold the piano lid
We take candies with which we will decorate the piano
Using double-sided tape, secure the candies to the piano
Let's make a music holder for our piano, take a chocolate bar and a thin wire, I painted it gold
We insert the chocolate into the wire and fix it on the piano
In approximately the same way we will make a chair from wire and chocolate
We secure the legs with tape
Next we will decorate the box of chocolates on which we will install the piano, we will use white corrugated paper, a thin red satin ribbon, a pen with gold paste, and other decorative material
We make a border out of paper and paint the edge with gold paste.
And we decorate with the available material
When I installed the piano on the box, I didn’t like how it all looked together, the composition didn’t fit together, so I remade it and decorated the box with artificial autumn leaves using double tape, so I like it much better. But I decided to show you this option for decorating the box and it may be useful for another composition. Then we place a container with fresh flowers in the piano, which we secure in a floral sponge, I chose the simplest flowers that grow in any garden, I also placed candies , securing them with double tape. And it turned out to be a bouquet of sweets “ Autumn Blues ”
We pack it in transparent paper and our gift “ Autumn Blues ” candies
“ Autumn Blues master class was previously published on my personal website “Grandma M’s good advice with my own hands”
Edible piano made from candies - an original DIY gift
Using this master class as a basis, you will make an unusual piano from candies with your own hands - an alternative to a sweet bouquet of flowers.
The original design of a box with chocolate dessert will not take much time, but will definitely delight the recipient of the gift. You can take a delicious gift to a concert or theater, or give it to a teacher, doctor, boyfriend or girlfriend. The fate of the candy piano is predictable - first they will admire it, and then they will happily eat it with tea or coffee!
- Preparation of materials and tools for decoration
- Step-by-step technique for turning candy into a piano
Preparation of materials and tools for decoration
To make a sweet piano you will need:
- candies in a rectangular box;
- flat portioned sweets or chocolates - at least 14 pieces;
- crepe paper in two or three colors;
- black velvet self-adhesive paper;
- white self-adhesive paper;
- double sided tape;
- decorative leaves, beads and other decorative elements at your discretion;
- satin ribbons;
- glue gun;
- stapler;
- knitting needle or skewer
Step-by-step technique for turning candy into a piano
The box chosen for the step-by-step master class has cardboard inserts. They are convenient to use in further decoration. You can take any other box of chocolates, then the final decor of the piano will be slightly different.
Wrap a rectangular box of candies with corrugated paper.
In order for the paper to be easily removed, it should not be fixed to the box itself; it is better to secure it in strips using a stapler.
The selected box has only one flat (cardboard) side, so it is better to place it with the candies facing down. Glue a rectangle slightly larger in width onto the top of the base so that you get an overhang on one side of 1-1.5 cm. First stretch the edge a little, forming waves.
Place the previously removed cardboard insert on one side (if there is one) over the wrapped box.
Decorate the resulting side folds with ribbon.
The base of the piano with candies is ready. To make flowers, it is better to use Italian-made paper; it is thick, with tight folds, due to which it holds its shape well. The Russian one is thin and has practically no folds, so it doesn’t stretch well and breaks quickly; the quality of the product made from it is much worse.
To make a rose, cut the crepe paper into rectangles. The smaller the rectangle, the smaller the flower.
Stretch the rectangle in the middle and twist the edges with a thin knitting needle or wooden skewer, forming rose petals.
There will be no sweets inside in this version of flowers, as in a candy bouquet with roses or in the form of an orchid branch. Twist the first petal into a tube and attach all the other petals to it using hot glue.
Decorate the bottom of the flower with ready-made leaves or make them from corrugated paper.
In order to make a bud, you need narrow strips, 1.5-2 cm wide and about 7-10 cm long, twisted in the center.
From paper scraps, form a ball of the required diameter and wrap it with the prepared strips, laying them with the twist up.
Decorate the bottom of the bud in the same way as on open flowers. Determine the number of flowers and buds at your discretion, taking into account the overall dimensions of the candy piano.
To make piano keys, secure two portioned candies with double-sided tape; they will act as steps for the black keys.
It is better to wrap confectionery products without a solid wrapper in cling film to prevent them from unfolding.
Apply double-sided tape to secure the first white row of keys.
Wrap piano key candies in self-adhesive black and white paper.
There should be at least seven keys in the bottom row and five in the top (one act). Glue a row of white keys onto the base of a candy cane piano. Place a piece of double-sided tape on each black key.
Attach the keys in a certain sequence, as shown in the photo.
Create a composition of flowers and leaves at your discretion. Glue everything with hot glue.
When working with hot glue, the main thing is not to melt the chocolate, so do not heat the gun to the maximum, the glue should be barely warm. Add ribbons, beads, rhinestones, decorative hearts.
At the final stage of the step-by-step master class, inspect the hand-made candy piano and remove all the glue threads, if any remain.
Additionally, you can make a piano stand. Beautiful packaging will give the gift a finished look.
A master class on making a bouquet of sweets in the shape of a piano was prepared specifically for the online magazine “Women’s Hobbies”. See what other sweet bouquets you can make with your own hands in this section. Having mastered bouquet and candy crafts, you will not only get rid of problems with flowers, but also earn extra money.
We are waiting for you in our groups on social networks. Look at the creations of others, upload photos of your crafts, and be the first to know when new publications are released.
How to make a children's cake from candy? Photo
It is very difficult to surprise a little princess or prince with toys these days. But if you prepare a gift for a child with a triple surprise, it will cause fireworks of his joyful emotions.
You can make a cake for your baby from Kinder chocolate candies, decorating it with a box with decorations in the form of a toy.
For this cake we will need to prepare in advance:
- Kinder chocolate for decorating the outside and any brand of candy for filling the cake inside
- Cardboard of different densities and different colors or any ready-made Raffaello candy box
- Scissors
- Ruler
- Pencil
- Rubber bands
- Lace fabric, satin ribbons and beads
- Thread and needle
- Jewelry box in the form of a toy
Manufacturing:
- All Kinder chocolate candies must be placed in one line
- Attach a sheet of paper below them and use a pencil and ruler to measure the future size of the box, leaving a centimeter on the sides for gluing
Making a children's cake from candies Making a children's cake from candies
- Draw teeth on the top side of the rectangle and cut them all out.
Making a children's cake from candy
- Glue the rectangle together and the teeth should be inside the upper perimeter
Making a children's cake from candy
- From cardboard we cut out a circle with a slightly larger diameter than the blank itself, which will be the bottom of the box
Making a children's cake from candy
- Glue the bottom to the base. Carefully place a thin elastic band on the box itself, loosely, so that it is convenient to place candies under it
Making a children's cake from candy
- Insert all the candies one by one, pressing them tightly against each other.
Making a children's cake from candy
- We cut out another circle from cardboard, which will be the lid for the cake.
Making a children's cake from candy
- From thick paper we also make a blank with teeth with a height of about 1 cm
Making a children's cake from candy
- Glue the teeth to the cardboard lid
- Using threads, we collect openwork lace into a beautiful circle, basting it together with a satin ribbon
Making a children's cake from candy
- We pre-fill the box itself with any candies that your sweet tooth will like.
Making a children's cake from candy
- Close the box with a lid. Using glue, we strengthen the box with the decoration on top
Making a children's cake from candy
- And we hide the elastic band with a satin ribbon with a bow tied around the box
This is how you can make any cake for a child and fill it with the surprise that he has long dreamed of.
Piano and origami chair
Paper crafts with children. How to make a piano and chair
Probably every girl dreams of not only learning to play the piano, but having a real piano at home! But, alas, not every dreamer makes this come true. But you can make a piano out of paper and put it on a shelf. Well, even if it’s not real, it’s beautiful! And such a piano is very easy to make. You just need to learn how to bend the corners evenly, because the final appearance of the craft depends on this. And the chair on which the pianist will sit is even easier to assemble. Check it out for yourself! Both the piano and the chair are made from a square piece of paper. For the piano you need to take single-sided colored paper, and for the high chair, both single-sided and double-sided colored paper is suitable.
How to fold a paper piano
2. Fold it in half horizontally.
3. Unfold the sheet, rotate it 90 degrees in any direction, and then fold it horizontally again. Fold the sides of the folded sheet along the dotted lines towards the middle fold.
4. You will have a blank in the form of a book. Fold the top parts of the moving parts diagonally (along the dotted lines) in half, bending them to the sides.
5. You will end up with something like this.
6. Spread the double edge of the workpiece so that the upper horizontal fold takes a vertical position.
7. You should end up with a white house like this with a black roof.
8. Do the same with the second side.
9. Then fold the central square part of the workpiece in half, bending it up.
10. Now fold the upper part of the newly folded sheet in half again along the dotted line. You will get something like this.
11. Raise the side edges of the craft at an angle of 90 degrees. You will get the side walls of the piano, which will also be the legs.
12. Place the piano on its feet.
13. Now pull the edge of the folded piece in half down and give it the same position as in the photo.
14. To make the piano look just like a real one, draw a keyboard on a separate piece cut from the same colored paper (on the reverse side).
15. Place the drawn piece in place for the keyboard.
The piano is ready.
How to fold a chair out of paper
2. Fold the piece of paper in half horizontally.
3. Unfold it and fold it again, but connecting the other two sides.
4. Expand the sheet. You will get a piece of paper with four squares.
5. Fold each square in half diagonally, aligning the corners with the center.
6. Turn the folded sheet over to the other side. Bend each corner of the square inward so that it coincides with the center.
8. Turn the craft over to the other side again.
9. Fold each of the squares in half diagonally again.
10. Turn the workpiece over again. As you can see, it has become much smaller.
11. Take the craft in your hand, put your thumb under the square and bend it towards the top.
12. Iron the folds.
13. The square will turn into a rectangle. Repeat this maneuver three more times.
14. Turn the craft over again, which will look like a wide cross.
15. Bend three sides of the “cross” upward at an angle of 90 degrees. You will get the legs of a chair.
16. Turn the chair over, placing it on its legs.
17. Bend the remaining part of the craft at an angle of 90 degrees upward, making the back of a chair.
18. To prevent the chair legs from moving apart, secure them together with tape.
The paper piano and chair are ready.
Cake box made of sweets, photo
The original cake box will be a very pleasant and useful gift for a lady of any age. You can make it from scrap materials and put inside everything you want to give.
We will need:
- Any ready-made candy box or just cardboard
- Scissors
- PVA glue
- Beads and ribbons
- Candies and pieces of fabric
The cooking principle is the same as described above. The main thing is to use your imagination.
candy box cake
We decorate the side surface with crepe paper and attach candies on top.
cake box made of sweets cake box made of sweets cake box made of sweets cake box made of sweets