The health of children should always come first. And everyone knows that nothing strengthens it more than physical education. Therefore, love for it must be instilled from a very young age. In order to somehow get children to move more and, most importantly, usefully, they need to be interested. Non-traditional physical education equipment will just help them look at sports from a different perspective and turn exercise into a fun game. This will significantly diversify a child’s life. In addition, you can make non-traditional physical education equipment with your own hands.
What it is
Various exercises are very important for children to help develop fine motor skills. This, above all, has a positive effect on their psyche and reduces the incidence of illness. Non-traditional do-it-yourself physical education equipment, a photo of which you can see in our article, puts the emphasis on such exercises.
The big plus is that with the help of such equipment you can play games of various types:
- training;
- entertaining;
- adversarial.
In principle, if you use your imagination, you can even prepare a special performance with interactive inserts (for example, how to defeat Koshchei using physical education classes).
How to make non-traditional physical education equipment with your own hands in kindergarten and at home
This equipment is very easy to make. Do-it-yourself non-traditional physical education equipment is made from available materials: bottles, caps, ropes, Kinder surprise packaging and other things that can be found in every home.
It doesn't take much time to make. You can also involve children to help. They will be very interested. When creating products, you should try to use your imagination and come up with something of your own. There are no restrictions here. But, of course, you can take advantage of already known developments in this area.
Ideas for creating sports-themed crafts
First you need to understand at what level of difficulty your child is able to complete the work, then decide on the topic.
For preschool children you can do:
- Plasticine craft on a sports theme;
- Unusual drawing;
- Beautiful applique.
Representatives of the older generation of children can prepare entire compositions. For example, this could be a model of a sports ground.
Of course, making crafts is a rather labor-intensive and creative process, but it is advisable to ensure that the child does everything with his own hands.
Thus, he will show his worldview in his work and reveal his own fantasies. Parents can give a little advice or help.
Bilbock
Everyone knows the game where a ball tied to a stick needs to be thrown into a special bowl. This is bilboke. Making such non-traditional physical education equipment with your own hands from available materials is as easy as shelling pears. For this you will need:
- plastic bottle with cap;
- wool thread;
- packaging from Kinder Surprise;
- decorations.
First you need to cut off the bottom of the plastic container. It is advisable to do this so that there are no pointed ends left. Using an awl, a hole is made in the yellow Kinder egg through which the thread is threaded. To prevent it from jumping out, a knot is tied at its end. The second end of the rope is threaded through the neck and screwed together with the lid. In order to make the bilboke more colorful and attractive, it should be covered with bright tape. You can use printed pictures, glitter and beads.
Games with bilboke help develop reaction and coordination of movements.
Description of the manufacturing process, step-by-step instructions
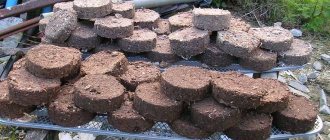
Barbell
- To make a barbell, we first make blanks for pancakes, cut them out and knock together a circle shape from boards. We measure the middle and insert a piece of pipe with a diameter of 32 mm. We get a centered base. We trim the edges with tin and connect it with self-tapping screws. The form is ready. We make forms using the same principle for dumbbells. You can adjust the dimensions of the mold yourself, keep in mind that the larger the pancake, the heavier it will be.
- Now we need to make a frame that will firmly hold our concrete. This frame is knitted from wire and placed on the bottom of the mold.
- To prepare durable high-grade concrete, we must mix 1 bag of high-grade cement, 2 bags of crushed stone and one and a half bags of sand. All this is diluted with water until a uniform mass is obtained and placed in molds. We smooth out all the unevenness with a spatula and lay another layer of wire. Be sure to tread and compact the concrete base to avoid the formation of cavities in the pancakes. Leave the molds until the solution dries completely. On average it will take 3 days.
- After the concrete solution has dried, carefully remove the pancakes from the molds; this must be done very carefully; if they do not come out, carefully beat the edges of the molds with a hammer and the pancakes can be taken out. Cover the finished pancakes with concrete paint and leave to dry.
- Let's start making the necks. We will make 2 of them, one is a classic bench press, the second will be W-shaped. For a classic bar, we take our blank, grind it so that it is smooth and comfortable. After grinding, using a welding machine, we weld the holders at a distance of 40 cm from the edges. We will use bolts as locks. Then we drill 4 holes on these 40 cm for installing locks.
- To make a W-shaped bar, we take a blank pipe, clamp it in a vice and evenly bend the middle to a W shape. For space for the pancakes, we retreat 20 cm and weld the holders.
Dumbbells
The design of dumbbell bars is made according to the same principle as a classic bar.
Press Bench
The bench press will have a more complex design.
We take our raw material, in the form of a square metal pipe, and make blanks from it. We need to consider the design and dimensions. Our piece is completely enough for manufacturing, and the drawing itself can be found on the Internet.
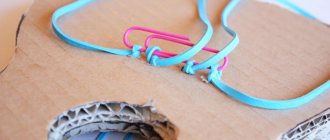
Punching bag
For the punching bag we need to choose the material. The best choice remains canvas fabric. If you don’t have the opportunity and skills to sew a bag yourself, then it’s better to take it to a tailor shop. It should be warned that the upper ring is not sewn in completely, but rather that 4 gaps 1 cm long are placed. Carabiners will be placed on these gaps.
After the bag is ready, you need to start stuffing it. The density is determined for each person individually, but if you are new to the sport, then you should not fill the bag tightly in order to avoid injuries and allow your hands to get used to it.
Summarizing
At the end of all the work, we get a set for developing strength, namely a barbell, a W-shaped bar, a pair of dumbbells, a bench and a pear.
According to the period of use, the pancakes will last for at least 2 years, the pear, if properly cared for and not exposed to a humid environment, will last about 5 years. The bars and bench are forever.
Pouch
It would seem, how to use it? But it can be found in many applications. For example, bags can be placed on the head so that children maintain their posture at all times. Since problems with spinal curvature are becoming more common, such exercises will be very useful. You can sew a bag from ordinary thick fabric. The filler will be salt or sand.
Magic bottle
A very simple product. To create it you will need a transparent plastic bottle, a cocktail straw, confetti or foil.
You need to make a hole in the lid. A tube will be inserted there. Small confetti, cut foil or large glitter are placed in the bottle itself.
The child should inhale through the nose and exhale through the mouth into a tube. This way he masters the correct breathing technique and watches the cheerful “fireworks” inside the bottle.
3D layouts on a sports theme
Perhaps your child has started playing some kind of sport, and he will be very interested in trying to make a craft from this area. The son, an aspiring boxer, will be happy to “create” his own battlefield.
It is advisable to find a hard surface at home on which you can then place human plasticine figures in different positions.
You can capture a fall or a blow, you can put the figures in their places, supposedly showing preparations for battle. For those who like figure skating, working on making a skating rink will be interesting.
To do this you need to do the following:
- Take a blue cardboard sheet and coat it with glue, forming the shape of the hills. We “represent” ice using foil; cotton wool will serve as snow, which needs to be glued along the edges of the product;
- You can put a cone on the edge that will resemble a spruce;
- It is necessary to place figures of animals or people on skates across the entire surface. Improvisation is encouraged - falling, figure in motion, pair skating. Figures can be made from cardboard, plasticine and other simple materials.
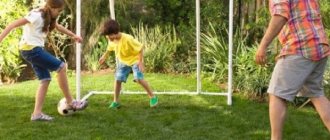
Air football
A very interesting and simple game. You don’t need a lot of materials to create such non-traditional physical education equipment with your own hands. All you need is a large box lid (or just cardboard), a plastic cup, colored paper, glue, straws and a small ball.
It is also easy to do. The lid of the box (if it doesn’t exist, you can simply make the sides out of cardboard) is covered with green paper on the inside. This will create something like a field. The gate can be made from halves of a plastic cup. They score goals on such a field using straws. You need to use a stream of air to drive the ball into the makeshift gate.
Applications
Perhaps this is also one of the simple and fairly easy craft ideas. Using your imagination, you can create a wide variety of sports-themed apps. To create an applique, you can use: colored paper, paper napkins, foil... This type of craft is very popular in kindergartens and first grades, because even a preschooler can make them. One of the simplest and simplest options is to create an applique for the sport of swimming.
For this you will need:
- colored pencils or markers.
- a set of colored paper;
- scissors;
- white cardboard;
- glue;
The base will be cardboard - all the parts are glued to it. First you need to take blue paper, tear it or cut it into long, uneven strips (this will be the water in the pool). Then cut out the swimmers: a white circle (face), white stripes (arms), small rectangles of any color (athletes' bodies). A little more than half of the cardboard should be covered with blue stripes, leaving space at the top for drawing by spectators and judges. Carefully glue the assembled swimmers on top of the blue stripes. On a piece of white cardboard you can draw fans, a judge... In such a simple composition, several techniques are used simultaneously for the child. Quite a simple and interesting idea for children's hands.
Beast racing
Using regular tape, a beautiful stick and a soft toy, you can make an exciting game that will help develop fine motor skills in your child’s hands. A soft toy is tied at one end, and the other end is tied to a handle. It is important that the ribbons are all the same size. The task is simple: you need to twist the handle, winding the rope around it. This way the toy animal will slowly move towards the baby. You can organize whole competitions.
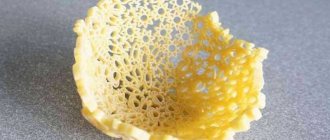
Dough ball
Not a single child will refuse the exciting work with dough, which is similar to plasticine, but at the same time it is a natural product.
First you need to understand how the dough itself is made:
- You need to mix one tablespoon of flour with one tablespoon of salt;
- Next, you need to divide the resulting mixture into two parts - add white paint to one container, black paint to the second;
Slowly add cold water. You don’t need to make the dough stick to your hands, but it shouldn’t fall apart either.
Now you can collect the soccer ball. This is a simple matter - you just need to divide each type of dough into small balls, combining them as in the original ball, and leave to dry for a day.
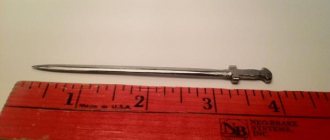
Robin Hood
With the help of non-traditional physical education equipment, you can organize an entire throwing tournament with your own hands. You don't need a bow and arrow to become a real Robin Hood. Just a tray of eggs, paints and Kinder packaging is enough. We decorate the tray so that it looks like the target. That is, in the center there should be a small square painted red. This will be an apple. Next is a slightly larger yellow circle, and then a green one. Instead of throwing arrows, you will need to throw Kinder packaging. This interesting game helps develop coordination, accuracy and dexterity.
Materials and tools
There is no need to go shopping in search of professional tools. Mono is easy to get by with what every home has - threads, scissors, colored paper and cardboard, plasticine, natural materials.