Safronov from Syktyvkar
A couple of months ago, at the intersection of Sovetskaya and Kuratova streets, I came across curb stones in the acacia bushes.
It was easy to notice that the stones repeated the silhouettes of the paths that had once been laid. It looked like this: It was going very hard, every piece of earth was dug out with effort. The collapsed curb stones did not add joy either.
While digging the park, we hammered a couple of metal posts into the ground to prevent random parking:
A week later, the post disappeared, cars continued to park between the trees. We decided to bury something more solid. I came across a piece of concrete pillar:
This was the third time they went to work, it was raining, the volunteers did not leave and continued to dig. We got thoroughly wet, but the result was worth it. The path began to take shape:
Working with shovels in the rain taught us a lot, the next time we came with a lawn mower:
For thick roots they brought axes, and shovels, where would we go without them:
In the photo above you can see that the soil became uneven over the years of neglect; the entire square was flat. The ground hung over the curb stones. Team for that day:
The paths are no longer clear:
The curbs spoiled the view:
That day it seemed to me that nothing meaningful would come of it. But the volunteers did not pay attention to the difficulties and decided to straighten the entire landscape, deciding to dig up and reposition all the curbs.
And if we left, we left the square like this:
Then next time it will be like this:
During this time, we dug up all the soil with a motorized cultivator, bought garden shears for acacias (the only expense at that time was scissors for 400 rubles, which immediately broke. The Tool store refused to accept them (to celebrate, we split the receipt somewhere), but they agreed to give us the largest garden shears to complete the job, which we later returned). This is how the square got an entrance from the street:
Further progress is not visible, but we have dug up a huge amount of land, leveling the square. They filled in meter-long holes and dug in three more protective concrete pillars. They re-arranged all (.) curbs: They brought pallets to make benches, alas, someone stole them:
At that moment, good-natured townspeople contacted us and gave us daisies, we planted them. We bought grass seeds (another 250 rubles). The center was seeded.
Then they put together a bench prototype by eye, making it without a ruler:
Then 5 more benches were added:
And, passing by, they began to notice the first guests:
During the excursion, Mikhail Borisovich Rogachev brought people to us:
At this point, the artist Andrei Stanislavsky actively joined us, who saw the park as more than a park. We held several meetings where the prospects for the resulting space were discussed. I would also like to note that at this point the work of the City Projects on the park can be considered completed. And despite the fact that the volunteers remained, this is a completely different story. Stanislavsky explained the importance of informing residents about the park. The more information they have about him, the greater ownership and responsibility they will feel for him.
The improvement continued, trash cans appeared (the guys regularly change the bags themselves), the benches were treated with stain:
Volunteers say that they are not going to stop there and they have grandiose plans. This is just the beginning.
This is not an example of demonstrative landscaping; we tried to do something with our own hands and we succeeded. And there are plenty of such spaces waiting for improvement; I can name at least 2 more squares on the same street. Soviet, requiring attention. And this is in the historical center, where, it would seem, everything has already been built up and everything is known to us.
Source
DIY house model: diagram, production. How to make a house model with your own hands?
Landscape, pond, sidewalks and roads on a sub-surface. Model designer.
In this article we will offer you ideas that will allow you to decorate your garden plot or cottage in a very original way. A few more variations on the theme of Chinese bells, this time made from metal lids, jars and shells.
A colorful pumpkin is a true fall decoration. Dear colleagues and dear friends, good day!
We bring to your attention step-by-step instructions on how to make a kite with your own hands, as well as tips on assembling the kite and launching it. You can easily make a kite, teach your children this exciting activity and have a great time at the same time! From the article you will learn how to make a children's garden swing from metal yourself.
The first half of autumn has already passed. Dear Colleagues! Journey through fairy tales October 23 in Golden Publications. Best 3 days.
Long-term work plan for the creative group on environmental education of preschoolers for the school year. Pictures: Theater artists for theater lapbook.
Materials from the web:
How to properly care for vineyards.
Master class “Layout “Natural areas and their inhabitants”
Tatyana Lastochkina
Master class “Layout “Natural areas and their inhabitants”
I present to your attention the layout “ Natural areas and their inhabitants ”
.
For this I needed: cardboard, a small piece of ceiling tile, self-adhesive film, color pictures of zones, some in duplicate (I’ll explain why later), natural material (tree branches, stones, laminating film, laminator, and of course glue, a stationery knife , scissors, a simple pencil and a ruler.
First I made the frame: measured, marked, cut, cut, glued. In general, I won’t focus on this; everyone knows how to do this very well.
Most of this layout is occupied by a zone of mixed forests.
Here I also used natural materials - branches and trunks of bushes. Since this area is typical for our area, I decided to include in the layout not only the wild forest and its inhabitants , but also the countryside and domestic animals. I cut pre-selected, printed and laminated pictures to put them on top of each other to get a volume effect. This is why the second copies of the pictures were needed.
Since the sides of the layout are larger than A4 format , I also enlarged the resulting images. Between the overlapping pictures, I laid small pieces of tile to get more volume.
Arctic desert zone. Icebergs. Glaciers. Snow. What else is characteristic of this zone ? Eskimos, dog sleds and the traditional Eskimo dwelling - an igloo.
For the icebergs and igloos, I used the same ceiling tiles, cut to the size of the desired picture. Icebergs are glued in three levels. The visual effect is almost like 3D.
The human figures are portable. For their stability, I used parts from Lego.
The desert and savannah zones were collected similarly. Sand dunes and dunes, a caravan, an oasis, a Bedouin and his tent - all this is one of the components of the desert zone. Dunes, as well as the umbrella-shaped acacia characteristic of savannas, like the icebergs in the previous example, also consist of several levels.
Authorization
Dealing with drunkards, planting flower beds, painting a stele, setting up souvenir shops - these were among the ideas proposed by Berezovka residents at the community cleanup that took place on April 25 in the park near Art School No. 1. The event organizers announced the event as a research cleanup, within which the population could voice his vision for the development of this place in the city center. There were even those who volunteered to be on duty in the park and keep order.
Top photo by Pavel Shabelnikov: throughout the day, many Berezovka residents stopped in front of the information stand, but not a single passer-by wanted to join the cleanup. Despite this, the head of the Blago charity foundation, Andrei Kharybin (pictured), assures that residents’ opinions about the park are now known. By the end of May, the wishes of the townspeople will be formalized in the terms of reference
According to one of the organizers of the event, Andrei Kharybin, head of the Blago charity foundation, on the eve of the cleanup day, participants in the Urban Spaces Laboratory carried out zoning of the area and marked existing objects on the map. On it, local residents left their proposals for the development of the park, and also identified negative aspects. A total of 20 people were interviewed that day. And many of them, including teenagers and older people, were in agreement on one thing - the square became a haven for those who liked to drink.
“I, like a grandmother, from time to time would even agree to be on duty here so that these alcoholics don’t make such a mess,” said pensioner Galina Smirnova.
How to turn a former wasteland into a beautiful park
Any Russian city is full of vacant lots. I recently talked about Moscow, but the picture is similar throughout the country. There are many reasons for the appearance of vacant lots in the city. Somewhere they were formed due to improper planning, somewhere the owner of the territory did not have enough money for construction, and the site is empty. Regardless of the reason, vacant lots have an extremely negative impact on urban space. All sorts of bad citizens gather there, they store garbage there, they just look unsightly. What to do? Vacant areas need to be integrated into urban space.
All over the world, city authorities are trying to solve the problem of vacant lots so that microcommunities arise in these places. For example, in New York, the mayor's office supports volunteers who work in city gardens - it allocates sites for them and even advertises for them.
Why don't we arrange such a place in Moscow? Well, we know how to cultivate vegetable gardens. City Projects even found a suitable vacant lot. Here, on the site of a half-destroyed house on Pyatnitskaya Street, a former estate from the mid-19th century, there is an excellent wasteland for such an experiment. Only one façade wall of the building remains now. Inside there is a courtyard of a three-story residential building.
DIY flower beds. Photos will help transform your garden.
More than a month! Reduce your advertising costs, attract new customers with discounts, promotions and sales! Prices are indicated in rubles and are valid at the time of publication. If the promotion is not reliable, we ask you to inform the site administration.
Mobile version. Place an advertisment. Building materials Construction work Houses, bathhouses, log houses, greenhouses Ceilings Electrical, Lighting Tools, household appliances Furniture Ventilation, heating Plumbing, water supply Doors, windows, stairs Decor, curtains, textiles Beauty and health Landscape design Medicine Real estate Clothing, shoes, accessories Appliances and electronics Household goods Transport Business services Hobbies and recreation.
Reviews about the promotion DIY flower beds. Photos will help transform your garden.
DIY flower beds. Photos will help transform your garden. Contents: Basic rules for creating flower beds with your own hands. We create creative flower beds with our own hands. Based on the specifics of the land plot, plant diversity, its geometry, as well as other parameters, flower beds come in several types; more on this a little later.
All types of flower beds can be divided into single-season and multi-season. When creating one-season flower beds, designers use annuals, biennials and perennials.
In multi-season flower beds, perennials predominate. It is worth noting that when creating flower arrangements, the height, volume and shade of plant leaves are important.
Project creation process
When the customer decides on the style of the park and indicates all his wishes, as well as design preferences, the labor-intensive work of a team of professional designers begins to create a unique design project.
In the process of creating a design project, the following issues are resolved:
- competent zoning of the territory;
- harmonious proximity of active recreation areas;
- public events, children's recreation, cultural and sports facilities;
- quiet recreation areas, walks, beaches and so on.
In addition, a certain type of landscape design of open and closed type is created, where the following is organized:
- layout and width of alleys;
- grouping of plants taking into account possible anthropogenic load on them;
- natural sound insulation;
- additional water surfaces;
- restricted use zones with unique and rare vegetation that requires careful treatment by visitors.
At the same time, it is important to preserve the aesthetics of the park at night and in the evening by installing a complex of landscape lighting so that the recreation area can attract the attention of visitors at any time. It is also important to organize everything in such a way that visitors, being in the territory of the square or park, feel themselves there. comfort and safety.
The next important point is the creation of ponds to create a relaxing and peaceful atmosphere. These can be streams, fountains and artificial ponds that will fill the park and attract attention with lively and dynamic colors, thereby creating comfortable areas that positively affect the mood of park guests.
Active BABY
The online store Kupitutu.ru has prepared a series of materials on how to interest children in smart games. You can make a model railroad that is lively and detailed so that it looks like the real thing!
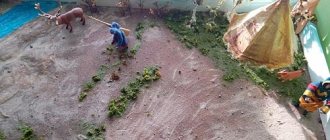
Therefore, our note is devoted to how we will create a body of water, be it a seaport, a river or something similar in our layout.
You don't have to be careful with this glue when applying it, it washes off easily with water or soap and creates a realistic water surface.
Unusual shapes of the water surface can be achieved using Faller Water Imitation Gel 171662
But the surface must first be painted!
Four components are ideal - black (base along the edges), former (at the end), blue (in the center of the reservoir) and green. Naturally, it all depends on your imagination; the order of colors can be very different. So, we paint with black strokes along the edges.
Then apply blue paint from the center, gradually flowing into the black area.
Then we will add neat green (in the picture in the center from the bridge) which creates the impression of water movement, and white, imitating waves or foam.
The first secret of application is that there should be several layers, and, having done one, you should go to sleep and continue the next evening to achieve a better effect. And so on for several days!
But you can limit yourself to one fill. In any case, let the pond harden and take on a glossy appearance.
With the back of the brush you can “exfoliate” the trodden paths and apply a grass coating (see picture)
You can use artificial grass, create bushes and trees. So, a wonderful Christmas tree (see picture) is made in three steps. And if you treat it with a spray (a special one, or you can use regular women’s hairspray) and coat it in powder that imitates grass, the tree will turn out to be very bright with a beautiful green color.
1. Fluff the grass cover.
2. Roll out the shape of a Christmas tree in your hands.
3. We will cut the base and can treat it with spray and green powder for brightness if desired.
Many other landscape elements can be used using your imagination!
The secret of application is that we only lightly dab the brush into our river so as not to leave excess material. After application, we again return to our idea the next evening so that everything freezes perfectly and takes on the desired color and transparency.
The surface without applying white paint will be completely transparent (see figure):
A surface interspersed with white pigment will display “seething” streams (see figure)
Result: The order of applying Liquid and Gel to simulate and create water effects can be changed and alternated, thereby obtaining original versions of reservoirs. Their difference is only in consistency. The liquid needs to be poured, but the gel is thicker, and allows you to create waves and flows of various heights and shapes with the help of brushes.
After each application of a layer, be sure to wait until it hardens.
As a result, the goal of our actions is a realistic pond! Time and effort well spent!
Of course, if you need to apply the water surface to the model in the simplest way, you can use a film that imitates the water surface.
Sincerely, Active Kid!
THIS MAY INTEREST YOU:
DIY gifts for mom
How to make a snowflake
Ideas for creating unusual pictures for your mother's birthday!
How to make an Easter egg with your own hands
DIY children's crafts!
Instructions for creating a volcano
You should definitely involve children in the process of making a volcano model with your own hands at home. This is not only a fascinating process, but also educational.
Paper model
For work, it is recommended to use thick paper, or preferably cardboard. First, you will need to draw a circle on one sheet of material, cut it out and glue it into a cone. After this, a tube is rolled up and glued from the second sheet. It will act as a volcano crater and will need to be put on the first part and then fastened together.
The third sheet will imitate the earth; it can be given any shape.
However, its dimensions should be larger in comparison with the base of the layout. After these manipulations, you need to glue the cone to the base.
All that remains is to decorate the volcano, for which you can use sawdust or sand , sprinkling them on the top of the model. The finishing touch will be painting the model to give it a natural look. Making a paper volcano model is very simple and does not require much time.
DIY paper city model
Greetings, my dear readers.
Shortly before the plane, my little one and I made a paper city model from !
Since our family has an ingrained tradition of remembering everything at the last moment, this case was no exception. My son Vadik told me about the assignment exactly one day before it was due. There was nowhere to go - I had to get to work!
Tools and materials
The model of the city does not require any extra-natural materials, and a normal student should have everything available:
- Ruler
- Colored paper + colored cardboard
- Colour pencils
- Scissors
- Brushes + paints (we used gouache)
- Glue
- A4 paper
How to make a city layout
We thought about it a little and decided that since time was running out, we would make a road + a couple of buildings + some kind of transport. We decided - we do it.
We took a piece of thick cardboard, cut out a 40 by 30 cm rectangle from it. Then we pasted it on one side with A4 office paper.
Having carefully trimmed the edges, we got a base for the layout, which is ready for painting.
They drew an impromptu road
We added markings and painted the lawns :)
The next step was to build a high-rise building. I don’t give explicit dimensions, since everything was done by eye...
Before gluing the building together I decorated it
This is what happened after gluing
We cut the back of the building to size, then glued it on and also painted it.
Children's city model
Sorry friends.
Due to the fact that time was really pressing, the shooting had to be postponed. The building alone took almost 2 hours.
The next step was a bus. They did it according to the same principle as the building - they glued it together and painted it. Balconies were added to the building and the inscription “shop” was attached to the bottom.
They built a stop with a sign and made several trees.
The final step was gluing all the products onto the base. To make it stick better in some places I had to use tape :)
And here is the result!
And further…
The city model with your own hands is ready!
Thank you for watching!
rukozhopim.ru
How to turn cardboard into wood: making a quick and budget photo backdrop
I really like wooden photo backdrops. But a real wooden photo backdrop takes a long time and is relatively expensive. So I decided to experiment with corrugated cardboard; its grooves reminded me a little of the old boards at the dacha!
So, we need a very simple set of materials and tools:
- corrugated cardboard (I gutted a box from a food processor);
- glue (I used a hot-melt gun, it’s faster and more convenient, but thick construction PVA, for example, will also work);
— acrylic structural paste (I had the cheapest Tair);
- an unnecessary toothbrush (preferably a hard one) or a hair coloring brush; you can use any tool with stiff bristles, even a fine-toothed comb));
- acrylic paints (white, brown, plus those shades that you want to see in the background, I also have red and black);
1. Cut out the base from cardboard (for me this is one side of the box 35x40 cm).
2. Now you need to cut the “planks”, I made 4 pieces measuring 35x10 cm (I made them a little less than 10 cm so that there was a gap between them). (We cut so that the grooves of the cardboard run along the “board”)
3. Glue the “planks” onto the base with a small gap. If you are not using a heat gun, but regular glue, then you need to put the workpiece under the press so that it does not deform and wait until the glue dries.
4. The next step is to apply texture paste to the workpiece and “comb” it with a brush, moving it a little in different directions, imitating the texture of wood. Let it dry.
5. Now cover with white paint using a hard brush (dry brush), no need to completely paint over the surface.
6. After the white layer has dried, cover everything with brown paint, again using a dry brush. It is also necessary to paint the spaces between the “planks”.
7. Now we apply paints of the selected shades (for me, black, red, I mixed with white to get gray, brown), you can moisten a light brush to make the transitions smoother.
8. After the previous layer has dried, I add a little white to it. (a little glare in the photo, not yet completely dry)
This is what I ended up with! In my opinion, it looks quite like a tree!
