If the trunk of your car does not fit all the bicycles belonging to members of your family, then this article will help you solve this problem. How to make a bike mount for a car?
The best thing to do in this situation is to equip the roof of your car to carry bicycles on it. Similar bicycle racks can be purchased at the store, but their cost is very high: from 100 to 150 US dollars. An excellent solution would be to make the fasteners yourself.
On the Internet you can find many instructions on how to make a roof bike rack with your own hands.
Possible damage to bike racks
So, you have purchased or assembled a rack, have already installed it on your bike and are getting ready for a trip. On the road, everything can break, although the trunks themselves rarely break at the welded joints, but very often the fasteners on the frame at the bottom are cut off. The reason for this is always weak tightening of the bolts. Take two spare bolts and nuts with you on a long journey. Insulating tape is also useful, because you can temporarily wrap it around a cracked part by placing a whole rod or a long screwdriver on it, like a tire in case of a fracture.
A broken steel trunk can be welded at the nearest service station. Your grandchildren will also get a titanium trunk.
Bicycle roof rack
Bicycle mount for car
A bicycle is a vehicle created for free people. If you own a bicycle and constantly move around on it, you are unfamiliar with such concepts as gas station and traffic jams. In some cases, the beginning of the planned route is far from home, and it is impossible to get to it without a car.
We will tell you how to make a bicycle rack on the roof of a car and what options generally exist on the market? For those who know how to use ordinary household tools, it will not be difficult to install a ready-made one or make a bicycle mount yourself.
About transporting bicycles by car
Bicycle mount for car
Let us immediately note that transporting a bicycle in the trunk of a car is not the best idea for two reasons:
- It's just inconvenient.
- You can damage frame or wheel elements, stain your bike, or scratch the finish of your car.
If you don’t have a roomy crossover, you’ll hardly be able to put a bike in the trunk at all - you’ll need to remove the wheels and handlebars, which is extra time and effort. You may encounter the same troubles if you try to carry a two-wheeler in a car. In addition, you may even get injured if you brake suddenly. The best option is to purchase a special bicycle mount for a car, which we will talk about.
Types of fastenings
Video: Mounts for transporting bicycles.
Today on the market you can find many different options for carrying bicycles in your car. First of all, the fastening differs in the method and location of fastening. There are four options in total:
- towbar;
- roof mount;
- on the back of the car;
- on the spare wheel.
Roof mount
Roof mount
Back in the Soviet Union, this option for transporting bicycles was considered the most popular. An important advantage of this method is that it saves money, since such fastenings are the cheapest. A reliable mount is installed on the roof, allowing you to fix the bicycle vertically. The wheels are inserted into a recess in the metal profile and then secured with strong, reliable clamps. Some additionally use ropes to increase reliability, but manufacturers guarantee that these are unnecessary measures. High-quality mounts hold bicycles perfectly without any unnecessary devices. There are different types of bicycle racks for car roofs, among which the following are popular:
- behind the frame (a reliable mounting option, but you can scratch the car);
- for the fork (you need to remove the front wheel);
- behind the wheel (the bicycle is transported upside down);
- by the pedals (a reliable method rarely used today).
Bicycle mount on tow bar
Tow bar mount
It should be noted right away that this method of transporting bicycles by car is the most expensive, but if you already have a towbar on your car, it can be an excellent solution for transporting two-wheeled vehicles. This option is also the most aesthetically pleasing and simply convenient. You can install 3-4 bicycles on the towbar at once. This type of mount is suitable for both large groups of friends and family outings. Aerodynamics do not suffer at all when riding with a bicycle on the roof at high speed.
Spare wheel mount
Spare wheel mount
Another good mounting option is to install the trunk on the spare tire. This option is only possible with vehicles such as:
- SUVs;
- crossovers;
- minivans;
- minibuses.
The fastening has been improved through the use of special slings and brackets. In the case where the luggage compartment has a special bracket or opens to the side, access to it will not be impaired. Naturally, very frequent openings of the door can lead to failure of the hinges, since they may not be able to withstand the increased weight. In the case where the tailgate opens upward vertically, to enter the luggage compartment you will need to remove the entire structure from the spare wheel. Otherwise, the mechanism simply will not lift the entire load.
DIY bicycle rack
If you have basic carpentry skills, you can easily make your own bike rack. You can make your own mount for the towbar or for the roof. To do this, you will need a metal profile from which the stand is created. You will also need the following materials:
DIY bicycle rack
- durable metal pipe;
- small metal sheet;
- set of bolts;
- nuts
If you want to make an attractive bicycle mount, buy additional metal paint to match the color of the car body. You may also need the following tools to work:
- welding machine;
- Bulgarian;
- drill;
- drill.
Video: Bicycle roof rack - AMOS Alu
You may not understand how to install the required mount on the tow bar. To do this, you need to bend the metal sheet using a vice on both sides so that you get something in the shape of the letter P. After that, take two tubes and flatten the ends like this. So that you can drill holes in them and attach them to the profile. We drill holes for future bolts, take a sheet of metal and cut two notches in it at a distance between the bicycle wheels. We recommend measuring it first.
After this, you need to screw the curved metal sheet to the main stand and place the profile on it. The tubes should be nailed in such a way that they cover the bicycle frame. You should know how to do it better, since every car is different. You can experiment by installing several profiles so that you can transport several bikes at a time.
avtozvuk.info
Carriage in the cabin
This method of transportation is considered the most complex and simple at the same time. After all, there is no need to spend additional money on purchasing accessories. It is enough to carefully place it inside the cabin, having first removed the front wheel. If the vehicle is spacious, then this procedure can be avoided. The only drawback is the increased level of pollution in the interior space of the car. If the bike is equipped with inexpensive mechanical brakes, you will have to adjust them after each ride. Expensive hydraulics will require the handle to be locked to prevent it from being pressed accidentally while the bike is being transported. Buying a special cover will help solve the problem of interior cleanliness, but you definitely won’t be able to take passengers with you. The bicycle must be fastened with seat belts.
We make the trunk ourselves
The main and only concern of the home craftsman when producing such mounts is rigid and reliable fixation of the bike at all levels. If this problem is solved, then the problems with the safety of sharp braking and cornering automatically disappear. Also, the bike is not in danger of scratching the frame.
Mounting to the roof of a car requires, of course, the presence of at least two transverse arches on it. Their cross section is assumed to be square. For simplicity, we can assume that there is a standard roof rack for domestic Zhiguli cars.
An inexpensive and budget option (one of the best in the entire Runet) suggests the following:
- a steel rigid profile (box-shaped, corner) longer than the base of the bike, so that it rests on the crossbars;
- a pair of duralumin corners (you can take steel ones, but they are heavier). The height of the shelf should be 2.5 – 3 cm;
- long bolts (50 mm) and nuts;
- front wheel hub axle (whoever wants can spoil the original one), but it’s better to buy it;
- a piece of U-shaped profile for the support point of the rear wheel;
- grinder, drill, steady hands and an hour of time.
Everything is clear in the pictures:
The main thing is to tighten all the screws tightly, tighten the hub well, and the rear wheel can be stabilized using a rubber elastic belt cut from an old tire. Its fastening is wound in a figure eight.
According to the author from the city of Barnaul, he drove more than 600 kilometers in one day, accelerating the car to 130 km/h. The design successfully passed the test.
As it becomes clear, such a do-it-yourself roof mount has a twist: tightening with the help of eccentrics of the standard bushing. It is this moment that makes it possible to impart rigidity to the entire vertical. Of course, with the help of such a device, you can install not only one, but two or even three bicycles on a car. In this case, it will be enough to fix them together at the top (at least with the help of a stick and rubber loops that cover the seat assemblies), and the structure will hold together as a single whole.
We've arrived!
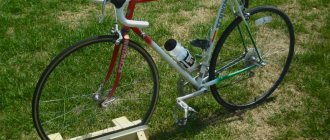
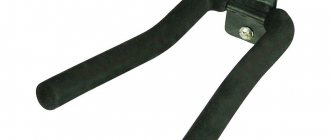
A bicycle that has already been ridden and removed from the car needs to be stored
- and this is also
a problem
.
In this case, there are the following devices
:
Thule Bike Stacker 5781 bicycle storage rack. |
Wall bracket for storing equipment. |
A simple and versatile bike storage hook. |
Thule Bike Stacker 5781
If you still have questions on the topic “How will the bike ride?”, then contact the experienced managers of the Za Rulem online store for advice. By the way, due to the end of the cycling season, prices for many products have been significantly reduced!
Transporting a bicycle: 5 useful solutions


