Step-by-step master class on creating wooden photo backdrops with your own hands.
A wooden photo backdrop is a great choice for product photography! Photos against such a background immediately attract the eye with their texture and naturalness. The original and unique pattern of wood fibers creates an atmosphere of calm and comfort.
Moreover, such a natural background is ideal for photographing products made in the popular styles of rustic, country, Provence, loft, etc.
I also wanted a wooden background for product photography, and I decided to make it myself, and at the same time shoot a step-by-step photo master class and share my experience.
In order to make a wooden photo backdrop, we will need the following materials:
• boards from a hardware store;
• nails, hammer, sandpaper;
• brush (special brush for brushing);
• water-based stains;
• acrylic paints from different lines;
• wide flat brushes.
Thank you for reading our articles! We are giving you a promotional code BLOG for a 15% discount in our online store
. Enter it in the “enter coupon” field when placing your order.
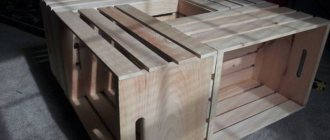
The first step was to organize a trip to a hardware store. We choose the most textured boards with interesting patterns, fibers and veins. The boards are usually sold very long, but large hardware stores and hypermarkets usually have a sawing service. You can make a photo backdrop from many narrow boards, or from several wide ones.
I chose two boards 20 cm wide, 2 cm thick and 1.8 meters long. Even then, a plan emerged to make two double-sided square photo backdrops. Upon request, a specially trained person in a hardware store sawed each board into three parts (the length of each board was 60 cm). In order to fasten the three resulting boards together and get a wooden square (60x60 cm), several narrow slatted boards, nails and a hammer were also purchased.
And most importantly - a brush for brushing!
What will you need?
- The basis. Wood, plywood, thick cardboard .
We are sure that everyone will have an old board, plywood, a piece of thick cardboard or another similar base for a future photo backdrop.
If, suddenly, you don’t have such a thing at home, ask your friends if you can help someone free up space.
Another option is markdown departments in hardware stores and building materials hypermarkets. There you can buy the right size base for next to nothing.
- Wood putty.
It is better to take white and acrylic. It doesn't smell and doesn't completely stain your hands or clothes. And stains come off easily.
Prices fluctuate. But, on average, the price for a 600g jar will be 80-100 rubles.
- Spatula/brush.
The ideal option would be a set of silicone spatulas and a medium-sized paint brush.
A set of 3 spatulas of different sizes can be purchased for 45 rubles.
Brush - for 30-50 rubles.
- Mixton color.
This is the shade itself. There are a huge number of bottles of various shades. For every taste and to please your wildest imagination.
A bottle of 1 shade will cost you from 30 to 100 rubles.
- Consumables.
Gloves. Any household, garden, rag will do.
A piece of rags, an old tablecloth, plastic film. This is so as not to stain anything around.
Jars for the finished mixture. Any food container, cream jar, etc. will do.
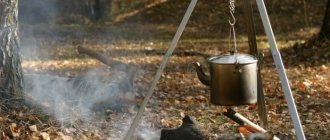
How to make a photo zone on the street or unusual places for photo zones
There are many ideas on how to make a photo zone with your own hands. What materials can you use to decorate a photo zone? Where else besides home can you arrange a photo zone?
You can use various materials to decorate your photo zone. If you like minimalism, then let there be one plain background, and the model’s clothes in some contrasting color. Also, if you like minimalism, then use lines. If the model has wavy hair, find something in the photo zone element that also adds wave. I myself like to make photo zones where the eye can already see, which in this place looks good even without my intervention. You just need to add a small element and the photo zone is ready. Go out into the yard, there’s probably either a colored wall or a large branchy tree there, like an oak. Earth, flowers and grass are also an excellent photo zone. And if you have a quadcopter or a stepladder, then use a green carpet strewn with flowers or greenery for your creative ideas.
If there is a small pond and a wooden boat plus a quadcopter, then feel free to put your model in the boat, launch the miracle technique and shoot. It will be especially impressive and beautiful in sunny weather, when clouds and blue sky are reflected in the water.
An excellent photo zone outside the home is shopping malls or residential complexes. Nowadays, these complexes always have one of the buildings painted brightly. You don't even need to add anything. All you need is a good idea, a perfectly chosen outfit. Yes, outfit is very important. If you have an antique Russian style, then probably a bathhouse, firewood, stove, forest, and various antique utensils are suitable for decorating a photo zone. But if you have a modern style, then choose apartment complexes with bright walls. But you can experiment. Often the best photos come out when you break all the rules in photography.
I like the way everything in nature is decorated. Especially in spring and autumn. Spring is full of awakening. Nature awakens, and with it various flowers and trees bloom. You can read about this in this article. In it I gave examples of where you can find beautiful places for photography in Moscow in the spring.
And autumn means leaf fall. Golden autumn is a gorgeous time of year, filled with amazing colors.
I hope I answered your questions about how to make a photo zone at home, on the street, for a birthday or a wedding.
Do-it-yourself concrete photophone - manufacturing diagram.
- To begin with, it is worth wiping the base of the future background from dust and anything unnecessary.
- Next, select the desired shade intensity.
The photo has a gray background. The shade was made by adding the required amount of black color to white acrylic putty.
Follow the instructions on the mixton packaging. Or you can make “samples” with examples of different shade intensities.
Attention! When kneading, add a smaller amount of mixton, gradually adding small portions as you mix. This way you can adjust the intensity of the shade!
And further! The raw photo backdrop and the putty on it look darker than the dried and finished version.
- Apply the substance obtained by mixing putty and mixton with a spatula using strokes or a brush. Here's how it's convenient for you. The width and severity of the strokes are determined by your taste. More frequent and relief strokes will make the photo background more textured.
4. One layer is enough. Drying time is at least 4 hours.
An interesting option would be to go over the finished raw background with a brush. This will give it additional relief and texture. This background looks very interesting in the photo!
Paper backgrounds
If we talk about paper, this is perhaps one of the most budget options. It is perfect for occasional filming and home use. If you don’t know how to make a photophone with your own hands from paper, then don’t be afraid, because it’s not as difficult as it might seem at first glance. Rolls of wallpaper, whatman paper, corrugated paper, etc. are most often used in work.
The paper is lightweight, easy to install, store and transport, but its main disadvantage is its lack of strength and soiling. If such a background is laid out on the floor, it will most likely be disposable, since stains and marks are very noticeable in photographs.
If you don’t know how to make a photo backdrop out of cardboard with your own hands, then you can use the most ordinary wallpaper to make a background at home. Moreover, they don’t have to be covered with anything, because today there are wallpapers on sale with a wide variety of textures and patterns that will look very beautiful in photographs. Of course, it is not advisable to purchase a whole roll for several photographs, but you can find the necessary scraps of wallpaper at home, because after renovation many people have such scraps left over.
Advantages of a do-it-yourself concrete photophone.
- Budget.
- You choose the shade yourself.
- It does not smell, does not crumble, and is durable.
- Easy to make and maintain.
- In addition, expressing emotions through creativity and working with your hands is often very useful!
Create! Hooray!
Materials for the photo zone
We have already listed a lot of things. But there are a couple more ideas. Photo zones can be made in a certain style. Choose all the accessories in the same style and you will have a great photo zone.
Styles: rustic, Provence, loft, Paris.
The most common ones are branches, balls, ribbons, flowers. Things that are not often chosen include household garbage, glass, metal, a lot of baskets, music instruments.
Second method: wooden photo backdrop tinted with acrylic paints
In the second method we also brush the boards, but for this photo backdrop we will use acrylic paints and the dry brush method.
On one side we cover the boards with black acrylic paint, slightly diluted with water for a smoother and more uniform application.
When the paint has dried, put white paint on the brush (for example, “Acrylic Hobby”), remove the excess on paper or a napkin and begin to whiten the boards with light, touching movements. In no case do we dilute the paint with water and always remove the excess - we don’t want to completely cover the black color, we need it to show through in the recesses of the wood fibers.
I decided not to knock together this photo backdrop, but to leave the three boards separately so that, if desired, I could build a corner out of them, or put them on top of each other.
The back side of the boards should not disappear! Let's make another background.
We cover the back side of the boards with “Acrylic-Hobby De Luxe” paint, Indigo color, heavily diluted with water.
Immediately after application, wipe off the applied paint with a napkin or rag.
Mix on a palette (or plastic plate) the Lilac and White colors of Acrylic-Art paints. Dilute strongly with water. And apply a second layer to our boards.
And again we wipe off all the paint that has not yet been absorbed into the wood with a napkin or rag.
Use sandpaper to remove the color from the top layers of wood.
It turns out to be an interesting color transition. But I want something lighter. We work again with a dry brush: we take white paint, erase the excess and begin to create a relief.
It turns out a very delicate light background.