Successful examples and options
It happens that some old things become even more useful than before. To do this, you just need to apply them in a new way. Let's look at several good variations of using improvised means as a toilet paper holder.
Read also: color combination IN COLOR BALANCE
Using a skateboard as a paper holder can be original and practical. If the old equipment has become unusable and you can no longer ride it, or there are other reasons not to use it for its intended purpose, make a paper holder out of it. In this case, the rolls will be mounted on wheel hangers.
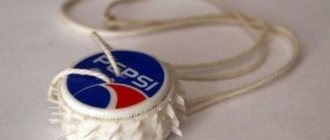
You can use a rope as a holder by attaching it to the wall with tape. This is the simplest and fastest, but no less useful option. The main thing is to ensure reliable fastening of the material to the wall.
As you can see, there are almost endless variations of toilet paper holders, especially if you create and decorate them yourself. At the same time, you can completely surrender to a flight of fantasy and self-expression. The result will not be long in coming. The combination of originality and practicality will delight both the owners and their guests. And you can use the most creative options as a gift for loved ones.
Marine theme
A rope holder is easy to make, but you will need a fairly thick twine for the main part, two thin ropes to tie around the edges of the cut ends and attach to the carabiners.
An ordinary metal hook is attached to the wall and two carabiners are put on it at once, holding the rope. Typically, such a rope is used in the navy, so if you have a sailor in your family, you can organize an original surprise for him by making a toilet paper holder from a thick ship’s rope. This will bring back nostalgia and pleasant memories of working on the ship.
DIY wooden toilet paper holder
To make an interior item, as in the photo below, it is enough to purchase one small board of pine or spruce. It is cheap wood and easy to work with. To give the design parts the required shape, use an electric jigsaw. When the shelf for magazines and toilet paper is screwed together, you need to sand it with sandpaper.
The shelf can be painted in any color with acrylic paints or varnished, the surface aged with a wire brush or rubbed with wax. The cylindrical stick for the paper roll is made removable. To place it on opposite walls of the product, arc-shaped recesses are attached. Now you know how to make a toilet paper holder with your own hands. A step-by-step description of the work will help you create an original craft quickly and easily.
Doll wardrobe
You will need: plywood 4 mm thick, white wood paint, cabinetry veneer, carbon paper, sheets of paper, pencil, ruler, jigsaw, jigsaw blade for straight and radial cuts, glue, sandpaper, brushes and sponges for painting, scissors, screwdriver, construction knife, 2 wooden sticks, furniture fittings (hanger hooks, 3 handles, self-tapping screws, 4 hinges).
Master Class
- Draw a sketch of the cabinet.
- Draw each detail on paper.
- Cabinet parts: 2 side walls and 2 rectangular parts for them, roof, bottom, back wall, partition, 2 shelves, drawer module, 2 doors and 2 patterned parts for them, 4 figured legs, upper horizon (shaped part), drawer (bottom, back, 2 sides, front panel and a rectangular part for it).
- Cabinet size: height 34 cm, width 22 cm, depth 9 cm.
- Transfer the cabinet parts onto the plywood using carbon paper.
- Use a jigsaw to cut out every detail of the future cabinet.
- Sand each piece of the cabinet with sandpaper.
- Glue the redwood veneer to the cabinet sides, drawer fronts and cabinet doors, then leave to dry.
- Paint the patterned pieces for the cabinet doors, the rectangle for the drawer and 2 rectangles for the side walls with white paint, then wait until dry and glue them on as decoration.
- Paint the 4 curly legs with white paint and leave to dry.
- Glue the 2 sides, the back wall of the cabinet and the legs as shown in the photo and leave to dry.
- Glue the box parts together.
- Glue the roof and the upper figured horizon.
- Glue the partition inside the cabinet, visually dividing it in half.
- Glue 2 shelves as shown in the image.
- Glue a wooden stick as a pipe for things.
- Make hangers from pieces of wood and hooks.
- Paint the inside of the cabinet, hangers, top horizon and inside of the drawer with white paint, then leave to dry.
- Attach handles to drawer and cabinet doors.
- Screw the hinges to the cabinet and attach the cabinet doors.
Article on the topic: DIY plasterboard furniture
The plywood doll closet is ready!
Hot napkins with applique
Cute and comfortable runners will definitely come in handy in a kitchen with an expensive or too “delicate” dining table made of glass or soft wood. They will protect the tabletop from impacts, stains, contact with hot dishes, and will certainly cheer up the whole family.
First, you will have to sew three-layer rugs measuring 30x40 cm and quilt them crosswise on a sewing machine, and also trim the edges. After this, the most interesting part of handicrafts for the kitchen begins - decorating. Cut out cups, flowers, animal faces from contrasting fabric and sew them on the front of the tracks with your own hands. It would be nice at this stage to make small pockets into which it is convenient to insert cutlery or napkins. It takes a long time to create such pictures by hand, so it is better to use a sewing machine and a zigzag stitch.
If you create any other decorations for the kitchen using appliqué, it is better not to bother with seams, but to use glue. But then, for “cut-outs”, choose fabrics that will not fray over time, otherwise panels, potholders or other accessories will look untidy. By the way, wall pictures can be additionally decorated with elements of hand embroidery, ribbons, beads or sequins. This way, a DIY kitchen panel will become even more expressive.
Those who do handicrafts or are just learning a new type of creativity can come up with hundreds of other cozy and cute little things for their kitchen. Don’t be afraid that your crafts will not look like exquisite accessories from the store - this is the main beauty of hand-made.
Crafts from paper rolls
Since we have touched on this topic, we can expand on it to the end. Once a roll of toilet paper runs out, you are left with a cardboard core that is thrown away. But if you knew how many useful things could be made from such details, then you would leave it. Some people are already familiar with a small part of such work, but in these crafts they used solid bushings. And you can cut them, decorate the details in an unusual way, and get wonderful things for your home, such as, for example, this Christmas wreath.
Useful tips
When creating home accessories, it is convenient to use scrap items and old things that can be given a “second life.”
A basic option for the lazy is to secure a small rope to the wall with tape. You need to make a knot that will prevent the roll from falling, twist the rope so that the paper hangs freely and can be unwound.
There are a lot of options for creating toilet paper holders with your own hands. You can use your imagination or use the option that seems optimal for a particular interior. There are solutions that are durable, while others are more decorative than practical, since they will not withstand long-term use, but will serve as decoration.
Important! The holder doll will become a bright “inhabitant” of the toilet room. It can be made neutral or stylized to suit the room.
Textile pocket
This DIY paper holder is ideal for your garden. One of the great solutions in terms of decor is to use textiles. This product can also be knitted in the form of a case or a doll. Then even your guests will pay attention to your work. In this case, it is necessary to take into account the visual appearance of the room so that the holder fits perfectly into the interior. To create textile pockets, you need to prepare the following materials and devices:
- thick fabric for the base of the pockets;
- fabric for finishing pockets (different types);
- padding polyester;
- threads to match the color scheme of the material;
- snow-white lace 1.5 cm wide;
- felt in different colors;
- glue called Moment Crystal;
- beautiful buttons, rhinestones and other little things to decorate the holder;
- sewing machine;
- iron;
- special scissors for closing;
- ruler;
- tailor's chalk;
- English type pins.
Bottle preparation
In order to make such a useful device for toilet paper, we need a regular two-liter plastic bottle. Find a two-liter Coca-Cola bottle with a flared base. This is very important because the base is where the toilet paper needs to fit.
We measure 23 centimeters from the top of the plastic bottle and cut it using a stationery knife or sharp scissors. But before you are going to cut this part, it is better to make a mark using a regular marker or felt-tip pen.
A neighbor advised me to put a measuring cap in the machine before washing: life hack
A faded industrial building was turned into a studio home: the result
After the restrictions were lifted, Russians rushed to buy trips to the south
We measure approximately six centimeters from the base and cut it out.
The middle part can be thrown away, or you can make something useful out of it.
Place the two ends together to form a smaller Coca-Cola bottle.
Floor holders
How to make a floor-mounted toilet paper holder with your own hands? A floor holder is a rather cumbersome design, but if the area of the toilet allows it, then you can safely use this solution.
A floor-mounted toilet paper fixture can look like shelves. Imagine a tic-tac-toe field.
An accessory designed in this way looks very impressive and can decorate the room.
By the way, if you put “crosses” in some windows, for example, made of polystyrene foam, and in other rolls with paper, then the “tic-tac-toe” will delight you with its simplicity and originality.
Toilet for a doll
Assembling a wall-hung toilet. We cut through the drain.
Cover the toilet lid with paper.
I painted the tiles on the floor, walls, mosaics for the bathtub, sink and toilet with a watercolor pencil.
Curtain
For this DIY craft you will need quite a lot of them. To calculate the exact number, measure the length and width of the window you will be making the curtain for. Then, count the number of bottle bottoms, for example, for a 120*70 window you will need 84 bottoms, based on the fact that their diameter is approximately 10 cm.
- Cut out the bottom of the bottle to create a flower-like appearance;
- Lightly melt the edges in a clean, hot frying pan;
- Make holes on 2 or 4 sides using a hot knitting needle;
- Thread a silver thread or transparent cord through the holes;
- Fasten the resulting strips with “flowers” strung on them on a transverse board or thick cardboard, previously decorated.
Clutch
- Take a bottle of detergent (it should be slightly flattened);
- Cut off the bottom and neck to make a cylinder;
- Cut in half to create a long sheet;
- Cover the resulting part with denim fabric;
- Sew a loop in the middle and a button at the desired level;
- Decorate with flowers and rhinestones as desired.
As you can see, there is nothing difficult in doing many things with your own hands that can make life easier or add good mood and bright colors to everyday life . All the crafts are made from plastic bottles, the photos were taken together with the children - this is a fascinating process for them.
Cool textile paper holders
Paper holders made of fabric occupy a special place, as they easily lend themselves to women's hands. Once upon a time, such products were called “newspaper boxes”, since there was no special toilet paper, and newspapers served a dual purpose.
There are many options for the execution of such attributes, so both the construction and design are entirely in the power of needlewomen. For those who use a sewing machine, there is no need to give special instructions on this issue.
A novelty was brought by cool crafts in the form of homemade dolls that act as paper roll holders. They are also made from fabric and tights. A wire is inserted into the hands of such figures, which acts as an axis for the roll. There are both wall and tabletop options. The theme and appearance of the dolls themselves are not limited in any way.