Summer, sea, sun! What could be better? We all want to extend this time longer. If you've been to the sea, you've probably collected a lot of shells. Website “Mom can do anything!” invites you to make many beautiful shell crafts for children and more. With our ideas, you will create masterpieces with your own hands and preserve sea memories of a wonderful vacation for a long time.
All boys and girls love to collect small objects, and everyone collects shells - both adults and children. We really like their shape, color, and unique pattern. You want to look at them again and again. We invite you not just to look at the masterpieces of nature, but also to work and dream with them.
Shell wind chimes
We offer a master class on creating crafts from shells that will delight not only the eye, but also the ear. It's about wind chimes.
To hear the “chime” of sea bells, you will need:
- Thick thread, twine or fishing line;
- Wooden stick (you can take a tree branch);
- Glue gun or door with a 2 mm drill;
- Scissors;
- Seashells of any size.
Making such a craft will take from 30 minutes to 1 hour. It all depends on the method of attaching the shells. So, you can drill holes in the shells and thread a thread through them, or you can take the easier route and use a glue gun to attach the “bells” to the fishing line. In the first case, you should first drill small holes at the base of the shells.
Next, we proceed according to the instructions: 1. We tie twine (fishing line) to the edge of the branch and leave about 7 cm. 2. Using a glue gun, attach a shell and another 7 cm of thread to the end of the twine. We repeat the procedure until the desired length is reached. 3. We hang as many threads with shells on the branch as will fit, leaving equal sections between them. To make the “chime of the wind” have an original look, you can alternate long segments with short ones. 4. To complete the shell craft, we fix another piece of twine at both ends of the branch and attach the wind chime where it will please the ear and eye. This craft can be done with both the youngest children and teenagers. And to make the design look more bright and original, the shells are painted in different colors, and additional feathers, buttons and bells are strung on the threads. Here you can give free rein to your imagination!
Original ideas for crafts
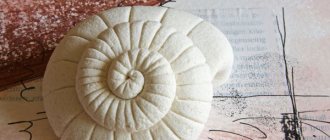
In general, shells can hardly be called a material: they are independent objects with their own unchangeable shape and size, from which a product is assembled, or they themselves serve as a finished decor item, painted and trimmed with rhinestones and sparkles.
As you can see in the photos presented, any craft made from shells is structurally understandable and it is not difficult to figure out how it works - the most valuable thing is the design of the craft, the idea, the direction for creative thought.
Applications and surface decoration
The easiest way is to make various kinds of applications from shells. Even a child can cope with this task; all you need is a piece of colored cardboard with a drawn outline of the future picture, which is pasted over with shells of suitable shape and size, pre-painted in the desired colors.
The most successful applique paintings should be placed in a frame under glass!
A more complex and practical type of decoration is the decoration of photo frames (ready-made or pre-made independently), mirrors, and picture frames with all kinds of shells and other starfish.
It’s a good idea to use photographic examples to learn a creative approach to solving such a problem. You can try to repeat the design you like, but to do this you should especially carefully select the shells in shape and size, having previously finished their surface accordingly.
In the same way, you can create valentines, original Christmas wreaths on the door or fireplace, even Christmas tree decorations!
You can breathe new life into your favorite cup by covering its outer surface (preferably the lower half or third) with a composition of small shells. An option is a stand for pens and pencils instead of a cup, as well as a flower vase.
Among the many famous crafts made from shells, an important place is occupied by all kinds of boxes, boxes and chests decorated by these inhabitants of the seabed. Moreover, surfaces can be covered with shells either completely or fragmentarily, creating all kinds of ornaments, floral patterns, etc.
Candlesticks for regular and decorative candles are also popular as “shell” decor. There are two possible solutions here: either paste over the lower half or third of the candle itself, assembling a symmetrical structure from different shells, expanding downwards to give the candle a stable position,
or cover a cardboard cylinder the thickness of a candle with shells, and it will be a real candlestick.
The first option is more decorative, so make sure that the candles are high-quality and expensive-looking.
There are also many solutions related to using the shell itself as a candlestick.
To do this, paraffin melted in a hot water bath is poured into the internal volume of a more or less large shell,
Using tweezers, hold the wick pre-glued to the bottom of the shell in a vertical position. As a rule, after 15 minutes the paraffin completely hardens and such romantic candles are ready for use.
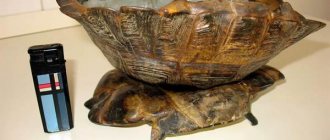
Volumetric crafts made from shells
Creating three-dimensional crafts from shells can be even more fun than “flat-surface” decor. Children especially agree with this, from under whose skillful fingers come funny little animals, birds and people.
As a rule, once you have some experience in “shell” modeling, you want to start creating flowers, three-dimensional Christmas tree decorations and other New Year’s decor, various kinds of sailboats, lamps and three-dimensional panels.
Often, many very complex and quite simple, but created with taste and imagination, crafts made from shells amaze the imagination. The following photo shows a lot of such crafts, each of which can be repeated if you have the appropriate experience in working with the material and a trained eye for needlework.
In principle, the same super-or hot-melt adhesive, double-sided tape and plasticine are used everywhere, and the surface is painted with acrylic paints, gouache, and varnished. Any beautiful and simply curious little thing that experienced craftsmen thriftily collect in their creative “bins” will come in handy; You can have a good time searching for suitable jewelry and decor in art and craft stores.
Just start making crafts from shells, and you will very soon see that it is not very difficult, but so much fun!
DIY shell candles
One of the simplest crafts made from shells is a candlestick. A marine-style candle can be created quickly, and the work does not require expensive materials or special tools. But, the main thing is that such an activity will captivate both very young children (from 5 years old) and teenagers. To make candles you will need:
- Large shells;
- Paraffin candles-tablets;
- Scissors;
- Wick.
The main rule to remember when creating any shell crafts is that seafood should be pre-processed. To do this, the shells are thoroughly soaked in water with added salt, and then washed under running water. If this is not done, the craft will acquire an unpleasant odor over time. And so, the shells are prepared, now you can start making a candlestick. We take out a tablet candle and take out the wick from it. Melt the paraffin on an electric stove (without removing it from the metal stand). Insert a pre-prepared wick into the candle. For stability, we can fix it with dry paraffin. Pour liquid paraffin into the sink to the brim and wait until it hardens completely (2-3 hours). For crafts, you can take not only shells of mussels or oysters, but also brine. To make the candle look brighter and more original, melted paraffin can be tinted with 2-3 drops of food coloring. The video shows step-by-step instructions for making candles from shells:
Basic instructions for preparing shells
Cleansing
Before you start making crafts from shells, you need to prepare them well.
- If the shells are “dead” and there are no shellfish remains left in them, then you just need to soak them in a solution of water and any chlorine-containing product (for example, bleach, “Duckling”, etc.) in a 1:1 ratio for 30 minutes. If the shells are very dirty or you want to remove the dark outer layer (periostracum), soak them longer. After soaking, brush the shells and rinse in clean water.
- If the shells are “live”, that is, they have the remains of mollusks (even if they died long ago) and have an unpleasant odor, then they need to be thoroughly cleaned. To do this, put the shells in boiling water for 5 minutes, and then remove the remains of the shellfish using tongs, nail scissors, etc. There is a second way: heat the shells in the microwave for 30 seconds, then try to remove the remains with tongs. If unsuccessful, continue heating the shells in the microwave, checking the result every 10 seconds. When all remains have been removed, treat the sinks with a bleach solution according to the first instructions.
After processing, inspect the sinks for chips and, if any, sand them with a sanding block, disc or sandpaper. If desired, you can add shine to them using clear nail polish or furniture polish, as well as using oil or rich cream. True, in this case, before treating the shells with glue, the gluing areas will have to be additionally degreased with alcohol.
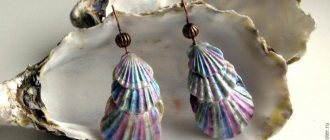
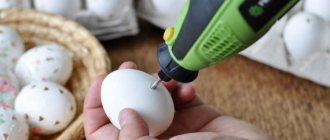
Drilling holes
To make some types of crafts from shells (for example, wind chimes, garlands, beads, bracelets and other jewelry), you need to drill a hole in them. This task is quite simple, the only difficulty is that the shells can crack or delaminate at the drilling site.
- Therefore, remember the main rule: the thinner the shell, the smaller the hole should be in it and, accordingly, the thread/accessories of the decoration.
To make these beads, you need to drill holes in the shells and string them on a silk cord, securing the location with knots. Next, all that remains is to clamp the ends of the laces in the crimp ends and attach the fasteners to them- To make these beads, you need to drill holes in the shells and string them on a silk cord, securing the location with knots. Next, all that remains is to clamp the ends of the laces in the crimp ends and attach the fasteners to them
There are two ways to make holes in shells - manual and automated.
Method 1. Select a drill bit for a drill, screwdriver or straight grinder with a diameter of 0.8 - 2 mm. Place the shell on a wooden or plastic board and secure it with masking tape. Drill a hole directly through the tape - it will prevent the shell from splitting or delaminating.
Method 2. If you do not have a screwdriver or drill, then you can make a hole in the sink using a nail and a hammer. To do this, first cover the shell with masking tape, put a mark on the inside of the shell, then place a nail and gently tap it with a hammer several times to make the initial hole. Next, widen the hole by moving the same nail back and forth inside it until you reach the desired diameter.
If you don’t have a nail or a hammer at hand, then use an ordinary needle, nail scissors or a knife and “drill” the hole by hand. The result will appear in about 10 minutes.
Heart decorated with shells for Valentine's Day
Valentine's Day is just around the corner and children also want to please their beloved mothers, fathers, and grandparents with an original craft. The master class presented below will allow you to create a heart from shells, which will definitely not leave anyone indifferent and can add new colors to any interior. To create a heart from shells you should prepare:
- A sheet of thick cardboard;
- Shells of various shapes and sizes (both sea and river are suitable);
- Sackcloth;
- Tow;
- Scissors;
- Glue gun;
- Starfish (if available).
When everything is prepared, you can start working. It should be noted here that primary schoolchildren and kindergarten children will need adult help. Draw a heart of the required size on cardboard and cut it out. We make two holes at the top of the heart (so that the craft can be hung in the future). Using a glue gun, glue one side of the piece with tow (you can take sisal). Cut out a heart from burlap and glue it to the cardboard blank on the other side. We stretch a small piece of twine into the pre-prepared holes and secure it with knots.
Now we begin to glue the shells onto the sisal or tow. It is recommended to move from the edges of the heart to the center, and fill the resulting empty spaces with medium or small shells. If there is a starfish, attach it to the center of the heart. The final step is to frame the edges of the heart with twine using a glue gun.
Important step-by-step actions of this creativity
Subsequence:
- carefully and carefully place the required amount of glue on the base of the shell;
- make an image of a bud;
- glue artificial greenery and a wire stem;
- decorate the product with a delightful cute butterfly based on shells; white threads are suitable as antennae;
- Apply clear varnish to the finished craft.
Cute shell fairies
This shell craft, made with your own hands by a child, can become a real dream keeper. To make a fairy, you only need one shell with a pre-drilled hole. And the process itself is so exciting that children of any age will enjoy it . Materials:
- Large shell with a drilled hole;
- Wooden bead;
- Two pairs of wings, cut out of cardboard of any color;
- Threads;
- A piece of ribbon of any color;
- Rope for hanging.
The first step is to make fairy hair. We wrap regular threads around the fingers of the palm. We remove the resulting skein and put a ribbon on top for a bow (1 cm). We pull everything in the middle with a thread, leaving long ends for further work. We thread the head bead through the thread. We pass the threads passed through the bead into the shell-dress. Now let's make the wings. We thread a needle through the thread under the dress and sew on cardboard wings. One or two stitches are enough for a tight fixation. Glue a second pair of cardboard wings onto the sewn wings. Attach a thread to the head for hanging. We cut the hair (so that it is even). Using a marker, draw the fairy's face. The Dream Fairy is ready, but if you wish, you can complement the image with bright colors by painting the wings.
Clocks, photo frames, mirrors with shells
The same shells will help you create an individual creative design for everyday things. Now they become the main element of our design mosaic. We find a base item for decoration. This could be a photo frame or its cardboard base, a watch in a wide case, a mirror and a large base.
If we want to increase the decoration area, then we glue an additional plane of cardboard or plastic. If everything is in order with the place, then we immediately begin to lay out our puzzle and attach it to the base with glue.
Shell dog for little ones
Why not take out shells brought from the sea on a cold winter evening and remember the summer days? We bring to your attention a simple master class, accessible for children from 5 years old, on creating a cute puppy. To make a dog you will need:
- Shells;
- Super glue (preferably “Moment Crystal”);
- Brush;
- Gouache.
We select shells for the head and body. For the body: two large shells of the same size (it is desirable that their edges meet). For the head: two small shells. The kids do a great job with this task! We glue the shells together and fix the head with glue on the body. We select 2 small shells for the ears and attach them to the puppy’s head. Select an oblong shell-tail and glue it to the body. We are preparing a stand for the dog and paws. Here you will need one large shell, which can easily accommodate a puppy. We select 4 claw shells, proportional to the puppy’s body. Using glue we fasten all the parts, as shown in the photo. After the glue has dried, we begin to decorate the dog. First, we paint all the shells in one color (red, black, white), then we draw a muzzle, highlight the paws and tail with paint. This craft will keep your child occupied for several hours, and then will become a worthy decoration for a child’s room.
Seashells in interior decor
Shells are a universal natural material, as they are suitable for decorating objects of any size and shape. The original combination of shells, beads and colored glass gives the products an unusual look.
Decorating the mirror
Creating decor from shells on a frame with your own hands is a task that is feasible even for novice needlewomen. Step by step process:
- The surface of the frame is cleaned of dust. All material is thoroughly washed and dried.
- Several large shells are evenly placed and glued along the frame.
- The surface of the frame is then filled with small shells.
- The remaining areas can be covered with small pebbles and pieces of mother-of-pearl.
Stylish decor for a mirror in the living room.
When choosing a material, you periodically need to move some distance away and evaluate the pattern of shells from afar. To prevent a small frame from looking overloaded with decor, it is advisable to use it sparingly.
Decorating photo frames
An original photo is the best idea to preserve your vacation memories. The kids love to collect pebbles and shells on the seashore. Every child will enthusiastically accept the idea of covering a photo frame with them. The original option is to decorate the lower part of the frame with shells, and paint the top and sides with blue paint.
Or stick a small starfish and a few small shells in the upper corner of the frame, and grease the other sides well with glue and sprinkle with washed sand - you get a kind of piece of the seashore.
Vase with shells
A fashionable trend is to decorate the holiday table with glass vases filled with shells of different sizes and shades. Containers of non-standard shapes look especially impressive.
Unexpected decor of glass vases.
You can emphasize the maritime character of the decoration with a thin rope: just glue several rows of linen cord imitating a rope along the edge of the vase.
Panel
When creating a decoration, it is recommended to use a specially prepared base (cardboard, framed canvas, stretcher covered with fabric). Themes for the panels can be very different. Shells are pasted in random order, or figurines of a mermaid or seahorse are laid out on the canvas.
The music of wind
It is believed that the unusual Feng Shui talisman transforms the negative energy of the house into positive energy. Naturally, a handmade accessory brings a special atmosphere to the room.
Different ways to design crafts.
It is not difficult to create “music of the sea wind”: a cross is made from two identical sticks. Shells and mother-of-pearl plates are hung on threads, securing the elements with knots. Having collected 8 threads, secure them to the cross. It is necessary to select approximately identical elements so that the cross does not warp.
Candlestick made of shells
On the sea coast you come across a lot of bivalve shells. This material can be successfully used to create a candlestick in the shape of a flower bud. Step by step process:
- A row of shells is glued along the contour of a round wooden base of small diameter.
- In a similar way, the entire base is gradually filled, and closer to the center the shells are fixed at a smaller angle of inclination.
To stylize the craft and give it a more glamorous look, the edges of the petals are smeared with glue and sprinkled with glitter.
Exquisite candlestick with mother-of-pearl petals.
Shell topiary
An original and delicate topiary made from shells is created using conventional techniques. Shells, pieces of coral, beads, and small pebbles are used as elements decorating the ball. Small bows made of sisal will give the craft both a harsh marine and romantic look.
Flower pot
Clam shells are best suited for decorating large containers. But small pots will be interestingly transformed by a wide, beautiful border of shells. To prevent the pot from looking too colorful, it is recommended to paint it white or sand. The ground near the flower can be covered with small gray pebbles, which will go well with the white structural surface and protect the soil from drying out.
Desk lamp
When decorating lighting items, you need to decide in advance on which part of the lamp the shells will be attached. If you are decorating the base of the lamp, it is advisable to choose several large and many small shells. They can be glued randomly or according to a certain pattern (the sketch must be drawn in advance). Starfish and pieces of coral are perfect for decorating a lampshade or lampshade. It is better to glue large elements along the edge, and distribute small ones higher.
How to elegantly decorate a lampshade.
Volumetric postcard made of shells
Butterflies, flowers, hearts - all this can be made from shells. And if you decorate a postcard with your children in this style, then an original gift for any holiday is ready. We present to your attention a craft that can be done at home with children in just 1-2 hours. For a 3D postcard you will need:
Seashells of all sizes and shapes;
- Nail polish of various colors;
- A sheet of white paper;
- Colored paper;
- Brush;
- Glue;
- Toilet paper (for the stem);
- Beads.
We varnish the shells: two large ones - green; 5-6 petals - red, yellow or any other color. Fold a sheet of paper in half. We glue pink and white inserts to the front side, as in the photo. We twist a tight tube from toilet paper and paint it green. We put a flower made of shells on the card and glue them with a glue gun. Fill the middle of the flower with glue and fill it with fine-grained beads of any color. Now you can make any inscription and present the card to a loved one. The video shows a detailed master class on creating a 3D postcard from shells:
Sea shell flowers
Agree that thin and delicate sea shells resemble the petals of earthly flowers. You should definitely take advantage of this similarity and make a flower arrangement for the holiday, as a gift, or to decorate your home.
Jar and shells - MK on creating a pencil holder
To create a beautiful and useful thing, it is not at all necessary to have a lot of expensive materials on hand. This craft requires only shells, a jar and flour, and the result of creativity with children can be used for many years.
For the stand you will need:
- Flour;
- Salt;
- 0.5 liter jar;
- Shells;
- Brush.
Knead the salted dough in the following proportions: 2 cups flour; 1 glass of salt; 2/3 glass of water. The result should be a mixture that does not stick to your hands and is soft enough for modeling. Roll out a wide layer 1 cm thick. Carefully distribute the dough throughout the jar, removing excess pieces. We form a thin sausage from the mass and close the neck of the jar with it. While the dough has not hardened, decorate the jar with shells. To fix them, press shells of any size into the dough. The pattern, size and color of the shells does not matter - here the child himself can imagine to his heart’s content. Using a brush we can create additional patterns on the jar. The craft is almost ready. Now the dough should harden; to do this, place the jar in a dry and warm place for 2-3 days.
Step-by-step description of execution
- Step 1. Preparing the product. Remove the mirror or protect it with newsprint. Paint the baguette white.
- Step 2. Carefully lay out and glue the shells, choosing the desired combination. If necessary, the gaps are closed with the next row of shells.
- Step 3. After the glue has dried, the product is varnished. The mirror framed with seafood is ready.
We create an easy-care orchid from shells
An orchid is a beautiful flower, but due to difficulties in caring for it, not every housewife can afford such a luxury. Why not make a craft from shells, which will not be very different from a living flower? Such a master class is available for children 8-10 years old and will certainly captivate children. You will need:
- Shells;
- Gypsum;
- Branch;
- Ceramic pot;
- Dye;
- Brush;
- White beads;
- Glue gun.
First of all, you need to prepare the base of the flower. To do this, pour diluted gypsum into a ceramic pot and insert a twig. We wait until the plaster hardens. Now you can start making the flowers themselves. Glue together three large shells. We select smaller shells, fasten them together and, using a glue gun, glue large white beads to the centers. We connect large petals with small ones. Paint the orchid sprig green. And after it is completely dry, glue the finished flowers to it. The flower is ready. Now you can decorate it with artificial leaves, and open the flowers themselves with mother-of-pearl or any other paint.
How to make paintings from natural materials
Using shells, you can create unusual paintings or decorations. Doing this is not as difficult as you might think at first glance. You just need to approach the work from a creative side, using your imagination. The main material is shells, which can be bought or collected on the coast. Then they need to be sorted depending on type and size. To create a masterpiece, you will also need the following materials at hand:
- base, you can use plywood, board or thick cardboard;
- frame;
- glue;
- paints;
- beads, twigs, blades of grass, sand, beads and other decorative elements.
The process of creating a picture from shells consists of the following steps:
- Sketch design. If you are not very skilled with a pencil, find a picture on the Internet, scan it and make an image along the outline.
- Preparing the base. Thick plywood or a cutting board, such as a cutting board, is best. It is recommended to sand the base and then repaint it. The background can be made with a stain of a suitable color or potassium permanganate.
- Drawing. If you are working with a sketch, it is better to use a carbon copy to transfer the picture onto the base, or simply create the future picture directly on the board, like a mosaic. You need to paint the material before you start gluing it. It is advisable to use bright acrylic paints. If you are making a flower, it is better to take white or multi-colored paints, but for a panel with a seascape, green and blue shades are suitable, which convey the color of the waves well.
- Gluing the material. Shells and other decorative elements are well fixed with PVA glue.
- Framing the painting. Homemade baguettes can transform paintings, but making them will require a lot of patience and skill.
Seashell panel with seascape
This type of needlework will awaken everyone’s creative abilities. A panel with a seascape will look great in the bathroom. It’s not too difficult to make it using a master class:
- Paint the frame with stain or potassium permanganate and set it aside to dry completely. For a panel with a seascape, use white, blue and green paints.
- Insert the prepared base into the frame.
- The background can be made of mesh, sand, fabric or burlap. Cut the material according to the size of the baguette, attach with glue or a special glue gun.
- Proceed to the next stage - creating the picture itself from shells. Remember that you need to carefully attach each part with glue.
- Cover the finished panel with acrylic varnish. This will give it a complete look, and the sea will shimmer, as if you were really standing on the shore.
Portrait applique made of seashells
A painting made by yourself will be an excellent gift or decoration in the home. To create a shell applique, you need to have a lot of base material in different sizes and colors. If you are good with a pencil, then making a portrait from shells will not be difficult. The process itself is as follows:
- Prepare the foundation on which the creation will be located.
- Draw a sketch using a photo of a person as a reference.
- Apply glue to the image and immediately lay the shells, not allowing the glue to dry. Elements must be suitable in color and size.
- If the portrait applique is ready, do not forget to spray it with varnish. This will give it shine and completeness.
Making a flower arrangement from shells
Using natural materials, you can create original interior items. The decor of the room will be decorated with a hand-made flower arrangement made from shells. For production you will need:
- main material – shells (any size);
- frame;
- varnish and paints in cans;
- universal glue;
- piece of film.
A step-by-step picture of flowers is made like this:
- Use paint to create a background for your future work. Using a spray can for this purpose, you will do everything neatly and without streaks.
- Start making flowers: wipe off the shells, place them in a row (this makes it easier to take).
- Place a little glue in the center of the film.
- Glue the shells one by one in the shape of a bud.
- Make the core of the flower: glue a small shell of a different color into the middle of the half-opened bud.
- Make the rest of the flowers in the same way, the quantity depends on your desire. It is worth noting that the flower arrangement will be more interesting if shells of different shades alternate in one flower.
- Think about where each flower will be located on the base; you can make marks.
- Glue the flowers and spray with varnish.
This is interesting: Homemade Hair Masks
Abstract seashell mosaic
Such paintings will make any interior exclusive. Making a mosaic from sea shells takes a long time, but you will have fun doing it. When creating a masterpiece, an important step is preparing the base. The “weeping” shell is often used. Get started:
- Draw an even circle on the sink and cut it out with scissors.
- Glue the shells in a certain order onto a prepared base (photo frame, flowerpot or any other object). Start from the top outline, moving down, from the right side to the left. It is better to attach it with a hot glue gun, applying the composition to the base and to the sink. Please note that the glue strips should be no more than 2-3 cm.
- When most of the mosaic picture is ready, apply glue only to the shells and carefully insert each one into place, pressing it firmly into the base.
- Decorate the background with backfill - plastic or glass chips. Apply glue to the required area with a brush, then cover the material in a dense layer and press with your fingers to compact it. Afterwards, turn the picture of shells over so that the excess falls off.
Decoration of baskets based on shells
Seashells will complement the weaving of the basket with their natural beauty. The work contains very simple steps. With the help of such decoration, the basket will acquire an elegant image and give joyful emotions.
To implement this plan you will need the following materials:
- shells of all possible shapes and distinctive sizes;
- thick rope;
- strong glue;
- items that decorate the craft.
Step-by-step steps towards the goal
Carefully tie or glue the rope to the circumference of the basket. Paint the shells in the colors you like. Cover them with varnish base. Wait for the shells to dry. Glue them to the rope.
You can also make a hole in the shell and tie it to a rope. This will create different lengths of attached shells. This is followed by decorating the finished product with various decorative items.