DIY baseboard frames
Plinth is a decorative and protective element of room decoration for hiding the gap between the floor or ceiling and the wall.
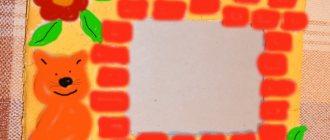
In addition to being used in the construction and finishing industry, skirting boards are a great thing for realizing creative fantasies. For example, the production of various kinds of frames.
Frames for photos, paintings, mirrors, etc. They turn out very original and beautiful.
It is also worth noting the ease of processing, since the plinth is made mainly from materials such as foam, wood or plastic.
This article shows how to make frames from baseboards, which you can make at home with your own hands.
Types of skirting boards
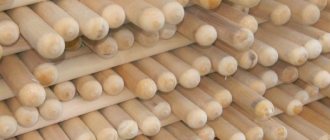
The main materials for skirting boards today are: foam, wood and plastic.
Plaster, metal and ceramics are also used in certain interiors.
These materials require certain skills and tools for processing, so they are very rarely used for making various kinds of crafts with their own hands.
So, the main material for the plinth is foam :
This is a very cheap and very easy to process material, it cuts and glues perfectly, you can buy it at almost any hardware store.
But there are also disadvantages: polystyrene foam is a very fragile material, any careless movements or falling even from a short distance can ruin the appearance of the product.
Plastic:
The main advantage is that plastic is a strong enough material for use in modern creativity, and plastic is also not susceptible to moisture.
The disadvantages are that plastic is quite more difficult to process than foam and it is made from artificial materials.
Tree:
The main advantage of wood is its naturalness; you must agree that no matter what material looks like wood, natural wood is immediately visible.
The beauty and environmental friendliness of the material still does not allow a large number of people to be indifferent, despite the rather high cost compared to other materials and the complexity of processing.
Picture frame made from plinth
Today we will tell you how to make a frame from a ceiling plinth with your own hands. This is a very simple step-by-step master class with which you can easily and quickly arrange your paintings and photographs into a beautiful baguette. The resulting frames will look as if they were made by a real master - they will become a worthy frame for your favorite images.
To make frames from ceiling plinth, you will need the simplest materials and tools. It will take you about 10-15 minutes of free time to create one baguette. If you need several frames, it is better to make them at once - this will save you time. When you get the hang of it, you will make them like on an assembly line - in 3-5 minutes each.
What do we need?
- polystyrene foam ceiling plinth
- glue
- acrylic enamel
In construction departments you can find polystyrene foam baseboards with various patterns. We advise you to choose several “beams” of a wide format if you want to frame pictures - this way you will get a chic imitation of a good baguette. If you make photo frames from plinth, choose a standard format - one that is slightly narrower. Look for interesting designs and pay attention to fancy curls - they will greatly decorate your crafts.
How to make a frame?
Decide on the size of the frame and cut the first piece of baseboard. It is very convenient to take an angular ruler. We need to make a 45 degree cut to glue the frame together nicely. If you don't have an angled ruler, use a protractor or eyeball the line.
Prepare 4 pieces to create a picture frame. We advise you to make baguettes from the same “beam” in order to better glue the sections.
The parts need to be coated with glue on the side edge along the corner cut of the plinth and pressed tightly against each other. Before painting, the frames must be thoroughly dried so that the glue has time to set and they become durable.
Let's start painting the baguette. Even if you want to leave it white, it's still better to use enamel. This will make the picture frame more durable and also protect it from moisture and excessive dust accumulation.
You can leave the frames as is - attach the photo directly to them with glue and hang it on the wall. You can also place the image on the wall using tape and then cover it with baguette to make it look neat. If these options do not suit you, glue the baseboard frame to the cardboard, and then place a photograph or painting inside. You can even insert glass, but in this case you need to use good superglue and a wide ceiling plinth.
Try making several frames from skirting boards of different shapes and sizes and place them next to each other on the wall - it looks very nice. If you have spray paints or colored enamel, you can give them the shade you want. The most beautiful baguettes are classic white or silver and golden shades.
We recommend watching: paper photo frame
Making a frame
So, we seem to have figured out the types of skirting boards and now we can safely proceed to the question - how to make a frame for a picture from a skirting board. If you are an artist, cross-stitch, sculpt various miniatures from mosaics, or are interested in photography, then you will probably need a lot of frames so that you and your guests can admire the result of your work.
But the modern trend is such that not everyone can afford to spend a lot of money on a dozen different frames.
Designers took this problem seriously and came up with a cheaper and simpler solution - a DIY frame made from plinth boards.
I would like to pay tribute to the various design of frames - you can not only paint them, but also glue all sorts of decorative elements to them, from decorative flowers to buttons and other small details. But this question is more suitable for women - the technical component of the work is mainly required from men, and therefore we will immediately get down to business.
Let's get started
In order to begin work, you will need to purchase the following tools and material:
- Ceiling plinth (as has already become clear from the article, it comes in three types);
- Any glue that will be able to tightly glue the material you have chosen. For or polystyrene foam, adhesive for ceiling tiles, which is applied through a special gun, is perfect;
- Stationery or construction knife;
- Small miter box;
- Marker with ruler;
- Acrylic (or any other) paints.
Execution of work
To be honest, many home craftsmen will probably be somewhat skeptical about this kind of product. In general, polystyrene foam and polystyrene foam are somewhat different materials that have high strength indicators. But if you think a little, then in general it turns out that a frame is not a structure into which nails are driven, but one that simply dangles on the wall.
It turns out that we do not need high strength of products - the main factors here are durability, ease of processing and, of course, low weight. If we consider the design according to these parameters, then these materials are simply ideal.
Below are step-by-step instructions to help you:
- To begin with, we take the baseboard in our hands. In our case, we will consider a product made of polystyrene foam, since it is the most popular. Such material can be easily cut, glued, and like polystyrene foam it does not have a fine-grained texture that crumbles;
- The next step is to take measurements from a photograph, painting or embroidery. In our case, it uses the usual A4 format, so the dimensions are 210x297 mm. Now we measure these dimensions on the baseboard and make marks with a marker. Then, using a miter box, cut the baseboard at an angle of 45°.
Attention! Particular attention should be paid to the fact that the frame will be the same size as the sheet. This is necessary so that you can then glue the frame itself to your work of art.
- Before gluing, you will need to check the conformity of all sides - to do this, the parts must be laid out on the table and attached to each other (see photo);
- We glue the product. For these purposes (as mentioned above), we use a glue gun. He will glue the individual parts of our product tightly together. To do this, you will need to warm up the gun and apply a little adhesive to the end of the part, and quickly, before the glue dries, attach another part to it;
- The products are pressed tightly together for a few seconds. Next, according to the same scheme, we should complete our frame;
- Now all that remains is to paint this thing. For this we used acrylic enamel - it looks quite nice;
- After drying, all we have to do is glue the frame to the picture and that’s it, the job is successfully completed!
Attention! Glass cannot be inserted into frames made of polystyrene foam or polystyrene foam!
Decor features
A great idea to decorate both a large and medium-sized mirror is to build a frame for it. And an excellent material for the frame is the ceiling plinth, or the so-called fillet. With this cheap material you can turn an ordinary mirror into a work of art.
You will need:
- roulette;
- marker or simple pencil for marking;
- knife or hacksaw for metal;
- miter box;
- wood glue or “liquid nails”;
- special putty for wood;
- varnish or acrylic paint.
Work process:
- We measure the mirror.
- We make marks with a marker on the corresponding parts of the baseboard.
- We place the fillet in order in the miter box and cut it according to our marks at an angle of 45 degrees.
- We check the symmetry of the cuts by applying the fillet to the mirror.
- We glue together all the parts of the structure.
- When the glue has completely dried, you need to apply a little glue along the mirror edges and connect it to the structure.
- The gaps formed between the joints are filled with putty.
- We cover our frame with varnish or paint.
A frame made from ceiling plinth is suitable for both a mirror in the hallway and other rooms.
What is a picture frame?
Many people have noticed that the same painting looks different in different interiors. The correct choice of frame has a huge impact on this. Translated from French, because that’s where the word came to us, “baguette” is a carved or painted plank for making a picture frame or wall decoration
It is an element that creates a transition from the picture to the interior, while focusing attention on the image
Initially, little importance was attached to the design and the existing slats for the picture were simply attached to the canvas, but over time, a reassessment of values occurred and the baguette frame became one of the main components of a spectacular interior design
The designers understood how important it is to choose the right product, especially if it itself is of high artistic value.
How to make a stretcher for a painting with your own hands
The stretcher is used to stretch the canvas and comes in two types: modular and solid. When making picture frames, people decide for themselves which stretcher is more convenient - each model has its own characteristics. A blind subframe is a solid structure, the corners of which are fixed together with glue and wooden triangles. If the canvas sag, you have to re-tighten it.
Transporting such a painting with a solid stretcher is not very convenient
A modular stretcher, unlike a fixed one, is movable and allows you to adjust the tension of the canvas. This is a collapsible design, very convenient for transportation.
We'll tell you how to make a blind stretcher with dimensions of 100x180 cm.
To do this, we will prepare two-meter wooden slats, Moment wood glue, a tape measure for measurements, sandpaper for processing the product, a hammer, a furniture stapler with staples, corners and screws.
Moment-Joiner
- We apply slats perpendicularly to the length of the slats (180 cm) and measure 100 cm.
- For stability, make a couple more vertical support sticks.
- We cut the slats at an angle of 45°. We go through sandpaper and remove shavings and sawdust.
- To connect the vertical and horizontal slats, we need wood glue: apply it to the saw cuts, press it and immediately fasten it with a stapler on each side. If you have a special vice in the house, now is the time to use it.
- We tap the staples with a hammer to ensure that they do not bulge.
On the reverse side of the structure, metal corners need to be screwed to the corners.
Related article:
Photo frames for the wall : varieties, how to choose the right one, rules for making collages, selection of scenes for different rooms, examples of photo placement, original ideas for compositions - read the publication.