Photo: mashinnaja-shtukaturka.ru Making soft toys is an interesting creative process that is fascinating not only for adults, but also for children. To make a toy truly beautiful, you need to put in a little effort and imagination. Especially for you, we have made a selection of 15 inspiring ideas on how to make a soft toy with your own hands. Use them and have fun!
1. Cheerful company
Please your child with a cheerful company of cute soft toys. You can sew them yourself or together with your baby. To work, you will need fleece of different colors, stuffing, beads for the eyes and a piece of leather to make a voluminous nose.
You can print out the toy pattern or enlarge it on the monitor, attach a sheet of paper and trace it. Next, transfer all the details onto the fabric and pay attention that you need to cut two blanks for the body, four for the legs, you will also need two white circles for the eyes and one leather circle for the nose.
First, form the legs, using two blanks for each, and sew them to one of the base parts. Now we sew the body from the wrong side, leaving a small gap at the bottom. We turn it inside out, stuff the toy with stuffing and sew up the hole with a hidden seam.
Now we sew on all the details of the muzzle, as shown in the photo. To form a voluminous nose, you need to go around the edge of the leather circle with a needle and thread, tighten it tightly, and fill it with filler. You can simply embroider the mouth. Our wonderful animal toy is ready! Use the patterns provided below and make a whole party for your baby!
Photo: tr.pinterest.com
Photo: tkanix.info Photo: liveinternet.ru
Photo: veles-fish.ru Photo: posudaizkamnya.ru
Photo: toysstyle.ru
Photo: hozyaika-mama.ru Photo: lk-mebel.ru
Several master classes for beginners
The algorithm for making a fabric toy is simple and the same for any model.
- creating a pattern;
- transferring the pattern onto the fabric. In order not to do unnecessary work, to cut out paired parts, the fabric is folded in half;
- cutting fabric blanks with seam allowances;
- sewing the parts on the wrong side, leaving a small unstitched area;
- turning the workpiece right side out and stuffing it with filler through the hole left;
- sewing up the unstitched area with a hidden seam.
How to make simple soft toys with your own hands
All that remains is to decorate the finished toy, embroider or sew on the necessary details.
Video - Master class: how to sew a cat and a cat with your own hands. Simple toys
Birdie
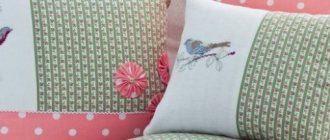
Let's start with the simplest thing - making a bird. Depending on the size, it can simply become a toy, a sofa pillow or a Christmas tree decoration.
| Stage | Description |
| 1 | We prepare scraps of fabric, thread, scissors and a pattern. You can draw the outline of the bird yourself, highlighting only the head with beak and tail. The abdomen is left straight, without rounding. |
| 2 | We trace the pattern along the folded fabric, cut it out and sew along the line. We turn the workpiece inside out and hand-quilt along the bottom edge. |
3 | We stuff the bird with stuffing and tighten the quilting thread. We sew or glue a small circle of thick fabric to the assembly site. |
| 4 | We sew on beady eyes and wings cut from the same fabric as the abdomen. |
Cats in love
Such a gift will be nice to receive on Valentine's Day or birthday. And anyone familiar with a sewing needle can do it.
Cats in love
It is better to take fabric that is not too colorful, but bright. And if you make not one cat, but two, then a contrasting one. You will also need floss threads for embroidering mustaches and noses, beads for the eyes and some decor.
Step 1.
Enlarge and print the proposed pattern or draw your cat. For clarity, you can immediately draw his face and decorations to visualize the result.
Fabric cat, pattern
*Click on pattern to enlarge!
Step 2.
Fold a piece of fabric of a suitable size in half with the right side inward, place the pattern on it and trace it. Sew both layers of fabric along the outline. To prevent them from moving, you can pin the fabric in several places with safety pins. In the tummy area closer to the tail, leave a few centimeters unstitched.
Pattern and fabric
Step 3.
Cut the resulting workpiece with sharp scissors, leaving no more than 1 cm from the seam. Sew the workpiece, leaving a 5 cm long section unstitched to turn the fabric inside out.
The workpiece is cut and stitched along the edge
Step 4.
Turn the cover over onto the face through the unstitched area and press the seams. Fill it with padding polyester or other light and soft filling. A long wooden stick, a regular pencil, a pen or a knitting needle will help fill in hard-to-reach places and small details.
The workpiece is inside out, you can stuff it
Step 5.
After stuffing and evenly distributing the filling, carefully sew up the hole with an invisible seam using thread that matches the fabric.
All that remains is to sew up the area through which the stuffing was carried out
Sew beads or small round buttons on the legs in place of the eyes. Embroider the nose and mustache with contrasting threads. The rest of the decoration is up to your wishes and capabilities. The gift idea will be supported by heart-shaped buttons.
The cat is decorated with embroidery, ribbon, beads and a wooden button
You can make a tie for a cat, a bow or a lace shirtfront for a cat. If the gift is for a spouse or family of friends, in addition to the adult cats, you can sew small kittens using the same pattern.
Purple fabric cats
Turtle
This toy is sewn from several parts and fabrics of different colors. Which, however, does not make its production any more difficult than the previous model.
Turtle
The choice of fabric color is arbitrary - it is not necessary to make the paws green and the shell brown. But it is better to choose a soft and pleasant texture, since this flat toy will most likely be used as a pillow.
Step 1.
We prepare patterns and transfer them to fabric. You should get: four paired pieces for the legs, one paired piece each for the tail and head, one round piece each for the abdomen and shell. The latter should be made a little larger than the abdomen. We cut out all the blanks from double fabric, having previously chipped it with needles.
8 paw parts, 2 tail parts, 2 head parts, 2 children. shell (diameter 30 cm)
Step 2.
We finalize the shell blank by sewing symmetrical darts on four sides to make it convex. The depth of the darts should be such that the diameter of the finished part is equal to the diameter of the blank for the abdomen.
There are 4 small darts on the top part
Close-up photo
Step 3.
We sew together the small parts of the head and paws in pairs, sewing up the end cut, and fill them with padding polyester. We sew a triangle for the tail, but leave it without filler.
Details of paws, heads
Step 4.
All parts, except the tail, are distributed around the circumference of the shell sewn with the belly and sewn with a hidden seam.
Joining workpieces
The parts are hand-sewn with a hidden seam, around the circumference, so that the cavities of the paws and head communicate with the cavity of the shell
Step 5.
We fill the body of the turtle with filler through the hole left in place of the tail. Then we sew in the tail itself.
Tail
Step 6.
We embroider the eyes with black thread or sew suitable buttons in their place.
Embroidery - eyes
Simon's cat
There are a lot of images of this beloved cartoon character on the Internet. To create a pattern, you can take any.
And just enlarge and modify it to get such a funny cat.
Simple DIY toy
Or use the ready-made pattern offered here.
Cat diagram
Copy it, enlarge it to the desired size and print it on a printer. All parts are paired. If you use stretch fabric, then you need to place the pattern on it in accordance with the arrows drawn on it: it should stretch in the indicated direction.
Advice. The ease of production and popularity of the character will certainly encourage you to sew more than one cat like this. Therefore, it is better to immediately make the pattern on cardboard or thick craft paper.
Step 1.
We start as usual: fold the fabric in half with the front surface inward and pin it together. Then we outline all the details of the pattern cut out of cardboard. Since the fabric is white, it is better to use a gel pen, felt-tip pen or marker for tracing.
Pattern transfer
Step 2.
Without removing pins or cutting out parts, we stitch them along the drawn outline entirely, without leaving gaps and especially carefully going through small parts. When stitching by hand, the seam on the paws should be made as small as possible so that each toe is visible. There is no need to sew the round parts - these are separate single blanks for decorating the eyes. They just need to be cut out.
Stitching blanks
Step 3.
We cut out the cat, stepping back from the seam by 3-4 mm. Between the fingers and the ears we make transverse cuts almost to the seam line, otherwise after turning the fabric in these places will stretch and the contours of small parts will be unclear.
Blanks are cut
Step 4.
We make neat cuts on the fabric in two places: in the place of the eyes in the front and the tail in the back. Through one of them, we turn the workpiece onto the face, helping ourselves with a wooden stick when you need to properly straighten the tail, ears and paws. And we stuff it tightly with holofiber or other synthetic filler. In the area of small parts, add filler in small portions so that they are completely straightened and smoothed out.
Stuffing toys
Step 5.
We sew up the slit on the muzzle, and sew a tail filled with holofiber to the back slit.
The slit on the muzzle is sewn up
Tail sewn on
Step 6.
Using black thread we embroider the pads on the paws and mark the toes.
Embroidery on paws
Step 7
Using thick black threads in two folds, we sew two round parts in place of the eyes using a “back needle” seam. We leave a small gap in which we place the filler, giving the eyes a convex shape. Then we finish the seam. We sew on the pupils from black beads and embroider a triangular nose and mouth with the same threads.
Embroidery on the muzzle
That's it, the toy is ready and can be an excellent gift or decorate the interior of a bedroom, children's room or living room.
Another way to make New Year's cat Simon
Simon's cat, pattern
Detailed pattern, enlarge by clicking on the image
Redraw the cat figure onto pattern paper
Fold the fleece in two layers and lay out the patterns
We cut parts with 7 mm allowances
We sew all the parts on a machine, leaving holes for stuffing the toy with filler.
Details of the tail, eyes
On small and large parts of the eyes we make notches in this way: fold the part in half and notch on both sides, repeat the operation with opposite sides of the part
Sweeping away the details
Trimming the allowances
Stuffing the details
We sew the hole in the tail with a hidden seam. On the eyes - we sew them up with a simple stitch, since in the end it will not be visible
Turn the part right side out
We stuff the cat tightly
We pin the eyes to the place outlined in pencil, baste and sew evenly
Embroider the nose and eyes
Embroidering paws
Sew on the tail
This is what a finished cat looks like
Decorating the cat
Christmas decorations
If it’s scary to take on a large toy right away, you can practice on small scraps, making cute Christmas tree decorations and tiny children’s toys.
Christmas decorations
The ideal material for quickly stuffing your hand is felt. It can be hand stitched over the edge or any other simple stitch using contrasting thread.
Toys can be made not only stuffed, but also flat, choosing the simplest shapes to begin with: Christmas trees, hearts, stars, mushrooms, etc. They are decorated with embroidery, rhinestones, sequins, and tinsel. And a loop is sewn to the top for hanging on the tree.
By the way, such small toys can also be sewn for a children’s mobile.
DIY mobile
Children's mobile made of felt
Baby mobile for crib
Video - How to make a mobile
Video - Sew a felt unicorn together
Sewing fabric toys is a very exciting activity. Even those who generally don’t like to sew like it. After all, you just need to make a few stitches, and everything else is an inspiring process of giving shape to a flat product and “revitalizing” it: inventing a character, facial expression and outfit.
Toy storage basket
Mustachioed-striped
There is probably no child who would not be delighted by the playful faces of cute kittens. But not every mother is ready for a heroic act - to have a live pet in her apartment.
Sew funny toys from fabric, stuff them with cotton wool, synthetic padding or stuffing from old pillows. Add accessories at your discretion, for example, a scarf for a cat or an openwork bow for a cat.
Photo: smelovdelo.ru
Photo: livemaster.ru
Ritual doll “Bird of Joy”
Make a tight twist of fabric. It is tied with threads in 3 places. Wrap it in a white piece, tie it with red thread, dividing it in half. Fold the limb flap diagonally and tie it to the neck. For the breast, roll up a tube and place it under clothing. The shirt is put on the doll, tightened with a belt from below. Wear a skirt and apron. Then they make a headdress. The long side faces upward and is used to make a beak.
Bright poultry joy brings happiness
Owl pillows
Decorate your child's room with decorative pillows. They can be sewn in the shape of cute owls - your baby will be happy to go to bed surrounded by such company.
Making such a pillow toy will not take much time - just draw the pattern correctly, sew the parts and stuff it with soft “filling”. Next, form a muzzle with large, curious eyes.
Photo: newarchit.ru Photo: dshi10krd.ru
Techniques and materials for preschoolers
For crafts in kindergarten, you can safely use glue, scissors, colored paper, glitter, feathers, small beads, different types of fabrics, cardboard. Everything that allows you to develop skills and show imagination is used; there are practically no limits anymore.
A child’s capabilities are growing day by day, and it is important for adults to promptly offer certain options for educational crafts to improve skills and, again, develop fine motor skills at a higher level.
This will soon help the child tie his shoelaces, button his clothes, and do many other things.
Smeshariki
Smeshariki are the favorite cartoon characters of many children. Place Funny Krosh, flirty Nyusha, thoughtful Hedgehog and other “round” animals sewn with your own hands in the nursery - your child will be immensely grateful to you.
Choose fleece in different colors - preferably, like those in the cartoon, because your child is used to perceiving cartoon characters exactly like that. For eyes and noses, you can use beads, buttons or fabric. Don't forget about accessories! For example, little Nyusha can come up with a bow, and the Hedgehog cannot do without glasses.
Photo: vladtime.ru Photo: liveinternet.ru Photo: roughplus.tumblr.com
Educational crafts for kindergarten
Children usually go to kindergarten from the age of three, and this is a new stage in the child’s development. The child becomes more independent, he can already do a lot on his own, fine motor skills in many children are already quite well developed.
This is why children are now able to make more complex crafts using an expanded range of tools and materials.
What comes to the fore is practicing the skill of using scissors, which is still not easy, but each time the movements become more confident and harmonious.
We recommend reading:
Easter crafts: the best ideas for DIY gifts and decorations (90 photos + video)- Autumn crafts - 100 photos of themed crafts for children's creativity. Review of the best ideas and new products to create at home
Military crafts: 135 photos and video instructions for step-by-step implementation of military-themed crafts
Soft toy “Bunny” made from a sock
You can make a gorgeous bunny without spending much effort. To work, you will need a regular sock, several thin elastic bands (you can use thread), scraps of white and black fabric to decorate the face, a ribbon for a bow and a pom-pom tail.
Divide the sock into three parts. Fill two of them - the body and the head - with filler and tie them with an elastic band. From the remaining part we cut out the ears and sew the edges. Now we cut out the details of the muzzle and glue it on. All that remains is to sew on the pompom tail and decorate the neck with a bow. The bunny is ready!
Photo: decodato.com
Step-by-step instructions: soft toy cat
Just a few simple steps need to be completed to create the charming cat Matroskin:
Making patterns:
- Cut out all the parts on the fabric (2 pieces each) and sew them together, leaving a side hole for everting, then fill them and sew up the cut.
- Drawing a muzzle and stripes on the body, tail and legs, after the paint has dried, attach the legs and tail.
- Cutting felt boots, hats and scarves from velvet.
- Sewing the product.
- Dressing up a cat.
Snowman
Using a similar pattern, you can make funny snowmen out of socks, which will become excellent room decorations for the Christmas holidays. They can be placed on cabinets, shelves or a Christmas tree.
Photo: thepurplepug.blogspot.com
Photo: thepurplepug.blogspot.com
Intellectual Teddy
To add a gentleman to your collection of soft toys, you will need:
- sketch;
- paper;
- scissors;
- pen-pencil;
- fabric in two shades;
- sewing pins;
- needle;
- padding polyester, cotton wool, etc.;
Attention!
Before you pick up a needle or cut out an abstract shape, imagine how the toy will look in the end. Awareness of what is happening gives the character texture, character and its own so-called “highlights”. Formulate a thought and put your soul into it so that the product becomes a personality. For example, gentleman Teddy is well-mannered, sociable, and romantic. Friendly, responsive, always ready to lend a helping hand.
Imagine how you would like to see Teddy. For example, stand? Sit or keep surprise? Accordingly, we find approximately the same sketch, which we pin to the edge of the canvas to avoid unnecessary waste.
We outline the outline. We cut out the common part in two copies. To prevent our man from shrinking in size, leave 0.5 cm on all sides; Using a sewing machine, sew along the drawn outline.
Remember to tack at the beginning and end of the work, and leave a small gap between them for the next step.
Now we turn the bear inside out; the presence of Chinese roll sticks simplifies the task. We fill it with filler, then use a needle to sew the hole up imperceptibly.
If desired, you can paint facial expressions with acrylic paints or glue on eyes, which are sold in any craft store. We embroider the nose and mouth with black thread.
Sew a bow tie and tie the teddy bear around the neck. If you wish, you can easily insert a Valentine card.
It will be more difficult to make Teddy more textured, paying attention to every detail. Unlike the previous option, here everything is cut out separately, including the muzzle, four legs and, say, the heart.
The base will need terry, soft and fluffy, which is usually used for plush toys, and the seams can be done by hand; you can easily put the sewing machine aside.
The reason for this is the literal sewing of some parts into others. For example, one heart is sewn with a loop stitch inside another. As a result, the volume and bulge of the same paws or tiny tail at the back.
Also keep in mind that due to the use of terry, plush fabric, the paws do not need to be stuffed with filler, so that it is easier to “bend”.
Little elephants
Sew a little elephant from felt and turn it into a keychain or decoration for a child’s backpack. Many colorful baby elephants will become a real decoration for a nursery if you form them into a garland!
Using the pattern, sew the main piece and the ears separately. Fill all the parts with padding polyester and patch the holes. Secure the pieces together and add a couple of eye beads. To make a pendant keychain, don’t forget to sew in a loop – you can use a narrow braid for this.
Photo: benziedesign.blogspot.com Photo: benziedesign.blogspot.com
Photo: joy-jeans.ru
Ten-handed folk rag doll
The ten-handed doll is a Belarusian traditional autumn doll. It is made in October. Lots of handles to help the housewife with household chores.
- For the body of the doll, take a rectangle of fabric. Fold in half. Place a twist from a piece of cotton wool and tie it with thread, making a head. Make a roll of fabric around the cotton wool. The threads are not cut.
- Five pieces of fabric are needed. They are rolled into rollers and secured with threads on both sides. They also make a cross on the body.
- The next step is a blouse for the doll. A hole is cut in the square and put on a ten-handle. Secure with a belt. Skirt. You can make an apron.
You might be interested in this Features of mini cross stitch and satin stitch embroidery
Autumn ten-handed helper in household chores
Basket chicken
Using felt, you can sew a wonderful voluminous chicken. Put Kinder or candy in it - you will see how much joy such a gift will bring to your baby! Also, the miracle chicken can be used to decorate an Easter table or basket by filling it with colored eggs.
Photo: lachat.ru Photo: lasmanualidadesdeclaudia.blogspot.com
Plasticine figures
Plasticine is an excellent craft material that will become a faithful assistant to kids in their creativity. You can use it to make various applications, animal figures, flowers and much more. By making plasticine products, the baby not only has fun, but also develops motor skills at the same time.
We bring to your attention the plasticine craft “Multi-colored pyramid”. The manufacturing process is quite easy and fun. The baby will be able to get acquainted with all the colors of the rainbow. We recommend using soft plasticine that will be comfortable for your child to work with.
For this craft you will need: plasticine, stacks and a sheet of cardboard of any color.
Step by step execution:
- Using stacks, separate seven multi-colored pieces of plasticine of different sizes.
- Roll the blanks into balls.
- Flatten the balls into thick disks.
- Place the multi-colored elements of the pyramid on the cardboard, starting with the largest disk.
- Make a cone-shaped top from the last color and secure it.
The multi-colored pyramid is ready.
Little mouse
A cute little mouse will be a suitable toy for a child under one year old. It will fit comfortably in his hand and promote the development of tactile sensations.
Choose bright scraps of fabric and contrasting threads. Sew all parts on the outside using a buttonhole stitch. Attach the beaded eyes and nose especially securely to the body so that the baby cannot accidentally tear them off.
Photo: rukodelnye-idei.ru Photo: ladycharm.net Photo: easyladys.com
Photo: kolyaski-baby.ru
Photo: bunny24.ru
Baba Yaga doll (rag)
Head and neck. Prepare a square of fabric. Fold diagonally. Put cotton wool in the middle, secure with threads, and make a nose. Attach a cotton ball to the skewers. Cover with fabric, connect with the previous part.
For the woman’s arms and torso, you need to wrap cotton wool around the skewers. Connect with thread. Make a skirt from polka dot fabric. Strengthen the figure with thread. Make an apron from gray rags and secure it with a sash. Vest made of the same fabric. Flax is necessary for hair; attach it to your head and straighten it. Tie a red scarf on your head. For a broom, you can take a branch, a pencil and glue burlap to it.
You might be interested in How to embroider a picture yourself using ribbons
Important! For the stupa, cover the jar or bucket with burlap. Fill with polystyrene foam, cotton wool and burlap. Baba Yaga should sit in a mortar.
Folk motanka doll in national costume
Making a reel should be step-by-step. They are created without piercing/cutting things. You can only prepare patterns using scissors. Parts of the body are connected with threads, wrapped several times. The threads used are naturally produced and mostly red in color. It protects against evil spirits and evil spirits. The head must be decorated with a scarf or any other headdress.
baby hippo
For unknown reasons, these representatives of hot Africa are rarely found among children's toys, but kids really like these cute creatures. You urgently need to correct this deficiency. Prepare thick cotton fabric of different colors, filler and get to work immediately!
It is better if the fabric for the body and legs is different in color - this way the toy will look funnier. For the eyes, use beads, buttons, or buy ready-made ones at a craft store. Don't forget about a small piece of braid for the ponytail.
First form the paws by filling them with filler. Now you can start assembling the toy - during the formation of the body, you need to simultaneously sew in the legs, stuff the toy, and decorate the face and tail. Such a wonderful hippopotamus will certainly delight your child!
Photo: liveinternet.ru Photo: clipart-library.com
Photo: podelunchik.ru Photo: liveinternet.ru Photo: posudaizkamnya.ru Photo: liveinternet.ru
Photo: pinterest.com
Photo: liveinternet.ru
Photo: babyblog.ru Photo: myhobi.org
Straw masterpieces
Straw is the stems of cereals. The basis of the toy for peasant children was a bundle of straw, folded in half and tied with a rope. The fan-shaped straws resembled a sundress. These were the first straw creations.
Over time, this type of creativity improved, and ideas arose for creating not only human images, but also all kinds of little animals, golden-maned horses, and deer.
Skillful weaving and artistic taste, imagination and ingenuity of talented people led to the creation of wonderful plates, boxes, chests, hoops, bracelets and many other original souvenirs.
Crafts made from material saturated with the sun, nourished by mother earth and the warmth of human hands, create a certain style for a fashionable interior.
Fleece teddy bear
To make a teddy bear, it is better to use fleece - this is the softest and most pleasant material to the touch. Additional details in the form of ties and butterflies will give the toy a particularly stylish look.
The details of the pattern can be adjusted, making the toy shorter or taller, thinner or fatter. Still, we recommend leaving the arms and legs long, as shown in the photo - then your baby will be able to play cuddles with the teddy bear.
Photo: garderobus.ru
Photo: easyladys.com
Crafts made from straw
A universal material for DIY folk crafts is straw. You can buy ready-made material or prepare it yourself. Select straw of the same length, without thickening knots, and bright yellow color. Pour boiling water for 15-20 minutes, drain the water. Cut each straw along the entire length with a stationery knife. Unfold and iron with a hot iron.
You will get a flexible, shiny material for weaving dishes, boxes, and figurines. These straws make amazing sunny paintings in the Russian style. Products created in this way are fragile and require careful handling.
A folk toy for children to make at home, made from polymer clay or salt dough. After drying, they become durable and can be used for playing.
Tilda's gnome
Tilda's toys have a special charm. Looking at them, it’s as if you are plunging into the atmosphere of a cozy village life of past centuries. If you make a toy as a fairy-tale character - a gnome, it will always give a feeling of fairy-tale magic.
The pattern in the photo shows how to make a wonderful group of Christmas gnomes that can be placed under the tree or on the fireplace. It is better to take flesh-colored material for the “body”. If you don’t have one, first hold the fabric in a light tea leaves solution and dry it.
It is better to sew clothes for gnomes from bright materials and be sure not to forget about the cap with a bell - after all, it is the main sign of a real gnome!
Photo: topotushky.ru
Photo: pinterest.ru Photo: topotushky.ru
Photo: topotushky.ru Photo: topotushky.ru
Photo: topotushky.ru Photo: topotushky.ru
We sew clothes for toys with our own hands
No less attention is paid to small details on a toy, so clothing is just as important for them. Often these are quite small in size, which means “creating” is a little more difficult. But if you approach the matter responsibly, then the result will be excellent. Here are some tips that will make the process much easier:
- choose dense, non-flowing fabrics - cotton, calico, thin fleece;
- almost any imperfection in clothes for toys can be corrected by steaming and ironing it;
- all patterns should be simplified, it is not necessary to sew according to a person’s example;
- if the clothes are not supposed to be removed, then all the nuances are even easier to complete by sewing some parts to the “carcass” of the toy itself.
Of course, it’s easier to make clothes that you don’t need to take off. But many children will be interested in the opportunity to dress up their favorite bunny for bed or a walk. In this case, dresses and T-shirts should not be sewn together so that the child can complete this task on his own or with a little help.
Video on how to make clothes for a teddy bear:
An interesting activity can not only diversify your leisure time and help you have fun with your children, but also help you find your life’s work. Many women liked this entertainment so much that they began making soft toys professionally. Which is especially important, given modern society’s love for manual labor and individuality.
Puppy made of fur
A soft fur toy will be especially warm and beautiful. It is not necessary to use natural material - faux fur is also quite suitable, especially since it is much easier to work with.
When cutting out parts, make sure the fur is in the correct direction. You'll need a little more fleece to line the inside of the dog's ears and mouth. All parts of the toy need to be stuffed with padding polyester and sewn. Make a tie on the muzzle with thread, as shown in the photo, to give it a realistic shape.
When the puppy is completely ready, you can add a decoration in the form of a neck bow or a bright leash.
Photo: joy-jeans.ru Photo: euamoartesanar.blogspot.com Photo: multiurok.ru Photo: megapolis-salon.ru Photo: s30316698063.mirtesen.ru Photo: s30316698063.mirtesen.ru Photo: multiurok.ru
What to stuff soft toys with
Previously, cotton wool and small pieces of fabric were used to fill soft toys. However, today these materials are being replaced by lighter and more hygienic synthetic materials (sintepon, holofiber, synthetic padding, foam rubber, etc.).
They do not come true, allowing the products to retain their original shape even after prolonged use and repeated washing. It is quite acceptable to use old sweaters made from light yarn in the form of finely chopped strips.
It is also allowed to stuff toys with undyed, cleaned and combed sheep wool (sliver). At the same time, you need to be sure that future owners of such crafts will not have an allergic reaction. The vulnerability of this material lies in its susceptibility to damage by moths and deformation when moistened.
If it is necessary to make some toys heavier (balls, rattles, etc.), soft fillings can be combined with pre-calcined cereals, seeds, husks, and pebbles.
Personally made pillows in the shape of different animals and birds can be stuffed with medicinal herbs (mint, sage, lavender, fennel, lemon balm, jasmine, etc.). In this case, the individual tolerance of the components contained in them should be taken into account.
Hedgehog made of fur and fleece
This toy will be made of two materials at once - the belly and legs are made of fleece, and the coat is made of fur. Transfer the templates to the fabric at the required scale and make patterns.
The fur coat and belly will be formed from two parts to make the hedgehog as voluminous as possible. All parts need to be filled with padding polyester or scraps of fabric. Now all that remains is to attach the pre-sewn arms, legs and decorate the face.
Photo: katjushik.ru Photo: katjushik.ru
Turtle
The turtle pattern is quite simple and is suitable for all beginning needlewomen. This is how you can make a toy without a sewing machine!
The materials are the same. Choose the fabric to your taste.
The basis of the body pattern is one circle of your favorite size. 8 identical leg parts, two for each; one smaller circle for the head.
- We cut out a circle from the fabric and, stepping back from the edge, sew along the edges. Gently tightens, adding cotton wool inside.
- We sew the parts of the legs together in pairs, turn them inside out, and fill them.
- We tighten the head around the perimeter to form a ball. We sew it to the body, just like the paws.
- Beads instead of eyes.
- You can make a design on the shell of black threads.
Funny trio
Three soft toy representatives of the zoo will take their rightful place among your baby’s favorites. To make these cute toys with your own hands, you will need a minimum of materials and time.
Use patterns and colorful fabric. The details of the face can be simply embroidered or drawn with a marker.
If you want to involve children in the work, trust them to make a toy whale. It is so easy to do that your child can easily cope with this task, and the result will please the whole family!
Photo: mp3-format.ru Photo: mp3-format.ru
Photo: podelunchik.ru Photo: pl.pinterest.com Photo: teatrmdot.ru
The best crafts for kids: techniques and materials
When you need to come up with crafts for 2-3 year olds, you don’t need to look for overly complicated options. All the same, a child of that age will not be able to pick up, for example, a needle, and it’s better not to deal with scissors. But paints, plasticine, cotton wool, cardboard, pine cones, sunflower seeds, chestnuts, acorns - all this can be used.
On the Internet there are a lot of options for materials for crafts that can be used with kids, here you will also find photos of educational crafts.
We recommend reading:
- DIY wall panel using scrap materials
- How to choose a secure travel case
- Registration at 1xBet
It is worth noting that if the child is very small and is not even a year old, then it is better to refrain from working with small objects that he may accidentally swallow or put in his nose. Kids are curious, you know, and it’s better not to take risks.

