What to consider when choosing
In order to answer this question, you need to consider the design of the cabinet and its components. The coating can be semi-matte, matte or glossy. This protects this piece of furniture under daily stress. The application technology will ensure uniform distribution of the selected layer and the desired shade over the surfaces of the panels.
The coating should protect the cabinet from moisture and daily stress.
The internal structure may contain the following elements:
- mirrors, cabinets with built-in mirror surfaces;
- attached type cabinets;
- cabinets, shelves, bookcases;
- boxes for a basket with dirty laundry, for another part of the furniture.
The inside of a cabinet can contain many elements. The materials chosen for the manufacture of these structures must be durable, moisture-resistant, and environmentally safe. The fittings should not be susceptible to corrosion or deformation.
Eco-friendly furniture for children's rooms
When choosing environmentally friendly furniture for children, the first thing to evaluate is the materials from which it is made. The most environmentally friendly items are created from solid wood. They are large monolithic bars, for the production of which the least number of various toxic adhesives are used. After all, inhaling harmful fumes exposes the child’s body to the risk of developing a number of diseases.
To fasten parts, bolts and screws, manufacturers of environmentally friendly wood products use casein glue, which does not contain poisons. Companies specializing in the manufacture of furniture for children and teenagers do not use substances harmful to health (formaldehyde, phenols, resins) in their work. All varnishes and paints they use on wooden surfaces are safe.
Study suppliers' offers, paying attention to the types of wood used in the manufacture of products. The most environmentally friendly furniture for children is considered to be that made of pine, birch, larch, walnut and beech. This wood has tonic and healing properties. For example, pine is the most economical material that will not stand out for any special decorative qualities, but in terms of ecology it is priceless. The unique antiseptic properties of pine can protect your baby from many diseases.
Purpose and types of bathroom cabinets
There are several types of bathroom cabinets according to their purpose:
- Linen. Useful for storing towels, bathrobes and similar items;
- Under the sink. The cabinet allows you not only to hide the not very attractive pipes under the sink, but also to use this area to your advantage. There you can place cleaning and detergents, washing powders, and other household chemicals;
- Under the bath. The principle is the same, only it is equipped from the edge of the bathtub to the floor;
- For washing machine. Even modern models are difficult to fit into the overall design. Therefore, it is often hidden with special cabinets. It can be installed under the countertop and become a harmonious extension of the sink. Separate sections with or without doors that house equipment are also not uncommon.
Installing a sink above a washing machine
Whatever lily sink you choose for your restroom, several rules are mandatory in any case:
Parts of the sink - in particular the drain pipes - should not come into contact with the washing machine. The point here is not only the risk of short circuiting, but also vibration - from constant shaking, the pipes can simply “loose”.
The washbasin must protrude slightly forward above the machine. This reduces the likelihood of accidental water entering the surface of the latter.
All wires of the washing machine must be in perfect order - in good condition, with strong insulation. Do not forget that even with the most careful installation there is still a risk of water getting on them.
And finally, before installing the washing machine, you need to read the instructions for it in order to finally understand whether the unit can be installed in close proximity to water appliances.
How to install a sink above a washing machine
To install a sink over a washing machine, you don’t have to resort to the help of specialists - you can do it yourself, there’s nothing complicated here. Installation proceeds as follows.
First of all, brackets are attached to the wall, on which the sink “sits”. Most often they come complete with plumbing fixtures; if not, it’s okay - you can buy them at any hardware store.
Before drilling the wall and screwing in the fasteners, figure out “roughly” whether the washbasin will fit comfortably. In other words, place it a few centimeters above the washing machine and see if this height suits you. If the faucet for the bathtub and sink will be shared, make sure that it rotates freely between them and that the water will not flow onto the floor or along the walls, but evenly into the bowls.
The edge adjacent to the wall must be sealed with a special agent.
Rules for installing a water lily sink siphon
- The siphon is attached before the sink itself is fixed above the washing machine.
- The flexible drain tube is attached directly to the siphon of the “washer”, and on top this structure is strengthened with a “clamp” - this way you don’t have to be afraid that the connection will accidentally break.
- And only after this the drain hose is inserted into the sewer pipe.
It is important to remind once again that parts of the sink should not come into contact with the surface of the washing machine - constant vibration will disrupt the strength of the connections. In addition, after installing the sink above the washing machine, before use, check whether the siphons and pipes are securely fastened, and whether water is leaking from somewhere
Types of cabinet designs
The bathroom uses different furniture, which differ in size, purpose, installation method and other parameters.
Standard options
Most often, cabinets have a standard rectangular or square shape.
In most cases, such models are hung above the sink to store personal hygiene products. They are small and are rarely used for storing household chemicals and things.
Corner systems
Such structures are installed in the corner of the room and placed above the bathtub, toilet, washing machine or in empty corners. They save space, and their large depth allows you to store many different things in them. The disadvantages include the inability to install drawers, so corner systems only have shelves. Such furniture is equipped with hinged doors, installed on the floor or fixed on the wall.
With horizontal placement
They have a small height and a large width. Basically, they are installed high from the floor, so they do not interfere with free movement in the bathroom. Such models are most often equipped with doors that open upward, which makes their use more convenient.
Wardrobes
They are installed mainly in bedrooms and corridors. They are large, so they are not suitable for a small room. In a large bathroom closet you can hide a variety of items (towels, bathrobes, household chemicals, a drawer for dirty clothes). Sliding doors do not take up free space - you can install a mirror on them and equip it with lighting.
Built-in structures
Often there are niches or recesses in the bathroom walls that can be adapted for installing built-in cabinets. The main problem is the difficulty of selecting the finished product according to the given dimensions, so it will have to be made to order. It is impossible to rearrange it, and transporting it to a new apartment is irrational. In built-in structures you can hide a washing machine or make shelves and drawers for storing various items.
Hanging wall
All designs that are mounted on the wall save space. They are placed above the existing plumbing fixtures or washing machine in the bathroom. They come in different shapes, sizes and colors, which allows you to choose them to suit your bathroom interior.
Column cabinets
People call such structures “pencil cases,” but their correct name is column cabinets. They are used in small rooms, because... They have a small width and depth, but a large height. It is not necessary that the height of the pencil case be up to the ceiling: it can be level with the bathtub or washbasin. The presence of a large number of drawers and shelves allows you to store different items separately.
Floor furniture
These models are installed directly on the bathroom floor. Cabinets are large in size, so before purchasing them, you need to know where they will be installed. If the bathroom space allows it, this model can store all household chemicals, cosmetics and necessary bath accessories.
The lack of contact with the floor protects the material from direct interaction with water, so its service life is increased.
Storage system
- Shelves: straight or corner. Needed to supply bathing products and cosmetics.
- Cabinets with shelves or with drawers (some with a built-in sink). They usually store supplies of cleaning products for the bath and toilet.
- Cabinets: floor or hanging. Items that are rarely used are hidden in closets.
- Mirror . An accessory that is often placed above the washbasin. It is attached to the wall or to the cabinet door. With this product, if the lighting level is sufficient, there is no need to install an additional lamp.
Making a frame for a sanitary cabinet
The frame of the sanitary cabinet is made according to the drawing.
- First, guide profiles (PN 27×27) are installed along the floor and ceiling;
- Then four (for a corner cabinet) or six vertical racks (PS) are installed at the corners of the frame. Two joining profiles are placed in the outer corners of the cabinet;
- Two racks are placed where the cabinet doors are installed. Wooden blocks are inserted into these racks to install doors;
- According to the size of the doors (hatch), cross members from the PS profile are installed. This creates a frame for the doors;
- To strengthen the structure and transverse fastening of plasterboard sheets, cross members are made in the frame structure from the PS profile.
How to connect profiles read: How to connect profiles for drywall. How to install corners in plasterboard structures, read Corners in plasterboard structures.
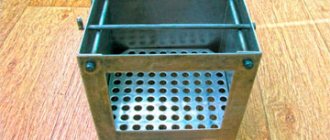
Important to note! Since the dimensions of plumbing cabinets are usually small, many craftsmen change technology and replace rack profiles (PS 50×50) with ceiling profiles (PP 60×27) and instead of racks they use guide ceiling profiles PNP (27×28), and crossbars are made from ceiling PP profile (60×27). Example in the photo
This does not provide much savings, but in home construction it is important to obtain a durable structure. It's easy to explain
Bathroom renovation is done as a last resort and for the sanitary cabinet they use the leftover materials left over from the renovation and therefore you can find the most intricate designs of sanitary cabinets.
General technology for assembling cabinets from furniture panels
If the drawing of a cabinet made from furniture panels is drawn up in accordance with the dimensions of the blanks, then a minimum of cutting parts will be required. For these purposes, it is best to use an electric jigsaw with a wood saw. After cutting, the edges need to be sanded.
Then they move on to processing the surfaces of the parts. The first coating with varnish and enamel is carried out before assembling the cabinet from furniture panels with your own hands. All parts are thoroughly dried, if necessary - under a press or with the lamellas secured with clamps. If the prerequisites for warping and cracking of the canvas are visible, the parts are either re-glued and dried under a press, or replaced.
How to assemble a cabinet from a furniture panel with your own hands step by step
Unlike furniture made from laminated chipboard, confirmats (euroscrews) are almost never used when assembling a cabinet from furniture panels. The main fasteners are self-tapping screws for twisting the workpieces. As well as furniture dowels for invisible connection of parts with simultaneous gluing.
Housing assembly
They start by calculating the distances between the holes on the sides of the cabinet for fastening horizontal parts (shelves, bottom, roof). Then carefully drill out according to the markings for installation of fasteners.
- If these are self-tapping screws, then from the front side of the sidewalls, use a drill with a diameter of 3-4 mm all the way through.
- If these are furniture dowels, then you need blind holes for them with a 7-8mm drill on the inside of the sides.
After control assembly of the cabinet body from furniture panels, it is necessary to check the geometry of the product
This is important if you plan to install drawers, as well as hanging or sliding facades in the cabinet body
Then proceed to the final varnish coating of the product body.
Installation of internal filling
After final assembly of the cabinet body (gluing it onto furniture dowels and allowing it to dry completely), they proceed to installing the internal filling.
According to the drawings, in wardrobes made from furniture panels, flanges are screwed onto 4x20 self-tapping screws for installing rods with hangers, and various storage systems. The drawers are pre-assembled and then installed on the selected guides.
Kitchen cabinets made from furniture panels are complemented by removable shelves, dish dryers, and pull-out baskets.
If necessary, the back wall is nailed with small nails.
After installing/hanging the cabinet from furniture panels in the planned location, they proceed to hanging and adjusting the facades.
Hanging and adjusting facades
The process of installing doors on a cabinet made of furniture board is largely determined by the type of opening and fittings chosen. Often the hinged doors of wooden furniture are installed on card or heel hinges. But most often, standard four-hinged hinges are used with a preliminary insertion of the hinge on the back side of the facade.
We make furniture from solid wood ourselves: features of creation
So, now that the decision has been made to create furniture yourself and the material has been selected, it is worth getting acquainted with some aspects of the construction of such structures. Namely, with the stages of work. In general, the list of work stages looks like this:
- idea formation;
- creation of a detailed drawing with all dimensions;
- selection and acquisition of materials;
- creating a product - cutting, applying certain compounds, assembly, finishing and decoration.
Cutting wood is one of the important stages. The appearance of the finished furniture will largely depend on the correctness and sequence of actions. It is most convenient to cut wood with a circular saw, but installing one at home is problematic. So at home it’s easier to get by with an electric jigsaw, and then mill the edges of the parts or process them with a grinding machine
As for the jigsaw, it is important to choose the right blade according to technical characteristics
Lumber cutting
For those who want to make their own furniture for the first time, it is recommended to choose a product with the simplest possible configuration. Carved and figured shapes are extremely difficult to make with your own hands accurately and beautifully the first time. As a last resort, you can invite a master for cutting. Sometimes furniture factories also help with cutting.
DIY master class on making a table from solid ash
How to make a cabinet behind the toilet with your own hands?
Strict adherence to the algorithm will allow you to obtain a beautiful, high-quality and durable design.
Project development. At the first stage, it is necessary to design the structure on paper and create a drawing. To do this, you need to decide on the design of the cabinet, choose its shape and take measurements. Correctly taken measurements are of great importance. First of all, the back wall of the future structure is measured: top, middle and bottom. Next, measurements are made of the “front part” and the height of the proposed cabinet
During the design process, it is important to determine the number and size of internal shelves. Choosing materials for the cabinet behind the toilet. Furniture for the toilet can be made of plasterboard, plywood, natural wood or laminated chipboard. What material to choose is a purely individual matter.
But it is important to remember that when choosing a building material, the main criterion should not be price, but practicality and durability. The material must be moisture resistant and durable. The best solution would be noble wood treated with clear varnish. Preparing tools for installation. After creating the design of the cabinet behind the toilet, you should get all the necessary tools, fastening materials, fittings and other elements to assemble the structure. So, you will definitely need:
What material to choose is a purely individual matter.
But it is important to remember that when choosing a building material, the main criterion should not be price, but practicality and durability. The material must be moisture resistant and durable
The best solution would be noble wood treated with clear varnish. Preparing tools for installation. After creating the design of the cabinet behind the toilet, you should get all the necessary tools, fastening materials, fittings and other elements to assemble the structure. So, you will definitely need:
- level;
- tape measure (electronic rangefinder);
- screwdriver;
- hammer;
- jigsaw;
- screwdriver;
- electric drill.
- Assembling a cabinet in the toilet. The installation of the structure is carried out strictly according to a pre-developed drawing. Following a certain algorithm step by step will greatly simplify the assembly process.
To make a closet in the toilet with your own hands, you need to follow the following steps.
- At the first stage, the bars are cut to size and attached to the walls using screws and an electric drill. Sawing wood and other materials can be done either independently if you have the appropriate skills, or ordered from any construction company.
- At the second stage, the blanks for shelves and doors are cut. The prepared shelves are installed on bars and secured with fasteners. When using wood materials, it is recommended to treat the surface of the structure with a special antiseptic, which can be purchased at any hardware store.
- At the third stage, markings are made on the door blanks on the hinges, which are subsequently screwed on. Many people use piano hinges because they are more durable and can withstand heavy loads.
- At the fourth stage, the cabinet is finished at individual discretion. To make the design aesthetically attractive and fit into the interior of the toilet room, you can cover the surface with self-adhesive wallpaper or laminated paper. Alternatively, the wooden structure can be varnished to imitate wood or painted in a bright, rich color.
- At the fifth stage, handles are installed and, if desired, the cabinet facades are decorated. Construction stores sell various decorative decorations that will give your toilet cabinet an original appearance.
On our website you can find many design solutions and assembly diagrams on how to make a cabinet in the toilet behind the toilet. Furniture in the toilet room, made with high quality by yourself, will delight you for many years.
Making a shelf with your own hands
When all the necessary tools are in place, you can get to work.
If wood or MDF sheets are chosen as the material, you will need to follow the following procedure:
- make marks with a pencil along the edges of the slats;
- Glue blocks of equal size to the areas of the marks;
- draw additional marks in the center of each block, drill holes in them;
- assemble the structure using screws for the previously made holes;
- cover the finished structure with a varnish base for its presentable appearance;
- make special holes in the wall, fix dowels in them;
- mount the assembled shelf on the installed mounts in the wall.
The homemade shelf is ready! This option is great for any bathroom.
Options for placing a washing machine in the kitchen
In the kitchen, the washing machine is placed so that it fits organically into the interior and does not interfere with the use of the room for its intended purpose.
When choosing a place for equipment, they give preference to the space next to the kitchen sink. This simplifies connecting the device to communications.
We list the options for installing the machine in the kitchen.
Under the table top
The easiest option is to install the machine in a niche under the kitchen countertop. This arrangement allows you to conveniently use the equipment. However, the noise from a working centrifuge may disturb household members.
The open arrangement of household appliances is typical for the high-tech design direction. But only if all the devices are designed in the same style.
Behind masking doors or curtains
If the machine does not fit into the kitchen design, you can hide it by hanging it on the door niche. This option will reduce the noise level, but will require more space. The unit itself should be smaller in size.
Important! If you decide to hide the washing machine behind doors, make sure that they open completely and that the countertop does not block access to the detergent compartment. Otherwise, it will be inconvenient to use the device. If there is not enough space to install a full door, but you need to hide the washing machine, use a masking textile curtain of a suitable color
If there is not enough space to install a full door, but you need to hide the washing machine, use a masking textile curtain of a suitable color.
Embedding
Embedding a washing machine is the most compact placement option. With this method, the device is placed in a cabinet, and the door is hung on the body of the machine itself.
A significant disadvantage of this option is the higher price of built-in washing machines.
Installation in a cabinet
Another functional placement option, suitable for large kitchens. In this case, the equipment is installed in a special kitchen cabinet, possibly together with a drying apparatus.
Such installation and connection require special skills, so it is better to entrust them to a specialist.
What forms are there?
Round, rectangular mirror fits any style. Such models are popular and look elegant.
A rectangular shape can visually enlarge the space, especially if the canvas is large.
Trapezoid, polygon, asymmetrical canvases will decorate a modern interior.
In figured canvases, the reflection must be placed completely. Moving part of your face out of frame will cause discomfort.
Subtleties of choosing a cabinet
Before purchasing a bathroom cabinet or creating it yourself, you need to take into account the conditions in which it will be used:
- High humidity. If a material is chosen that does not tolerate moisture well, it must be additionally coated with protective water-repellent agents, otherwise its service life will be short.
- Temperature surges. In the bathroom there is often not only humid, but also hot air, which is replaced by cool air.
Placement
The main difference between built-in cabinets is that they do not have their own frame. The role of the sidewalls and rear panel is performed by the walls of the niche. There are also semi-built-in designs that have 1 side panel.
The following installation methods are available:
along the wall; in a niche where exact adherence to dimensions is important (so that shelves and drawers fit into the prepared area without distortion); in a corner where the space is often empty (installing a cabinet here allows you to effectively and efficiently use the bathroom space).
The method of opening doors is also important, which can be:
- Swing. Mounted on special furniture hinges. They take up a lot of space when opened. They need to be adjusted and lubricated periodically.
- Sliding. They are afraid of distortions: when opening, the doors move to the side and hide one behind the other. The rollers used must be moisture resistant.
- Foldable. They can be in the form of an “accordion” or a “book”. They don't like jerks. They move only on the upper rollers. There are small hinges between the sashes.
Size and color
You can purchase a ready-made cabinet of the required size, make it yourself, or have it made to order. The depth of wall-mounted furniture is from 15 cm. This is not enough for storing household chemicals or towels, but it is enough for hygiene products.
The height of floor-standing models is limited only by the height of the room. The minimum width of pencil cases is 20 cm. They are placed either individually or in pairs, for example, on both sides of the washbasin.
There is a large selection of color combinations for bathroom furniture. To do this, it is necessary to observe the color scheme of both the cabinets themselves and other interior items.
Additional features
The purpose of any closet is to store various things.
It may have the following content:
- Laundry basket. It is a separate compartment where it is convenient to store dirty laundry from prying eyes.
- Folding towel rail. After the towel is dried, the structure is folded and hidden behind the door.
- Backlight. It is created near the mirror built into the door and makes it more convenient to apply makeup or remove it before bed.
- Heated mirrors. Helps get rid of high humidity, which accumulates on the mirror and appears in the form of water droplets, impairing visibility.
What things is it needed for?
When buying or creating a cabinet with your own hands, you must immediately decide what things it will be used to store. The smaller the shelf, the more weight it can support. For example, if the length of a shelf is 0.5 m and it can support 50 kg, then with a length of 1 m it will only support 10 kg.
There are a number of rules that will help you store things correctly:
- Any fabric items (towels, clothes) are stored on the middle shelves, because... the steam rises up and when it cools down, it falls down, so in the middle the textile will have the least risk of becoming damp.
- Household chemicals are kept on the lower shelves: if the container leaks, the detergents will not get on other things.
- The top shelves are used to store things that are rarely used.
- Cosmetics and hygiene products are placed at such a level that they are visible and convenient to take.
Bathroom cabinet with mirror
The shapes and sizes of the bathroom can be very different, which determines the size of the cabinet. The latter also depend on the availability of free space on the wall above the washbasin. It is better to design a small cabinet with one door and without a lower open shelf (Fig. 1). The cabinet can have one or two doors, and to keep it clean, it’s a good idea to provide it with removable shelves.
To place tall items in the cabinet, we suggest limiting yourself to one horizontal shelf. At the bottom there is an open shelf for soap dishes, toothpaste and other small items.
You can provide an open shelf on both the left and right sides of the cabinet. Fastening the cabinet to the wall will be provided by steel overhead hinges or hidden brackets
It is important that the mirror is located strictly above the sink. Shelves can be made from regular or acrylic glass in a glass workshop
The shelves are relatively small, so we recommend ordering them from tempered glass - it’s safer. For a home first aid kit, it makes sense to organize your own small compartment, and if you do not exclude children from accessing it, then a door with a lock will be useful.
Related link: DIY storage system - drawings and photos
The cabinet has a compartment without a door, a mirror is attached to the back wall, and a lamp is mounted above the latter. Some lamp models are additionally equipped with a socket. It can be useful for electrical appliances - a hair dryer, electric razor or rechargeable toothbrush. In the open compartment you can mount a stand for toothbrushes, made, for example, of tinted plexiglass. It is recommended to use laminated 15 mm chipboard for the cabinet body, and waterproof plywood 6 mm thick is suitable for the back wall. Connections of chipboard parts are made with dowels and glue. Waterproof paint should be used for the surface of the cabinet. You can attach the cabinet to the wall using pendants.
Selection of materials
You can find a huge number of different materials on the market today, but not all of them are suitable for assembling bathroom furniture. The most important point for this room is, of course, moisture resistance. The material must not only be resistant to constantly humid air, but also impervious to direct contact with water. Thus, the main things bathroom furniture is made from are wood with appropriate impregnation, plastic and glass.
Plastic is easy to process, but it is fragile, quite soft and not always aesthetically pleasing. It should be used not for the frame of the structure, but for auxiliary elements. Glass is also very fragile and heavy. In addition, fixing glass is also relatively more difficult than other materials. It is better to use it for shelves or doors.
The wood that can be used for the frame and all structural parts can be in the following form:
The tabletop deserves special attention. The materials for its manufacture are boards, chipboards, plastic or stone. This is the most functional element, so it must be provided with reliable fastening and have high strength.
You select the thickness of the materials based on your drawing. It is necessary to take into account that for the supporting frame of an organizer or cabinet it is better to choose plywood from 15 mm, laminated chipboard – from 20 mm. On the contrary, it is better to make shelves, doors and drawers from thin sheets (5-10 mm) to reduce the weight of the structure.
You can cut the blanks yourself or order them from a workshop. To prepare yourself, you will need a jigsaw. When working with laminated chipboard, it is better to glue the laminating layer with tape and run a cutter along the cutting line. Then it will be possible to avoid its splitting.
Price policy
A built-in wardrobe by default implies individual execution. Moreover, this concerns not only the appearance of the sash, in this case only the size varies, but also the dimensions of the frame, the number of elements and filling.
If the bathroom and the furniture in it are going to be used for a long time, then the material for the cabinet, even a built-in one, must be appropriate: MDF or chipboard with water-resistant impregnation. And, therefore, the cost of the product will be slightly higher than that of the same design located, for example, in the hallway.
The built-in model consists of a frame, filling and door. The material and design of all three components, as well as dimensions, determine the cost.
- The frame is an ordinary wooden beam treated with antiseptic compounds. In some cases, only a frame for the leaf is required, and if the door is sliding, then you can do without it. In this case, the shelves and drawer slides are fixed directly to the surface.
Particular attention should be paid to the decoration of niche walls. Condensation should not be allowed to accumulate here.
- Filling: regular shelves, drawers, drawers, laundry basket. The elements are standard, only the sizes vary, and even then only slightly. However, a large cabinet may include such non-standard cells as a compartment for a washing machine, for a heating tank, etc.
- A hinged door with the same design will cost less than a sliding door. In addition, the latter requires installation into the floor, which is not always possible. For the bathroom, it is recommended to choose an option made from MDF with acrylic film or acrylic panel, which is more reliable. Models with glass and mirror inserts will be more elegant, but also more expensive.
If the goal is not to decorate a built-in wardrobe, but, on the contrary, to hide it from view, then the simplest panel door, which is pasted over or finished to match the wall material, will do.
It is impossible to even estimate the cost of the model. To imagine how much a particular project will cost, you need to contact the furniture company, at least by phone, or use one of the online calculators on the company’s website.
If the bathroom area allows, then you can build a really spacious and stylish wardrobe into it, as in the following video: