There was a time when in every self-respecting family, not only the TV, but also the VCR occupied a place of honor in the living room. They were especially appreciated for the fact that you can watch your favorite films and shows on them without commercial breaks, as well as watch family videos.
Now everything has changed: more powerful and “advanced” technology has appeared for watching films at home - small compact DVD players, powerful home theaters...
They are not that expensive, and their quality is good. But the paradox is that the good old VHS format is in no hurry to retire. Take a closer look at the windows of household appliance stores and you will see that they still sell not only many different models of VCRs, but also a variety of video cassettes with recordings of films, music, programs and cartoons.
And some multimedia market experts have accurate information that the widespread distribution of the DVD format is a privilege mainly for metropolitan residents. Once you travel outside of Moscow and St. Petersburg, you will see that the outback still spends its leisure time watching videotapes. And this is correct, because VHS tapes have been the most common video storage medium for quite a long time, and they are inexpensive.
So, if you have a large collection of videos on cassettes left at home from past times, and the VCR has already “decided to live for a long time,” do not rush to get rid of the film library: think, maybe you will still need it? If yes, then it's time to think about buying a new VCR. Fortunately, today on the market you can find modern models for every taste.
When making a purchase, first of all you need to remember some information about these devices and decide what you really need - is it enough to buy a video player or do you still need a full-fledged video recorder?
Let us remember that the first type - a video player - is a cheaper and very simple type of video equipment that is needed exclusively for watching videotapes. Firstly, it does not have many additional functions - a built-in tuner (a special device for convenient viewing and recording of TV programs), a clock or a timer. And the cheapest and simplest models do not even have a cassette recording function - only playback.
However, if you are sure that you will no longer need the recording function from the TV, then you can buy a non-recording player. But you won’t be able to save much, because players with a recording function are only a little more expensive, but they can already record from one video camera to another, as well as from a TV.
Video players are extremely simple technology. They have very simple controls, menus and remotes with only 5-7 buttons. Only two video heads are responsible for the recording and playback modes and there is no Long Play mode, in which twice as much information can be recorded on the same video tape.
The VCR is another matter. It is much more complex, costs more, but can also do much more than a player. If you buy this device, you won’t have to worry about not being able to get your favorite show on time: the tuner will allow you to record whatever you want without much hassle, and then arrange viewing at a time that is convenient for you.
This very useful skill of VCRs arose because it does not need a TV to record - you just need access to a TV antenna. He performs all other operations in automatic mode, which is programmed in advance by the owner. Moreover, learning to program a VCR is not too difficult a task. You just need to read the instructions carefully.
In addition, VCRs have several additional video recording and playback modes: the same Long Play, as well as Super Long Play (or EP). With their help, you can make a higher-quality freeze frame, as well as find any desired fragment by rewinding the recording at different speeds.
Those amateurs who are interested in home video recording need a VCR in their household, since it allows them to edit the material onto a cassette. Moreover, it would be better if this device were not with two video heads (it is very simple and is unlikely to provide the required quality), but with four, or even six.
Six-head models are the most expensive, but provide the best recording quality, because there are 4 heads responsible for the image, and two more for sound in stereo mode. And besides, they are often initially intended for editing work: there is the opportunity to precisely join frames, insert fragments, find the last recorded fragment, or separately add sound to the footage.
With six heads, the owner of a tape recorder can enjoy all the benefits of stereo sound, even if the TV does not have this function. After all, it provides a special output for external equipment, which means you can connect a stereo system.
Common methods of connecting equipment
Detailed instructions on how to connect a video recorder to a TV can be found in the operating instructions for the equipment.
But since the technology is quite old, many users may lose this document. The connection is made sequentially, as in any technology, but there are no modern options such as USB, HDMI. Only the following connectors are presented:
- For coaxial cable;
- RCA connector;
- Input for SCART wire.
We will analyze in detail each option for connecting equipment. And we’ll look at options for what to do with connecting a VCR to a modern connection.
Classic RCA connection
RCA cable or tulips are a classic option for connecting vintage equipment. In modern equipment, such connectors are also available, but are rarely used. New “flat” TVs often do not have inputs for tulips. Therefore, you will have to choose a different connection method or buy an adapter.
You can connect the video recorder to the TV via tulips (RCA) like this:
- The yellow connector is inserted at one end into the Video OUT port on the VCR itself, and at the other end into Video 1 or 2 on the TV panel. Typically the connectors are the same color as the plugs to make wiring easier.
- The white and red connectors need to be placed in the audio inputs - these are cables for audio signals.
- Connect the radio to the network and use the Play button. Turn on TV.
- Find the broadcast source in the TV menu - AV and switch to it.
- If the connection is correct, the video menu will be displayed.
In some TV versions there may be not three inputs, but as many as 9. This is done for the layout of color channels. In this option, you need to focus on the colors of the tulip and the designations on the OUT-IN panel of the TV.
Connection via SCART
A more modern way to connect video equipment and TV. This is an alternative to RCA ports. Moreover, via SCART you can achieve video and audio transmission without loss of quality. But new TVs may not have such a port, then an adapter will be required.
There are no difficulties with this connection: one end of the wire is inserted into the corresponding sized connector on vintage equipment, the other - on the TV. Then both devices turn on. And the AV signal source is located in the TV menu.
Application of coaxial cable
Coaxial or antenna cable fits most modern TVs. To connect the video recorder through it, just follow the simple instructions:
- Insert the cable into the video equipment connector marked RF/COAX Out.
- Connect the other end of the wire to the TV in the RF/COAX In connector.
- Turn on the equipment. On the VCR, press the Play key.
- Using the TV remote control, start searching for channels. When the video frequency is detected, save it under a specific channel number. Through it you can turn on the tape recorder again without a new connection.
- Watch the selected videotape.
The only difference from previous methods is that you need to find a channel that shows video from a tape recorder connected via an antenna wire. At the same time, other TV programs, if they are broadcast via a digital signal via an HDMI cable, will not be interrupted. But you will have to switch from HDMI to TV or another signal source where the VCR will be picked up.
How not to knock down the antenna when connecting a VCR
Broadcasting digital television is also possible via coaxial cable in an apartment or private house. They come from a satellite dish or a common wire in the entrance of a high-rise building. And so that you don’t have to pull out the antenna and insert the cable from the VCR, you can do the following:
- Buy or install an attachment that will act as an adapter.
- Purchase two sets of RCA cables and one coaxial cable.
- Connect the Cable Out ports on the set-top box to the RF In on the video equipment using a coaxial cable.
- Connect one tulip to the ports on the set-top box Audio Out and Video Out and to the inputs on the video recorder Video In, Audio In.
- Include the second set of tulips in the VCR and TV (Video In or 1).
- Turn on the equipment and check its functionality.
Such a parallel connection will allow you to quickly switch between the video camera and the antenna signal, but will significantly reduce the quality of the broadcast. A modern solution is to connect digital television and additional equipment separately, using different wires.
How to connect a VCR to a computer to digitize videotapes?
How to connect a VCR to a computer.
More recently, a VCR was the only means for viewing various videos, home and wedding recordings at home. Video taken while traveling. Or, if you just needed to play a cartoon for your children. Such gadgets of the past were very convenient, since they had the opportunity not only to watch a video like on a TV, but also to review the moments you liked by using rewind.
But on video cassettes, which contain the video we need, there is a viewing limit. It's somewhere (may vary). Then, the clarity of the video recording begins to decrease and the quality drops. Also, the cassette itself may become damaged. For example, in the best case, it just breaks (then it can be sealed). Or, the tape recorder may jam it, which is much worse. Also, the cassette may become demagnetized.
From here, it becomes clear that to preserve your recording, it is better to copy it onto a DVD disc or a regular flash card. Of course, this can only be done through a computer.
Methods for connecting a VCR to a computer
Of course, before transferring a recording like this, you first need to simply connect the VCR to the PC. Let's look at methods of such connection.
TV tuner . At one time, many carefully chose this device for watching TV channels on a computer. Can you imagine how cool it was to watch TV through a computer 17 years ago! Yes, that was something! Interestingly, at the moment the tuner can also serve as an excellent service if, thanks to it, you can dub video from a cassette onto a PC!
If you removed the tuner from the computer, connect it to the motherboard in a free slot. Next, do not forget to add drivers from it via the DVD that came with it (the photo clearly shows: 1 - analog antenna input, 2 - video tulip, 3 - S-Video, 4 - Audio input).
To do this, carefully look at your tuner from the connectors side. We are interested in connectors for audio and video inputs. The so-called tulips. Similar connectors for tulips should be on the VCR. You won't get confused by them. Red tulip, connect to the red input in the tuner and tape recorder. White with white.
Video card . Also, a very simple method of connecting a computer to a video recorder. Look at all the connectors on the back panel of the SB, and if there are inputs from tulips (usually they are located on the video card or tuner), you are very lucky, you do not need to purchase additional equipment. This is an RCA card. We purchase a cord from tulips and further, as in the first option. White to white, etc. If you have a sound card, connect an audio tulip to it (in the photo there is a video card with a yellow tulip video input).
It happens that the VCR itself does not have inputs for tulips. But there must be an input for the spider (a special input for connecting to a rectangular TV). In this case, we purchase an adapter from the spider to the tulips.
S-Video . There may not be connectors for tulips on the back panel of the video card. In such a case, look at exactly what inputs there are and purchase an adapter for your video card.
In any case, you need to look at what inputs the video card has in the instructions, and it will become clear to you which adapter you need, and whether you need it at all. Also, advice: consult a specialist at a computer store. In the picture, the HDMI adapter with tulips fits perfectly with the video card above. Although, it was possible to take VGA with tulips.
If you have a sound card, connect the audio input to it. If there is no video card (you have a simple video card that is located on the motherboard), then read on.
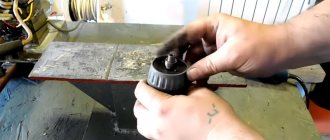
Video capture card . Also a simple method for connecting a PC to a tape recorder. It can be purchased separately and inserted into the system unit, connecting it to the motherboard through a free slot. Of course, you need to know what this PC node looks like. This can be easily found out in Yandex Images. Next, we remove the cover from the system unit and carefully examine whether it is there or not. If you yourself are afraid to get involved with computer hardware, ask a specialist to do it.
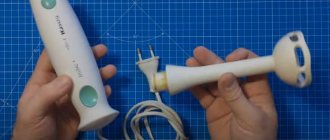
The second life of a VCR
The goal was to create a small multimedia center for watching downloaded movies. I had an old unnecessary VCR at hand and I decided to give it a second life. I worked a little on its appearance, completely replaced its insides with new components, and the VCR was reborn again.
I just want to add that for greater functionality I added a circuit for automatically turning on and off the network, like the computer itself? and the equipment connected to it, amplifier, external hard drives, and so on. All this connects to sockets on the rear panel of the center. A DVD drive was not initially provided because it was unnecessary. I watch downloaded movies from external hard drives.
This is how the old VCR, after many years, again took its place of honor next to the TV.
8 Replies to “The second life of a VCR”
What is the socket for?
Cool stuff came out. I need to make one for myself, I have an old radio from the 60s lying around...
Yes, three buttons work. Two for starting the computer and one for rebooting.
The temperature inside the case does not exceed 35 degrees.
Do the buttons on the face work?
Doesn't he suffer from overheating in such cramped conditions?
original)) and doesn’t take up much space!
Good job! I was especially pleased with the rear strap. The most tedious part was probably drilling holes for ventilation by hand!