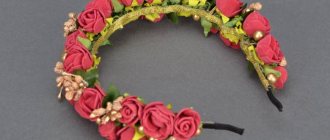
The popularity of hair bands is at its peak. Here fantasy has no limits. Any needlewoman who has the skills of weaving kanzashi, or who wants to acquire them, will find new ideas for all occasions in this master class on creating kanzashi headbands. So, how can you decorate your head using kanzashi skills? Of course, the most popular are headbands with flowers. To create such an ultra-fashionable thing, first get the basics. To do this, simply purchase a headband or hoop. A bandage would also look good. Next, decide for yourself whether to leave the hoop in its natural form (choose it without decorations, plain), or braid it with two or more ribbons. The bandage can also be purchased or made with your own hands. Today's lessons will clearly demonstrate the creation of a base for hairbands.
Braiding the headband with two or more ribbons
To braid a headband with your own hands you will need the following materials:
- based on a simple black hoop;
- scissors;
- lighter;
- glue "Moment";
- two hairpins;
- Two colors of satin ribbons are enough, we settled on white and pink, take one and a half times less of the latter.
We start the kanzashi headband by crossing the ribbons at its very edge and secure them with a hairpin, as shown in the photo. Wrap first a pink and then a white ribbon around the base. Repeat these steps alternately until the very end of the rim. Then cut off the excess from the short tape, singe the edge, and glue it well. The remaining long tip of the white tape needs to be wrapped around the base, as in the photo, glued and singed. Do the same with the second side, which is secured with a hairpin. You can decorate such hairbands with any colors that you already know how to make, or you can explore new ideas and lessons. You can braid the headband not only with two, but also with any even number of ribbons, alternating their braiding.
How to quickly braid a headband. Method number 1.
The simplest and simplest way to braid a headband is with 1 ribbon. We take the tape depending on the width of the rim: the wider the rim, the wider the tape.
To work you will need:
- The headband is 2 cm wide.
- A ribbon whose width is 1.2 cm and length is 1.5 m.
- Glue gun, Moment glue, double-sided tape - any of your choice.
- Clothes pins.
Place a drop of glue on the end of the tape and press the tape to the rim. Carefully apply glue along the outer surface of the rim. Next, I wrap the rim with tape at an angle, trying not to “climb” onto the previous moment.
At the end of the rim, carefully glue the tape inside. We cut off the end. After wrapping the ribbon around the headband, press it on top with a clothespin and leave it like that for 1 hour. Then we remove the clothespins. In this way you can braid a headband for September 1st and for any holiday. There are a lot of options for further decoration of the kanzashi headband. You just need to choose ribbons, lace, felt, organza, beads, and so on that match the color. And choose 1 or several types of colors.
Weaving ribbon headbands
As mentioned above, a hoop or headband can be used as a basis, the weaving of which is easy even for novice needlewomen. This MK will clearly demonstrate the ease of this process. This children's headband will be an excellent basis for an adult decoration made of satin ribbons. Weaving this base is similar to the process of creating fecheneks. You can easily find photo and video lessons on our website.
Read
Master class on kanzashi technique for beginners
The process is easy to learn for beginning crafters.
As a base, choose two satin ribbons, the colors of which will contrast with each other;- Fold each ribbon 10 centimeters from the edge, fold it crosswise towards each other and wrap one of them over the other;
- Pull the free end into the resulting loop and tighten the knot, holding the ribbon that you pulled out;
- Repeat the knot formation process with a different color of satin ribbon;
- Thus, you weave with your own hands until the length of the headband matches and wraps around your head.
- The weaving will be completed by processing the edges of the bandage; to do this, trim off the excess, first tying knots, then be sure to finish the edge with a lighter.
- Connect the ends of the bandage using an elastic band of the same color; if you can’t find one, then braid it with your own hands with the ribbons from which the base is made (as in the previous MK) or simply sew it around it.
You will find this weaving and its step-by-step process in the photo materials of this MK.
Fairytale decoration in the form of a snowflake
When the base is selected, kanzashi headbands can take on a finished look with the help of the final decorative touches. In the midst of the holiday celebrations, a child's dream will undoubtedly be delighted to have a magnificent, fairy-tale snowflake in her hair. The master class on creating such decoration is based on adding snowflakes of any shape to any type of kanzashi base. All this splendor is easily and simply created with your own hands, using photo and video lessons from this MK.
The master class requires stocking up on the following materials:
- several colors of satin ribbons, the width of which is five cm;
- needle and thread;
- felt base, if you can’t find one, then any other dense fabric base with a diameter of 4.5 cm will do;
- lighter with glue.
First of all, we will cut the ribbons from which the kanzashi will be weaved into squares with sides divided by color:
- white: 5 cm - 6 pieces and 2.5 cm in the amount of 36 pieces;
- purple: 4 cm - 6 pieces and 2.5 in the amount of 24 pieces.
We turn all the squares into pointed leaves. To do this, the workpiece is folded in half diagonally, and then two more folds in half. If the bottom edge is squeezed well and treated with a lighter, a “blank” petal will come out. You can also leave the option with a hole as in the photo. Weaving a multi-color leaf involves separately folding the initial elements of different colors up to the penultimate one. Then you should fold the different pieces and roll them up one last time. In this way you can combine three or even four colors. If such a pointed blank is turned out, you will get reverse petals. All this will help, after studying one master class, to make snowflakes of various shapes, colors and sizes.
Read
Bridal bouquets made of satin ribbons, as well as other crafts using the kanzashi technique
Next, our snowflake begins to take shape. To do this, we glue together three and five pieces of small twig blanks, and string the purple parts in the amount of 6 pieces onto a thread and pull them towards the center, forming a small flower. For a large one, pull six large white parts on a thread, glue 6 purple ones with a side of 4 cm into them, and the smallest white ones into them. All components are visible in the photo. The future snowflake, made with your own hands, will delight beginners at this stage with its ease of execution.
Now let's complete the design. Glue all the elements onto the base in this order:
- Having previously smeared it well with glue, in the center of the fabric base on which the structure will be assembled, first attach the largest flower;
- glue the three-leaf parts on the sides;
- we attach the parts for five elements in the corners of the snowflake;
- on the reverse side we secure the long eyelids by gluing a narrow tape to them (photo);
- also make two cuts on the inside and insert an elastic band or elastic band. The photo shows the front and back sides of the felt base;
- glue the base inside out to the snowflake. The resulting fastenings will attach a kanzashi snowflake to a hairpin or decorate a hoop;
- The master class ends with gluing a small kanzashi flower and beads in color.
Children's beautiful hairpin or hoop “Snowflake” is ready!
DIY kanzashi decorations
Making a “kanzashi” headband using a master class is not at all as difficult as it seems at first glance. The first step is to prepare the base. You need to braid it with satin ribbons so that it blends harmoniously with the flower decorating it.
There are quite a few ways to braid a headband with ribbons. One of them is the “pigtail”.
To do this, use both narrow tapes. Burn the edges with a lighter to prevent them from fraying, and make a small loop at the beginning of both ribbons. Secure with glue. Now thread one loop through the other (the green ribbon is threaded through the yellow). On the yellow one, make a loop again (no need to secure it with glue this time) and thread it into a loose loop of a different color. Tighten them and continue threading loops, alternating colors.
You should get a checkerboard stripe.
When the required length of the braid is reached, it needs to be glued to the base. The ends of the ribbons are cut, burned and secured with glue so that the product does not unravel. After cleaning the surface of the headband with a file, apply glue and carefully connect the pigtail to the base.
You can leave the headband as is, which also looks pretty good, or you can continue decorating it.
Now let's move on to the most difficult and most exciting process. This is the making of a kanzashi flower. For one flower you will need 8 squares of thick satin ribbon (for example, if its width is 5 cm, then the squares will be 5 x 5 centimeters). We carefully and carefully process the edges using a lighter. In further steps, the kanzashi technique is somewhat similar to another Japanese traditional art form - origami. But the essence of origami is folding paper, and satin is used for kanzashi.
Amazing headbands with roses
Headbands with flowers are at the peak of popularity now. Wreaths, ribbons, and poppies made in the Ukrainian style undoubtedly also occupy a leading position, but the next master class will talk about them. Now we will learn how to make kanzashi headbands with rows of beautiful, unfading roses with our own hands.
We would like to provide you with some excellent video material. A fairly simple way to decorate a headband with roses, but no less effective. See for yourself that the effect of living roses does not go away. I want to admire the wreath again and again. At the same time, it can be stylized in any color scheme.
Read
White daisy made from ribbons in kanzashi style
Decorating flower headbands with roses is very simple. Let's start the master class. Stock up on red satin ribbon. Width 2.5 cm, length about 45 cm. Exactly at this mark, bend the tape the first time, forming an angle of 90 degrees. Then we bend the tape one by one, as is done in the video. As soon as the short edge of the tape ends, connect the ends together and release the structure. Then, holding the short edge near the main one, tighten the structure until rose buds form. Trim off the excess and scorch the edge over the fire. You sew it with thread so that the structure holds and does not fall apart. Carefully note the puncture sites that are clearly visible in the video. Repeat the process of forming rose buds as many times as your idea requires. The size of the bud can be changed. Just take a wider ribbon or make more folds. Next, decorate your hair headbands with the resulting roses. Place larger specimens in the center, and attach small roses to the edges. Add kanzashi petals or leaves to this. Vary colors, sizes, material quality, add stones, pearls or rhinestones to headbands with flowers and roses. Each piece of jewelry will become a unique, unique work of art, made with your own hands.
Braiding method number 3
Next, we will braid the rim with two ribbons. This is also a simple and quick way to braid with ribbons. Despite the fact that there are many master classes on this topic online, it is often not possible to really understand the weaving pattern itself. We hope that our master class is more understandable. Take a narrow metal hoop 0.5 cm wide.
To work you will need:
- Metal rim 0.5 cm wide.
- Ribbon of any color, 0.6 cm wide, 1.5 m long.
- Glue gun or Moment glue.
- Lighter.
- Scissors.
Wreaths in Ukrainian style
Hairbands in the Ukrainian style are not only popular, but will also come in handy at any celebration or festive event. Therefore, we will give a video of MK on creating the most typical wreath of a Slavic beauty using the kanzashi technique. The main difference of the Ukrainian wreath is the presence of wild flowers of poppy, chamomile, and cornflower. The weaving of each of them is revealed in great detail in the MK video material in the kanzashi style. All work begins with the design of the hairband using green ribbon. Weaving is performed using the technology of braiding the base with two ribbons, which is described in detail at the beginning of this lesson. Then the process of creating each flower begins. Then the correct format for attaching all kanzashi elements to the base is shown. Headbands with flowers in the Ukrainian style will become your trump card and pearl in your handicraft collection.


