Using things made with your own hands is always doubly pleasant. Especially if this thing is made taking into account individual requirements for it. And even if we are talking about such a simple item as a DIY wooden kitchen cutting board. It would seem that take any sanded board or piece of plywood and use it - what difference does it make what you use to cut bread or meat? But the daily routine of cooking becomes less burdensome when you do it using beautiful and convenient tools.
DIY wooden cutting board
And the cutting board is not as simple as it seems. And one is usually not enough; you need at least three for different products. Therefore, many will be interested in learning about the features of choosing and making it yourself.
The history of the origin of the cutting board
Original wooden cutting boards
Selection of material for manufacturing
We sweep away plastic, ceramics and glass immediately. And not only because these materials are difficult to process manually. But also because of their high hardness and negative impact on the knife blade, which quickly becomes dull when in contact with such surfaces.
Cutting board materials
Let's focus on wood, as a natural, beautiful and pliable material, most suitable for our purpose.
Dimensions and shape
The dimensions of the wooden block are also of great importance. They are determined based on the required dimensions of the finished product, taking into account the method of its manufacture and waste from trimming.
The dimensions of the board, in turn, depend on its purpose. If a small board is enough for cutting cheese or fruit, then for cutting meat it should not only be large, but also thick enough to withstand the blows of a kitchen hatchet.
Cutting board for chopping meat
Cutting board for cutting baguettes
However, you should also take into account the dimensions of the kitchen workplace. A large board will be of little use if it simply does not fit on the countertop between the stove and the sink, for example.
The cutting board must match the dimensions of the countertop on which food is cut.
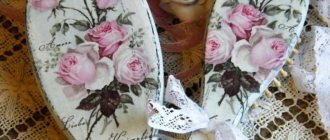
This applies not only to products for working purposes, but also for decorative purposes. After all, quite often they are made exclusively as decoration for the kitchen interior, and not for their intended purpose. Decorated with carvings, paintings or appliques, such accessories are an integral part of kitchens in a rustic or Provencal style.
Decorative carved cutting board
Wood painting
The dimensions and shape of the board should be such that it is convenient not only to use, but also to store. For example, when storing in a hanging position, a hole must be provided. It can be located in the middle or in the corner of a rectangular product or in the center of a long handle.
Storing cutting boards
Cutting board storage stand
The golf course has many surprises in store. Holes are hidden somewhere, kitchen knives are hidden somewhere
If the product will be used not only for cutting and cutting food, but also for serving, it is worth giving it a non-standard shape.
Cutting boards for the sink
Types of wooden boards by manufacturing method
Based on manufacturing technology, these kitchen accessories are divided into solid and glued. The first ones are cut according to a template from a single piece of wood (a wide board or a cross-section of wood) and processed.
Solid wood cutting board
Puzzle cutting boards
Glued boards can be assembled from longitudinal bars, end cuts or various shapes like puzzles or mosaics. They are more durable and practical, as they are less susceptible to internal stress and deformation.
Glued end cutting boards
For reference! Particularly valued are the so-called end boards, in which the wood fibers are located not along the working surface, but perpendicular to it. When cutting, the knife blade does not bump into hard fibers, but seems to fall between them, so it remains sharp longer and requires sharpening less often.
History of the invention of the drawing board
At one time, these devices were manufactured by a German company, which, like the device itself, inherited the name from its inventor and founder Franz Kuhlmann. Although there is another (admittedly erroneous) version that this drawing device was invented by another German engineer Karl Kuhlmann. So, having invented this graphic tool, which includes a drawing board, a pantograph - a metal parallelogram frame with movable articulated joints and a lamp mounted on a bracket, Franz Kuhlmann founded, which began to produce these products for the whole world. Until personal computers appeared and computer-aided design (CAD) programs were created for them, the drawing board for drawing had no alternative - it was the main working tool for an army of draftsmen, designers and design engineers.
Drawing board device
It is unlikely that anyone would think of making a drawing board with their own hands, since it is much more difficult than making an easel. Despite its bulkiness, the drawing board is a fairly accurate mechanical device that allows you to draw straight lines of arbitrary length and at arbitrary angles in the plane of the board. The device could have two options for a movable frame:
A goniometric (dividing) head was attached to a parallelogram or one of the carriages, from which two scale rulers emanated at an angle of 90 degrees. The rulers were usually marked on different scales, and they themselves were of unequal length: the vertical one had a length of 300 mm, and the horizontal one had a length of 500 mm. Rulers were made of metal-reinforced transparent plastic or thin-walled steel profile. The accuracy of the goniometer head was 5′, and its position could be fixed in any position. Both forward and backward reference scales were used simultaneously. Using a device for displacing the head, projections were constructed at an angle. The device has a brake that fixes the position of the head. The head can be rotated perpendicular to the plane of the board. The installation of a printing device, hatching devices, tools for adjusting rulers, etc. was provided.
DIY making
Below are examples of how to make wooden cutting boards yourself.
Solid boards
First you need to choose the size and shape of the board. If it has a complex configuration, you will need a paper template, drawn to a real scale by hand or in a computer program, and then printed on a printer. It’s easy to transfer it to the board by cutting it out and tracing the outline with a pencil.
Transferring the template to the board
Advice! If the product has a symmetrical shape relative to the axis, it is enough to draw half of the figure on a sheet folded in half, and then cut it out, using scissors to grab both layers of paper.
In addition to the wooden blank itself, you need to buy beeswax and oil to impregnate the board. It will give the wood a more pronounced texture and rich color and will protect it from moisture. You can use special mineral oil to impregnate countertops. But flaxseed or Vaseline bought at the pharmacy will do.
Oil
As for tools, you don’t need anything special to make a solid wood board. Of course, if you have a planer, sander and jointer, circular saw, router and jigsaw, the job will be done quickly and effortlessly. But it is quite possible to get by with a hand jigsaw and sandpaper, especially if the shape of the product is simple, without small radius elements.
If all this is available, you can get started.
Step 1. We transfer the outline of the future product onto a wooden blank and cut it out with a jigsaw or a hacksaw for metal with a fine tooth - it does not make large chips.
Sawing the workpiece
Step 2. Using sandpaper, a file or a grinder, we process the planes and ends of the board, eliminating broken chips and wood fibers and making the product smooth.
Grinding
Step 3. If you have a router, you can use it to round the edges or cut a hollow around the perimeter.
End processing with a router
Step 4. Drill a hole and process its edges.
Drilling a hole
Step 5. If this is provided for by the project, we decorate the board with carvings, paintings or other means, keeping in mind the purpose of the product. If this is an applied accessory, it is better to decorate only one side. A drawing or carved ornament is allowed on the working surface only around the perimeter or in a small area at the edge.
Wood carving
Step 6. Treatment with a protective composition. Since food comes into contact with the cutting board, it cannot be coated with varnish or other synthetic compounds. It is better to use the oils listed above to impregnate wood, applying them with a brush, sponge or piece of lint-free cloth. The number of layers depends on the absorbency of the wood. Each layer should be given time to dry and absorb, after which you should walk over the surface with the softest sandpaper. The last layer is applied with a mixture of oil and melted beeswax in a ratio of 3:1. If it is not completely absorbed, it is heated with a hairdryer and the excess is wiped off with a paper napkin.
Treatment with a protective composition
Video - Wooden cutting boards
As a starting material, you can use not only boards, but also plywood, furniture panels, and transverse cuts of wood.
Tools for work
To make a plywood board quickly and efficiently, you need to use the appropriate tools. If the work on making a kitchen product is being done for the first time, questions may arise regarding tools.
To make the simplest board you will need the following tools:
- If you think about how to cut plywood, then the ideal option would be a manual or electric jigsaw.
- To form the holes you will need a drill with a set of wood drill bits.
- A set of sandpaper with different degrees of grain.
- Sander.
- Milling machine.
- Rasp.
The set of tools for decorative finishing depends on how and with what the product will be decorated.