Today, with time constantly freed up due to increased technology, more and more people prefer to do everything with their own hands.
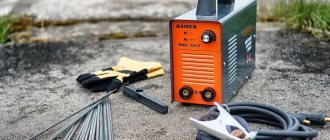
Today we will talk about how to make a welding machine with your own hands. Yes, it is possible to buy ready-made. But it’s much more interesting to create an inverter welding machine with your own hands. This will provide significant savings.
Types of welding
First you need to understand what kind of welding we are making the machine for. The following types of welding are distinguished:
- Electric arc;
- Microarc;
- Point pulse (contact);
- Gas.
Arc welding
It uses an industrial frequency of 50-60 hertz, as well as a direct current of 200 amperes. You can weld a fence, garage and other fairly serious structures.
Micro arc welding
Used when laying wiring, as well as when repairing it.
Spot pulse or resistance welding
Used in the manufacture of products from thin steel sheets.
Gas welding
It is such a serious process that there is no point in making such a device at home. It's easier and cheaper to buy it. Moreover, it is impossible to make gas cylinders for it at home.
Making a gas generator at home is dangerous; if something goes wrong, an explosion may occur.
Obtaining a Voltaic Arc
For small welding work, a transformer of 200-300 watts or more with an output voltage of 30-50 volts is suitable. The welding current, in this case, will be limited by the power of the transformer and can reach 10-12 Amperes. But, since the arc burning process itself does not last long, this cannot lead to overheating of the transformer, even with a saturated magnetic circuit.
You can read about how to change the output voltage of a transformer here>>>
You can also use a laboratory autotransformer - LATR for 9 Amps or more. But, do this only if you are aware of the danger of lack of galvanic isolation from the electrical network. Also, when using LATR, it is advisable to limit the input current with a fuse (fuse link) so as not to damage the graphite roller current collector of the LATR in case of an accidental short circuit in the electrode circuit.
Almost any leads from simple pencils can be used as electrodes, although soft ones are preferable. Surely many people still have simple pencils that are unnecessary in the age of universal computerization.
A stylus holder can be made from any available materials. It is very convenient to use the metal part of electrical terminal blocks (terminals).
Here is a holder assembled on the basis of the above-mentioned terminal block. One threaded hole in the brass part of the terminal is used to attach the lead, and the other is used to attach to the handle.
Fiberglass washers pos. 2 were used in large quantities to ensure that the terminal block pos. 1, when heated, did not melt the body of the disposable syringe pos. 3. I just couldn’t find another, more heat-resistant part for the electrode holder handle. In order for the electrode holder to be connected to any standard cable (end), I used a standard device socket, pos. 4.
The electrode holder is connected to one terminal of the secondary winding of the step-down transformer, and the part or parts being welded is connected to the other terminal of the secondary winding.
And this is another electrode holder also assembled on the basis of an electrical terminal. The second holder comes in handy when you need to weld two metals with the same melting point. It may also be needed when you need to heat up some metal part, for example, when hardening a tool or changing the shape of a spring.
Diagram for connecting two graphite electrodes to the secondary winding of a step-down transformer.
To prevent the bright light of a voltaic arc from causing a burn to the cornea of the eyes, you need to use a protective filter. The same filter will protect your eyes from sparks. I bought a light filter at the Everything for Repair store for only $0.5. Instead of a welding shield, I used the frame of binocular glasses, from which I removed the lenses. The filter was secured with a stationery clip, having previously laid a piece of cotton tape. Probably, such glasses will be found in the arsenal of a modern radio amateur who is familiar with SMD components.
You should not use dark glasses to observe the Voltaic Arc, especially since the density of their light filters is insufficient. It is much safer to use the proposed shield, which will protect your eyes by simply tilting your head.
To weld copper with steel or nichrome, it is advisable to use flux. It can be made by adding a small amount of water to borax (sodium tetraborate) or boric acid. The resulting slurry can be used to lubricate welding areas.
Minerals for making flux can be purchased at a hardware store or pharmacy. A long time ago I bought a box of boric acid as an insect repellent called Borax.
How to quickly make a simple welding machine
You need to find a step-down transformer in your household. Power - 1 or 2 kW. If you find it, then the process was a success! The fact is that it is capable of lowering the voltage and serving to power a DC welding machine.
Even if the winding of your transformer has already completely failed, this does not mean that nothing will work. You can still build a working simple welding machine!
Prologue
The first time I built such a welding machine was as a child, after I visited the set of a feature film where electric arc spotlights were used for lighting.
Fortunately, we had a two hundred watt autotransformer at home, which was used to adjust the supply voltage of a tube TV.
The circuit of this autotransformer looked something like this. Switching the output voltage was carried out by rearranging the TV plug in several sockets.
So, I connected graphite electrodes between the terminals, at which there was a voltage of about 40 volts. I used a piece of exposed and developed photographic film as a filter. True, due to inexperience, then I still picked up the “bunnies”.
It should be noted that the autotransformer does not provide galvanic isolation from the electrical network, so it is recommended to use it only if you are familiar with the basics of electrical safety.
Many years have passed since then, but I have successfully used that first experience in solving a wide variety of problems, from welding wires to hardening the working parts of tools.
Toroidal apparatus
It is much lighter than usual. It is convenient to carry. Such devices are used where the ability to quickly transport is important.
Whatever device you choose, in any case, make it yourself:
- Interesting;
- Practical;
- Economical.
And, of course, it’s always nice to show a homemade welding machine to your friends. It will become a source of pride and an indispensable assistant in the household.
Repairing a welding machine with your own hands is also quite exciting.
Advantages of industrial designs
Considering that welding work is classified as complex and responsible, the presence of additional accessories and items intended for mobile carrying or long-term storage plays an important role in this. The advantages of industrial designs are as follows:
- The front part of the box body, bottom and back wall are made of a metal base.
- The side walls, as well as the closed part of the top in the form of a lid, are made of impact-resistant plastic with a suitable varnish coating.
- The service life is at least 5 years.
- The movable tray mechanism, as well as the built-in organizer components, are used to accommodate basic accessories and additional spare parts for inverter equipment.
- Universal and strong locks made of chromed metal add not only aesthetics, but also reliably protect the drawer from intentional opening.
An industrial case is more expensive than a do-it-yourself welding inverter box, but at the same time, you can use this device as a full-fledged working tool for storing and carrying a welding inverter.
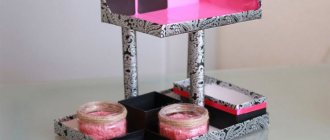
Features of self-assembly of a case for a welding inverter
To assemble a box for a welder yourself, you need to have minimal knowledge of mathematics, in particular geometry, in order to correctly cut the structure and make a useful accessory for temporary storage of inverter equipment.
Photos of do-it-yourself welding machines
What you need for a homemade design
To independently assemble a machine for welding copper wires you will need:
- A homemade or purchased transformer with a voltage on the secondary winding of 10 - 30 V, capable of delivering a current of 60 - 80 A.
- Alligator holder for fixing the electrode. Instead, you can use another one that provides reliable fastening.
- Two-core cable with a plug for connecting to an electrical outlet.
- Heat sink clamp for twisted wires.
- Welding copper conductors with a cross-section of at least 10 mm².
- Graphite or carbon electrode.