I'm developing a design
I decided to simplify the design of the board as much as possible and use only materials available at my local hardware store. The choice settled on polystyrene foam for filling and plywood for the body. The materials are very light, buoyant and cheap.
Also, in order not to come up with ways to bend the plywood to the desired shape, I decided to make the board flat.
Plywood is 6 mm thick, and polystyrene foam is 70 mm. I decided to combine everything in the form of a sandwich. In the middle of the polystyrene foam I decided to add a plywood rib to strengthen the structure and a fin at the lower end for stability on the water.
Materials
Stock up on all the necessary materials and tools in advance to make it less fussy and more seamless. Try to be careful when purchasing material. The process of creating a surf sail is already quite labor-intensive. And buying missing products will only add to the hassle.
So, before you start making the board, buy the following consumables:
- two large sheets of plywood. It is necessary that the thickness of each of them reaches 4 millimeters;
- a sheet of plywood 1 centimeter thick;
- slats 20 by 20 millimeters. You will need about seven pieces;
- seven meters of thin slats;
- slats 2.5 meters long, 10 by 30 mm. You need to purchase six pieces;
- a small piece of plywood up to two millimeters thick;
- epoxy waterproof glue;
- nails;
- construction foam;
- fiberglass;
- waterproof dyes;
- metal strips;
- a small piece of brass;
- duralumin strip 4–5 mm thick.
After purchasing all these goods, you can begin the process of creating a sailing shell.
Filling voids with epoxy resin
To make the board waterproof, I decided to use epoxy resin. It is tough and durable.
Added sawdust to the mixture. They will add rigidity and increase volume to fill any voids.
After that, I poured epoxy resin into the voids. Additionally, I compressed the structure with clamps and let it dry.
How to make a windsurf with your own hands?
Windsurfing is one of the most exciting and exciting water sports. Windsurfing is a hybrid of surfing and sailing. To ride the waves, athletes use a windsurf (sometimes called a windsurfer, just like the athlete himself). This is a floating board to which a mast with a sail is attached.
You can make your own windsurfing board
This board does not have a steering wheel. The athlete learns to control the projectile by adjusting the direction of the sail and the positions of his own body.
Windsurfing is no less exciting than surfing, but less expensive than sailing boats. Moreover, you can make a windsurf for this type of active sport with your own hands at home. True, for this you must be able to handle wood well and it is advisable to know at least in theory the basics of elementary shipbuilding.
Motor surfboard
A do-it-yourself surfboard with a motor is made from simple, one might say, improvised materials:
- graphite foam;
- plywood (3-4 mm);
- polyurethane foam with adhesive effect;
- and, in fact, the engine.
Instructions for use:
- The “fish” shape is most suitable for this design. Shape the foam into the outline of a “fish”.
- Make a recess in it the size of a sealed box, where the engine and the PowerBank feeding it will be placed.
- From the box and the motor there should be a flexible shaft (from a drill, for example), to which a propeller should be attached. You can also build a steering wheel.
- We recommend using a pump motor of at least 200 watts and 2800 rpm. As already mentioned, it will be powered by a PowerBank (you can use one or a pair of batteries).
- The engine must be connected to the batteries through a waterproof switch.
This is a simple way to make a surfboard with your own hands. We hope this article gives you some inspiration to create the surf of your dreams.
fb.ru
Alexander Orlov decided to build his own SUP. After the first unsuccessful experience, he decides to start all over again, but approaching the process more thoroughly. Here's what the designer himself says:
“I sketched a sketch of the future board, taking as a basis those boards that Evgeny Rezontov advised me. Dimensions 3.4m by 0.75m. Thickness 0.11m. The shape is streamlined, symmetrical, flat. However, I noticed that many boards seem to have their aft edge cut off... Why is this done?
As for the design: it will be glued together from several layers. The top and bottom layers are 30mm polystyrene foam. Between them there is a continuous layer of 50mm polystyrene foam, the cavities in which are filled with ordinary ball foam. This is done to lighten the board, because... foam weighs 2 times less than polystyrene foam. Another option is not to fill these voids with anything at all.
Well, I plan to make the longitudinal stiffener from laminated 4mm fiberboard. All this is covered with two layers of fiberglass. The estimated weight of the board is up to 10 kg. Volume 230 liters.
My goal is some water time, plus maybe some shoulder training equipment. We are not talking about extreme skiing, catching waves, etc. Moreover, I live in central Russia on the Volga River. Therefore, I expect from the board, first of all, comfort, stability and good speed. Why did you choose this form? It’s just that it’s the easiest to make, and I don’t know what pros or cons other forms provide.
Why do I propose to use polystyrene foam? Yes, it is more expensive than foam and heavier. However, it is much stiffer and stronger. The first board, which I made too small, I managed to roll up in one layer of fiberglass and it was already rigid enough for me to jump on it. PSBS boards are much softer and are rolled into more layers of fiberglass, and the top surface is additionally veneered. All this is very labor-intensive, especially at home.”
After listening to comments and advice from other interested people, Alexander revised his drawings and slightly modified his sub, which would make it more maneuverable and improve performance on the water.
We are waiting for the continuation of this process and photographs of the finished board and its happy owner.
supsurf.ru
FAQ
When did the history of surfing begin?
In Polynesia, around the four hundredth century AD. And the first fiberglass board appeared in 1946.
What is SUP in windsurfing?
Simply put, paddle surfing. SUP windsurfing boards offer just this type of sport. Inflatable SUP boards are popular; they have many advantages and can also be done independently, although in a different way. But this is not the topic of this article.
The advice given above is to buy a used board. Won't it break the next day?
No, this is prejudice. Moreover, for such things as windsurfing boards - this is still not electrical engineering, and even in a used version they will more often serve for a very long time.
Electrofoils
Electro-Foil or eFoil is a new direction in motorsurfing that began no more than 2 years ago. And electric surfboards with hydrofoils appeared on mass sale no more than a year ago. Videos of surfers floating above the water, as if driven by an unknown force, literally blew up the Internet. more about Electro-Foils in our article.
I, as the author of this article, highly recommend that you experience these incomparable sensations of free flight over water, literally breaking the laws of gravity. You will feel incredible lightness and freedom of flight. The board responds to literally the slightest changes in body position. A feeling of movement in all planes of space. The maximum speed reaches 40 km/h.
As for the choice, at the time of writing, in the spring of 2019, we have the best boards in this segment: Flite board and Lift Foils . Only these two companies make truly worthy and proven motorsurfs with hydrofoil. All other projects and declared models remain nothing more than projects. No one has seen them live and there are serious doubts that they will even hit the market in this form and for such a price. Both of these companies have come a long way before creating their electric foils. Both models are of very high quality, beautiful and reliable, and are worthy competitors to each other. The only difference is that Lift Foils are already battle-tested boards that have received many positive reviews. And Flite is just entering the mass market, but they have a number of interesting technical features and features.
How to make it yourself
The most convenient ones to make yourself are fiberglass and epoxy surfboards.
To do this, you will need a polyurethane foam mold, polyurethane resin and fiberglass (first option) or EPS resin and a polystyrene foam blank (second option). In both cases, you will need a long wooden plank - the future stringer, thanks to which the surfboard gains rigidity.
We make them with our own hands like this:
- Cut the workpiece in half and insert the stringer strip.
- Give the board a shape - the shape you need, which will influence the “character” of your board. At this stage, the length, width, thickness of the board, its type, the shape of its deck and bottom, rails, tail and nose are determined. A DIY surfboard is made according to the contours of wooden patterns. It is shaped with a saw, sandpaper and a plane.
- Write the size on the already formed board and leave your signature - this is the tradition.
- Mark the spots for the fins and paint your creation.
- Place fiberglass over the design and begin the final stage - lamination. This is a uniform application of resin with a spatula over the entire surface of the board. After it dries, drill holes for the fins and fins.
- Polish the surfboard with sandpaper, removing any remaining resin, cover it with a glossy resin coating and leave it to dry for a day.
All! DIY surfboard made.
SUP boarding in Russia
As already noted, for a real SUP boarder, even small ripples are not a reason to cancel training. But it is obvious that all SUP lovers, like surfers, dream of getting into M
surfing's ecca is in Hawaii, where every native has his own board. The California coast and the island of Bali are also excellent options. In Russia, SUP boarding has so far received the greatest recognition in St. Petersburg and the Krasnodar Territory, where the most famous domestic fans of the discipline live, and here you can comfortably rent a SUP board. For example, one of the SUP board rentals operates on the shore of Lake Lakhtinskoye, where, by the way, you can try it out right away.
The city on the Neva hosts the main Russian competitions among SUP boarders. In general, the first SUP boarding competition in Russia with the support of the Russian Surfing Federation took place in 2011. The Baltic SUP Cup is held annually in June, the “Autumn Marathon” is held in September near Vybor.
Thanks to the SUPsurf.ru website team for their help in preparing the material.
My friends started this hobby a few years ago with some rope and an old wardrobe door. They've come a long way since then. At first there was only a rope attached to the bridge and a handle on the board.
This allowed for nothing more than to stand on a board that scours from side to side along the river.
The next step was to use two ropes - one for the board and one to hold on to, allowing for turns.
But it was dangerous, the rope could get tangled around your feet and if you fell into the water, it would be better if someone ended up with a knife on the bridge.
I almost drowned one day, realized something needed to change, and decided that an ankle leash was the best option. Because when you fall into the water, you simply let go of the handle and swim to the shore.
This is my third DIY surfboard, the first one was too small, the second one worked great, but didn’t last long without reinforcing fibers.
This is the pinnacle of DIY surfboard technology, and you'll see it for yourself!
Step 1: What you need
How surfboards are made, their structure and design
Modern boards use a rigid polyurethane or polystyrene foam core coated with fiberglass and resins. If a stringer is involved in the design, it is made of mahogany, linden or spruce. The fins are made of wood or several layers of fiberglass and resin.
Shapers (those people who make surfboards) are constantly experimenting with board designs. Most surfboards these days are handcrafted. Each design, each form is, as a rule, an individual development of a single shaper. Over the past 4 decades, boards have become shorter, then longer, and then shorter again. Two fins replaced one, and these, in turn, were replaced by three fins. And today, shapers continue to experiment with surfboard design, as they make surfboards better and better each time, trying to invent “the one.” For example, some pro surfers use five to ten boards, depending on their riding style or the type of wave at a particular spot.
Sail
The sail is the engine of your surf. Therefore, it is advisable not to save on it. Don't skimp and buy this part in the store.
However, if you decide to create this part of the projectile with your own hands, do it carefully and carefully.
Material
Choose a synthetic material with minimal ventilation. It will not gain much weight when wet and will cope well with the role of a “tractor”.
Dacron is ideal. You can also use a thin tarp.
For loyal riding conditions, you can choose jacket and raincoat fabrics, as well as cotton materials. But when using them, remember the need for additional reinforcement. False seams will help you with this.
Making a windsurf boom
For our board we will make a whishbon or double boom. This boom is glued together from ten by thirty millimeter slats. The slats that you will use must be carefully folded in the tsulag, precisely adjusted and the slats tightly pressed against each other. After this, sand the areas that will be glued together. Next, the slats are lubricated with glue and pressed together in the tsulag.
The final touch will be bending the front frame of the boom made of duralumin, the thickness of which will not exceed five millimeters. A regular steel strip up to three millimeters thick will also work.
Mast
A do-it-yourself mast can be made from long slats. In principle, they can be replaced with a duralumin tube.
When creating a mast from slats, they need to be glued together according to the drawings presented in Figure 1 and processed.
After manufacturing, the mast must be tested for strength. If the device turns out to be too flexible, coat it with epoxy glue and cover it with one layer of fiberglass. This should increase the elasticity of the product.
The mast must be coated with water-repellent varnish.
Make flats on its thick ends. Each will have a hinge attached. You can see its device in Figure 2.
The hinge cube is made of brass, and the metal parts are made of metal strips, the thickness of which is 2–4 millimeters.
10 by 30 millimeter slats are also useful for it. They need to be laid on the tsulaga and precisely adjusted to one another. After this, the surface of the slats must be sanded with sandpaper and coated with glue. Now they can be clamped with tsulaga.
The outer frame must be made from prepared duralumin.
Frame
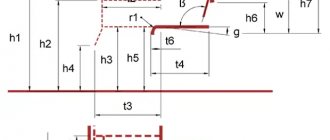
The first step is to make a board - the body of the product. You can see the dimensions of its parts and the principle of their relationship below in Figure 1.
Keelsons
When making a surf with your own hands, we take plywood and cut two keelsons. They can be made using a regular saw. For convenience, first draw the outlines of one keelson and cut it out, and make the second board in the image and likeness of the first.
The keelsons need to be connected along the contour. This is done using slats. Don't forget that the product will have a mast. Leave room for her. The future level of controllability of the surf depends on how you secure the mast and centerboard.
When creating the board, be sure to cut small holes in the keelsons. This will help the device ventilate in the future.
Most likely, the sheets of plywood you purchased will not be long enough to create a solid structure. But the board can be glued together. Use a rasp to process the parts to be glued. The gluing areas need to be processed so that they become rough (this will increase the level of adhesion). After this, grease the edges of the board with epoxy glue and connect the sheets of plywood. A rod can be inserted between them to determine the internal height of the projectile. Overlapping areas of the plywood structure must be nailed down. When the workpiece dries, the sharp tips of the nails will need to be bitten off. The lath is also removed when dry.
Deck and bottom
You can also make them yourself. This is done according to the drawings. These cut parts must first be glued to the keelson and then secured with nails. Please ensure that the fastenings are located from each other at a distance not exceeding thirty centimeters.
The sides need to be filled with construction foam. In the worst case, you can use the packaging form of this material.
Lubricate the foam with epoxy to secure it. Glue must be applied to each piece. After this, the material should “look” behind the board by half a centimeter.
When the glue dries, you will need to give the foam an oval shape. This is easy to do with sandpaper.
The resulting structure must be “packed” in fiberglass. You can use a wood stapler for this.
Holes
After upholstery, it is necessary to prepare holes in the places to which the fin, steps and centerboard will be attached.
Painting
Now you can give the device the desired appearance by painting the board with waterproof paint. If you saturate the plywood with drying oil after painting, it will last longer.
Cralusso Surf floats
Articles Float fishing Cralusso Surf floats
Hungarian floats for fishing on rivers with wiring. The Hungarians have developed a flat float that holds perfectly under the surface of the water while holding the gear in the current - it does not “go out” of the stream. However, Hungarian developers went even further. We came up with a float that, when held, floats away from the shore! It is intended primarily for fishing with a Bolognese fishing rod.
"Cralusso Surf"
— surf float for the current.
You will be able to fish successfully using the revolutionary new technology of the Cralusso Surf
because:
- the float can be held, stopped, and retrieved against the current over the baited area without re-casting;
- due to the fact that the float can move in all directions, even against the current, you will be able to fish only baited areas or avoid underwater obstacles;
- When configured correctly, the pressure does not lift the float body out of the water, only the float antenna is visible;
- The float body does not get wet even if the float surface is damaged.
This float is designed for use with plug-in and telescopic fishing rods and is suitable for catching predatory fish, incl. onto twister or pieces of fish. The float body does not absorb water if damaged. Cralusso Surf floats
can be successfully used for fishing with flies and nymphs and with bait (spinners and rubber) in the current and keep them there.
Individual packaging contains:
- float body - 1 pc.
- for left current - unmarked keel and antenna - 1 pair
- for right flow - marked keel and antenna - 1 pair
- 3 interchangeable antenna attachments
- 1 waterproof silicone cambric tube (can be cut into 4 pieces of 8 mm each.
Review
Using revolutionary new technology, the Cralusso Surf
makes river fishing much easier than it was before. After all, that old lollipop float forced you to move around and you had to have an extremely rigid and balanced plug or telescopic rod to control it, with the Cralusso Surf float you can use any rod on the market and achieve the same results for bait demonstrations. This also eliminates decoys during slow swimming.
Cralusso Surf floats
can glide against the flow and can swim from the bank to the middle of the river!
The results achieved and the opinions of familiar fishing friends prove that we are on the right path, and this gives us strength to carry out more and more new improvements.
Cralusso Surf floats
Available in the following load capacities:
3 - 4 - 6 - 8 - 10 - 12 - 15 - 20 gr
.
Float assembly
For left flow
- Take the body of the float in your hand so that you see the inscription “Cralusso” upside down, and the number of grams is on your left side!
- Install the unmarked upper part - on the antenna holder (in short) from the side looking at you
- Install the unmarked lower part (longer) - the keel, which points in the opposite direction from the upper part!
- The antenna must be installed and rotated at an angle of 45 degrees (according to the picture)!
For right flow
- Take the body of the float in your hand so that you see the inscription “Cralusso” in the normal position, and the number of grams is on your right side!
- Install the marked upper part - on the antenna holder (in short) from the side looking at you
- Install the marked lower part (longer) - the keel, which points in the opposite direction from the upper part!
- The antenna must be installed and rotated at an angle of 45 degrees (according to the picture)!
Fixation on axes:
Installation on the axle: install 4 silicone tubes, putting them on the axle and fix them on the “Cralusso” so that there is one on the upper part, and three silicone tubes on the lower keel (according to the picture)!
Loading and overloading
Starting with Cralusso Surf
, used in current fishing, this concept means what is the difference between a float driven slowly or held in one place and what will be the main difference in speed between wiring and holding in place.
As a result, the current increases the weight value for river fishing, so if you put 10g of weight in, it works as if it were only 6g and gets carried away. This is why Cralusso must be overloaded, and the overload value can be from 10 to 100% (see table).
| Current speedDepthHolding | |||
| Overload g | +10-30% | +30-60% | +60-100% |
| * (dots indicate the influence of this value) |
Overload depends on speed, water depth and retention intensity.
Boards are different
Surfs are divided into several types according to stability, maneuverability, and functionality:
- Longboards. In appearance, they resemble a small boat and are the most stable, so they are well suited for beginners, helping to maintain balance.
- Minimalibu. They are even more suitable for developing surfer skills - on a voluminous and moderately long board it is easy to feel the wave.
- Evolutiv. Suitable for surfers making progress. They perfectly combine stability and maneuverability.
- Ghana. Their element is big waves. The most functional of the entire range.
- Shortboards. Short and narrow surf for real pros. It is distinguished by its technicality and maneuverability.
