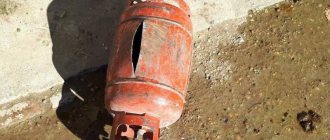
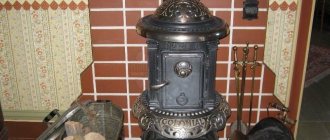
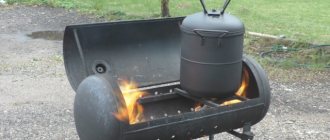
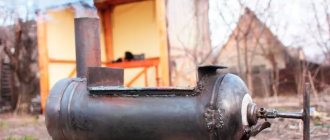
What can be made from a gas cylinder is a frequently asked question, because most people use mains gas, and many of them have unnecessary propane cylinders. Therefore, you should not rush to get rid of them, because such structures can be used to make useful items. Moreover, even a beginner can cope with such a process. Let's begin!
What can be made from a gas cylinder
Benefits of using cylinders
It should be noted the reasons why many prefer to use gas cylinders as a material for the manufacture of structures:
- Low cost. If you already have unnecessary cylinders in stock, you will not have to pay.
- Reliable material. The cylinders make durable structures that last for many years.
- Form. Since the products have a universal shape, they are suitable for making a large number of household items.
Gas cylinders are a durable material for making household items
Materials
To assemble a grill-steam locomotive with your own hands, you will need the following tools:
- electric drill with drills and nozzle for cleaning metal;
- pipe wrench;
- hammer;
- grinder with circles for stripping and cutting metal;
- chisel;
- screwdrivers for self-tapping screws;
- electrodes – 4mm;
- chalk for notes;
- spray bottle or brush for painting metal.
Materials for barbecue from a cylinder:
- clamps to secure metal;
- pipe – diameter 100 mm (for arranging a chimney);
- elbow – radius 900;
- hinges (for closing the grill lid);
- metal handles;
- fine grate;
- nuts, bolts and rivets;
- priming;
- solvent, paint;
- Scenery.
Before working on building a barbecue, it is worth remembering safety precautions. Even if the cylinder valve has been unscrewed and the gas has been released, you cannot immediately cut the metal. The pressure inside is no different from atmospheric pressure, but propane particles and condensate still remain there. You need to secure the cylinder upside down. Then the container is filled with water and left for 3-4 hours, only then the liquid can be drained and cutting can begin.
What materials and tools will be needed during the work process?
During the work you will need:
- empty gas cylinder;
- welding machine;
- drill;
- Bulgarian;
- hacksaw;
- spanners;
- fastenings;
- pliers.
Very decorative designs can be made from old cylinders
IMPORTANT! Additional materials and tools may be required, depending on the type of product that you plan to manufacture.
Prices for popular brands of portable welding machines
Portable welding machine
General design
A grill is a special portable or stationary installation for preparing various culinary dishes over an open fire. The classic form of this design is a deep metal container in which grates are installed at different levels: the bottom one is for placing coals, the second is for cooking.
The grill is equipped with a lid, but some models are made without it. The first option is more functional, as it allows you to cook in three ways:
- straight;
- indirect;
- combined.
There are three types of grill:
Classical. Connected to the mains. Grills of this type are used as additional equipment for professional and home kitchens. Operating on gas.
Options running on gas and electricity are more functional, but for country holidays many people prefer a charcoal grill.
Photo: grills of different types
A classic grill involves the use of charcoal.
For a gas grill, a small cylinder is enough.
Electric grill is convenient to use at home
Table: advantages and disadvantages of a classic grill
| pros | Minuses |
|
|
Grill briquettes are more economical
What is the difference between a grill and a barbecue?
Quite often, people do not find the differences between a grill, barbecue and barbecue. Each of the braziers has individual characteristics, despite the fact that they are used for cooking food over coals.
The barbecue has the simplest design. This device is a metal box. Food is cooked on metal skewers. Hot coals are located at the bottom of the box.
High design legs create comfort during frying
The only difference between a grill and a barbecue is that the first does not have a lid, while the second is equipped with a spit and lockable hatches for air supply.
The barbecue does not have a lid in its design
Safety precautions
Even if you are sure that the cylinder is empty, there may be residual liquefied gas at the bottom. Therefore, in order not to take risks, you need to get rid of it. To do this, leave the structure open for 12 hours. In this case, it is necessary to make sure that there are no sources of ignition nearby.
Before flushing the structure, you must unscrew the valve
After this time, it is necessary to rinse the inside of the cylinder with clean water, which will remove any remaining gas. In addition, it is allowed to use lime with water or chlorine to clean the structure. True, after such manipulations an unpleasant odor may remain, which quickly disappears.
Scope of application of oxygen cylinders
For what purpose the cylinder is intended depends on the composition of the gas:
• Technical. May contain minor amounts of impurities. The total proportion of pure oxygen is at least 99.5%. It is obtained by low-temperature rectification and water electrolysis. It is used in welding and metal cutting, soldering, energy, oil industry, chemistry and agriculture.
• Medical. The proportion of oxygen is at least 99.5%. The gas has no odor. May contain trace amounts of water vapor (0.009%) and carbon dioxide (0.01%). Obtained only by low-temperature rectification. It is used in medical, health institutions and at home to compensate for the lack of oxygen in the air.
• High purity oxygen. Maximum purified from impurities, the proportion of the substance is 99.999% of the total volume. Used in the production of electronics and measuring equipment.
The capacity of the cylinders varies: from 1 to 50 liters. The pressure can be 150-200 kgf/cm2. The company supplies oxygen cylinders of various sizes and purposes.
Gas cylinder stoves
Most often, stoves are made from a gas cylinder - such designs are suitable for heating a summer house or garage.
You can read more about garage ovens in our special article.
It is worth noting that the optimal shape for the design of the stove is a sphere, because such a product warms up quickly and does not require complex cleaning. The chamber must have two openings on each side: for placing coal, other fuel and heat release.
If you look closely, a standard gas cylinder has this shape. Since these devices are made of high-strength steel, even after working them out, I use them to create stoves and other products.
An example of a spherical furnace made from a cylinder
Preparing for the manufacturing process
In order to make the furnace body, it is necessary to select a cylinder in accordance with the following parameters:
- It should only be an all-metal structure. Composite products are not used for such purposes because they have poor resistance to temperature changes and explode under certain circumstances.
- The volume of the gas cylinder must be at least twelve liters, because stoves made from small-volume structures will be uneconomical. In such a stove, complete combustion of fuel will not be observed. For medium and small stoves, cylinders with a volume of up to 25 liters are suitable. If you need to make a massive product to heat a large room, it is recommended to take a 50-liter cylinder.
Only empty containers are allowed
You should not purchase pneumatic cylinders for such purposes, which are widely used in industry, because they are not suitable for the manufacture of products, and in particular furnaces. The reason for this is the thick metal, which will be difficult to cut. In addition, these cylinders are heavy and oblong in shape, which is not suitable.
Prices for popular drill models
Drill
Jet furnace: step-by-step instructions
The stove is also called a “rocket” - it is a complex product that is made from empty cylinders. This design makes it possible to use fuel with maximum efficiency, which is why it has earned popularity among users.
Advantages and disadvantages of the rocket stove
Step 1: First you need to prepare the following materials:
- round pipes measuring 7 and 15 centimeters, 0.4 centimeters thick;
- profile pipe with a cross section of 20 centimeters;
- a piece of pipe for the chimney - 12 centimeters;
- steel sheets;
- fireproof wool or other material.
Workpieces should be prepared according to size
Step 2: Next, using a grinder, cut the profile pipe, retreating 3.5 centimeters from the edge. One half will be used for the ash pan, and the other for the blower.
Having made the appropriate cuts, you should join the firebox and the pipe at an angle of 90 degrees.
You will have to make a hole in the top of the chamber where you will need to weld a hopper for loading.
Step 3: next you need to weld the firebox and riser, then secure the 15 centimeter pipe by making a cut under the chamber.
It is necessary to install and weld the bunker where the fuel will be stored. In this case, the doors of the ash pan and firebox should be secured.
Step 4: Next, you should cut off the top of the cylinder and cut a side hole for the furnace structure.
The lid should be removable
Step 5: check that the parts are assembled correctly and weld the chimney pipe into place.
This is what the finished structure will look like
Video - Rocket stove: manufacturing
Prices for angle grinders (grinders)
Angle grinders (grinders)
Making a potbelly stove: step-by-step instructions
This is a simpler, mobile version of the stove, which is suitable for rooms where communications have not yet been installed, but there is the possibility of venting a chimney. The advantage is that the potbelly stove can be quickly heated and, if necessary, moved. However, during long-term use the body part of the structure burns out, so it is suitable as a temporary option.
Step 1: first you need to take a balloon of the optimal size and mark the incision sites on it.
It is necessary to make holes in the side of the structure for the firebox and ash pan.
Step 2: Next you should take a sheet of metal and cut out from it the details of the windows for the firebox and vent. After which these parts are welded together to form a single structure.
We weld the frames and try them on the cylinder
Step 3: now you need to make a grate from the remaining metal and fittings.
Trying on the grate for the stove
Step 4: Now you should move on to making the door. In this case, you can use ready-made loops that can be welded to the product. The old key serves as a lock here.
Making a door and a lock
Step 5: Now all that remains is to weld the door into place.
The design should look like this
Step 6: Now you should weld the chimney pipe to the structure.
A jumper should be installed to allow the chimney to exit to the street.
Step 7: if desired, the stove can be painted with special fireproof paint. This will give the structure an aesthetic appearance.
Painting the potbelly stove
Making a bubafonya stove: step-by-step instructions
A long-burning stove has such an interesting name. This process occurs due to the high pressure from the piston to the fuel, which leads to the combustion of pyrolysis gases, which heat the structure.
Step 1: first you need to unscrew the valve; if there are gas residues in the cylinder, then rinse with water. After that, you should put markings in the upper part of the structure and saw off the top. For such purposes, it is recommended to use a grinder. Moreover, in the process of cutting a cylinder, it is necessary to take into account that on domestically produced products there is an additional reinforcing sheet of metal at the joint, so the cylinder will have to be cut above this strip.
Saw off the top of the cylinder according to the markings
Step 2: now you should take the top part of the balloon and cut off the top. Here you need to make a hole the diameter of the heating pipe.
We try on the pipe and make a hole in the lid
Step 3: now we will have to take another cylinder, which we will use in order to increase the height of the stove. This will increase the efficiency of the device. You should step back about 1.5 centimeters from the beginning and put a mark at a distance of 30 centimeters. It is these dimensions that a piece of pipe will be needed to extend the structure.
It is necessary to cut off a fragment of the cylinder and try it on the base of the future stove
Step 4: Next we need to weld the parts of the stove.
We weld a piece of pipe
At this stage, it is necessary to weld holes and damage to the structure (if any).
Step 5: Next, cut out a circle with a diameter of 270 millimeters from the metal sheet.
Draw a circle on the surface of the sheet and then cut it out with a grinder
In this case, it is necessary to leave a mark in the middle along which we will center the pipe.
Step 6: Next you need to make six blades. Moreover, they should not go straight, but with a bend. This is necessary to increase the path for air when leaving the hole. For such purposes, the remaining part of the second cylinder will again be useful. It is necessary to cut a metal plate of approximately 40-45 millimeters, which will go to the blades.
The result should be blades like this
Before welding, you need to try them on the circle. The parts are arranged clockwise. If there are shortcomings, they should be corrected.
Step 7: Next, you need to take an old disk or metal sheet and cut out a round part with a hole from it, which will need to be welded onto the blade. This is done so that the parts stay more securely on the wheel.
Cut out the part and weld it onto the blades
Step 8: Now you need to weld a pipe to the metal circle with blades. In addition, it is necessary to make an additional reinforcing frame around the pipe.
The design should look like this
Step 9: Next you need to make a hole at the top (as close as possible to the beginning) of the structure with a pipe diameter of 100 millimeters.
The pipe should be placed and welded
Moreover, the structure should not be located straight, but at an angle.
Step 10: at the end, all that remains is to weld the top cover to the structure, and also take the pipe outside.
Upon completion of assembly, you should light the stove and check its functionality.
Operating principle of a potbelly stove
A potbelly stove is a primitive version of a metal wood-burning stove. This device works extremely simply: firewood is placed in the firebox, it burns, the stove body heats up and gives off heat to the surrounding air. Smoke gases are removed through the chimney, and the ash is poured through the grate into the ash pan, which should be cleaned periodically.
One of the main advantages of a potbelly stove is its simplicity of design. There are no strict dimensions here, the main thing is that the body can withstand heat and the chimney works properly. An experienced craftsman will make such a stove in just a couple of hours. And you can burn almost any dry wood in it: logs and sawdust. On our website there is an article with a detailed description of the process of making a potbelly stove with your own hands.
A potbelly stove is also heated with other flammable materials: diesel fuel, coal, peat, household waste, etc. If desired, you can cook quite successfully on such a stove. This point should be considered before the construction begins in order to create a smooth cooking surface.
A potbelly stove is a combustion chamber made of thick metal with a loading door, a chimney, a grate and an ash pit. You can use an old gas cylinder as a housing
But one should also take into account the disadvantages of such a heating solution. For starters, there is a high risk of burns and fires.
For the potbelly stove you need to choose a special place, decorated with fire-resistant materials. It is advisable for it to stand to the side, where no one will accidentally touch the body and get burned.
If desired, the upper part of a vertical potbelly stove from an old gas cylinder can be turned into a modest-sized hob
Such a metal structure weighs a lot, so we are not talking about any mobility of the device. It will be difficult to move a potbelly stove to heat different rooms.
Such stoves are usually used to heat utility rooms where there is no electricity or where it is supplied intermittently: garage, barn, workshop, etc.
From two gas cylinders connected perpendicularly, you can make an improved version of the potbelly stove, which allows you to retain more heat and get high efficiency when burning fuel
Another problem is low efficiency, since part of the thermal energy during the combustion of wood literally flies out into the chimney. There are various ways to retain heat and modify your stove slightly to make it work more efficiently.
Finally, you need to take care of good ventilation of the room in which the potbelly stove is installed, since such a device burns a large amount of oxygen during operation.
So, a potbelly stove consists of a metal body, the role of which is usually “invited” to be an old gas cylinder. It is necessary to make two doors in the case: large and small. The first serves to load fuel, the second is needed as a blower, through which air enters from the combustion chamber to ensure the combustion process and draft.
A drawing of a stove-stove from a gas cylinder allows you to make a device with specific parameters and calculated power, but such accuracy is not required
Below, at some distance from the bottom of the structure, a grate should be welded. It can be made from thick wire or simply take a sheet of thick metal and cut long slits in it. The distance between the grate rods should be such that the combustion material does not spill down into the ash pan.
If the potbelly stove will be heated only with wood, the gaps of the grate are made larger, but when it is intended to use wood chips, the grate should be made more frequent.
A curved metal chimney installed on a potbelly stove made from a gas cylinder allows you to retain more heat in the room and increase the efficiency of the structure
The ash box can be welded from sheet metal or take a ready-made metal container of a suitable size and resistant to strong heat. Some people prefer to do without an ash pan altogether, simply scooping out the ash from the lower section as needed, although this is not very convenient. As a rule, the chimney for a potbelly stove is oriented upward to provide the necessary draft.
The standard design of a gas cylinder stove can be modified to increase productivity by turning a solid fuel heater into a heater or hob:
Image gallery
Photo from
Fixed to body
Attaching heating pipes to the cylinder
Air heating unit
Devices for heating food
Do-it-yourself grill from a gas cylinder
You can make another useful device from a gas cylinder - a barbecue, which is used during outdoor recreation to cook meat.
To decide on the design, you will need to consider the types of barbecues that are made from cylinders.
Table No. 1. Types of barbecues
| View, illustration | Description |
| Barbecue grill | This option involves the possibility of frying meat over an open fire. |
| The meat is immersed in the interior of the structure, where it is processed with hot smoke. |
| This is a universal design that can be used for barbecuing and smoking. |
Before you start making a barbecue with your own hands, you will again need to remove the remaining gas from the cylinder. Moreover, it is better to do this away from the yard, otherwise the smell will take a long time to dissipate.
Table No. 2. Instructions for making a barbecue
| Step, no. | Description | Illustration |
| Step 1 | First you need to cut off the top ring from the cylinder. | |
| Step 2 | Then you should move on to the marking stage: - for the lid: take the joint in the middle, from which we retreat 25 centimeters on each side; — for air supply: we retreat 12 centimeters from the joint to the sides. Then you need to make cuts in the places where there will be hinges for the lid. Moreover, for the convenience of welding, no other cuts should be made yet. | |
| Step 3 | When the hinges and fasteners for the handle are fixed, you will need to cut the structure along the remaining marks. | |
| Step 4 | Now holes should be made on each side for air supply. | |
| Step 5 | Now you need to install metal spacers on the back of the cover. | |
| Step 6 | Next, use a drill and a drill bit of the appropriate size to make openings for the skewers. It is recommended to make them wider so that any skewers can fit there. | |
| Step 7 | Then you need to weld a metal plate with holes for skewers to the edge of the structure. | |
| Step 8 | Now you should use another piece of metal to weld the hole that remains from the valve. | |
| Step 9 | Next, you need to take pipes from a metal profile, cut them to size and weld a stand for the grill. The design should look like in the photo. | |
| Step 10 | Then you will need to make a removable table. It is made from corners and then covered with boards. | |
| Step 11 | Next, you should weld the handles to the structure and the canopy-limiter. | |
| Step 12 | The table needs to be covered with wood. |
The finished grill will look like this:
How to paint a grill?
Since the grill is used outdoors, the structure will have to be painted. The presence of a coating will protect the product from the negative effects of the environment. Of course, exterior painting is required, because it cannot be done inside.
You should be careful when choosing a coating, because it must meet the following criteria:
- the composition must contain substances that protect the metal from corrosion. You should choose a coating that is resistant to high temperatures (up to 480 degrees);
- Since the grill is used for cooking, the paint must be environmentally safe. As a rule, the packaging is marked accordingly.
Paints are sold both in cans and in aerosol form. The second option is practical because you don't have to use brushes.
An example of heat-resistant paint for a barbecue or barbecue
IMPORTANT! Before you start painting the structure, you must thoroughly clean the surface of any dirt. In addition, it is recommended to grind welded joints.
Cylinder marking diagram
- Since the circumference of the large balloon is 96 cm, it should be divided into 4 parts, starting by marking the distance from the outer longitudinal seam to ensure uniformity.
- Then you need to retreat 24 cm from this seam on both sides and draw 2 lines with a marker. After this, place the cylinder on the ground and make the necessary marks in the places where the skewers will be located.
- You should step back approximately 3-4 cm from the lower and upper transverse seam and draw a cutting line with a marker. A standard cylinder contains steel rings inside, so it is necessary to cut it in such a way as not to touch them, since they will serve as a support for the lid of the “Train Locomotive” barbecue.
- From the first and second marks it is necessary to place points of 10 cm for attaching the wheels of the locomotive.
- The boundaries of the lid will be 2 lines that were marked from the longitudinal seam of the cylinder (24 cm each).
Outdoor fireplace from a gas cylinder: step-by-step instructions
The advantage of such a product compared to previous options is that there is no need to use a welding machine. Therefore, even an inexperienced craftsman can create such a fireplace.
Step 1: You should start cutting the balloon. It is recommended to take a helium cylinder, which is used to refill balloons.
Using a grinder, you need to cut off the bottom of the cylinder. Then you will need to take a file and polish off the burrs on the structure
Step 2: secure the base. This base will be the cut bottom, which should be secured with brackets and nuts. For such purposes, you will have to prepare openings in it. Then all that remains is to insert the brackets and tighten the nuts.
Secure the base
Step 3: now all that remains is to sand the paint off the structure and make indentations for the smoke to escape.
Grinding and drilling holes
Step 4: Next you will need to paint the fireplace with fireproof spray paint.
Painting the structure
After installation is completed, the stove should be tested. In this case, you need to wait until the paint dries.
Manufacturing
You need to be prepared for how long it will take you to build a barbecue-steam locomotive: if you do construction every day, then at this pace you can build a barbecue structure in a few days, but it most likely will not work to assemble the entire barbecue in one day. We need to keep this in mind.
Before you start construction, you definitely need to make sure that all your drawings are of good quality and have all the exact markings and dimensions of the future barbecue on them. You need to immediately think about whether your barbecue locomotive will have wheels or without, whether there will be another carriage in the design into which you can put materials or firewood in the future. You need to compare your capabilities, come up with a couple of options, choose the best one, imagine how you cook meat, as if you already had a barbecue, as you imagine it to be. Now you need to look at the available materials, supplement them if necessary, buy something in addition and, constantly checking the drawings or sketches, begin construction.
The best structure for a barbecue-steam locomotive is obtained from gas cylinders; the main element will be the brazier itself - it looks like a vertical part with a pipe and also a horizontal part.
Similar models are made from different metals, because it is the one that is best suited for this purpose, being both a strong and durable material. The metal can withstand elevated temperatures and is easy to process and change. More specifically, it is possible to use cast iron or steel; these materials are the basis of all elements of the locomotive structure. It is the properties of these metals that will make it very easy to prepare juicy meat that will be very tasty, with a crispy crust. This design is quite durable and will serve you for many years.
If you want the grill-steam locomotive to serve you well for a long time, then during manufacturing it is important to choose the optimal thickness of the metal, not thinner, but not thicker than the standards. Those surfaces that will be in direct contact with burning substances must certainly be at least eight millimeters thick
Otherwise, if you do not comply with these conditions, the metal may become so thin that, due to its own weight, your brand new grill-steam locomotive will become beveled and deformed under the weight of its own weight.
Such barbecues perform many functions, which is the main good point of such complex designs. The grill-steam locomotive with several compartments provides everything for cooking over natural fire. So, kebabs and fresh vegetables are cooked on the grill. On the barbecue, steaks are cooked on the grill, which smell of aromatic smoke. For hot smoking, sections of barbecue makers are used. If the locomotive barbecue has a side chamber, then it is used for cold smoking.
What else can you make from a gas cylinder?
We have considered only a minority of the products that can be made from cylinders. However, if desired, you can build the following structures:
- Boiler. The structure is welded, then the connections are connected and used as a water heater.
Boiler
- Feed cutter. The structure is made of two cylinders to which the engine is attached.
Feed cutter
- Feeders for pets. To create the structure, you need to cut the cylinder into two parts and weld the stands to them.
Feeders
Handles and blower for fire
Now you need to weld the grill handles. Their shape and appearance are unimportant. Any heat-resistant material will be useful for the job. It is easiest to use concave reinforcement. However, then you will have to attach a piece of wood to it to avoid heating the metal. Stages:
- The lid may fall inside the cylinder, so it is recommended to weld a metal strip (2x3) around the perimeter.
- Using the old marks in the grill, recesses for skewers (10 mm) are made. On the back side of the cylinder (opposite the holes) small cuts are made in the plate.
Next we proceed to blowing up the barbecue-steam locomotive, since the fuel burns poorly without the supply of oxygen. The frypot turns over. Process:
- You need to move 10 cm away from the seam in both directions.
- Measure 10-12 cm from this line so that you end up with longitudinal stripes.
- Small slits are made across each one, 5-7 cm apart. These may be holes, but then the number will have to be increased.
It is better not to make holes in the bottom of the cylinder. The first reason is that it is recommended to leave the factory seam intact, otherwise the structure will lose its rigidity. The second is that fat from the meat falls to the bottom and clogs the holes, which is why air will eventually stop flowing to the fire.
The final touches to arranging the brazier are cutting off the tap. In its place, you need to attach a bent metal pipe to remove smoke and ventilate the system.
The chimney allows you to remove excess smoke, smoke meat and simplifies the cooking process
The base of the barbecue is ready - all that remains is to attach the frame for the stand and fasten the wheels, and weld the decorative elements so that the structure looks like a steam locomotive.
Welded frame and rack housing
You need to measure the finished grill. This determines where the wheels, frame and additional elements will be attached. Job:
- Racks can be made of reinforcement, solid sheet or pipe. The corners are cut into 4 pieces of equal length (50-70 cm).
- Then they are welded to the grill at the marking points at an equal distance from each other.
- Next, the frame is formed - additional corners are attached diagonally from the bottom point of one leg to the top of the other (the junction with the cylinder).
- Thin metal sheets are welded on top of the frame on the sides to form a kind of box. They should protrude slightly from the front, then cut at an angle. Rings are welded onto the sheets - they can be made from car wheels or cut into circles from another cylinder. Important! The frame must firmly fix the grill so that it cannot tip over.
At this stage you will have to use your imagination to make wheels, side covers, and other decorative elements reminiscent of a train
Painting the structure
You need heat-resistant paint - the container heats up to 800 degrees Celsius, and this coating will also prevent rust from forming.
The old coating must be removed before applying a new layer. To do this, use sandpaper or a special attachment on a drill. The metal is degreased with acetone and primed. Next, paint is applied to the container using a brush or spray.
What and how to make doors from
Doors for potbelly stoves can be purchased cast. You will need a small height for the ash pan and a larger one for storing fuel. There are ready-made blocks - a flow door with a blower in one design. In this case, a frame made from corners welded to size is welded into a hole cut to size, and the casting is already bolted to it. To prevent air from blowing in from the cracks, a small edge is welded around the perimeter of the cutout under the door - a 1-2 cm strip of metal.
How to attach a cast iron stove door to a gas cylinder
You can not buy doors, but use a cut piece of a balloon wall. Then you will need some kind of hinges or replacement parts. It’s clear with the hinges: mark the places, weld them. There is an interesting version of homemade loops: several links of a thick chain.
The hinges on the door can be made from several links of steel chain
A latch will need to be welded to such a door.
Advantages and disadvantages of “working off”
This method is often used in non-residential premises such as garages, workshops, warehouses, etc. It all works quite simply - first the waste is heated, after which oil vapors are formed, which also burn, and much more intensely than the liquid fuel itself.
As a result, we have a fairly efficient gas cylinder stove that is capable of heating a small room for a very small amount. This method of heating a room is extremely popular in car repair shops - they always have free oil on hand, which is drained from old cars. In this case, the heat is generally free, plus, there is no need to look for how to dispose of old oil. The only point is that before use it needs to be cleaned so that there are no all kinds of impurities.
The cost of a furnace operating during mining is minimal. If you don’t want to buy it, you can make it yourself from the same gas cylinder or sheet metal. There are plenty of drawings and videos on the Internet; even a person with minimal skills can repeat the entire process.
In second place, of course, is the price of the fuel itself - if you buy it “ready to use”, the price per liter will be no more than 15 rubles. It is often sold at a price of 8 to 12 rubles (depending on seasonality and region).
The design and the fuel itself are safe. The stove from the cylinder provides enough heat, and there is no unpleasant smell or burning/smoking. This is due to the fact that when the oil is heated, it releases vapors, and during combustion they provide a “supply” of heat to the room.
Used oil that has not been purified should not be used in the oven. In this case, the nozzles will quickly become clogged and the bottle may explode; in addition, the effectiveness of such oil is questionable.
Fuel must be stored under certain conditions. At low temperatures, the oil freezes and becomes useless. Imagine you come to the garage, want to quickly heat it, but the stove turns out to be completely useless, since the oil has turned into ice.
Furnace modernization
Improving the operating parameters of the furnace is associated with an increase in its heat transfer. For this purpose, additional heat exchange surfaces are used on the furnace body. Such parts can be made from various metal profiles, including strips, angles, and profile pipes. The choice of material depends on what is available from leftovers.
Additional heat exchangers made of metal profiles increase the efficiency of the device
Additional heating surfaces can be installed not only on the outer surface, but also inside the firebox, which allows you to intensively heat the air in the room. A negative result of such a solution will be oxygen burnout at high temperatures.
How it works
The part of the cylinder that was initially cut off will be used as a waste container. Do not forget that under no circumstances should you use kerosene or gasoline instead of oil - this can lead to an explosion. If desired, you can use the finished structure not only to heat the room, but also as a stove for cooking food. It is enough to weld a steel rectangle to the lid.
Fill two-thirds of the container with oil; for ignition, you can add a little kerosene or gasoline; a rag soaked in one of these liquids will do. After 3-5 minutes, all the gasoline will burn out and the exhaust will begin to work.
After finishing use, you should clean (at least partially) the cylinder itself - just tap the lid on top of the structure thoroughly so that all the carbon deposits fall off.
Features of operation of a pyrolysis furnace
The main difference between pyrolysis furnaces is the ability to use a wide variety of fuels. In solid fuel stoves, it is possible to burn not only traditional flammable substances, but also rubber, plastic and other materials that are strictly not recommended for burning conventional stoves.
This feature is associated with complete decomposition of the fuel and secondary combustion of the resulting gases in a separate chamber. After this, only carbon dioxide and water vapor remain in the smoke emissions. No harmful emissions into the atmosphere occur during pyrolysis.
But when using such fuel at the ignition stage, a persistent smell of burnt rubber remains in the room. Therefore, such heating units must be installed outside residential premises.
