- Date: 04/07/2015 Comments: Rating: 43
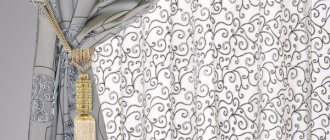
Curtains that cover a window or doorway are usually made of fabric. Beautiful and expensive curtains definitely give the room solidity, but if imagination and the need to decorate the house with your own hands requires a change in the boring environment, you can devote part of your free time to diversify it. Making wooden curtains with your own hands is not difficult; this exciting activity will certainly interest other family members, allowing you to spend your evenings doing a fun and interesting activity.
Curtains with wooden elements are suitable for interior design in a rustic, oriental or African style.
Curtains made of wooden elements complement any interior well with their appearance.
This design technique is especially appropriate when decorating an apartment in a rustic, oriental or African style. This combines two fashion trends at once - the use of natural materials and the idea of hand-made, that is, making things with your own hands. The original decoration of the house makes its atmosphere cozy and original, and gives the owner the opportunity to express herself in this creative activity.
Wooden curtains can be made from a wide variety of elements. To do this, use beads, rings or other small wood objects. If one of the family members has experience cutting wood with a jigsaw, then his contribution to the curtain making process will be invaluable.
Thanks to this tool, the components will become much more diverse and elegant. The curtain will become completely unique, impressing guests with flowers, stars or other wooden figures hanging on threads, well sanded and varnished. Curtains made from bamboo sticks, which are also considered a wood material, look good.
Making wooden curtains with your own hands
To make wooden curtains you will need wooden beads.
Everything necessary for the work must be prepared in advance, and the tools you will need are very simple, available on everyone’s farm:
- a plank or strip made of wood; a drill for drilling holes; a thick nylon line or cord; a needle with a large eye; wooden elements for stringing; scissors; crimps.
First, you will need to think about what elements the curtain will be assembled from and the exact layout of their location on the threads.
The basis for the assembly will be a wooden plank, the size of which should be slightly larger than the width of the door or window opening. Holes are made in it to secure vertical threads, the number of which is calculated according to a pre-created sketch.
Usually the parts are strung on a thick nylon fishing line, but depending on the idea being embodied, it may be appropriate to use a bright ribbon or colored rope. If the design of the curtain requires free gaps between the parts, special clamps are used for fastening, which do not allow the elements to move. They are called “crimps” and are clamped in the right places using pliers.
It is better to secure the collected threads using another fishing line along the bottom of the curtain to prevent the possibility of them getting tangled.
You can care for wooden curtains using a vacuum cleaner or a soft bristle brush. Sometimes you can wipe the parts with a damp sponge, but it is not recommended to use large amounts of water for cleaning. The impression of wooden curtains can be complemented by additionally made pendants placed on the lampshade of a chandelier or sconce, wooden figurines, boxes or other interior items.
Today, beautiful wooden cornices are gaining popularity.
With the help of curtain rods we attach curtains to the walls or ceiling.
This is the main method of fastening and the most convenient. This method was used in ancient times in Egypt, which is why cornices similar to ancient Egyptian ones are now highly valued. Convenient because with the help of rings threaded into the rod, you can easily move aside tulle or curtains.
There is no need at all, like in the good old days, to pull them with all your might so that they come off. It is important that it matches your interior more in style than in color. First, let's look at their types: profile, baguette, round, forged and string.
Wall-mounted wooden curtain rods: selection criteria
The most popular type are wall cornices.
As a rule, rods of this type are made from coniferous and deciduous trees, but exotic species, such as mahogany or rosewood and others, are considered the most expensive. It cannot be said that any type of wood is the most durable. Everyone has different density, color, sensitivity to weather conditions.
It is better to choose according to the criteria that are most sensitive to your home. Such cornices have a practical and decorative function. The practical one is a clamp on a wooden sword. In this case, you will have to focus specifically on the curtains. The decorative factor includes decorations on the tips of swords.
By the way, the buyer can choose the shape of the tip himself. Most often they are universal, for example, plants, animal figures, sculptures or something according to your sketch. All this is thanks to wood carving, since wood is the most convenient material for such work. This is a very powerful fastening, because it can withstand even the heaviest fabrics.
Ceiling cornices made of wood: what to look for
Such cornices have more of a decorative function than a practical one, since they are much more noticeable than wall ones. This element of decor can no longer be hidden, and indeed it is not necessary. With the right choice of wood and color, it will complement the curtains perfectly.
For this type of carving, wavy lines are considered universal carvings. They are often confused with profiles. Unlike wall cornices, functional mechanisms are completely hidden in ceiling cornices.
There are also other advantages over wall-mounted ones, for example, the following: fasteners can be three-row, the choice of design for such fastenings is huge. However, they can hardly be called budget.
The high cost is due to the exquisite carving and massive material. This design is most likely suitable for draped curtains, as well as heavy dark fabrics. If you want to emphasize your high income, then it is better to choose mahogany ceiling cornices.
Products made from oak are considered more restrained. If, on the contrary, you need to save money, then it is better to choose products made from pine or alder. In some cases, they even emit a pleasant forest smell.
Profitable homemade products from plastic pipes
Today we will make a couple of useful crafts from plastic pipes. Thanks to them we will save a lot of money. As a result, you will get a budget corner for the bathroom curtains.
We will make a corner for curtains in the country from a pipe
We use 20 mm PVC pipe for homemade work. Also some tees and corners. Budget for 50 rubles. Saving about 2000 rubles. We look and remember how to do useful things. We cut a pipe of a certain length, turn on our imagination, soldering iron and begin to connect the workpieces. The soldering iron is ordinary, without any bells and whistles. Having combined the necessary blanks, we finish them.
Everyone will have individual sizes, so the author of the video did not name the dimensions of the product. All that remains is to cut off one more piece of pipe and something useful in a country house is almost ready. We try to make it as smooth as possible. It will look more beautiful this way. The device is ready. Let's drill a hole and go fasten it. Curtains are not inferior in strength and rigidity to purchased ones. Some may not find this product very beautiful. Those who value functionality, reliability, and budget will have no doubts about homemade products. And it actually doesn’t look that scary.
Window curtain made of PVC pipe
Let's move on to the next homemade product. It's even simpler. Suitable for a country house. We take a piece of pipe and attach plugs along the edges. This is the simplest curtain for curtains. The cheapest one, found in Ikea, cost 400 rubles. This is a piece of aluminum pipe. And here the budget is 20-30 rubles.
When the room is clad in wood, a good cornice design comes from an old bamboo fishing rod. And so that the curtain placed on the cornice does not touch the wall, the cornice is secured with a long self-tapping screw through a bamboo extension. All ideas deserve respect. Great creative success to everyone!
2 comments
What to do about condensation? Insulate the pipe. Condensation always appears on something that is colder than the room itself (window, pipe) and something that removes heat well. From the condensation itself, the cold surface will heat up and then there will be no condensation at this place, however, if this surface is cooled (by cold water, for example), then condensation will appear. Something that is cold to the touch condenses water. A simple polyurethane foam will already solve the problem, then they sell the same type of corrugations for insulating pipes, put them on and that’s it. This is what thermodynamics is like. However, if you have more moisture in your room than the air can tolerate, there will be condensation somewhere. If a cubic meter of air at 30 degrees can hold, say, 30 grams of water, and its relative humidity is 100%, then there are actually 30 grams of water in the air; if the same air is cooled to 20 degrees, then the air can only hold 20 grams of water per cubic meter. That is, then after cooling the relative humidity will be 150% and the air is looking for a surface that can be wetted to get rid of moisture. In other words: if the relative humidity exceeds 100%, then the air immediately tries to get rid of it (at least somewhere). And if you have cold pipes, then condensation will be there, if they are not, then condensation will be on the floor, on the walls, on the tap, etc. The air chooses the coldest surface. Either you need to ventilate and create a draft, or you need to let it condense somewhere where you don’t mind. Under the pipe you can attach a profile that collects water.
Just right for a dacha. But in an apartment, I wouldn’t risk installing what I have in my toilet and bathroom for running water. Unless you somehow decorate, paint, varnish it beyond recognition, so that it doesn’t even smell like a loft style...
Tips for choosing carved wood cornices
When choosing carved wooden cornices, you should pay attention not only to the design and design of the accessory itself, but also not to forget about the overall design of the room: it is not quite easy to choose a wooden cornice for every interior style.
Here are some tips for choosing carved cornices:
Cornices must necessarily match the overall design of the room.
There is no need to buy an expensive, luxurious cornice for a modest room. It will look stupid. Or the choice will be considered unsuccessful when the room has a modern style, and cornices with exquisite carvings made of dark wood, which are suitable only for the Baroque style. The weight of the fabric is of great importance.
When purchasing, it is better to check the durability of the fabric in advance, since now it is more fashionable to choose heavy, opaque fabrics. If you miss this nuance, then the cornice may simply collapse and break, sometimes without even a chance of repair. It is best to choose double rows. You will hang tulle on the first row, and a curtain on the second.
There is no need to hang both fabrics on the same row, because of this the textiles often tear and the elements of its fastening break off. In addition, it will be inconvenient to open and close the curtains. If you don’t like the fact that you have a small window, then you can choose long rods that will cover part of the partitions. This visually enlarges the windows.
You can also hang ceiling cornices, they also enlarge the window. With such methods, your guests most likely will not notice this secret. If there are a lot of elements on the cornice, then it is better to play it safe and buy a lot of fasteners. A small number of fasteners may cause you to accidentally injure yourself.
Guided by simple criteria and selection tips, you can choose a worthy accessory for the interior of your room.
DIY wooden cornice: do it step by step
For a capricious owner, it is best when he makes the cornice himself with his own hands. Especially if you have not only an idea, but also good materials, and most importantly a little patience.
On the Internet you can look at photos from which you will build. To create a practical cornice you will need less materials and physical effort. For a practical frame, you only need a barbell, rings, fasteners and tips.
Below are the approximate stages of creating a decorative wooden cornice, but they are individual for everyone:
- Make the sidewalls of any shape you like; Drill holes in the sidewalls; Attach hangers (it is best to take metal ones); Use a jigsaw to cut out the bottom shape to your liking; Sand the remaining parts of the cornice; Coat with varnish in the color you like (if the wood has an uneven color, or you can coat it with a product to protect the wood); It is best to leave everything to dry well in the sun for 24 hours; First, fix the decorative parts; Then attach them to the ceiling or wall using self-tapping screws.
If you want to hide the fasteners, paint them over or attach a decorative piece.
Assembling the cornice
Do-it-yourself curtain rods made of wood are assembled according to the following principle.
The cornice is assembled only after all previous steps have been completed. A fastening bar must be inserted into the rings, and it must be attached to them using glue. After the glue has completely dried, it is necessary to cut off the part of the timber that will protrude inside the ring. After this, the rings are put on the guide. The first must also be attached with glue so that the cornice does not “walk.” Next comes the turn of stringing rings to hang the curtains. The finished structure is attached to pre-installed hubs. For a reliable connection, a large amount of glue is also used to coat the parts.
Design of wooden curtain rods (interior photo)
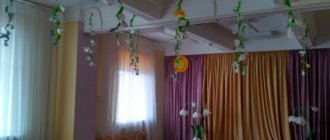
Since ancient times, curtains in the interior have been used not only as decoration for windows, but also for doors. The style and patterns of curtains have changed over time. In addition, many of their types known to us today were named after the countries in which they appeared: Roman, French, Japanese and Austrian. Their functionality depends on the purpose of use.
Do you like exclusive curtains? Do you want to save money on this? In this case, we suggest you make them yourself. From this article you will learn how to make a curtain for a door with your own hands.
What do masters need to know?
Creating a cornice on your own is not an easy task, requiring careful preparation, attentiveness and accuracy from the master. It is recommended to preview various videos and master classes to get an idea of the work ahead.
Then you need to decide on the choice of a suitable cornice. They come in several types. Let's look at the most popular options:
- Plastic. Good and inexpensive material. Suitable for heavy and massive curtains;
- Wooden. Standard round wooden cornice. A classic and versatile option. Used in any interior and in combination with all types of curtains;
- Multi-row. Such a cornice will be required if the owners plan to hang several curtains (in 2-3 rows);
- Metal. The heaviest type of cornices. Forged products not only hold curtains securely, but also act as interior decoration.
Each owner decides for himself which option to give preference to. Please note that making metal products yourself is extremely difficult. Therefore, it is better to create a cornice from plastic pipes or wood.
Let's look at examples of several simple models that almost every home craftsman can make.
Pros and cons
Before making a curtain for the door, we suggest you familiarize yourself with some of the advantages of such a solution:
Using curtains, you can visually adjust the size of the room - reduce or enlarge it. You can achieve this effect using the appropriate color of the product. Possibility of using different materials.
It can be textiles, wood or threads. Curtains bring a certain lightness to the interior. Saving usable space, which is especially important in small apartments. On average, a swing door requires 1 m2 of space, and when installing curtains, this problem is eliminated. Save money on purchasing a high-quality interior door. Even the most expensive curtains are cheaper than doors.
Like everything else, curtains installed on a doorway have their drawbacks. Among them, it is especially worth noting the insufficient heat and sound insulation. In view of this, the choice is between beauty and practicality.
Some people install a door, on the opening of which they then hang curtains. Some designers fully justify this option, especially in cases where the room has an old door that is not in harmony with the overall concept of the interior. This combination is quite logical when arranging a balcony doorway.
Varieties
Curtains are divided into types depending on their purpose:
- Curtains with a door - perform decorative functions and protect the room from excess light, giving it a certain charm. Curtains instead of a door - are attached to the doorway, they are a replacement for the door.
Types of curtains depending on the material used:
Textile curtains are made from different types of fabric.
It can be silk, chintz, satin, satin, velvet, tweed, linen, etc. Rope or thread curtains are a continuous airy veil made of threads. It delimits rooms without interfering with air circulation.
Curtains should be chosen depending on the style of the interior.
For example, if it is made in a classic style, then it is better to give preference to a textile curtain. For hi-tech and minimalism style, it is better to make curtains with eyelets. Wooden curtains will fit perfectly into the country style, while thread curtains harmonize best with the oriental style.
Mounting methods
Attaching the curtain depends on whether there is a door or not, as well as on the shape of the opening.
So, there are these types of fastenings: Installation on trims - suitable for hanging curtains. Curtains are installed on the door leaf in cases where they want to hide from the sun or prying eyes. Roman blinds are usually installed on such a mount. The curtain rod is installed above the passage on the wall. In this case, the curtain is fixed with loops, rings, and a drawstring. It is worth noting that the latter option is only appropriate if the structure is stationary.
Soft rings form soft folds. Curtains can be decorated with tassels, lambrequins, and eyelets. If you want the curtain to drape, then sew curtain braid to its upper edge. Each detail must correspond to the general concept of the interior style in color, shape and texture. Choose materials that are in harmony with the design of the room.
Lift curtains
With your own hands, from scrap materials, you can sew a fashionable Roman blind that would be appropriate in any interior. At the same time, the consumption of material on the window is significantly reduced. They fall in light waves if they are made from fabrics for curtains; for thicker curtains, choose linen or jacquard. The cloth may not consist of a single cut, but of stitched flaps located vertically or horizontally. To make a Roman blind for the kitchen with your own hands, you need the following materials and accessories:
- a piece of fabric and thread;
- plastic rings;
- wooden block or plank;
- self-tapping hooks;
- chalk;
- thin cord.
Dimensions of the canvas: width - like a window plus 10 cm, length equal to the height of the opening from the top edge to the window sill plus 15-20 cm. The rings can be replaced with a special transparent braid for Roman blinds. The sections are finished with a hem seam or a roll stitch. To form beautiful folds, several horizontal lines are drawn at a distance of 10 cm from the top edge, 30 cm apart, along which rings are sewn on the wrong side with an interval of 20-25 cm. For light fabrics, a narrow curtain is attached at a distance of 50 cm from each other braid. The upper part is folded over and sewn tightly, the lower ends of the laces remain free.
You may also be interested in: How to sew lambrequins with your own hands with patterns for beginners
To attach the curtain, hooks are screwed into the bar at a distance of 20-25 cm, and there is another one on the side that will hold the curtain when folded. The top is attached to the plank with Velcro or furniture nails. The cord is cut into several parts and each is tied to the rings located in the bottom row. The free ends are threaded through the remaining rings and thrown over the fastening hooks. The curtain is raised to the desired height and secured by gathering all the cords together and passing them through an additional fastener.
Be sure to baste pieces of sheer fabric before sewing, as they may slide under the machine foot and become dislodged. Needles for chopping must be very sharp. Having familiarized yourself with the design of such curtains, you will see that their manufacture is not difficult. The main thing is to make accurate measurements and calculate the necessary materials. Curtains created with your own hands to suit your taste are unique.
Manufacturing of textile curtains
You shouldn’t have any particular difficulties when sewing curtains, because the technology is practically no different from making curtains for windows.
So, you will need: Fabric. Curtain rod. Sewing machine. Chalk for markings. Scissors. Pins. Threads. Before starting work, take measurements of the opening, you will need its width, curtain height and mounting points. Decide on the fabric. Add 3 cm to the total width of the curtain to process allowances, and for fastening to the cornice - 5-10 cm. In order for the fabric to shrink before cutting, it must be soaked in hot water, dried and thoroughly ironed.
Cutting is carried out in accordance with the measurements. If you wish, you can decorate the edges, for example, with fringe, frill or beads. It depends on the style of the interior. After sewing the curtain, all that remains is to hang it on the cornice.
Classic style
Not long ago, such a concept as modern classics appeared. For its design, strict draperies with luxurious outlines are used.
These can be straight curtains with large vertical folds. To do this, you can purchase thick textured or smooth fabric. If you want your doorway to look more elegant, then complement the curtain with a light translucent curtain. Often lambrequins with folds are used to decorate the cornice.
The process of sewing such curtains is no different from the technology described above. To make curtains in a modern classic style, use only natural textiles. The lower part of the curtains should not reach the floor by 2-3 cm. Fabrics that shimmer with silver or gold are ideal for making curtains over the opening. If you consider this combination too pretentious, then it is better to make curtains from a plain dense fabric.
Romantic style
Light, airy chintz curtains are an excellent solution for decorating a romantic summer style.
If you combine them with transparent curtains, the effect will be truly delicate. Chintz transmits light well, but at the same time softens it. To make a chintz curtain, you will need 3 times more fabric than the size of the opening. This way, you will get beautiful and large folds. To prevent the curtain from fraying at the edges, it needs to be hemmed.
The cornice is a wooden or metal pipe onto which large rings are placed. Otherwise, the technology for making chintz curtains does not differ from the technology for making any fabric curtains. The cornice is usually screwed 5-10 cm higher from the top edge of the opening. If desired, you can install clamps on the walls that allow you to open the curtains slightly, thus letting the coolness of the night into the house.
No drapery
The basic principle of the modern method of window design “minimalism” is the absence of folds and gathers. Curtains with loops (patches), which are made from ribbons, braid in a contrasting color or from curtain fabric, look stylish. It doesn't need hooks. The loops can be fastened with buttons, snaps, Velcro, or tied with bows on the curtain rod. If it can be easily removed, the patches can be sewn without unfastening. You should first check how easily the fabric will move along the cornice. The width of the fabric for it should be 1.5 times larger than the window opening. The side sections are processed as stated above, the corner joints are sewn together with a hidden seam. The simplest option is to sew curtains on “blind” loops. Their width and length are chosen arbitrarily. The required allowance is 2 cm. The number of loops is calculated based on the fact that the distance between them should be 2 times their width. The strips for them are folded lengthwise with the right side inward, stitched, turned inside out, ironed and pinned to the top edge of the main fabric turned 2 cm. After this, the loops are adjusted with some kind of braid or fabric facing.
Curtains look elegant on grommets - holes edged with metal or plastic in the fabric with an internal diameter of 1.5-5 cm. Round fittings are in greatest demand, although they can be square, triangular, or in the shape of flowers. In addition, eyelets are selected by color: plain, transparent, wood texture. Their internal diameter should be at least 1.5 cm larger than the diameter of the cornice. Metal eyelets are installed only in special workshops using a press. Although they look impressive, they often rust after washing and damage the fabric. Plastic fittings are installed at home. How to make a curtain with eyelets yourself? The bottom and sides of the curtain are processed in the usual way; the upper part must be sealed, otherwise the fittings will not stick to the fabric. For light curtains, use a transparent duplicating grommet tape 2-3 cm wider than the outer diameter of the elements, the number of which must be even, otherwise one of the side seams will always turn towards the room. Markings are made on the sewn curtain, holes are cut into which the eyelets simply snap into place.
Products made from threads
Most often, colored threads or fishing line are used for the base of such curtains, on which glass balls, wooden tubes or beads are strung. First think about how the finished product should look and what cornice to use for it. To make curtains in an oriental style you will need: Fishing line or threads. Beads, wooden tubes or glass balls for decoration. Needle for attaching beads. Glue. Self-tapping screws. Screwdriver /drill.So, let's start the workflow.
We mark the doorway for the cornice. This design is best secured 5 cm above the edge of the doorway. As fasteners, you can use a wooden strip, which should first be painted in the color of the curtain. On this bar you need to mark in advance the points through which you will pull the threads. Their number depends only on your ideas about beauty.
Depending on the thickness of the threads, the curtain will be either thick or translucent. Then you need to string the beads onto a thread and attach them to the cornice. Calculation of the height of the threads: measure the distance from the cornice to the floor (or other desired height from the floor level), add to this figure 5 cm for fasteners and multiply the resulting amount by 2. This length necessary in order to string beads with a crossover.
In this case, it is important to draw up a diagram first or use a ready-made one. To make the fastening of the threads more reliable, use a loop, and not just knots. To prevent curtains from fluttering in a draft, weight the curtains at the bottom with large, heavy beads that are secured with a loop and knot. To make the fixation more reliable, glue the bottom bead with polymer glue.
Variety of gazebos made of plastic pipes
With fixed pillars
If you take fairly thick pipes and fix them in the foundation, you can make some kind of canopy and tent. It is best to sheathe the roof with the lightest possible material, for example, fabric or polyester, so that the frame does not deform during gusts of wind.
With arches
Thanks to its flexible shape, plastic can be used to make a decent arched gazebo covered with polycarbonate sheets. This structure is perfect for the garden to take a break between chores.
Gazebo with arched roofPortable
The lightness of the material allows you to make a very light gazebo, the weight of which even one person can handle (in the absence of a heavy roof or cladding). If you do not fix the gazebo into the ground with the help of a foundation, then it can be moved from place to place, depending on the need.
Installation of polypropylene connections through couplings
For work we will need the following tools and building materials:
- Polypropylene pipes.
- Couplings (straight, angle and tees).
- Special scissors.
- Special soldering iron.
Straight
Angle 90
Tee
Installation instructions are shown in the picture below. The entire frame of the plastic gazebo is assembled using this principle.
Installation of polypropylene connections
Installation of metal-plastic connections through fittings
Working with metal-plastic will require an additional tool - press pliers. The price for each connection will be significantly higher than simple polypropylene couplings. Therefore, if you are planning to build such a gazebo, try to make as few connections as possible in order to save on this point.
Installation of metal-plastic connections
Installation of pillars
To make the frame stable, it is necessary to fix the vertical posts (racks) as tightly as possible. To do this, you can use metal pins or full-fledged concrete foundation pillars (dig a hole and fill it with mortar).
In any case, this point needs to be thought through in advance. If metal can be laid freely on the tile and it will not go anywhere due to its mass, then plastic may well “escape” from a gust of wind.
Pipe for post insertion
Installation of a support pillar
Erection of the roof
It is not possible to make a rafter system similar to a wooden or metal roof. It is necessary to use a truncated cone shape with several rafter legs, which will create a strong frame for further cladding. An example of this roof is shown in the photo below.
Frame and rafter system of the gazebo made of plastic pipes
Polycarbonate sheathing
The pipe structure is strong, but extremely unstable. To securely fix the entire structure, it is necessary to sheathe the frame with something. Polycarbonate will come to our aid; its weight and strength are ideal for installation.
Sheathing the frame with polycarbonate
Protecting the gazebo from the sun and wind
An interesting version of a summer gazebo is presented in the form of a tent. An ordinary frame is made of sixteen pipes (six for pillars, four for the top frame and six for rafters), and a light fabric or polyester is hung on top of it, which performs decorative and protective functions.
In my opinion, this project deserves attention, since its cost is cheap, and it looks very civilized.
Tent made of plastic pipes
Made of wood
To make curtains from wooden elements, you will need to purchase them from a specialized store.
They can be of different shapes: diamonds, circles, squares or leaves. You can also use plastic that imitates wood. You will need: a strong thread/line; a cornice with rings; special clips for holding the decor, called crimps. Making such a curtain is practically no different from its counterpart made of beads. You need to prepare sections of thread, string the decor, while securing each element with crimps or simple knots.
Attach it to the cornice and install it above the opening. Using curtains on or above the door, you can beautifully complement the interior in the opening. Thus, the room can be decorated in a classic style, retro, modern, Provence, minimalism and hi-tech. It is quite possible to make interior curtains yourself, and for this you will have enough information described in this article. If you have experience in making such curtains, then share it with our readers in the comments to the article.
Florons
A decorative detail whose name means flower in Old French. They became widespread in Gothic lancet architecture. Manufacturers of cornices use them as decorative decorations.
The form may be:
- round;
- square;
- rectangular;
- with pointed tips.
In children's rooms, it is quite possible to place images of fairy-tale characters on the cornices.
Important! Florons immediately attract attention, so they must be selected in strict accordance with the interior of the room.