Original cakes are made from chocolate bars and sweets. Decorative sweet designs can be themed as gifts for children's birthdays, colleagues, women - on March 8, relatives or friends - New Year, etc. Satin ribbons and wire are used as fastenings for elements; the product is decorated with bows, artificial flowers, rhinestones, and beads.
DIY candy master class
To create a candy cake you will need:
- a set of Raffaello chocolates in beautiful wrappers (2 packs);
- foam sheet;
- corrugated paper;
- scissors;
- hot glue;
- decorative elements (beads, multi-colored silk ribbons, rhinestones);
- ruler;
- lace fabric.
Step-by-step preparation with photos:
- A round blank is cut out of foam plastic for the base of the product.
- The edges of the base are processed with sandpaper.
- The next tier of the cake will be a large box of Raffaello chocolates.
- The packaging is decorated with patterned paper or lace fabric, the canvas is fixed with glue or tape.
- The edge of the second row is covered with a tape of corrugated paper.
- Candies are fixed on top, the joints are covered with a thin strip.
- The bottom tier of the cake is also decorated with a corrugated sheet cut in the shape of a ribbon.
- The tiers can be decorated with rhinestones and beads. The elements are fixed with tape.
- Candies are attached to the side parts using adhesive tape.
- The top tier is decorated with a small Raffaello box, which is covered with corrugated stripes or bows, flowers made of fabric, mastic or paper.
How to decorate a cake with candies for a girl: “Amusement Park”
We will need:
- gummy bears;
- small marshmallows;
- large round caramel on a stick;
- small rectangular cookies (for example, Leibniz minis);
- Kinder chocolate egg;
- waffle cone;
- savoiardi cookies.
Our task is to create a real Amusement Park on the surface of the cake: we cover the side parts with savoiardi cookies. Closer to one of the edges we place a large round multi-colored caramel, having previously cut the stick to the optimal length - this is our Ferris wheel. Place two “benches” under the cookie “wheel” and place a couple of gummy bears on them. Place a waffle cone horizontally on the opposite side.
You can stick it in so that the tail is a little higher. Under the cone, use small marshmallows to build a soft “lake.” Arrange the gummy bears so that they appear to be flying out of the cone directly into the marshmallows. On the free side, place two halves of Kinder eggs one behind the other, make wheels out of marshmallows - this is a train. Place gummy bears on the train. The candy cake is ready!
Read a very useful article - several recipes on how to prepare Prague cake at home and recipes on how to prepare it step by step.
If you take a creative approach to creating it, gratitude in the form of a child’s joy will not keep you waiting.
From chocolates
Before making a chocolate cake, you will need to prepare the following materials and tools:
- confetti;
- bars or chocolates in beautiful wrappers;
- sheets of thick cardboard;
- corrugated paper;
- scissors;
- double-sided tape;
- glue.
Step by step work:
- To create a frame, you need to cut 2 strips up to 10 cm wide from thick cardboard. Their length is calculated taking into account the diameter of the tier (top, bottom) of the future cake.
- The ends of the strips are glued together to form cylindrical structures.
- Then a cover for the part is made from cardboard. You will need to cut 2 circles with diameters of 15 and 25 cm.
- The covers are connected to the cylinders with tape.
- Cardboard blanks are covered with gift paper.
- The cylinders are fixed with tape or glue.
- Double-sided tape is glued to the back of the bars and chocolates.
- Protective tapes are removed from the elements. The candies are attached to the bottom tier of the cake structure. Sweets are placed close to each other.
- Then the sidewall of the second row is formed.
- At the next stage, the upper part of the frame is decorated with confetti cut from corrugated paper.
- You can make decorative flowers from paper and use them to decorate the top tier of the composition.
Cooking recipes:
By letting your imagination take flight and putting in a little effort, you can present a special and exquisite gift to your loved one. Using your favorite sweets, create a simple and completely unique surprise that will definitely be appreciated.
DIY candy cake
Required:
- a piece of foam plastic or any other dense material;
- corrugated paper of various colors and shades;
- PVA glue (you can take a hot gun);
- double-sided tape;
- candies (absolutely any to your taste and color).
How to assemble the cake:
We cut out a round base of the required diameter from foam plastic. It is not forbidden to use any other dense material, either to make a base from cardboard, or to take a ready-made one, for example a cookie box. As for the shape of the product, there are also no restrictions - round, square, oval and even triangular, if you wish.
We paste the resulting blank with paper using glue. We choose the color of the paper depending on the tone of the candy labels. Instead of paper, you can also use colored foil. After pasting, we leave our future cake to dry for several hours.
To make the cake look more neat, tightly twist the ends of the candy wrappers on both sides. They shouldn't be visible. You can choose the sweets as you wish, the main thing is that they match the size of the shape.
We take double-sided tape and stick it to the side surface of the base. We will attach our candies to it.
The protective paper from the double-sided tape can not be removed all at once, but as the sweets are glued. This way we will avoid the sticking of unnecessary debris, and the adhesive base will not dry out.
To make the cake smooth and beautiful, the confectionery products must be placed tightly to each other. We do everything diligently. We use all our imagination to decorate. You can use various decorative elements: paper or fabric flowers, figurines, soft toys, etc. Don’t forget about the event on which you are going to congratulate and choose jewelry with the appropriate motif.
Cake decorated with sweets and chocolates
Ingredients:
- ready-made biscuit;
- cream 33% –120 ml;
- vanilla curd – 200 g;
- canned peaches or pineapples - 1 can;
- butter – 100 g;
- dark chocolate – 100 g;
- powdered sugar – 120 g;
- 2 packs of M&M candies,
- 8 packs of Kit-Kat bars,
- colored ribbon.
Cooking method:
Whip the cream, pre-chilled in the refrigerator, with powdered sugar until fluffy. Then mix the mixture with baby curd and mix with a whisk or pastry mixer. Cut the finished biscuit into 3 layers.
Grease each cake with cream and add canned pineapples or peaches. Do the same with the rest of the cakes. Prepare the ganache: take a chocolate bar and melt it in a water bath with butter.
Brush the top of the cake with melted warm chocolate until smooth. You need to decorate the baked goods before the chocolate hardens - place the Kit Kat bars vertically against the sides along the entire circumference. Place a packet of M&Ms on top and tie the cake with a colored satin ribbon.
Chocolate cake decorations
Anything will be suitable as sweets for such an original gift. The main thing you need to know is the taste preferences of the person for whom this cake is being prepared.
Ingredients:
- Kinder chocolate;
- Kinder Surprise;
- Barney bars;
- small juice packs.
For older children:
- Chupachups,
- MMDems,
- chewing gum and much more.
Cooking method:
Having prepared the base frame of the desired shape, we give it color using corrugated paper. Cut a strip 4 cm larger than the width of the base. Glue it with glue and smooth the joint thoroughly.
We wait a little for the glue to set, and carefully stretch the side sticking out at the top. This will create a wavy edge on the bottom tier of the cake, which can be filled with small multi-colored candies or other decorations.
From kinder surprises
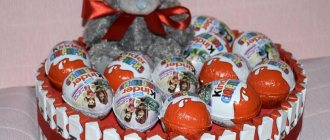
A children's cake can be made from kinder surprises.
To work you will need:
- chocolate eggs (3-5 pcs.);
- Kinder confectionery tiles (their quantity is determined by the size of the gift);
- colored cardboard;
- cardboard packaging for pastries or cake (1 pc.);
- satin red ribbon (1 m);
- thick sheets of cardboard (1-2 pcs.);
- double-sided tape (1/2 pack);
- glue gun;
- confetti.
Step-by-step production:
- The cardboard base is adjusted to the required diameter and height of the chocolate bars.
- The blank is covered with bright cardboard.
- The chocolate is attached around the circumference with double-sided tape.
- The cake is tied in the center with a satin ribbon and a lush bow is formed.
- The top tier is decorated with chocolate eggs and a soft toy.
- If necessary, the space inside the box is filled with shaped cookies and chocolate bars.
Gift snowman
You will need: a glass jar with a screw-on lid, a foam ball with the diameter of the jar's circumference, chocolate candies, a glue gun, a brush, PVA glue, white glitter, scissors, white Christmas tree tinsel, small black pompoms, orange polymer clay, colored lace, red felt and green, cotton wool, knife.
Master Class
- Using a sharp knife, cut off a small portion of the foam ball to create a flat bottom.
- Attach the ball to the jar lid using a glue gun.
- Grease the ball with pva and sprinkle with glitter.
- Make a carrot from clay.
- Glue a carrot as a nose, and use pompoms to make eyes and a mouth.
- Cut 2 circles of the same diameter from felt and glue them together.
- Glue 2 candies and glue them onto a felt circle, forming a cylinder hat, then wrap the fastening area with lace.
- Make headphones from a strip of felt and two candies, glue them to the snowman's head, and attach a hat on top.
- Place cotton wool at the bottom of the jar and fill the rest with candy.
- Connect the head to the jar and wrap the white rain as a scarf.
The gift snowman is ready!
From candy for a man
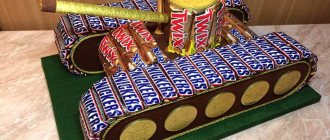
Cakes made from sweets and chocolates can be made as gifts for men.
To create the product you will need:
- candies or bars in beautiful wrappers;
- ready-made tin box or thick sheets of cardboard;
- glue gun;
- expanded polystyrene;
- colored paper matte or laminated with gloss;
- silk ribbons of different colors (dark blue, mustard, brown).
Step-by-step making of a gift:
- A circle is cut out of polystyrene foam taking into account the height of the tin packaging;
- The round base and surface of the jar are covered with bright paper.
- The sides of the tiers are decorated with candy bars or chocolate sticks.
- A satin ribbon is tied over the structure and a bow is formed.
- The tiers are glued together, and sweets, cookies and fruits are filled into the packaging.
- The top of the product is decorated with candies, which are glued with double-sided tape.
Useful tips
You can decorate a cake made by yourself not only with candies and sweets, but also with ribbons and beads. To create a romantic look, you can add buds of artificial flowers.
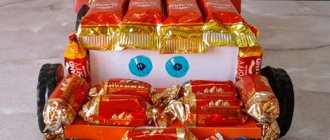
In order for beautiful cakes to be suitable for children's parties, you need to use cardboard to give them the shape of a car or a flower. And brightly colored paper will make them memorable.
When choosing sweets for a cake, it is best to combine chocolates with bars and candies.
For a child's birthday
For your children's birthday, you can prepare a themed cake (for boys or girls).
To make a gift you will need:
- candies;
- medium density cardboard;
- gift or colored paper;
- silk ribbons;
- double sided tape;
- additional thematic decor (appliques, confetti, plastic sculptures, culinary mastic).
Step-by-step design of a sweet product:
- Blanks for a two-tier structure (bottom, lids, sides) are cut out and glued together.
- You can use a ready-made round cardboard cake box and cover the top with colored paper.
- The middle of the composition is filled with sweets, mini chocolates, fruits, lollipops.
- The form is closed with a lid.
- Sweet products are glued to the perimeter of the two-tier cake using double-sided tape.
- Candies or a themed gift, mini-sculpture, etc. are placed on top.
In honor of the eighth of March
Before making a candy cake for women on March 8, you will need to prepare the following materials and tools:
- “Mercy” confectionery products, sweets in bright packages (the number of sweet products is determined by the size of the cake design);
- expanded polystyrene;
- corrugated paper 2 shades;
- hot glue gun;
- the wire;
- ribbon made of silk or satin fabric;
- narrow double-sided tape;
- scissors.
Step-by-step production of a themed gift:
- A round or square shape is cut out of polystyrene foam for the base of the cake.
- The top tier is covered with bright paper, the sides are decorated with sheets of other colors with a small allowance in the form of a decorative frill.
- Mini-bars of Mercy brand milk chocolate are glued around the structure using double-sided tape.
- The three-core wire is bent in the shape of a figure eight and wrapped with a red satin ribbon.
- A hole is made in the central part of the cake and a symbol of the March 8 holiday is placed.
- Decorative three-dimensional flowers, buds, and leaves are made from paper.
- Floral elements with leaves are glued around the formed number “8”. You can complement the composition with butterflies cut out of paper.
A bright candy cake is an original sweet for any occasion!
When planning to give someone a gift, we very often think about making it unusual, joyful and original. You always want to leave pleasant memories with a loved one. Even if the event is not grandiose, and the gift is just symbolic, by showing a creative approach, you can deliver a particularly vivid and memorable experience. For example, give an unforgettable candy cake...!
Perhaps you have long wanted to learn how to make a cake from candy, but it seemed difficult? The website bystryerecepty.ru has prepared the best master classes on making a candy gift. You will understand that making a candy cake is easy!
Heart-shaped - Mercy sweets
To create a heart-shaped gift set you will need:
- confectionery products of the Kit-Kat and Raffaello brands;
- corrugated sheets;
- satin or matte fabric ribbons (white and red);
- expanded polystyrene;
- Double-sided tape;
- hot glue gun;
Step-by-step making of a sweet gift:
- A base is cut out of polystyrene foam in the shape of a heart.
- The cake structure is covered with pink paper, and a frill of up to 2 cm is formed on top.
- Kit-Kat tiles are fixed to the sides of the cake with an adhesive base or double-sided tape.
- A white ribbon is tied over the secured bars, then a red one.
- The top layer of the structure is decorated with Raffaello confectionery.
- Sweet sculptures, souvenirs, soft toys, etc. are used as additional decoration for the cake.
From juice and candy
For the next sweet design you will need:
- small juice packs;
- candies;
- thick sheets of cardboard;
- corrugated paper;
- scissors;
- bright ribbons made of satin or silk;
- ruler;
- pencil.
Stages of making a gift design:
- A circle with a diameter of up to 40 cm is cut out of cardboard or packaging.
- A strip is measured on another cardboard sheet and teeth are drawn along the edge.
- The strip and base create the first layer for the cake and for placing the juice boxes.
- The structure is covered with paper.
- Using standard technology, smaller base parts are manufactured.
- The blocks are attached to each other using tape or glue from a gun.
- A strip is cut out of corrugated paper for the side of the base and a relief insert is created.
- The remaining sheets are curled with a pencil.
- The tape is fixed to the sides with attached candies.
- The design of the cake is tied with a ribbon.
- Buds and flowers are cut out and made from corrugated sheets of different shades and placed between juice packs.
- Candies can be poured into the hollow structure of the cake and closed with a lid.
Universal cake decoration with chocolate at home
What you will need:
- Oreo cookies;
- Chocolate without additives;
- Snickers;
- Round chocolates like Ferrero Rocher.
First, you need to melt the chocolate in a water bath. Next, we make chocolate drips. Cut the Snickers into even pieces and remove the candies from the wrapper. Place sweets around the edge: Oreos, chocolates, Snickers, etc. As a final touch, everything can be covered with “gold dust”, then the cake will look not just delicious, but also festive.
