Storage rules
It is most convenient to store spices in the kitchen so that they are always at hand during cooking. To preserve the taste and aroma of seasonings, create the right conditions.
Where and how to put fragrant mixtures of herbs and seeds is an individual matter for the housewife, but you must remember what factors have a destructive effect on the quality:
- exposure to direct sunlight;
- heat from the immediate vicinity of the frying panel or radiators;
- strong humidity, water splashes;
- placement next to household chemicals.
For some substances, freezing is the best option to preserve the freshness of the product for a long time. This method is suitable for chili peppers, paprika, sesame seeds and poppy seeds.
What containers should you choose?
The seasoning will not spoil for a long time if it is placed in a glass or ceramic vessel with a well-ground lid - the essential oils will not evaporate, reducing the richness of the aroma. Glass is easier to clean and does not absorb any foreign odors - these are valuable properties for quick and easy maintenance.
Plastic containers are used for storage in the refrigerator or freezer. Poor quality material in a hot kitchen atmosphere can emit unpleasant odors and substances harmful to health. Therefore, caring housewives prefer glass, metal, and wood.
Paper bags are carefully closed using paper clips or clips. For herbs, choose thick linen or linen bags, the neck of which is securely tightened with a cord.
What materials are best to use
There are no special restrictions on the choice of material . Perfect for:
Cereals must be immediately poured into a jar and not left in plastic bags. Otherwise, mold may appear, which can lead to the appearance of toxic microorganisms and simply an unpleasant odor. The product can no longer be eaten.
Before you pour the cereal into a jar, be sure to check it for the presence of insects (especially flour). There may be a Surinamese flour beetle living there, which not only eats the product, but also contaminates it. Eating such cereals can lead to poisoning.
If you choose a plastic jar, make sure it is of good quality. Otherwise, an unpleasant odor may arise, which over time will be transferred to the cereals. It is also worth remembering that metal containers retain the same odors for a long time.
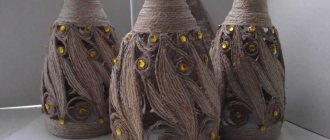
DIY spice jars
Making your own set for seasonings allows you to solve the problem of accumulated empty containers and save on the purchase of household utensils. This is also a great opportunity to bring your idea to life, to create things that cannot be bought. For creative people, the process itself will bring a lot of pleasure, and the results will delight loved ones.
Decorating glass jars
Good use in the household can be found for containers of sour cream, yoghurt, and baby food. The main thing is that the containers have tight-fitting lids. Before turning a collection of glass jars into a beautiful set, they must be thoroughly washed and the paper labels removed.
You need to prepare:
- PVA glue;
- tassels;
- scissors;
- paper napkins with a beautiful image;
- thin file;
- putty;
- acrylic paints;
- small plastic bag;
- varnish
When the workplace is prepared and everything you need is at hand, start decorating.
Step-by-step description of the process:
- Degrease jars with alcohol or acetone.
- On a napkin, separate the white layer from the colored one and cut out a motif of a suitable size.
- Carefully apply PVA to the application site.
- Pour a puddle of water onto the file.
- Place the cut out silhouette face down in the liquid.
- Carefully smooth out all wrinkles and folds with your fingers.
- Slowly drain excess liquid from the file.
- Attach the file with a napkin to the area coated with glue and smooth out all errors through the cellophane, remove bubbles.
- Remove the file and coat the top with PVA applique.
- Mix the putty with PVA (ratio 1: 1) and put the mixture in the corner of a durable plastic bag, secure with a knot for convenience.
- Just cut off the corner just a little and, squeezing out the putty, draw a convex ornament or floral patterns around the image.
- Dry and tint in the desired color with acrylic enamel, leaving a transparent window to see the contents.
- Apply varnish when everything is completely dry.
Decoupage will help out when there is an indelible design on the can, and putty decor will mask unnecessary raised inscriptions well.
Artificially aged food-grade plastic containers
The master class will help those whose kitchen in the Provence or Shabby chic style is so difficult to find suitable decorative utensils. Vintage spice boxes made from a regular store-bought plastic set will fit well into the interior.
For this you will need:
- PVA glue;
- brushes;
- acrylic paint and contours on glass;
- labels with the name of spices, printed on a printer;
- hair dryer;
- varnish
To ensure that the glue adheres well to plastic products, they are degreased and treated with fine sandpaper.
Instructions:
- Using a wide brush, apply a dense, uniform layer of glue over the entire surface.
- When the PVA sets into a thin but strong film, cover the jar with a layer of paint.
- Dry with warm air using a hairdryer until cracks appear.
- Using a piece of rag, rub paint of a contrasting or metallic shade into the completely dry cracks, trying not to go into the main tone.
- Labels are applied using decoupage method.
- The stained glass contour is used to decorate the borders of the application with lines or dots.
- Cover with varnish.
Antique craquelure can be made using eggshells, gluing them like a mosaic. The scuffed effect is created with bitumen varnish; it can be found in an art store.
Stained glass painting
A great idea to add color to a minimalist modern kitchen design. Only clear glass jars will do. Decorated tall narrow vessels look good; they take up little space, but hold a large volume and make it convenient to store spices in the kitchen.
For stained glass decor you will need:
- brush with natural bristles;
- stained glass paints and contours;
- napkins or cotton pads for correcting errors, alcohol;
- a sheet of paper with a printed pattern or image.
The containers are first thoroughly degreased. Then the sheet is placed inside with the pattern facing outward to make it easier to navigate. You can first make a sketch with a thin marker.
The following actions:
- The silhouettes of the details are drawn with contours, maintaining the continuity of the line and the closedness of the outlines.
- The elements are poured gradually, being careful not to smear the already applied layers.
- Dry in the oven at 150° for about half an hour.
- Varnish the product.
To hide the inscriptions on the lids, they are wiped with alcohol and covered with aerosol paint of any suitable shade.
Jars for small items
In a room, on a balcony or in a corridor, there are a lot of small things that constantly get lost somewhere due to the reluctance to buy special storage containers. Why not make molds out of small coffee jars?
Coffee cans for small items
In order not to scatter the jars around the rooms, we suggest that you fasten them before you start decorating. Place four small jars in a square, cover each with tape, and then cover them all together. You will receive a small portable box to store small items.
After the technical steps, cover the jar with a beautiful cloth, leaving its upper part open, on which the lid is placed. After distributing small items among the jars, close the lids and glue an inscription to each one that will indicate what is in the jar.
Types of shelves for storing spices
In the kitchen space, jars are placed on separate shelves and special built-in structures. Modern railing systems allow you to beautifully and functionally fit any container for nutritional supplements into the interior - from a set of test tubes to wicker baskets. In such designs, both glass and wooden coasters look equally good.
A common solution is a separate drawer for storing cans or a small cabinet. Cardboard organizers and boxes woven from paper tubes keep flavors separate and easy to find.
How to make a shelf
Modern furniture showrooms offer a huge range of shelves for every taste. However, it is not always possible to find the right size and appropriate style design. A DIY spice rack will solve the problem and add comfort and coziness.
All you need are simple skills acquired in craft lessons at school, a small set of tools and a desire to make an original shelf yourself.
From plywood or furniture board
The material can be used from old unnecessary furniture or purchased at a hardware store. The tools you will need are a hacksaw and a screwdriver.
Procedure:
- Decide on the dimensions - study the location for the future structure, draw the shape and design.
- Choose a material - preferably a soft wood, the thickness of the board is about 18 mm, the length and width - so that there is as little waste as possible.
- Mark the contours of the blanks on the shield and cut with a hacksaw.
- Sand the edges with sandpaper - first coarse, then fine.
- Coat the parts with varnish.
- Assemble the structure using self-tapping screws.
Buy reliable metal loops for fastening. The product can be decorated to your taste, for example, decoupage in the same style as jars will allow the stand to fit perfectly into the kitchen interior.
Magnetic holder
This method will help out when there are very few free horizontal surfaces in the kitchen. Placing seasonings on a vertical wall or refrigerator door will make it much easier to find the right spice if you have more than a dozen items in your collection.
How to assemble such a structure:
- Find the required number of jars with a volume of about 120 ml.
- Buy powerful neodymium magnets measuring 6x1.5 mm at the rate of 3 pieces per container.
- Clean the bottoms with sandpaper.
- Using epoxy glue, glue 3 magnets to the convex part of the bottom of each jar, distributing them evenly across the diameter.
- Write names or stick labels on the lids.
Neat rows of spices can be placed on a free space of the wall by attaching a metal screen of the required size to it.
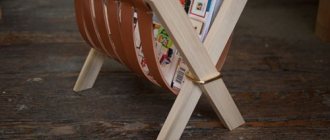
Simple wooden shelf
Do not rush to throw away the wooden boards left over from the renovation. It is easy to build an original hanging structure in ethnic style from them.
Instructions for action:
- Determine the dimensions of the workpiece and draw the markings.
- Cut along the contours.
- Drill holes with a diameter of 10 mm in each corner.
- Sand the workpiece with sandpaper.
- Cover with varnish.
- Pass two pieces of rope with a diameter of 8 mm and a length of 1 m into the holes - each on one side of the board.
- Tie large decorative knots at the ends of the ropes.
Hang the product on strong hooks previously screwed into the wall. In this way, you can assemble an entire rack using several identical parts.
Condiment cabinet
To make a wall organizer, you can use an unnecessary drawer from an old chest of drawers. You will need a piece of plywood, ingenuity and patience.
Process description:
- Remove the handles from the drawer and cover the holes with putty.
- Paint the workpiece.
- Cover the bottom with wallpaper from the inside.
- Draw the outlines of the dividers on the plywood, carefully taking measurements from the inside.
- Cut out the elements along the contour.
- Paint the details.
- Install partitions using wood glue or liquid nails.
- Cover the craft with varnish.
- Screw the metal hinges onto the self-tapping screws.
The cell sizes are determined based on the size of the jars. The main requirement is the ability to freely remove the containers and put them back in place.
Screw-on cans
Space saving and functionality are the motto of the option with the location of condiments at the bottom of the shelf or cabinet. This way you can place containers of impressive size without taking up free surfaces.
How to do it:
- Choose jars with screw-on metal lids.
- Attach the covers to the screws so that the threads are on the bottom.
- Screw the containers into the lids until they stop, having first filled them.
- If two rows are planned, then longer jars are selected for the farthest one to make them easier to get out.
You can stick bright labels on the containers, and paint the lids in one shade for a harmonious composition.
Decorating tin cans
If you get creative and use some tips, you can turn boring cans and other tins into unusual home decor items.
Preparing for work
- First of all, you need to clean the surface of the cans. Remove labels, rinse and dry walls. If there are any unevenness, sand them with sandpaper (one or zero).
- If the metal is prone to rust, or the product will be actively used in contact with water, treat the surface with a special product. Construction and creative stores offer a large range of sprays: rust converters, anti-corrosion, inhibitor compounds, lithium or silicone grease.
Clue. If the surface of the tin can is to be covered with acrylic paint or primer, no additional means should be used - their composition additionally protects the metal from corrosion.
- The necessary materials and adhesives are selected.
- The edges of the jar are checked. The cut should not be sharp (for example, like in canned food). If there is a possibility of cutting yourself, it is better to process the top with a file, coarse sandpaper, or glue a strip of fabric.
The main difference between products made from tin and glass is that such containers can be modified. For example, drill holes to make special fastenings (to hang the product on a hook or attach a convenient handle). To do this, you may need a drill, knife or other sharp object.