What is it like?
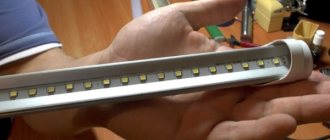
A USB LED strip is a chain of low-current LEDs designed for 5 V power supply. It is a highly specialized design, so there are few manufacturers of such lamps. Most of them are concentrated in the countries of Southeast Asia. Online stores (Aliexpress and the like) have a lot of offers for such lighting.
There are regular, single-color options, or multi-color RGB strips, for normal operation of which you will need a control device - a controller. All of them come ready to use, with a connector attached. All that remains is to plug the plug into the socket and place the tape in the planned location.
If desired, a regular LED strip can be converted to 12 V to operate from 5 V. However, this process requires some preparation, both theoretically and practically. Some users suggest assembling a 5 V to 12 V converter, but with this solution the permissible current drops from the original value of 500 mA to 250 mA. In addition, the very point of connecting the tape to USB is lost - then you can simply take a standard 12 V power supply and connect it to the network.
It is much easier to use ready-made luminaires based on SMD 2835 LEDs, containing 60 elements/meter of length. There are single and multi-color options, with varying degrees of protection. You can purchase them and connect them to the USB socket yourself by following some technical procedures. The advantage of this option will be a more precise adjustment of the length of the tape to the dimensions of the supporting surface, and the choice of the most suitable color shade.
Important! The connection process does not pose any significant problems and is quite accessible to a person who can handle a soldering iron. These considerations attract many users who do not want to wait for parcels from Aliexpress.
↑ How do we shine?
At first, this “device” was powered by an adjustable alternating voltage available on the lighting control panel, which was later abandoned because The remote control was updated and had its own adjustable lighting fixtures. But there was a need to power it from the USB socket of the laptop itself, which was done.
General lighting
Local lighting
In order not to think for a long time, an inexpensive Chinese-made LED table lamp was first used, from which a “gooseneck” with an LED shade was taken, the “leds” of which had to be connected in series to reduce the current consumed from the USB. But later it turned out that Chinese LEDs are very unreliable, which means we had to find a more suitable replacement for them.
The LED strip came in just right - there were three links. It had to be glued to a piece of strip-tie of sufficient width (it is self-adhesive) and stupidly connected instead of the previous garland of “ice”, for which the end surface of the original lampshade was removed so that the luminous strip would stick out. Through the side holes drilled in the lamp body, the strip was glued to a double-sided self-adhesive crumb, and then pulled in with thin strips.
Use Cases
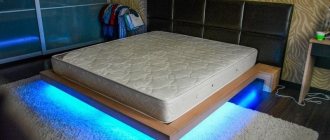
The purpose of such LED lighting is purely decorative. Sometimes there are statements that installing LED backlighting on the back of the monitor is good for the eyes and reduces fatigue, but in this case the main purpose is the usual decoration, the lighting design of the device. Users install the LED strip in different areas:
- finishing the internal or external surface of the computer system unit;
- decoration of a retractable table for keyboard and mouse;
- monitor design;
- installation on the edges of a table or wall shelves;
- decorating other items located near a computer or laptop;
- creation of floor lamps, table lamps and other lighting devices.
If desired, you can come up with a lot of options for using such LED lighting. All of them do not require labor-intensive installation, do not load the computer’s power supply and allow you to obtain an attractive lighting effect. Another advantage can be considered the soft, non-dazzling glow of the LED strip. It does not create excessive brightness and does not disturb other family members at night.
Design ideas
Now I will present to your attention some original ceiling lamp ideas for your home. So, how to make a lampshade for a chandelier with your own hands?
Idea 1: photographic film
A lamp made from a lampshade from an old chandelier and photographic film.
Such a lamp cannot be used as the main lighting: the old photographic film transmits too little light. But for zone lighting it’s easy. Here is a small master class on making a lampshade:
| Image | Description |
| We cut the photographic film into pieces of equal length along the height of the lampshade and cover its surface with glossy decoupage glue. | |
| We glue the pieces of film end to end, carefully smoothing them, and wait for the glue to set. | |
| We cover the lampshade with another layer of glue to get a smooth, glossy surface. |
Idea 2: steampunk chandelier
Steampunk lamp with incandescent lamps.
Antique-style incandescent lamps with long spirals with low temperatures were used as light sources. This feature increases the life of the lamp. Ebonite sockets and wires are painted with bronze paint, and improvised lampshades are wound from wire.
Idea 3: decorative braid
Lampshades made of decorative braid on a wire frame.
Very interesting retro lampshades are made from multi-colored fabric ribbons. The braid is wound around a wire frame.
Winding the ribbon around the lamp frame.
Idea 4: glass bottles
Make a chandelier from bottles of refreshing drinks? Just a piece of cake!
Don’t rush to throw away beautiful bottles of expensive alcohol. They can be used to make a chandelier. Some tips for creating it:
- In this case, you will need sockets and lamps for a small base (E14);
- It’s easy to cut the bottoms of bottles with a grinder and a diamond wheel;
- The power cord is pulled through the neck, and only then the base with the lamp is attached to it;
- Use low-wattage, retro-style incandescent bulbs.
Idea 5: plastic bottles
Not a fan of elite alcohol? Well, plastic beer bottles can also make an unusual and stylish lampshade.
The transparent ball is glued together from fragments of plastic bottles.
Polyethylene containers are easily cut with a stationery knife. For gluing, use transparent silicone sealant: it will not be visible in the light and will not darken with prolonged heating.
Idea 6: Beer can openers
Another idea: you can make lampshades from scrap materials with your own hands by rummaging through the garbage accumulated at home. In particular, the material for them can be... beer can openers. To glue them together, you can use the same silicone sealant: it adheres perfectly to degreased metal.
Such a lamp will immediately indicate to your guests your preferences in the field of drinks.
Idea 7: Embroidery hoop and fringed braid
How to decorate a ceiling lamp with fringe? It's very simple: hang embroidery hoops of two different sizes on cords and glue fringed braid to their outer surface. The easiest way to do this is to use a hot glue gun.
The frame of the lamp is made of hoops on cords.
Covering the frame with fringed tape.
The result is a neat and cozy-looking chandelier shade.
Idea 8: paper
Do you like retro-style floor lamps and table lamps? A paper lampshade will help give new life to an old lamp.
Remaking an old table lamp: a new lampshade is made of paper, tied with a twisted cord or ribbon.
Idea 9: gramophone record
Do you have old gramophone records lying around in your closet, but you haven’t had anything to play them on for a long time? Don't worry: even the rarest compositions can long ago be found in digital form on the Internet. There are other uses for records.
Lampshades in the shape of a flower from old vinyl records.
To make a lampshade, heat the plate over a stove burner or using a hair dryer, then carefully bend the plastic edges into folds.
Idea 10: fairies and butterflies
If you need an original lamp for a nursery, no problem: we will use animals, butterflies and fairy-tale characters.
Butterfly lampshade. They are made of colored cardboard and secured with fishing line.
There is a fairy living on the lamp in my children's room.
Materials and tools required for work
To create and connect a USB LED strip you may need:
- the tape itself;
- wire or separate USB plug for soldering (best option);
- soldering iron and solder, ideally a soldering station with adjustable temperature and smoke extraction;
- scissors, knife or other tool for removing insulation;
- tester or multimeter;
- connecting wires;
- current-limiting resistor (the value is calculated based on the operating voltage of the LED);
- screwdriver, pliers (just in case).
Materials for fastening the tape are deliberately not included in this list, since different installation methods are used for each case.
Popular models from Aliexpress
There are more than 100 million products on Aliexpress. If you need a good USB lamp, then this is the place for you. Below are the most popular models of such devices:
Ebyphan USB
The lamp is made of environmentally friendly material, according to the manufacturers, and is available in 8 colors. The flexible LED device can be connected to any USB port and rotated in the desired direction. The device costs from $12.
Da Voice
The lifespan of this lamp is 40,000 hours. It is a flexible product that can be connected to a USB port and is also very durable. Made in different colors and designed to illuminate a laptop. Product price starts from $15.
Litwod Z20
An LED product in the form of an astronaut figurine with a USB connector is perfect for a child’s bedroom and for illuminating a laptop. The light in the model comes from the spacesuit's helmet.
If you raise this lamp higher, it will stay firmly on the tube, creating the illusion of a flying astronaut illuminating the laptop keyboard. The price of the product is only 2 dollars, and the device has a power of 0.5 W.
USB pinout
Modern computers most often use USB version 2.0. They use 4 wires, two of which carry data and the other pair carry the plus and minus 5V power supply. In standard units, the plus wire is red and the minus wire is black. The contacts in a regular, flat socket (USB type A) are arranged in such a way that the data wires run in the center, and the power supply runs along the edges.
Important! For mini USB sockets of both types, the placement will be the same, and for USB type B, which are used to connect printers or other peripherals, the power is located on pins 1 and 4, located on the right, one above the other (if the beveled edges are on top). A continuity test using a tester will help you determine more accurately where the plus and minus are. When connecting, it is necessary to take into account the location of the contacts, since you will have to solder the plug, where everything is located in a mirror order.
What should you not be afraid of?
The fact is that when wood is heated throughout its entire mass to 150-250 degrees, it softens and bends, and when it cools, it retains its given shape. You can heat a piece of wood to this temperature without charring it with a hair dryer. Just remember to pre-drill the axial holes (say, for wiring an electrical cable); this will not be possible in an already curved part.
Finally, a completely elegant wooden chandelier can be made from non-bent parts: modern light sources make it possible to implement such a solution. Then the ceiling lamp is made in the form of a ceiling chandelier, see below.
What should you pay attention to?
For old Soviet chandeliers and household lamps in general. The USSR, as we know, was a very controversial phenomenon, which was especially clearly expressed in Soviet consumer goods. If you have an old Soviet-made home chandelier lying around in your closet, then its light-diffusing/light-transmitting parts are probably made of high-quality glass, and its porcelain/earthen decorative parts are made of the same high-quality material. Let 1 “horn” out of 4-5 be broken, the remaining ones will be enough for a new homemade chandelier. Is the paint peeling? Now there are any washes and excellent acrylic enamels on sale. Are some of the pendants lost? From the others, you can also build something very beautiful, if only there was some creativity and taste.
Connection diagram
The schematic diagram of connecting an LED strip to a USB socket is simple - a current-limiting resistor is connected to the plus, to which the corresponding contact of the strip is soldered. The negative wire is connected to the negative terminal of the socket. It is important not to confuse the polarity. It must be remembered that when soldering the plug, the contacts will be mirrored relative to the socket.
First of all, it is necessary to calculate the value of the current-limiting resistor. The formula looks like this:
R=(UPIT-ULED)/ILED
Where Upit is the supply voltage equal to 5 V;
U LED is the voltage drop across the LED, which depends on the length of the emitted wave;
I LED - current strength of the LED in operating mode.
The voltage drop across different LEDs can be clearly seen in the table:
| LED element color | Voltage drop |
| White | 3-3.7 V |
| Red | 1.6-2.3 V |
| Blue | 2.5-3.7 V |
| Yellow | 2.1-2.2 V |
| Green | 2.2-3.5 V |
| Orange | 2-2.1 V |
If the calculation seems too complicated, or its result is in doubt, you can use an online calculator. There are a lot of them on the network; to be safe, you should duplicate the result on two or three resources.
Once the rating has been calculated, you can prepare the wire or solder connector for use. If you use a ready-made USB cable, you need to leave one end intact (it will connect to the socket of a computer or laptop), and cut the second to length and strip the two outer contacts (these are the red and black wires, “+” and “–”, respectively). The other two wires carrying data should be shortened and insulated to prevent a short circuit.
If you plan to use a solder plug, it must be disassembled and soldered to the outermost contacts of the wire. You can do it simpler - immediately solder a resistor to the positive contact of the plug, and the corresponding electrode of the connecting cord to the negative one. Plus is soldered to the free contact of the resistor after assembling the plug. It is imperative to check whether the contacts are shorting with each other. They are located very close to each other, during soldering you can accidentally connect adjacent pins.
Selecting light sources
What lamps can be used for lighting in a homemade chandelier?
Delight and adoration
I would advise you to pay close attention to the so-called filament - light bulbs on LED filaments. There are several reasons for this recommendation.
They look stylish, externally resembling the usual low-power incandescent lamp. The lamps will look great even with an open lampshade;
The photo shows a filament lamp in my lamp.
- They are very economical: specific luminosity reaches 100 lumens per watt. For comparison, an energy-saving (compact fluorescent) lamp produces 50-70 Lm/W, an incandescent lamp - 12-14;
- They produce light not in one hemisphere, like LED lamps with a flat board and a round diffuser, but in all directions (except, of course, the axis of the base). This feature allows the bulbs to be installed with the bulb facing up;
For comparison, LED lamps with a flat board and a matte diffuser shine in one hemisphere. This is convenient for a spot light, but inappropriate for a ceiling chandelier with arms pointing upward.
- They are more fault-tolerant compared to other LED and energy-saving lamps. The reason is the extremely simple circuit design of the driver (power converter): instead of a complex stabilizer with an electrolytic capacitor that is very vulnerable to heating, it only includes a diode bridge that converts alternating current into direct current;
- They provide the most accurate color rendering among LED and compact fluorescent lamps: the color rendering index CRI reaches 85, very close to that of incandescent and halogen lamps (90-95).
Color rendition of lamps of different types.
A spoon of tar
To temper the reader's excitement, I will mention a few disadvantages of filament lamps.
Power: at the beginning of May 2022, I have not seen bulbs on sale with LED filaments with a power of more than 9 watts (and, accordingly, with a luminosity above 900 lumens). Flat board lamps reach a power of 30 W with a luminosity of 2400 lm.
One of the problems with these bulbs is the relatively low maximum power.
Sensitivity to voltage drops: the driver of these lamps does not stabilize the voltage, but only rectifies the alternating current. When the voltage dropped below 190 volts, my filament lamps went out, but older LED and compact fluorescent light sources continued to shine properly.
Price: Due to their relative newness, filaments remain the most expensive of energy-saving and LED lamps. An 8-watt light bulb from an inexpensive brand at the ASD or Smartbuy level will cost the buyer about 250 rubles.
