Stages of creation
- Use a professional marking board or a regular ruler to correctly mark the dimensions of the workpieces. Having decided on the desired size, draw the shapes with a simple pencil on cardboard. Then you need to cut out the blanks with a sharp stationery knife. We will need two parts for each letter, so we need to make them in two copies at once.
- We measure the length of each side of the workpiece around the perimeter. We cut out the sides: the thickness can be any, we will make them 5 cm thick. To do this, we cut out cardboard strips of the required length, 7 cm wide, leaving a centimeter allowance for hemming on each side. Having folded the allowances with your hands, we glue them to one side of the base with double-sided tape, forming the sides.
- We apply the second side of the letter to the side and also glue it with tape.
- We use regular adhesive tape to secure the part in random places for reliability.
- We decorate the resulting blank according to our own taste and desire.
A simple and quick way to design a blank is to attach it to beautiful paper (you can use bright wallpaper for this purpose), trace the shape with a pencil, adding a few centimeters on each side for folds. Cut the paper with scissors and glue it to the cardboard blank with PVA glue. Allow the glue to dry, then additionally decorate the facade with lace, beads, pearls, and artificial flowers.
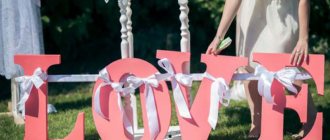
Common options for words in capital letters for a wedding photo shoot: love, married, wedding, happiness, love, happy, just married, amore, amour. The phrases “I agree”, “Forever”, “Yes, I do”, “Family” also look beautiful in the pictures. Inscriptions with equation signs look elegant, for example, “Masha + Sasha = Love” or the inscriptions “Husband” and “Wife” with arrows facing the heroes of the photo shoot.
Volumetric letters with backlight
Three-dimensional luminous letters will become an original decoration for any holiday.
For illumination, you can use a New Year's garland or make individual light bulbs yourself and connect them using a wire.
Tools and materials
To work you need:
- thick cardboard;
- thin cardboard;
- stationery knife;
- ruler;
- a simple pencil;
- hole puncher;
- glue;
- glue brush;
- spray paint;
- narrow tape;
- box for painting letters;
- electric garland.
Step-by-step instruction
The manufacturing process consists of the following stages:
Stages of creating volumetric letters with backlight
- First of all, you need to select a letter template and calculate the size of the future figure.
- Transfer the template onto a sheet of thick cardboard with a simple pencil and cut out blanks for the future letter with a stationery knife or a sharp scalpel. This will make the edges of the parts smoother.
- Holes for light bulbs should be made along the perimeter of all blanks using a hole punch. Their number should be sufficient to understand which letter glows in the dark.
- Thin cardboard should be cut into strips about 5 cm wide and pasted over the outer surface of the product. This technique will give the figure additional volume.
- The completed letters should be placed in a prepared box and painted on all sides with spray paint of the selected color.
- Using the described method, you need to make several letters necessary to form an inscription or phrase.
- After the paint has completely dried, the produced liters must be laid out on a flat surface according to the inscription and the garland bulbs must be inserted into the holes on the back side. The wire should be secured with narrow tape.
Before installing the garland, you must make sure that it is in full working order.
Having mastered the basics of creating three-dimensional figures, you can make any inscription to decorate the interior or any holiday.
Glowing 3D letters
Glow-in-the-dark letters can be made from thick cardboard and electric garland. Through holes are made in the volumetric parts and light bulbs from the garland are placed in each of them. In a dark room, the included decoration will delight not only children, but also adults.
Description of work with photos
By connecting the garland to the network, you will achieve an extraordinary effect: the letters seem to come to life! And your party will be remembered for its originality and solemnity.
Source
Making three-dimensional letters from wood with your own hands
Wood products are more difficult to make, but such letters will last longer. You can use both wood blocks and plywood. However, in the second case the letters will be flat. To make an inscription, you also need to make a stencil, which is transferred to the workpiece, and then cut out with a jigsaw.
It is very important to subsequently properly process the wood using sandpaper (eliminate irregularities and remove excess material). The letters can be painted, decorated with any material, and additional lighting can be installed in them.
The product must be varnished so that it is not afraid of exposure to moisture.
Volumetric letters made of paper
Three-dimensional letters are made from paper simply and easily. Such figures will be an excellent decorative element for wedding celebrations, photo shoots, etc.
Tools and materials
To work you will need:
- letter template of the required size;
- large format thick paper: whatman paper, designer paper or colored paper for creativity;
- scissors;
- stationery knife;
- a simple pencil;
- ballpoint pen with a non-writing refill;
- ruler;
- glue Titan or Moment;
- several books for the press.
Step-by-step instruction
The process of making a three-dimensional letter from paper consists of the following steps:
- First of all, you need to decide on a template, print it on a printer, transfer it with a simple pencil to a sheet of thick paper in two copies and cut it out.
- To form the ribs, you need to prepare several long paper strips with a width of 2 to 8 cm. The thickness of the figure depends on the width.
- On the prepared strips, press the fold lines using a non-writing pen.
- On the paper strips, you need to measure exact segments with a ruler. The corners also need to be drawn with a non-writing rod and bent. At the folds, the corners need to be cut off. On rounded areas, the parts to be glued should be cut on both sides with scissors at intervals of 2–4 mm. An important condition for working is that the ruler is positioned strictly at a right angle.
- Distribute the glue evenly over the entire surface of the rib area to be glued and join the front blank to it.
- The product should be turned over for a few minutes and fixed with your hand so that the glue sets.
- You need to glue the second (wrong) piece to the finished frame and leave the figure under pressure for a couple of hours.
- After the glue has completely dried, all defects and irregularities on the product must be eliminated using scissors or a stationery knife.
The inner part of the blanks should be cut out with a stationery knife and then continued with scissors.
Garland of paper flags
The simplest and most cost-effective technique for making a New Year's inscription, which even a child can handle. The idea is to create several multi-colored paper flags - 11 of them should be allocated to letters (one per flag), and add a few more for scale and color.
During the work you will need:
- multi-colored paper;
- scissors;
- cutting templates;
- stapler;
- decorative braid, ribbon, twine or strong threads for stringing.
How to create a garland inscription:
1. Fold each sheet of paper in half with the wrong side out. Focusing on the place of the fold, draw a template with a pencil so that when you turn it, you get a double-sided flag. Choose any shape, the approximate finished size is about 10-12 cm.
2. Cut out the flag along the contour and unfold it - make as many blanks as you need for your garland.
3. Apply the corresponding letter to each blank - you can draw it with a felt-tip pen or glue a ready-made template made of paper in a contrasting color.
4. Place a string under the fold of each piece and glue both sides of the flag, securing it to a common thread.
5. Hang the finished garland on the wall or ceiling.
Select the paper for the garland so that the inscriptions do not blend into the background and are clearly visible. If the back of the pendant will also be visible, write inscriptions on both sides. You can print letters and numbers using the templates given below.
Here the letter “O” is very similar to a zero, so you will also get the numbers for the coming 2022. The flags will be even more interesting if each of them is turned into an applique using the decoupage technique. Use stickers, lace, beads, funny pictures, paper snowflakes and glue them onto a paper base.
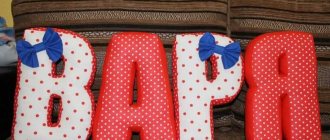
Fabric pillow letters
You will need: red and white cotton fabric, sewing machine, scissors, thread, pins, centimeter, ruler, sheets of paper, pencil, filler - synthetic fluff or holofiber.
Master Class
- Draw letters on sheets of paper.
- Transfer the letters onto red fabric in 2 copies.
- Make patterns, taking into account an allowance of 1 cm.
- Cut strips for the sides 7 cm wide from white fabric (5 cm width of the side, 1 cm allowance on each side).
- Start with a simple letter L: fold the blank right sides together, leaving 5 cm of the sides free, then stitch the bottom of the letter, 1 cm from the edge.
- When the stitching approaches the corner, make notches to make the corner even.
- Sew the side to the part without finishing 4 cm - this will be the opening for turning it inside out.
- Attach the second part of the letter L and make marks with a pencil on the sides opposite the existing corners so that the letter is even.
- Attach the piece, secure with sewing pins and make cuts in the corners so that the fabric does not wrinkle.
- Sew the second piece, leaving 4 cm for turning.
- Fill the letter with filler and sew the hole closed with a blind stitch.
- Start creating the letter O: fold the two parts of the letter and make symmetrical marks with a pencil every 2cm on two blanks on the outer and inner sides of the fabric. Also make marks on the sides of the outer and inner rings.
- Make notches (cuts) along the marked marks.
- Sew the outer ring on one side, matching the marks, leaving 4 cm for turning.
- Sew the inner ring on one side.
- Stitch the edges of the inner ring strip to form a “tube”.
- Sew the free part of the outer ring.
- Turn the workpiece inside out, secure the inner ring with pins and sew it by hand with a blind seam.
- Fill the letter with filler and sew the hole closed with a blind stitch.
- Sew the remaining letters using the same pattern.
Fabric pillow letters are ready! I recommend watching this video!
Master class “How to sew a pillow letter”
Watch this video on YouTube
Changing capital letters to lowercase letters using the Microsoft Word toolbar
Microsoft Word 2003
- Select with your mouse the piece of text you want to modify.
Select with the mouse a piece of text that will need to be changed - On the word processor toolbar, find the Format tab, located between Insert and Tools.
Click on it. Find the “Format” tab, click on it - In the window that opens, select “Register”.
Click on it. In the window that opens, select “Register” and click on it - In the interface that appears, select the phrase “all lowercase.”
Check the box for “all lowercase” - Click OK and the dialog box will close.
Click "OK"
Microsoft Word 2007
- Use your mouse to highlight the word or sentence you want to edit.
Select with the mouse the word or sentence that will need to be edited - On the toolbar, find the “Home” button.
Click on it. Go to the “Home” tab - In the “Font” group, located after the “Clipboard”, left-click on “Register”.
In the “Font” section, click on the “Aa” icon, which is called “Register” - In the dialog box that opens, select the phrase “all lowercase.”
Click on it. Click on “all lowercase”
So the user can choose the following letter spellings:
- “As in sentences” - the first character in the statement will be capitalized, the remaining letters will be small;
Example text with “As in sentences” included - “ALL CAPITAL” - all characters selected by the mouse will become large after pressing the button);
By selecting “ALL CAPITAL” all selected text will be in capital letters - “Start With Capitals”—the first characters of each individual text element selected in the document will be large;
subsequent characters will become small; Example of text with the “Start in Capitals” option enabled - CHANGE CASE - the text will be converted as follows: small letters will become large, large letters, respectively, will be small.
Example of text with the “CHANGE CASE” option enabled
DIY letter pillow
Nowadays you can no longer surprise anyone with an expensive toy or gift. The stores offer us a huge assortment of all kinds of goods for every taste and budget. But you always want more, you want to surprise and leave as a souvenir of yourself a thing in which you can feel the warmth of your hands and care. And only things made with one’s own hands can make a person smile as soon as he picks it up. Such a thing, for example, could be a personalized letter-pillow, which can be given as a gift for a baby’s first birthday or simply as a sign of attention.
To sew a personalized letter-pillow, we will need:
- cardboard;
- a simple pencil;
- scissors;
- ruler;
- fleece in two colors, in this case blue and white;
- needle and thread;
- padding polyester
First we need to make a stencil of the letter. We determine the size of the letter ourselves; in our case, the height of the letter is approximately 30 cm, the width is 25 cm. We take cardboard and use a pencil and a ruler to draw the letter on it.
If you have difficulties at this stage, you can print the letter on a printer using the Word program, the WordArt function. Cut out the letter and trace it on cardboard.
Instead of ordinary cardboard, you can use any available materials, the main thing is that they are thick enough, otherwise the stencil will slip on the fabric. In our case, for example, instead of cardboard, a regular shoe box lid was used.
Next, use scissors to cut out the letter along the contour. You can use nail scissors to cut out the hole in the letter A.
Now we apply the resulting stencil to the fabric and trace it along the contour. We make 2 parts.
Since the letter A is symmetrical, there is no need to ensure that it is positioned correctly on the fabric. But, if you are sewing, say, the letter P or C, then you need to place the stencil on the fabric in a mirror form. That is, you must have two parts that are “mirror” relative to each other.
After the letters have been outlined, we cut them out, but not along the contour, but 1 cm wider.
From white fleece, cut out a strip approximately 15-20 cm wide. The strip should be long enough to cover the side of the letter along the entire perimeter. The perimeter of the letter should not be measured in advance, since the initial result may differ from the final one. It is better to cut the strip longer and then cut off the excess.
Using the same printer, we cut out the letters of the name of the person for whom the pillow is intended. It is not necessary to cut out the internal holes of the letters; they can be made directly on the fabric.
We apply the letters to the fabric and trace along the outline. Remember about “mirror” letters.
Cut out all the letters along the contour. To cut out the holes in the letters, you can again use nail scissors.
Next, take a strip of fabric and one of the letter parts and, starting from a straight line, sew them to each other along the contour line with a “back needle” seam. In this case, the fabric should be positioned right sides to each other, but we sew the parts on the wrong side.
Sew a strip around the entire perimeter.
After this, we sew the ends of the strip to each other. If the fabric is longer, simply cut off the excess part.
Next, we again cut out a strip of white fleece the same width as the previous strip, but much shorter.
Place the fabric right sides together again and sew a strip on the wrong side around the entire circumference of the hole. The ends of the strip are also sewn on. You will get a “pipe” like this.
Now we sew the second part of the letter to the strip in the same way as the first, but carefully ensure that the parts do not twist. Therefore, first we find the corner of the letter (say, the lower right one on the leg of the letter), mark it on both parts and begin connecting the parts from this point. We also sew the second part along almost the entire perimeter, leaving a small hole at the end. The hole should be wide enough for your fist to fit comfortably into it.
Next, turn the letter right side out and thread the “pipe” of the letter’s hole through the hole of the second part.
Now we sew it to the edge of the hole of the second part using a “hidden” seam.
After this, you can evenly fill the letter with padding polyester through the hole left earlier.
Once this stage is completed, close the hole with a “hidden” seam.
Now we place the previously cut out letters of the child’s name on the side and sew them with a “back needle” seam.
The personalized letter pillow is ready.
The author of the master class is Elena Sharygina.
Garland of letters
Another creative interpretation of the New Year's inscription is the formation of a garland not from flags, but from cut out letters. For work, it is best to use thick designer paper or decorative cardboard - they hold their shape perfectly and look presentable. Shiny cardboard with glitter will look especially elegant. We suggest making the inscription in English, or using templates in Russian.
You can download the templates for free using the link below. Enlarge them to the size you need and print each letter individually.
In addition to cardboard, you will need the following materials and tools:
- printed letters;
- a stationery knife, scissors or a special scalpel for cutting;
- clothespins or hole punch;
- material for hanging - rope, twine, thin ribbon.
How to make a garland of letters:
- Cut out the printed letters and trace their outline on the back of the decorative cardboard.
- Cut each template onto a flat surface with a scalpel or sharp scissors.
- From the top of each letter, measure the same distance for fastening - about 1 cm. Mark the dots on the back side with a pencil.
- Use a hole punch to make holes at the marked points.
- In the correct order, thread the letters through the holes to form a garland.
The task can be simplified if you use ordinary clothespins rather than a hole punch for fastening. Additionally, you can cut out stars, snowflakes, Christmas trees - and also string them on a thread along with the letters.
How to make three-dimensional letters from foam plastic
There are several advantages of letters made from foam plastic: ease of use, cheap material, and the shapes hold their shape for a long time. Making volumetric letters from it is much easier than gluing a cardboard frame.
List of materials:
- foam sheets;
- pen or marker;
- ruler, sharp knife;
- thick paper;
- fine sandpaper;
- PVA-based glue;
- newspaper or thin parchment;
- acrylic paint, brush.
Operating instructions:
Buy polystyrene foam in sheets. You can find it in construction stores. Choose shapes that suit your thickness. If there are none, then you will have to glue several sheets together.
Draw the template first on a piece of paper. This way you can adjust it, which would be difficult to do with foam. Transfer the letter diagram onto the material. For convenience, divide the sheet into several parts according to the size of the workpieces.
Using a utility knife, cut out shapes from foam. Use a metal ruler to help you - move the blade along it. This will prevent the knife from slipping off in the wrong direction.
- The cut line must be sanded. Choose one with fine grains to ensure an even surface. Use a brush to brush away any excess foam scraps.
- To decorate the letters, use newsprint or thin parchment. Tear them into small pieces, apply glue to them and secure them to the foam. Super glue and a glue gun are not suitable for this material.
- After you have covered the entire surface of the figure, leave the glue to dry. Additionally, there is no need to prime the surface, since the glue acts as a primer.
- Now you can apply acrylic paint. If the layer turns out transparent, then paint the letters again. But only do this after the first layer is completely dry.
You can leave the figures in this state or decorate them with ribbons, beads, and artificial flowers.
As you can see, there are a lot of ways to make three-dimensional letters. If you make such decor with your own hands, you can not only decorate the interior or enliven a photo shoot, but also save on the original design.
Where to start making letters?
The production of volumetric letters begins with the development of the layout. If the company already has an individual corporate identity, then planning the design of a future sign will not be difficult. For those who have just started their business, preparing a pattern can be the starting point for developing a corporate image.
The blank is created using graphic programs, for example, CorelDraw. At this stage, the required font, sizes, and color palette are selected.
If the future letters do not exceed 30 cm in height and 20 cm in width, then their stencils can be printed on A4 sheet using a regular printer. In the case of larger letters, you will have to contact a printing house to print templates on specialized equipment and large-format paper.
For some, it will not be difficult to draw the designed inscription on their own using whatman paper and a pencil.
Volumetric letters made of cardboard
Cardboard is one of the simplest and most affordable materials for creating three-dimensional letters. It is very easy to work with and you can make shapes of different sizes from it.
To make voluminous inscriptions, it is recommended to use thick paper from packaging boxes.
Schemes and templates
Before starting work, you need to select a stencil with a letter and font.
At the next stage of work, the template of the future letter should be transferred to a sheet of ordinary or corrugated cardboard. Further manufacturing technology may differ.
Three-dimensional letters from cardboard can be made in three different ways.
Method No. 1
The simplest and fastest way is to make figures from several layers of cardboard. Such products are distinguished by their heavy weight and reliability in operation.
Tools and materials
To create three-dimensional figures from cardboard using this method you will need:
- regular or corrugated cardboard;
- scissors or stationery knife;
- PVA glue;
- long ruler;
- a simple pencil;
- decoration material: thick threads, colored or wrapping paper, artificial flowers, shells, small stones, beads or beads.
Step-by-step instruction
The workflow consists of the following steps:
- Using the selected stencil, you need to make from 7 to 10 identical cardboard blanks.
- All blanks should be glued together with PVA glue.
- After the glue has completely dried, the finished volumetric letters need to be decorated.
To decorate finished three-dimensional letters, you can use thick threads, which you simply need to wrap around the figure or paste it with colored or wrapping paper, decorate it with flowers, beautiful shells, small stones or beads.
Method No. 2
The second method of making three-dimensional figures is a little more complicated than the first. But with its help you can make classic letters that will become a real decoration for your interior or holiday celebration.
Tools and materials
To work you need:
- ordinary cardboard;
- scissors and stationery knife;
- PVA glue;
- ruler;
- a simple pencil;
- non-writing ballpoint pen;
- several books for the press;
- materials for decoration: white paper, glitter, beads, shells, bows, satin ribbons, etc.
Step-by-step instruction
The workflow consists of the following steps:
- Using pre-selected stencils, you need to cut out two identical parts from cardboard.
- To form the edge of the future figure, you need to cut a strip 3–4 cm wide greater than the thickness of the product.
- Using a non-writing rod, you need to draw fold lines through which the workpieces will be held together into a single whole.
- All parts must be bent along the formed fold lines.
- One of the blanks should be glued to the edge of the product. For greater convenience, in areas of the figure with smooth lines, the fold of the rib should be cut with scissors.
- In a similar way, it is necessary to glue the second blank to the rib.
- The finished letter should be placed under a press for several hours.
- After the glue has completely dried, the three-dimensional letter can be covered with white paper, sprinkled with glitter, decorated with beads, shells, bows, satin ribbons, etc.
To create three-dimensional letters with your own hands from cardboard, the third method is to use the papier-mâché technique.
Tools and materials
For production you will need:
- regular or corrugated cardboard;
- cardboard paper towel rolls;
- white printer paper;
- scissors and stationery knife;
- PVA glue;
- ruler;
- a simple pencil;
- acrylic paint;
- paint brush.
Step-by-step instruction
The creative process consists of the following stages:
- You need to draw two blanks on cardboard using the selected template.
- The paper towel roll should be cut into several identical rings with a width of at least 2 cm. The thickness of the future figure depends on their width. To create one letter you will need at least 7 such rings.
- The prepared paper rings must be glued onto one of the blanks without going beyond it.
- Apply glue to the free edge of the paper rings and glue a second cardboard blank to them.
- White printer paper should be wrinkled and cut into small strips.
- Use prepared paper strips to cover the surface of the letter in several layers and wait for the glue to dry completely.
- The finished figure must be covered with a layer of acrylic paint.
How to make a classic holiday Swedish glowing 3D star
These large volumetric night lights in the shape of stars made of paper came to us from Sweden and Scandinavian traditions. Today, for several years now, these stars have been one of the Christmas and New Year trends throughout Europe and even in the USA. Which is not surprising: their charm, both when lit and when extinguished, evokes the most festive mood. They are hung in the house and on the street, in clubs and cafes, placed on shelves, placed on the festive table on special thin high holders and even attached to the tops of decorated Christmas trees, like the classic symbolic Star of Bethlehem.
These stars are glued together from music paper, from filigree-cut modules (like paper snowflakes), from colored, waxed and tissue paper. They are made plain and colored, simple and decorated. You can glue a huge and small star, with long or short tops, a classic five-pointed, 18-pointed or even a ball in this style - the choice is yours. First, let's look at the basics of creating such a star, then discuss design options and how to implement them.
You will need : – Thick paper (the thickest for a printer) or very thin cardboard (or thin sheets of easy-to-cut plastic), as well as, if desired, colored paper or scrapbooking paper with prints; – Access to the printer; – Scissors of different sizes – from long to manicure; – Stationery knife (optional); – Glue or good double-sided adhesive tape; - Needle and thread; - Unnecessary newspapers.
Assembling a star lamp:
1. Print out the template of one vertex for the star from here. In the pdf file you will find templates for stars in three different sizes - choose according to your taste. Later, starting from them, you will be able to model stars of individual shape and size.
For a small star, all 5 vertices fit on one page; for large ones, you will have to print several pages if you make a star from plain white paper. If your printer can print on thin colored paper, make sure you print on the back - white - side of it.
If you just need a template for colored paper - which you will then trace with a pencil on the back of the colored sheets - print only 1 template from all presented in the file. If the colored paper is too thin to create the star, simply glue it onto thin sheets of white printer paper first and let the glue dry.
2. Cut out the parts from the template along solid lines (dotted lines are fold lines). Bend the parts along the dotted lines.
As a result, 1 finished star module vertex will look like this:
For now, for the first craft, you need 5 of these pieces. Then you will calculate and set the quantity yourself.
3. We glue each module on the side using a tongue specially provided in the template. We make sure that each time we glue the tongue inside the modules, and not outside. We add a little bit of glue so that it does not protrude beyond the edges and leave marks on the paper.
You can always use high-quality double-sided adhesive tape for these purposes - it will hold just as well, and many will find it easier (and faster) to work with it. But really hot bulbs can melt the tape, so choose your material wisely and be careful!
4. Take 2 modules each and glue them in pairs using the 2 lower tabs of the first module like this - see the picture below. The tongues go inside the second module.
5. We glue two paired modules and the remaining one in the same way into a star. At the same time, we do not glue the first and last modules together (if you want to place a light source inside the star; if your star is a simple decoration without lighting, feel free to glue these modules with their edges). Instead, we cut two identical long ropes from yarn of medium thickness (or take two thin ribbons), glue the tip of the first one (at least 5 cm) or pull it into the hole from the inside to the outside of the first module from the bottom (if you decide to “sew in”, do it at the tip of the rope/ribbon a larger knot, you can also string a small circle of cardboard on top of the knot to seal it; finally, sew the ropes/ribbons no more than 2-3 cm from the bottom edges of the modules), the tip of the second is inside the second module. Wait for the glue to dry if you used it. Using these strings you can tie the cones so that the star retains its shape.
Or you can take one long rope and thread it through the holes of both modules - also from the inside out. This method is not suitable if you will be placing a Christmas tree garland inside the star.
Here the ropes are sewn in the middle of both modules, but this is not aesthetically pleasing, and most people don’t do this. By the way, tying the ropes will be quite difficult, so be patient and/or ask someone with longer and thinner fingers to do it (or just help you - hold the first knot).
6. We completely insert a short Christmas tree garland with a battery-powered control unit inside the star (we place the unit right next to the hole in the star) and then tie the strings onto a bow - so that later you can easily untie them and turn the garland on/off or change the battery in the garland as needed. See below for lighting source options.
7. What’s remarkable is that when you untie the strings and take out the light source, your star folds perfectly into this multi-layered flat shape for absolutely safe storage - and takes up almost no space!
IMPORTANT : Although your star lights are not connected to the mains, for safety reasons do not leave them on without supervision, as sometimes the bulbs get quite hot, which can cause a fire. The optimal type of light bulbs for these luminaires is compact fluorescent light bulbs and, of course, light-emitting diode (LED) light bulbs, which are usually - usually! – remain relatively cold.
Alternative light source for the Swedish star lamp - also switchable:
1. Buy separate small LED bulbs (1 bulb per star, the optimal length of the bulb is about 10 mm; available for free sale both on the RuNet and in real construction supermarkets), a set of large flat round batteries (CR2032; 1 battery - 1 light bulb) and the same number of small flat neodymium magnets (available for sale). Also prepare transparent or matte regular tape - you can use separate rolls of tape 1.9 and 1.2 cm wide - and any double-sided tape. The coin in the picture below is just for clarity of size.
2. From cardboard we cut rectangles 4.5 cm long and the same number of rectangles 1.9 cm long. Their width should be slightly larger than the width of a large flat battery. The number of such paired parts is equal to the number of stars you want to illuminate. We buy a set of seals for the holes (if you find them on sale) or cut rings from the same cardboard (the diameter of the ring is equal to the width of the strip).
3. Glue the ring onto the tip of a longer cardboard rectangle. The glue has dried - cut out a hook like this on this tip. For convenience, a hole in the center can be made with a hole punch.
4. Closer to the lower tip of the resulting label, glue a wide piece of double-sided adhesive tape.
5. Shorten the antenna wires of the LED light bulb with wire cutters by about 0.6 cm. This can be done or not, depending on the size of your star-lamp, so that the light bulb then hangs strictly in the center of the star. Moreover, if you do cut, do it at the same angle at which the tendrils were cut initially, so that one tendril remains shorter than the second.
6. Cut a long piece of wider ordinary tape and stick its center on the positive side of the battery (marked “+”), leaving about a quarter of the height of the battery on top unsealed.
7. Now we squeeze the battery with tape - completely sealed edge first - between the antennae of the LED light bulb, with the longer antennae going to the plus side of the battery, and the shorter one on the back side of the battery. And we stop the longer tendril at the edge of the tape so that the wire does not touch the battery. If you are not sure which antenna is supposed to be attached to which side of the battery, push the battery deeper so that both antennas touch their sides of the battery: if they are placed correctly, the light will light up - and then pull the battery back to the desired level; If it does not light up, swap the antennae on the battery.
8. Glue the battery with the light bulb, back side down, to the bottom of the cardboard label - to double-sided tape - and securely fix it in place and at the bottom with the tape that was originally glued to the battery. Be careful not to move the top antenna of the light bulb beyond the border of the tape.
9. Wrap the structure over and across the label with another strip of tape, this time 1.2 cm wide, but be sure to leave the tip of the top tendril of the light bulb free from the adhesive tape.
10. Finally, we take a small piece of cardboard from step 2. We again glue a piece of double-sided adhesive tape onto it, and place a flat magnet on the tape in the center of the cardboard.
And here’s how it works: we apply a magnet simultaneously to the free tip of the antennae from the light bulb and to a large battery - and the light bulb turns on. The magnet will attract the battery and it will “sit” in place quite firmly. We turn the cardboard with the magnet over to the other side (magnet up) - and again apply it to the large battery - and the light turns off, but the cardboard with the magnet still stays in place. That's the whole secret!
For such a label with a light bulb, the connecting rope on the star on top must be made solid so that the label can be hung on it by a hook.
Design options for classic Swedish star-shaped lamps:
1. Buy shaped hole punchers and make shaped holes in the bent but not yet glued star modules (after step 2) - as symmetrically as possible or simply in a random order. These can be completely different figures from stars and months to hearts and flowers, or you can use only 1 type of figures (and also of the same or different sizes). Classic three-dimensional Swedish lantern stars usually come with shaped holes, and not made of solid paper.
2. Having outlined with a pencil the same design of large slots on each module that has not yet been glued together (it is optimal to do this using a single cardboard template - for complete symmetry of the pattern on the finished star), place each module on a stack of newspapers or a special mat for cutting and cut out with a stationery or craft knife this design.
3. After step 2, below the design, you can seal the blows with colored tissue paper (it is thinner and more transparent) or waxed yellow cooking paper.
4. The top of the stars can be decorated with a pencil or rhinestones, sparkles or additional details made of colored paper, but, as a rule, the patterns in these cases are made very simple and as discreet as possible, so as not to distract from the simple graceful beauty of the star itself. It’s just the way it’s done according to the classics, the rest is up to your discretion!
5. Glue thin colored paper onto thin white paper (so that light can pass through better) before cutting out the modules - and you will get a colored star, not a white one.
6. If you have 5 sheets of paper with the same large pattern, you can, by overlaying and tracing the pattern in a strictly defined place on the patterns, cut modules with the pattern in the center, and then, as described in paragraph 2, cut out individual specific parts of this pattern on all modules. You can again stick colored tissue paper under the cut out areas, or you can just leave the holes as they are.
7. By slightly changing the width (by making the modules Narrower) and the lower shape of the templates (by lengthening the rhombus at the bottom), you can make an 18-pointed star like this.
Add additional ears to all the lower edges - and you can glue a pointed “ball” instead of a star.
And it doesn’t matter whether you made a complex pattern on the star or a simple one - in any case it will look amazing!
Happy New Year!
Sources: www.homemade-gifts-made-easy.com/paper-star-lantern.html www.meandmydiy.com
Decoration of volumetric letters
There are many ways to decorate cardboard letter blanks. They involve the use of a variety of materials. Moreover, the process itself will not be complicated and burdensome.
Corrugated paper
This method is one of the simplest. It will require:
- Crepe paper;
- Scissors;
- Glue.
We follow the instructions:
- We unfold the corrugated paper and cut it into strips 70-100 mm wide.
- We fold the strips like an accordion.
- We cut the resulting accordion along one side. The distance between cuts should not be more than 15 mm.
- We retreat the width of a strip of crepe paper from the edge of the workpiece, glue the cut accordion onto the base with the fringe facing up.
- In this way we glue the entire workpiece, row by row.
Napkins
Paper napkins are an inexpensive and simple material with a soft base. It should be noted that to design three-dimensional figures they will be required in large quantities.
Preparation required:
- Napkins;
- Thread;
- Stapler;
- Scissors;
- Glue.
We carry out the work as follows:
- If possible, divide the napkins into layers.
- Take a few napkins, fold them in half, and fold them again.
- Using a stapler, we fasten the resulting squares in the center.
- We cut the square so that it turns into a circle.
- We lay out the round blanks on the table and lift up all the layers of the napkin with our fingers.
- We attach the resulting volumetric blanks to the cardboard facade using glue.
Textile
To decorate in this way, you need to have patience. All actions must be very careful.
In addition to the cardboard blank, you should prepare:
- Glue;
- Scissors;
- I love any fabric.
We proceed in the following sequence:
- Apply glue to the front part of the workpiece. It is better to use super glue, as it will not create additional volume between the cardboard and the fabric.
- We put the fabric on top and stretch it a little with our hands. There should be no folds on the front surface.
- We press the material and wait for the adhesive to dry.
- Turn the letter over with the side with the fabric already glued down. Carefully and evenly cut off excess material.
- Similarly to the first, we design the second side of the façade of the blank.
- After the glue has completely dried on large parts, glue strips of fabric to the sides.
Letters - alphabet
Letters can be used not only for decorating holidays and celebrations. They will look no less impressive in a children's room. You can always make an alphabet from felt for your beloved baby. This way he can not only play, but also learn letters.
DIY crafts, how to make a clock from scrap materials? Summary of a lesson on applique in the middle group on the theme of mushrooms, stencils, crafts Kanzashi bows for September 1 from satin ribbons for beginners, step by step What you can make with your own hands from a box and a cardboard box, how to decorate an organizer, box, shoe box
To work you will need to prepare:
- Thick threads;
- Multi-colored felt;
- Sintepon;
- Office paper;
- Soap or chalk;
- Scissors;
- A simple pencil.
Making templates for letters is very simple; they do not have to be very large. All necessary blanks can be printed on a printer and cut out, leaving an allowance of 5 mm.
Next we make the alphabet:
We apply the template to the felt and outline the outline using chalk or soap.
- We sew the felt using a thick thread, but not all the way.
- Through the small hole left, fill the letter with padding polyester or other filler. To make it more convenient to push it, you can use a simple pencil.
- Sew up the hole.
To decorate the letters, you can use flowers and figures, also cut out of felt.
.
Three-dimensional letters and numbers can be made in a variety of ways. Moreover, almost anyone can do them. In this way, you can not only make your photo shoot or holiday original, but also save significantly on decor.
In the video below, we invite you to watch a step-by-step master class on making three-dimensional letters from the most affordable material - napkins.
Manufacturing technology of volumetric illuminated letters
It is necessary to make a three-dimensional sign carefully, step by step: prepare the front and back of each letter, make the sides, mount the electrics, connect the parts together and install the mounting system.
Front and back parts
For the front part of future letters you will need thin acrylic glass of 2-3 mm. At the same time, the larger the font, the thicker the glass, so for a 40-centimeter letter you need 4 mm acrylic. The facade material should have a milky color, transmit light well, but at the same time not be completely transparent.
Using pre-prepared stencils and a marker, draw the outline of the letter on the glass, and then cut out the resulting base. This can be done using a CNC milling machine. If such a tool is not at hand, or the master does not have enough skills to work with such a unit, then you can use a specialized workshop. Cutting out custom 3D advertising letters from plexiglass is inexpensive - about 100 rubles per linear meter. The back part is made by analogy with the front part, only a PVC sheet with a thickness of 3-4 mm is taken for it. It can be easily cut using a plastic knife.
Side parts for letters
Volumetric letters made of plastic must have side elements that are made from PVC sheets. For these parts, thin material of 2 mm is suitable. From the prepared sheet we cut strips that will serve as side edges for the sign.
The depth of the letter depends on the width of the stripes. The optimal option is considered to be 5-20 cm. If you try to save money and make the lines narrower, light spots will appear on the sign, which will spoil the appearance of the advertising structure. Sides that are too deep will result in the letters not being bright enough.
The height of the sidewalls is not so important, because the interfering parts can be cut off, but it is more convenient to work with strips of 150-200 cm.
Gluing letters
The next step will be gluing the façade glass parts to the PVC sidewalls. This must be done along the edge and very carefully so that in the future the sign will look elegant. To do this, you will need cyanoacrylate-based glue, which tends to harden quickly. It is worth paying attention to the industrial Cosmofen.
If three-dimensional letters for outdoor advertising have smooth curves, then for their plasticity you will need an ordinary hair dryer, which will heat the plastic strips and make them pliable.
A sealant must be used to seal the joints between plastic and glass - this is necessary to prevent moisture from penetrating inside and damaging the LEDs.
We try on the backdrop to the resulting base and, if it fits perfectly, we leave it for later. It is attached at the very last stage, when the LEDs are already mounted in the letter.
Foam letters
Foam letters with creative inscriptions are a popular accessory for a wedding photo shoot. Lightweight foam words look beautiful in pictures. You can toss them in the air for creative and fun photo ideas. It’s easy to make large foam plastic parts for filming; you just need to acquire the necessary material, imagination and free time.
Necessary materials
- Polystyrene foam (use polystyrene from packaging for household appliances or specially purchase it at a hardware store, where they sell it in various thicknesses, so you can choose the thickness of the material needed for your idea).
- Bright marker.
- Stationery knife (sold at a hardware store in the wallpaper department).
- A piece of fine and coarse sandpaper.
- Various decorating materials: fabric, paper, paints.
