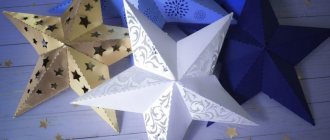
A bright, elegant star is a mandatory attribute of a Christmas nativity scene. In Ukraine, where living nativity scenes are still popular today, traditionally a man (or boy) carries a star behind the carolers. Attached to a long, strong pole, it can rotate and ring its bells.
Source: Instagram @bat.bat.girl
The symbolism of this item is quite obvious - the star is a reference to the same Bethlehem celestial body that first notified the world about the birth of Christ. Therefore, making a Christmas star has always been considered a very responsible and serious matter.
The basis for the traditional star was an ordinary wooden sieve, to which an even number of “horns” were attached - usually 6, 8 or 12. Carolers always competed with each other to see who had the biggest, brightest and most intricate star.
This tradition, by the way, is also still alive - for example, in Lvov, for Christmas, the festival “The Walk of the Stars” is held annually, at which all possible variations of nativity stars are presented as much as possible, as human imagination can conceive of them.
Source: Instagram @sophia_filipchuk
You can make such a star at home. It will be great to go caroling with her for your loved ones, and you can also limit yourself to a small Christmas star that will look beautiful on the tree. Making the Star of Bethlehem is a simple process, so your little one will take part in it with ease and pleasure. We offer your choice of two options for nativity stars - made of cardboard (paper) and plywood.
Making a three-dimensional star out of paper
Paper (or cardboard, which is essentially the same paper, but only thicker and stronger) is the most affordable material for making a New Year's star. For this craft you will need:
Read also: what to do with old keys?
- good paper (two square sheets);
- ruler;
- scissors;
- a simple pencil;
- scotch;
- glue.
Having prepared all this, we begin to make a star.
- Take a square piece of paper, fold it in half twice, then unfold it.
- Next, fold the sheet on both sides diagonally, then unfold it.
- The result is a square with 8 fold lines.
- We make small marks with a pencil on each line.
- We make cuts to these marks.
- We bend each side of the resulting ray towards each other and secure them with tape.
- We take another sheet of paper and make the second blank in exactly the same way.
- Glue both pieces together. The result should be a paper star with 8 rays.
A star is made from other similar materials in exactly the same way. For example, from soft colored foil.
The photo below shows the process of making a star.
Star for carols made of cardboard
Typically, a star for carols is made from materials stronger than paper, for example, cardboard, plywood, or polystyrene foam. This is done in order not to return to the craft every year and thus save pre-holiday time. They put such a star on a stick, and with it children and adults walk around apartments and houses with carols. For each carol, the owner must give the readers a gift. These can be any treats or small souvenirs, toys or coins.
Models of such stars, which are easy to make with children, are very diverse. Download the desired template from the Internet, copy it onto thick cardboard, paint it in any color you like, decorate the star with tinsel or sparkles and attach it to a stick.
Watch the video on how to make this craft yourself, and having prepared the necessary materials for this, begin the creative process.
We suggest that moms and dads themselves watch a video that shows several “adult” versions of the Star of Bethlehem crafts for decorating a house made of cardboard and paper with various decors, including those made from natural materials.
Experienced mothers and craftswomen can easily make such beautiful star decorations from cardboard and paper together with their children using different techniques.
Wire Christmas stars
Even a child can make such simple stars as in the photo under the guidance of adults. Just the wire should not be too stiff. To begin, draw the star itself or, again, use a template and take measurements from it with a ruler. That is, measure all the rays along the contour and add all the data into one sum. This will be the length of wire that will need to be cut for the star. If it is double, then bite off twice as much with pliers. To ensure that the star is even, mark the bends on the wire, again using a ruler.
Decorate the star as your imagination dictates. It can be:
- LED strip or lights;
- golden (silver) braid;
- wire or threads of different colors;
- weaving with beads, seed beads or glass beads;
- wire coated with gold paint;
- foil;
- natural material - cones, spruce branches, nuts, berries.
Look at the video to see what a beautiful “star” decor is made from wire, thread and natural materials.
Stars made of threads
Very light both in weight and in creating an asterisk. Children will definitely love them, because they are so beautiful and varied!
Here are just two options for Christmas stars made of threads, which are available even for preschoolers.
- On a clean cookie sheet or thick cardboard, draw the silhouette of a star and stick toothpicks or paper pins in the corners and in the middle. Pour some water into a bowl and mix PVA glue with it, about 1*1. Is everything ready? Now look at the photo to see how to proceed. Let the threads dry thoroughly, and then remove the star from the structure.
- The second method is identical to the first. You will need a backing or polystyrene foam, a star pattern (not necessarily five or six rays, more is possible), pins, plastic film and floss threads of different colors. The difference will be that the glue is applied to the finished outline of the star, and after it dries, it is decorated with threads of a different color. It’s clear – in the photo below.
A star can also be made beautifully from simple threads wound on a template made of any dense material. And if all this is also painted in gold or another bright color, it will turn out simply masterpiece!
If you use ordinary sewing threads, then such winding (which, although it takes more time) on the stars will look very delicate and beautiful.
Christmas stars from foamiran
The Christmas stars made from glitter foam are simply incredible. If you haven’t tried working with this material, be sure to start right now; for the New Year and Christmas holidays, amazing toys and decor are made from it.
To make a star like in the photo above, you need to download a template of an eight-pointed star and transfer its outline onto a sheet of glitter foamiran twice and once (without the internal section) onto a matte sheet of blue and white colors.
Cut out all the blanks and glue them in pairs. In the middle you insert a Christmas tree and a snowman cut out from foamiran. Everything is easy, but how beautiful it turns out!
Another version of a star made of this material is three-dimensional. But there is nothing complicated here either. You just need to cut out six circles of the same diameter, cut them on one side and make cones, which are then fastened together with glue.
The middle is decorated with a bead or decorated. In general, as your imagination dictates. There are other options for stars made of foamiran.
What other materials are Christmas stars made from?
The thrifty Russian people make Christmas stars for decorating the Christmas tree and home from everything they can find at hand. These can even be ordinary matches, which, by the way, make a very original decor.
What else?
Felt, for example, makes very cozy and pot-bellied stars.
Stars in retro style are made from old newspapers and sheets of music notebooks.
Ice cream sticks may seem like a waste material, but it will come in handy in business.
A star made from ordinary twine, wound on a cardboard template, looks perfect as a decoration for the front door.
And you’ll want to hang such a star-wreath made of multi-colored fabric using the patchwork technique in your baby’s room – it’s so bright and beautiful.
An original decoration for the holiday table is a Christmas star made from a napkin.
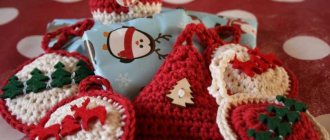
Skilled craftswomen can even crochet stars or make them into delicious and fragrant Christmas gingerbread cookies.
May the star of Bethlehem, which pointed the way to the birthplace of Jesus, bring happiness and peace to every home in which it is “lit” as decor, or decoration, or as a sweet for carolers in the coming year.
Christmas star craft ideas for school and garden
Stars using quilling technique
Using the quilling technique with your own hands, you can make not only postcards or decorative panels for interior decoration, but also individual exquisite non-standard pendant crafts.
In this case, strips of paper should be preferred in light shades:
- white;
- pastel;
- silver;
- mother-of-pearl.
Origami paper star
Using templates, diagrams for making this type of star, and also following our recommendations, you will make a magnificent product for interior decoration.
The square sheet needs to be folded in half, then, bending one of the tops into a triangle. A similar action should be done with the second top of the rectangle.
The other corner of the rectangle must be attached to the intersection of the existing folds. After this, you need to bend the existing rays along the drawn lines. Trim the remaining tail of the figure. If you create folds correctly, you will get a pentagon on the facing side.
The last stage is considered one of the most difficult. To form a star, you should carefully bend and wrap the existing template along certain lines.
Origami for the Christmas tree
Origami is the ancient Japanese art of folding figures from a whole sheet of paper without using scissors. Since we will need a pentagon for the New Year's craft, scissors will still come in handy. Below is a detailed diagram of how to fold a piece of paper and get an elegant pendant that resembles a flower.
How to Make a Plot from Popsicle Sticks
Take a cardboard box lid, preferably a larger one. Paint the bottom with green paint or cover it with green paper; this will be grass. Make a fence as described above. Glue it to the sides of the lid using hot glue.
Place a house on the site and several benches near the house. From paper or cardboard you can make bushes, trees and everything that your imagination allows.
Popsicle stick bird feeder
A very useful fake. Take 12 popsicle sticks and place them on the table close to each other.
- Secure them together with 2 sticks glued horizontally on top of these.
- Next, glue the sticks in a checkerboard pattern, two on the sides, two on top and bottom, and so on, until the feeder is the right height.
- Keep in mind, do not make it too deep so that it is convenient for the birds to eat from it.
If desired, color the fake. Take two thick threads, laces or twine and tie the ends to the corners so that you can hang the feeder from a tree.
Ice cream stick box
It is done in exactly the same way as the feeder, only higher. In addition, you need to make a lid.
To do this, take the same number of sticks as you took for the bottom of the box.
- And fasten them together with horizontally glued sticks. Color both parts.
- Take a piece of fabric and hot glue it to the bottom and sides of the inside of the box, trim off the excess.
- Glue a large bead on top of the lid or make a loop of twine or satin ribbon to make it easier to open the box.
The lid can be decorated with loose sparkles, small semi-beads or other decorations.
Popsicle stick star
This fake will be a great decoration for the New Year.
- Take 16 sticks and glue them two at a time in a triangle shape, approximately 20 degrees.
- You should have 8 blanks. Next, glue all the blanks together in a circle. You will get a star.
- For strength from the inside, glue several sticks crosswise. Open the structure.
- Since this is a fake New Year's, choose red, white or gold.
Popsicle stick photo frame
Cut a square out of cardboard the length and width of popsicle sticks.
- Glue 2 sticks to the edges at the top and bottom, which fit tightly to each other.
- Attach 2 sticks vertically on each side, making their length such that they fit between the horizontal lines.
- Decorate and paint. Photos are glued to the frame using double-sided tape.
Popsicle stick pencil holder
There are 2 options for making a pencil holder.
- It is performed in exactly the same way as a box or feeder. It is made a little more than half a pencil tall. Flatten and decorate. Ready.
- Take a jar of olives, chips or any other. Cut the height of the shelves and glue them close to each other in a circle. For strength, glue with PVA glue, paint and decorate.
Popsicle stick bracelet
Pour water into a glass so that the stick can easily sink into it. Leave it on all night.
- If you don’t want to wait a long time, then just cook the sticks for 40-50 minutes.
- When they are soft, place them horizontally inside a dry glass.
- After drying, the bracelet will take the desired shape.
- It can be decorated with any decorations and painted in any color.
Foamiran star
You will need: shiny and matte foamiran, a simple pencil, scissors, a glue gun, a decorative rope for hanging, cardboard, a ruler.
Master Class
- Draw an 8-pointed star of the desired size on the cardboard.
- Cut out the template.
- Trace the template on shiny foamiran 2 times, then cut out the blanks.
- Glue one star to the matte foam, then cut it out.
- Glue the second star on the other side.
- Cut out two identical winter figures from foamiran and glue them in the center of the star from different sides. It could be a Christmas tree or a snowman.
- Glue decorative string around the star and make a loop for hanging.
The foamiran star is ready! It also makes very beautiful flowers, click HERE to view.
I recommend watching this video!
Stars on the Christmas tree. DIY voluminous foamiran stars | Christmas tree stars
Materials for 3d stars
- Thin cardboard.
You can use cardboard from a box of cookies, candies, muesli, etc. A cardboard folder for papers will also work. - Aluminum foil
, which we usually use for cooking. - Pencil, scissors, hot glue gun.
You can also use regular glue. but then you need to choose something from the quick-setting ones (for example, Moment Crystal, etc.). - Star template.
You can find it on the Internet, or you can try to draw a neat five-pointed star yourself. By the way, there are many lessons on drawing stars on the Internet. One note: the size of the star template is always slightly larger than the finished star, since the blank will bend along the lines, acquiring 3D contours.
Shiny Star
You will need: paper. scissors, ruler, glue.
Master Class
- Cut the paper into 10 thin strips of the same size.
- Lay out 5 strips on a flat surface, then lay out the remaining 5 in a checkerboard pattern.
- Glue together the ends of the strips located next to each other in the corners. Please note that the 4 “cross” stripes must remain.
- Make the second piece in the same way.
- Glue the blanks together to form a star.
- Glue loose strips to the parts of the star.
A shiny star made from strips of paper is ready!
Traditional stars
The traditional decoration for the top of the tree is a star.
A similar decorative detail is most often used to decorate the top of the New Year's tree. You can buy it in a store, or you can model it yourself. As mentioned above, homemade items often turn out to be much more aesthetically pleasing and colorful than store-bought ones. You can make a creative star from:
- cardboard;
- wires;
- tape;
- shiny “rain”;
- glue;
- dry glitter.
Let's look at a step-by-step master class.
- 2 stars are cut out from a cardboard sheet. They must be the same size. They are folded along the midline to achieve volume. You can put crumpled paper inside. The star halves are glued together.
- So that the resulting figure can be used to decorate the top of the New Year's tree, you should use wire in the shape of a spiral. This part must be pulled onto a stick.
- One tip of the finished spiral part is placed in the inner part of the star and fixed with tape.
- The finished decoration for the top of the spruce is smeared with glue, a shiny “rain” is fixed on the edges, and the middle is sprinkled with sparkles. The decor will be very attractive and original.
You can make a more original star, which will look very unusual. The following components will be useful for this:
- scissors;
- paper;
- glue;
- glitter or shiny paint.
The decoration for the Christmas tree is modeled like this.
- First, the “body” of the star is made. You need to find a spherical base and glue pieces of paper onto it (using the papier-mâché technique). This needs to be done in several layers. An open gap should be left along the diameter.
- When the paper layers are dry, they are removed from the base and then fastened together with glue and paper. This will create the “body” of the star.
- Now the paper sheets will need to be twisted diagonally with maximum density. The twists should be thin and firm. There should be pointed ends on both sides of these parts.
- The dimensions of the sheets should be selected based on the dimensions of the base ball. Each stick will be divided into 2 rays, which also needs to be taken into account.
- The finished rays are glued to the ball (spacers are cut on the even tip). Each master selects the location and density of these elements himself.
- When the homemade product dries, it can be decorated with shiny paint or glitter sprinkled on the glue. You can attach beads to the ends of the rays and hang tinsel.
New Year's three-dimensional star
made from thick paper, painted on both sides.
Squares of 4 sizes (8 squares each) need to be folded as in the picture, and then glued according to size. The very first will be a large square and then in descending order.
Popsicle Stick House (Ideas)
Very easy to make. By making a lot of houses, you can create a whole village, and maybe even cities. To begin, cut out blanks from thick cardboard for the roof, walls and door.
Cover the blanks with sticks and fasten all the parts together. For strength, glue PVA glue over the sticks. Paint with brown paint, preferably acrylic.
Hundred rays
This craft is very similar to a balloon, consisting of hundreds of small rays. Straight as a fan. The rays are strung on a thread one by one.
The tips of the star are connected and after that the product can be hung from the ceiling or used to decorate the top of the New Year tree.
Tangerine peel decorations
New Year is always associated with the smell of a Christmas tree and tangerines. But hurry to throw away the tangerine peel, it will come in handy for New Year's decor. I suggest making a garland that will look good both on the Christmas tree and on a plain wall.
To prepare it we need
- tangerine peel,
- star-shaped cookie cutters,
- PVA glue,
- tassel
- thread
You can, of course, use orange peel, but it is thicker than tangerine peel and will take longer to dry, so I prefer working with tangerine peel.
First you need to prepare the stars. Carefully peel the tangerines so that they remain as smooth and intact as possible. Using cookie cutters, cut out the stars on a cutting board and place them on the radiator to dry. To prevent the stars from shrinking, it is better to place something solid on them.
Place dried tangerine peel stars on a sheet of paper.
Using glue and a brush, glue a strong thread to them.
When the glue dries, attach the resulting garland of tangerine stars to the wall using needles. You can even form a garland in the shape of a Christmas tree.
DIY rocket
A rocket made from a plastic bottle is more complicated than the one we offered for kindergarten crafts, and is more suitable for younger schoolchildren.
You will need:
- plastic bottle;
- cardboard;
- glue;
- scissors;
- foil;
- double sided tape;
- 2 toilet paper rolls/yogurt jars or something similar in shape.
To decorate the rocket: electrical tape in three colors: white, blue and red.
Progress:
- Cut off the bottom of the bottle.
- Cut a circle out of cardboard and build a “nose” for the rocket: cut a triangle out of the circle, fold it into a cone and secure it with glue.
- Wrap the body of the bottle, the cone and the bushings (or jars) with foil - the future jet engines of the rocket (see the master class at the link below).
- Attach the cone to the neck of the bottle.
- Use double-sided tape to secure the rocket parts together.
- Stick 3 strips of electrical tape of different colors on the rocket body in the form of a Russian flag.
- Cut out circles from cardboard - portholes. If you wish, you can paste on them pre-printed images of the first cosmonaut dogs Belka and Strelka.
- Attach the windows to the rocket using double-sided tape.
Decorative Christmas tree made of foil
If you are not planning a real Christmas tree for New Year 2022 for some reason, all members of your family, especially children, should not be too upset. After all, you can form a good forest beauty from foil with your own hands. Thanks to our master class, this craft will turn out dazzling - sparkling and eclipsing everything around. And you won’t have much trouble making it. Even kids can handle this kind of work in a matter of hours. So, let's get creative.
To do this you will need:
- Foil;
- Wire;
- Glue;
- Decorative decorations of your choice.
Progress:
- To create a Christmas tree craft for the New Year 2022 with your own hands, you need to collect a large amount of foil. From them you need to make thin tubes that will serve as tree branches.
- The base of the tree is a wire that needs to be wrapped in shiny silver material, and if necessary, you can use glue.
- Then the branches are attached to the base, like to a tree.
- To decorate the product, you need to make toys or hang tinsel. A bright and shiny Christmas tree will be the best decoration for any room. In addition, creating such jewelry does not require large financial investments.
To create an excellent outfit for your Christmas tree yourself, you need to watch our video, which will tell you how to make bright foil balls at home.
Master class on making Christmas tree decorations with your own hands
Star of Bethlehem
made from A-4 paper (you need about 50 sheets, you can take colored)
Cut sheets of paper in half lengthwise, twist each half into “balls”, coat the edges with glue and roll tightly. Using a stapler, staple 3 “rays” in the form of a fan, and then string the fans onto a thread, pulling them tightly and tying the ends. You should get a star, shaped like a ball. If the paper is white, you can spray paint it.
Stars with LEDs
Plywood lamps, supplemented with a scattering of LEDs, are no less impressive. And the more diodes you manage to fit, the brighter and more interesting the lamp will look. To do this, you will have to drill a lot of holes with a diameter sufficient for the diode to fit in. The holes are made randomly, and you can also make different geometric shapes from them. So, we make a template from cardboard, from which we will then cut out the base of the frame and the side frames. We will need 4-5 pieces of the latter, depending on the thickness of the plywood sheet used. The resulting curly trimmings can be used further - to make smaller lamps with your own hands.
LED star
The edges of the base, frames and drilled holes must be thoroughly sanded, making sure all components are as level as possible. If necessary, remove any identified irregularities with a plane. Insert the LEDs from the garland into the holes, bringing the plug and control unit to the back of the lamp (battery-powered models can also be used). Coat the frames with glue and fold them into a stack (it is clear that the top “star” does not need to be covered with glue). When the structure is dry, attach the frames to the base with self-tapping screws. Give it a good sanding on all sides again. If desired, coat with a special oil that prevents the wood from drying out or with varnish. The lamp is ready - this is what we should end up with.
LED star
At the final stage, you can also “play” with the finish. For example, paint the frames and base where the LEDs are located with multi-colored paints. Thanks to this, the craft will be easy to “introduce” into any interior.
Painted frames
Salt painting
Simple table salt is an unusual material for painting. You can offer this craft to both kids and primary schoolchildren.
You will need:
- cardboard;
- paints;
- sponge;
- pin;
- PVA glue;
- pipette;
- colored water;
- salt.
Progress:
- Use a sponge to paint a sheet of cardboard to your liking.
- Make splashes - constellations (using a brush or toothbrush).
- Use PVA glue to draw the outline of future cosmic figures (planets, rockets, etc.) and fill them inside with glue.
- Sprinkle the picture with salt. Let the glue dry.
- Shake off excess salt from the painting.
- Pour water into several glasses, paint it in each container a different color.
- Use a pipette to collect colorful water and use it to paint the shapes made of salt. Let dry.
More details in the video:
How to make 3D snowflakes from lunch bags
To prepare such snowflakes, you can use ordinary paper tomorrow bags measuring 10 by 17 centimeters. The color of the package does not really matter; snowflakes can be of very different colors.
To create such a court we will need:
- paper bags – 7 pieces;
- PVA glue;
- scissors,
- riveting
- thread to hang a snowflake
Apply a strip of glue from the bottom, along the bottom and in the middle of the bag.
Glue the next package and so on until we have glued all 7 packages.
Next, take scissors and cut off the corners. Unfold the snowflake and connect the ends with a paper clip. Some people glue the edges together with glue, but I don’t do that, because then, when the New Year’s celebration is over, you can safely fold the snowflake and store it in a more compact form until next year.
Admire how beautiful it turns out, and it’s very simple to make.
Tags
volumetric New Year's star foil with foil simple from foil and foil with your own Foil and foil with your own hands with your own hands with your own hands with your own hands with your own hands with your own hands Dictionary of handicrafts with your own hands Cardboard Furniture with your own hands Shoes with your own hands Clothes with your own hands Candles with your own hands Bags with your own hands Packaging with your own hands Share your option freely access.Do-it-yourself jewelryDo-it-yourself furniture
decorarticlestoyscommentssummerhousesplasticinewewillgiftscreatesitesimilarallviewreplycontent
DIY fabric stars for the New Year
Soft, cute fabric stars create a special atmosphere of warmth and homeliness. Making such stars is very easy. I prefer to make stars from knitwear; old, unnecessary sweaters and old mittens work well.
To create a knitted star you will need:
- textile,
- scissors,
- cotton wool or synthetic winterizer,
- threads,
- felt-tip pen for fabric
We fold the fabric in half, trace a star on a stencil, pin it with needles and sew it on a sewing machine, turn it inside out, stuff it with filling, sew up the remaining holes, make a loop and you can hang our stars around the apartment.
They will look good on a pine branch or on a Christmas wreath.
