How to sew a tilde-elk
The pattern is the main thing in creating a moose based on the tilde. You can use a ready-made one offered by the designer in your magazines, or draw it yourself. The main rule and difference between the tilde moose and all others is the long, elongated legs and head, as well as the presence of only eyes on the muzzle.
By the way, this is the main highlight of all tildas - despite the fact that their faces only have eyes, their images are very expressive, and each tilda is different from the other. The costume carries the main meaning, so the tilde moose can be dressed up in pants and a knitted sweater or shorts and a shirt, or you can make it New Year’s and sew a Santa suit for it - everything is limited only by your imagination.
Hooray!!! New Master Class Elk!!!!!!!!
Hi all!
Great news for those who were waiting for this master class (in e-book format) and wanted to sew their own Moose using my pattern!
And also for those who simply like these Losiki!
Christmas and New Year holidays are coming soon! There is an opportunity to make this cozy toy yourself with its own unique character. And give it to your family and friends. Or maybe keep it for yourself...
Ah-ah-ah! The aroma of homemade cookies, the smell of a Christmas tree and the anticipation of a miracle...
Perhaps this Elk will add to the collection of your New Year's miracles and become an integral part of the Annual Fairytale Holiday called the New Year!
Perhaps this is the Moosie your child will find under the Christmas tree, and then he will remember these moments all his life!
Detailed step-by-step pdf MASTER CLASS MOSK consists of 50 pages, contains 140 photographs.
Includes a pattern of a body, clothes, as well as a description of the sewing and knitting process.
All information HERE.
I will answer all questions about MK here or in personal correspondence.
Welcome to the world of creating handmade toys that have their own unique soul and their own unique stories!
And have a wonderful anticipation of the New Year holidays!
PS: Another MK Losik on 4 legs has appeared
www.livemaster.ru
What you will need
To create a toy you will need the following materials:
- The fabric for the body is beige, light gray or light brown, however, your tilde moose can be any other color or even made from fabric with a small print. For the body, thick cotton, linen or calico is best, but you can sew from thin felt or fleece. By the way, for the horns it is better to take a different fabric, for example dark brown, but you can make them to match the tone of the entire toy.
- Fabric for clothes - you can take whatever you like - cotton, corduroy, denim, knitwear, linen, cambric, or you can even knit an outfit in which your tilde moose will wear.
- Pattern.
- Material for stuffing the body, the easiest way to find is padding polyester.
- Threads to match the fabric.
- Wooden stick.
- You may also need tracing paper (any other pattern paper can replace it), a felt-tip pen or chalk for cutting, zigzag scissors (or regular ones), a sewing machine or sewing needles, and pins.
How to make a moose for the New Year with your own hands
Making a moose for the New Year with your own hands is not difficult. It’s enough to use your imagination, draw a diagram, prepare the necessary materials and start creating interesting crafts.
DIY fabric Christmas elk
You can sew a New Year's toy - a moose from fabric - with your own hands
To sew for the New Year you will need the following materials:
- pattern;
- pieces of fabric of different colors;
- threads;
- needles with pins;
- scissors;
- padding polyester or other filler;
- sewing machine.
First, you should carefully study the pattern of the future New Year's elk.
Animal clothing is sewn according to a pre-made pattern
Step-by-step master class on sewing a fabric moose with your own hands for the New Year:
- First, carefully cut out all the parts of the toy.
- The body, legs, arms, muzzle and ears will be sewn from light fabric. It is folded in two layers. Lay out the patterns on top and secure them with pins. The top of the muzzle is cut out on one layer of fabric.
- The details are outlined with chalk. The resulting fabric blanks are pinned together.
- Sew along the marked lines using a sewing machine or manually with thread.
- Cut out the parts, leaving small allowances.
- At this stage, they begin to work on the muzzle. Its lower part consists of two elements, and its upper part consists of one. The two lower parts are sewn along the middle cut. Leave room for turning.
- The seam of the lower part of the muzzle is smoothed with an iron.
- The two parts of the muzzle are folded with the right sides inward. They chop along the contour with pins. Sew along the marked line. They get a face like this.
- On the blanks along the width of the seams, notches are made with scissors. Using a plastic stick, the parts are turned out and filled with synthetic padding, distributing it evenly over all hard-to-reach places. When forming the legs, the filler is filled halfway, then pinned off with a pin and filled to the end. This creates knees and legs that can bend.
- All places left for turning are sewn up manually with invisible stitches.
- Handles are sewn through to the body. This will allow them to move up and down.
- At the bottom, the body is folded 0.5 cm, pinned, and stitches are basted.
- Determine the location where the toy's legs are attached. Fix with pins. The legs are sewn to the body by hand, making neat stitches on both sides.
- The places in the knees are stitched through with thread.
- Since the neck of the outerwear is narrow, first they put a shirt on the elk, and only after that the head is sewn on. A cut out piece of clothing is laid out on a white cloth. Trace along the contour with a pencil. The fabric is pinned. Cut out the elements, leaving small allowances.
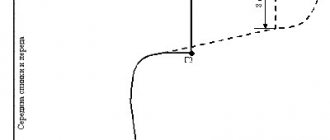
- Cut out the neck on the paper pattern:
- The fabric is folded in two layers and a facing is applied to it. Trace the facing pattern with a pencil and cut it out. The parts are laid out face up. The facing is placed face down on the neckline. Fasten with pins. They are machine stitched along the neckline. Along the width of the seam, notches are made close to it.
- The facing is turned inside out, the seams are straightened and pinned together. Iron from the inside out. Turn it right side out and stitch a decorative pattern along the neckline.
- On the sleeves, folds of 0.5 cm are also made with an iron. Finishing is done on the front side.
- The bottom of the shirt is also folded over. Make another finishing line.
- The shirt is folded face inward and the sides are connected with pins. They are then stitched together by machine. The finished shirt is turned inside out and ironed, then put on the body of the future elk.
- At the next stage, we begin making the head. To do this, use pins to mark the places where the ears will be located. Using a special tool or small scissors, cuts are made in the designated areas. They insert ears into them. Sew on by hand.
- The torso is inserted into the hole in the head. Hand sewn with invisible stitches.
- A pattern of horns is laid out on a dark fabric and outlined with chalk. A stitch is made along the line. The workpiece is cut out with scissors, leaving a small gap. Cut the ends with scissors and turn them inside out. The resulting horns are filled with padding polyester and the open areas are sewn up.
- The horns are pinned to the head. Sew on with invisible stitches.
- According to the pattern, the location of the eyes and nostrils is marked on the head with pins.
- The nostrils are embroidered with black thread. The eyes are formed from beads.
- Patterns of panties are applied to the checkered fabric, folded in half. These are the halves.
- Connect the two parts of the pants, right sides together. They are stitched on the sides. The bottom of the halves of the trousers is ironed 1 cm. The finishing lines are made with white threads. The halves of the pants are folded and connected with paper clips. Then they are sewn on a machine.
- For the bib of the panties, fold the fabric in half. Trace the pattern. Sew down the side edges using a machine. Turn the bib inside out and iron it. A finishing stitch is made on top. Sew the resulting part to the pants. The top of the bib is folded and hemmed by 0.5 cm.
- Since the pants will have straps, cut two strips of fabric 3.5 cm wide and 13.5 cm long. The straps are sewn along the length and turned inside out.
- For the New Year, they put panties on the elk calf, make folds and fasten it with pins. Sew on the buttons, capturing the bib.
- On the back, the straps are placed crosswise and secured with pins. The pants are sewn to the body with a hidden seam at the waist.
- The handles are decorated with a stitch, the ends of the threads are tied with a needle and brought inside.
- Boots are sewn from green fleece according to the pattern and turned inside out. A scarf is also sewn from this material, which indicates the approach of the New Year.
- The resulting boots are pulled onto the legs and stitched with threads so that they do not fall off. A scarf is tied around the neck.
To make your hand-sewn elk calf for the New Year truly festive, you can embroider snowflakes on the scarf
DIY felt Christmas elk
You can sew a New Year's elk with your own hands using a pattern not only from fabric, but also from felt. To create a toy for the New Year, you need to prepare:
- wooden blank;
- PVA glue;
- a beautiful napkin;
- white and brown acrylic paints;
- eyes;
- ribbons;
- semolina with glitter;
- red felt;
- threads;
- varnish
You sew a New Year's elk with your own hands according to the following pattern:
- On the top of the patterned napkin they draw a “sweater” for a moose. Cut out all the necessary parts of the clothing.
- The wooden stand with legs, horns and muzzle is painted brown. In this case, the muzzle should be light in color. The area intended for clothing is painted white.
- After the paint has dried, napkins are glued with glue.
- The muzzle and horns along the edges are tinted with dark paint. Thanks to this technique, volume is acquired. In the places where the eyes will be located, a slightly white tint is emitted.
- The workpiece is opened with varnish in several layers.
- Using glue, glue the eyes and ribbon onto the sweater.
- A knitted scarf is tied around the neck.
- A rectangle is cut out of felt, which is cut off at the corners on one side. Make a small pompom from threads. Sew the hat, tighten the top and sew on the pompom. You need to sew six of these hats. They are put on each elk antler.
To make the New Year's toy stable and cute, make artificial snow
Semolina is mixed with acrylic paint and PVA glue. Apply the resulting mixture onto the stand with a stick. Sprinkle glitter on top. The sides of the toy stand are painted white for the New Year.
DIY wire Christmas elk
To make a moose with your own hands, use wire with a diameter of 10 mm. The beast turns out to be 2.3 m high.
First, draw a diagram of the future animal. Then the wire is bent along it in the desired direction.
The resulting figure can be additionally wrapped with LED strip and the elk will glow at night on New Year’s Day
How to make a New Year's elk with long legs with your own hands
A detailed master class on how to make a New Year's elk with long legs with your own hands can be seen in the video.
To create a figurine for the New Year, you will need a wooden frame consisting of long beam legs, a torso, a neck and a head. All wooden parts are carefully wrapped with padding polyester. The material is secured with a wood stapler. Then the animal figurine is decorated with clothes for the New Year.
Moose tilde: master class on creating a toy
To begin, draw, translate or print a pattern for your future moose. Don't make the parts too small - the smaller the toy, the more difficult it will be to twist long and thin arms, legs and necks.
Carefully cut out all the pattern pieces, fold the body fabric in half, wrong side out, and pin the paper pieces to the fabric. Translate all parts, note that you should get:
- 3 head parts (1 muzzle and 2 side rear parts);
- 4 parts for ears;
- 8 parts for arms and legs;
- 2 body parts;
- 2 horn parts.
Trace each piece on the wrong side of the fabric and cut it out, leaving 1 cm on each side for seam allowance.
Toy patterns from Pretty Toys magazine. 17 Deer, horses, goats and moose
- VIDEO (6)
- MY (2)
- EMBROIDERY (79)
- cross stitch (8)
- useful embroidery materials (6)
- embroidery - ideas (3)
- application of embroidery (2)
- isothread (2)
- children's embroidery (1)
- KNITTING (53)
- for children (26)
- knitting and fabric (12)
- books, magazines on knitting (8)
- accessories (6)
- flowers, individual elements (6)
- crafts, toys (6)
- rugs, pillows, seats (5)
- scarves, shawls (4)
- mittens, mittens (3)
- cardigans, jackets (2)
- for home (2)
- headscarves, hats (2)
- techniques, patterns - useful (2)
- tunics, coats, capes (2)
- dresses, sundresses (2)
- bags, cosmetic bags, organizers (1)
- socks, knee socks, slippers, shoes (1)
- napkins, tablecloths (1)
- vests, boleros (1)
- Cottage, garden, vegetable garden (3)
- useful (2)
- design (1)
- DECOR (28)
- decor items (10)
- glass decor (7)
- wall decoration (4)
- children's room decor (3)
- pillow decor (3)
- decor of bottles, cans (2)
- decor of children's clothing and shoes (1)
- interior (1)
- DECOUPAGE (24)
- pictures for decoupage (13)
- spot painting (7)
- products using decoupage technique (6)
- decoupage lessons (2)
- eggshell (1)
- decoupage on fabric (1)
- DESIGN (17)
- color palettes (17)
- FOR CHILDREN (117)
- copybooks, coloring books (55)
- costume jewelry, hairpins (15)
- children's clothing and shoes (13)
- paper dolls (9)
- crafts for kids (9)
- rest (7)
- birthday preparation (6)
- games with children (1)
- furniture, organizers (1)
- FOR HOME (36)
- for storage (13)
- interior crafts (13)
- for children's (5)
- kitchen (5)
- indoor plants (1)
- home economics (1)
- interior design (1)
- PICTURE (5)
- EARNINGS (0)
- FROM THE INTERNET (2)
- PICTURES, CLIPART (38)
- themed (14)
- hodgepodge pictures (6)
- holiday pictures (5)
- vintage (5)
- flora, fauna (5)
- People, girls (4)
- children's clipart (1)
- Catch the Rainbow (1)
- COMPUTER (2)
- programs (1)
- BEAUTY AND HEALTH (5)
- nail extension and design (4)
- diets, weight loss (1)
- COOKING (19)
- Cake decorating (9)
- decoration of dishes (6)
- children's dishes (3)
- snacks (1)
- sweets (1)
- MODELING – POLYMER CLAY, COLD PORCELAIN (31)
- figures (18)
- sculpting flowers (12)
- hair decorations (1)
- decorations - sets (1)
- jewelry - brooches (1)
- MOLDING (21)
- mastic and marzipan (20)
- salt dough (6)
- modeling mass recipes (1)
- MASTER CLASS (56)
- WEAVING (18)
- bead weaving (18)
- CRAFTS AND GIFTS FOR THE HOLIDAYS (36)
- New Year, Christmas (21)
- wedding (4)
- gift packaging (3)
- Halloween (2)
- Easter (2)
- February 23 (2)
- Birthday (1)
- March 8 (1)
- PAPER CRAFTS (43)
- boxes, baskets (13)
- scrapbooking (11)
- rest (9)
- cardboard (8)
- paper flowers (4)
- origami (4)
- foamiran (1)
- UTILITIES (21)
- USEFUL TIPS (2)
- DRAWING (6)
- SCRAPBOOKING (82)
- scrap paper (33)
- pictures for scrapbooking (12)
- postcards (7)
- Pages for notebooks (7)
- tools, materials and elements (6)
- sketches (6)
- notepads, albums (5)
- templates (4)
- scrapbooking usefulness (3)
- wallets, holders, boxes, covers (1)
- stamps (1)
- HANDCRAFTS (37)
- from ribbons (15)
- all sorts of things (13)
- plastic (5)
- felt (5)
- kanzashi (4)
- drying (2)
- floristry (1)
- JEWELRY (27)
- for hair (17)
- earrings, cuffs (3)
- bracelets, brooches (2)
- jewelry selections (2)
- making jewelry (2)
- PHOTOSHOP (6)
- scrap kits (6)
- SEWING (58)
- ideas (without patterns) (28)
- sewing for children (27)
- toys, dolls (6)
- for home (5)
- organizers (5)
- accessories (3)
- patterns (3)
- bags, cosmetic bags (3)
- shoes, slippers (2)
- sewing usefulness (1)
- quilting (1)
- pattern making (1)
- sewing technique (1)
- TEMPLATES, Stencils (27)
- rest (12)
- children's templates (8)
- patterns (5)
- Indian ornaments (2)
- animals (2)
- ornaments (2)
- floral motifs (1)
- silhouettes (1)
- MAGAZINES embroidery (124)
- Cross Stitch Card Shop (63)
- Sandra. Embroidery (61)
- sewing MAGAZINES (35)
- Pretty Toys toy patterns (35)
- MAGAZINES on modeling (13)
- Porcelana Fria (13)
- Crafts MAGAZINES (6)
- Todo Souvenirs - making souvenirs (5)
zaxarik.ru
It's time to pick up the needle
So, all the details are cut out, it’s time to sew them. You can sew either on a machine with a regular straight stitch, or by hand with a stitch forward with a needle. If the toy is small, then it is better to sew it by hand, since the appearance of your toy depends on the accuracy and precision of all the curves and details of the pattern.
When sewing the parts, do not forget to leave unsewn holes for turning and stuffing the toy. On the pattern these places are indicated by a dotted line. When you sew the body of the elk, note that the neck needs to be sewn up and the bottom left open.
Pay special attention to your head. Sew the back pieces together first, leaving an open hole at the top. Then sew the details of the ears, attach them to the front of the head, placing them down and inward. So, after turning out, the ears will be symmetrically located on the head. Then assemble the entire head by stitching around the circumference.
Assembling a toy
To begin, turn all the pieces right side out. To carefully turn out the thin and long parts of the arms and legs, as well as the neck, use a thin wooden stick, such as a sushi stick or a kebab skewer. In this case, the pencil will be too thick, and the knitting needle will be too thin and may pierce the fabric.
After turning all the parts, iron them with an iron and start stuffing. Take your time and fill the parts of the head, horns and body tightly, without gaps and so that the toy turns out smooth, without waves or bumps. To ensure that your tilde elk holds his head well on his long thin neck, use one trick - grease a small piece of wooden stick with PVA glue and wrap it with padding polyester. Insert it into the neck from the inside and then stuff it tightly into the body.
Stuff your legs only up to the knee, not too tightly, so that your tilde-elk can sit. Having stuffed the legs to the knee, sew them in this place with a simple straight stitch to give the legs the opportunity to bend at the knee. Stuff your arms completely, but not too tightly, so that they lie along the body and do not puff up on the sides.
After stuffing, sew up the open holes on the head, horns and arms using neat over-the-edge stitches. Fold the open cut on the body inward, insert the legs into it and stitch. First, pin the arms to the body with pins, and only after making sure that they are symmetrical, sew them to the body. Sew the horns to the head from the back between the ears, and the head itself to the neck. It remains to make a couple of stitches at the ends of the arms to make it look like a hoof, and your tilde-moose doll is ready. It's time to give it some personality.
Adding details
To give your toy character, it will need a face and a costume or a couple of accessories. Start with the muzzle. As we have already noted, tildes and their friends only have eyes on their faces. Traditionally, they are made using the French knot technique, but you can draw them with a felt-tip pen or sew on beads. Mark the nostrils with a couple of stitches, where the patterns suggest. The New Year's tilde moose can also be decorated with blush. It is usually done with dry pastel or regular blush and a dry brush.
To dress up the toy, use whatever you have on hand. Sew simple shorts from scrap fabric and sew them directly to the body. Cover the seam with a sweater that is easy to put on top, and if you don’t know how to knit, sew a sweater from any knitwear. The jacket is sewn as simply as the trousers. Using the approximate measurements of the entire moose, draw on paper the outline of a sweater with a one-piece sleeve (letter T).
Fold the fabric in half and place the pattern on the edge of the fold, so you will cut out a solid piece for the front and back. Make a round hole in the middle for the collar and sew the side seams and sleeves - a simple blouse is ready.
The look can be completed with scarves and hats, boots made of felt, bags and bouquets of flowers in your paws, in general, everything that your imagination tells you.
Elk - pattern of a soft tilde toy for sewing
I met this little miracle quite recently, held it in my hands, twirled it - so cute!
I wasn't the only one interested in him. A touching soft toy - New Year's elk. I figured out the pattern in my head - it’s not difficult to repeat, nothing special. Sewing using the tilde principle.
Literally that same day in the evening I found a magazine with layers of vests and their patterns that could be used as a basis.
Naturally, you can change the pattern a little for yourself. Look through the post to the end, there you will find many ideas and examples of how to sew New Year's interior decoration.
Two moose patterns
How easy it is to make a baby animal, so charming it is! By the way, this costs only 20 euros in the store. I had a hard time resisting buying it. Then I decided that there was nowhere to put it, and the house was already full of everything. I took a photo for memory. Perhaps I’ll repeat it someday for myself, and specifically from knitwear.
Small, close-set eyes, a mouth embroidered on the side of the muzzle. The shaggy scarf, horns, nose, legs, boots and “hooves” on the arms are made of fleece.
There is wire inside the horns so that they keep their shape. Yes, the head is almost larger than the body. And it fits well due to the fact that there is a weighting agent inside the body - otherwise the head would have weighed down!
Soft toys from a magazine
We will sew these beauties according to the pattern below. If not all at once, then at least one. For sewing we need:
- A: 45 cm synthetic plush or fleece 110 cm wide
- wool felt (also 110 cm wide) - B: 15 cm black, C: 15 x 65 cm gray-beige
- J: material, vest buttons
- filler - cotton wool, padding polyester or special granulate
- wire for horn stability
The size of the figurine is approximately 25 by 52 centimeters.
Before starting work, you need to enlarge the pattern to the required size in a graphic editor, transfer the details onto the fabric with all the small marks. Cut out all elements with scissors, parts 1 - 7 are given with seam allowances of 0.75 cm, and part 8 does not require any allowances.
They say that moose calves can be planted or hung - they will look equally good.
Wire in the horns is required - this is how they will stand, they can be given any shape you want.
The legs and arms can be left hollow or filled with a little cotton wool, do what you like best. A vest is not required; if you wish, you can knit a scarf for the elk or wear pants.
Another version of a moose with a pattern. It is the simplest, I would say, primitive. But such techniques are now in fashion. This is good to put under the Christmas tree.
Other ideas for sewing elk
Finally, I’ll give you a few more pictures with various toy moose used for New Year’s interior decoration; I don’t have patterns for them, just photos. Perhaps those who sew themselves a tilde in the form of Santa’s cheerful companion for the New Year will draw from here new ideas for their needlework - sewing toys.
Below the horns do not require wire; they can be made of thick felt, suede or leather. The nose is a felt heart. The eyes are black beads. This is a girl in a dress.
Here the horns, on the contrary, are only wire, wrapped with brown woolen thread attached to glue. I really like the shape of the muzzle, and the material was chosen well - short faux fur.
Use fabrics that you already have - unnecessary clothes, even if they are worn, there are undoubtedly good quality areas left there. Warm winter materials will go - from jackets, old skirts, tweed. Use the remaining yarn to make knitted accessories - scarves, hats, socks, mittens for a new friend. Buttons will also come in handy.
This one comes with a fun pom pom hat, scarf, buttons and white trim for extra decoration. This is more difficult to do, because it requires a real frame - it must stand on its own.
I couldn’t pass by the window of a toy store - this one is made of chunky knitwear, I think it would be suitable as an idea for turning a sweater into a toy. The horns are ideally knitted from shaggy fluffy threads called “grass”.
It would be fun to design the nose as a pompom.
It is better to sew knitted parts, especially thick knitted ones, using an overlocker - the edges will be reliably processed and will not fray. But those who only have a sewing machine can get by with a zigzag seam.
dolgoli.ru
