An alarm system will ensure the safety of your home when the owners are away. There are many types of it, with different capabilities, from a simple sound notification to calling the police. For budget home use, a self-assembled GSM alarm system is well suited.
Its incomparable advantage is the notification of the owner when strangers penetrate through the security perimeter of the premises. The design itself is incredibly cheap and simple. Any person capable of holding a soldering iron can make such a system.
The essence of the gsm alarm system
GSM alert systems allow you to send SMS messages or a call to the owner's cell phone. Their extended variants are capable of making already established logical choices depending on the situation and are controlled by feedback, command signals from the user.
For example, in the event of a false alarm, the owner can turn off the alarm using SMS. Or, when there is no response from the notified subscriber, the system automatically calls the police.
One of the alarm systems with many possibilities
Of course, in order to provide similar flexibility to a homemade GSM alarm system, you will have to spend additional money on a logical unit - a computer, a communication module attached to it and sensors with corresponding parameters.
All this together will make it possible to create a warning system no worse than those officially sold in stores. Moreover, the price of a self-assembled one will be much lower than the options available on the market.
Add a link to a discussion of the article on the forum
RadioKot >Attic >
| Article tags: | Add a tag |
Simple GSM alarm from an old cell phone
Author: SSMix Published 09/17/2015 Created using KotoEd. Participant of the Competition “Congratulate the Cat as a Human Being 2015!”
The lifespan of cell phones is perhaps one of the shortest of all household radio equipment due to rapid obsolescence. Many people have outdated push-button mobile phones in working condition lying around idle. By adding an Arduino motion sensor module and a small control circuit to such a phone, you can build a simple autonomous alarm system via a cellular communication channel.
There are many video reviews of various models of small Chinese GSM alarms on the Internet. They only require installing a SIM card from a mobile operator and performing simple setup. The alarm is triggered either by exceeding the sound level or by a pyroelectric motion sensor. The first option is clearly impractical, because False alarms from loud extraneous sounds are inevitable (thunderstorm, doorbell, telephone ringing, neighbors' repairs, etc.). At the same time, a low sound (uninvited guests will definitely not make noise) may not trigger the alarm. Therefore, it makes practical sense to use a pyroelectric motion sensor in such a device. In practice, all these models of Chinese alarms have significant shortcomings. Firstly, anyone can call the number of the SIM card installed in the alarm, for example, by accidentally making the wrong number, and not only listen to what is happening in your premises. The last incoming number is recorded so that you can call it when the alarm is triggered. So you may not wait for a call from the Chinese at a crucial moment. The recommendation to periodically call the security number to confirm the correct number is quite troublesome. Secondly, the response time of such devices is quite significant and amounts to several tens of seconds. Thirdly, such devices do not have an interface for quickly viewing the account status, incoming messages from the operator, etc., which is also quite inconvenient. Therefore, it is more practical to use an outdated regular push-button mobile phone. In your phone settings, you can set a call filter, and no one other than those who are supposed to can listen to you. In addition, we will have at our disposal a full-fledged interface with a keyboard and display, where all the necessary information about the battery status, incoming messages, etc. will be displayed. Of course, the phone needs to be modified a little and a standard pyroelectric Arduino motion sensor module, as well as a small control board, must be added to it. The motion sensor is used in the form of an affordable, inexpensive, ready-made Arduino HC-SR501 module with a Fresnel lens:
There is a datasheet on the Internet with a diagram:
The module is based on the BISS 0001 microcircuit with strapping circuits. Module supply voltage (4.5-20) V, current consumption less than 50 μA. The detection distance is adjustable in the range of 3 - 7m. When motion of a thermal object is detected, a pulse with a duration of 5-200 seconds is generated at the output (adjusted by a resistor). The module has 2 operating modes depending on the state of the jumper: L - single capture, each time the sensor is triggered a separate pulse appears; H - repeatable measurements; when the sensor is triggered several times in a row, its output (at OUT) remains at a high logical level. Here is a picture from the site https://digitalchip.ru from the Internet:
The Out signal from the module is used to control the actuator, in this case the call button on a cell phone. The electrical circuit of the alarm looks like this:
It consists of a simple radio radiation detector on VD1, VT1, control logic on DD1, PIR motion sensor Arduino HC-SR501, decoupling optocoupler DA1 for controlling the phone call button, two switches and an external battery. It so happened that the battery in the used Siemens A50 phone turned out to be unusable, and a new one cost a lot of money. Therefore, I had to solder on the wiring another battery from a broken Fly smartphone, with a larger capacity and dimensions. The phone is connected by two thin wires (call button) through an optocoupler DA1. At the same time, the functionality of the keyboard is fully preserved. A separate microphone amplifier with a microphone is installed optionally in case the sensitivity of the microphone built into the phone is not enough. To save battery power, power is supplied to the amplifier only when the phone is transmitting. The pulses induced in antenna WA1 are rectified by the diode assembly VD1, transistor VT1 opens and discharges capacitor C5 through resistor R9. The charging time for this capacitor through R4 is about 30 seconds, so while packets of pulses are coming from the phone transmitter, capacitor C5 is constantly discharged through R9 and VT1, keeping the inputs of the Schmitt trigger (pin 1, 2 DD1) low. level. High log. the level at the inverting output (pin 3) of this trigger supplies the supply voltage to the amplifier. At the same time, the green LED HL1 lights up. The generation of an impulse to the telephone call button occurs as follows. At the first moment after turning on the power, capacitor C4 is discharged (through R10, VD2, SA2 to the body or R1, SA1 to the body). On the pin. 13 Schmitt trigger low log. level, and its output is 11 – high. In this case, optocoupler DA1 is closed and the formation of the call pulse is blocked so that there is time to move away from the alarm after switching on at a sufficient distance without its activation. Also, call formation is blocked from pin 6 of DD1 when the telephone transmitter is running. In the standby state, when capacitors C4, C5 are charged, pin 11 of DD1 is log.0 and the operation of optocoupler DA1 is allowed. When log.1 appears at the output of the motion sensor, the LED of optocoupler DA1 opens and the red LED lights up. When you press the telephone call button (green, with handset), the last dialed number is displayed on its display. When pressed again, a call is made. In this case, a working transmitter causes the appearance of log.0 on pins 6, 12 of DA1 and log.1 on pin 11, blocking further pressing of the call button. In order for continuous pulses to be generated at its output when a heated object moves in the sensor field, the jumper on the module must be set to position L:
The right trimming resistor should be used to set the minimum duration of the output pulse, and it is better to reduce resistor R13 in Fig. 1 to 100 Ohms. The trimmer on the left sets the maximum sensitivity of the sensor. In this case, the system is activated literally in a matter of seconds. When you try to quickly enter a room with an alarm and turn it off, you can see on the phone screen that a call is already in progress. Switch SA2 is used to turn on the motion sensor. Switch SA1 is the common power supply for the sensor and control board. Resistor R1 and zener diode VD4 are protective. The orange HL3 LED flashes occasionally in security mode when power is supplied to the control board. The control circuit is assembled on a printed circuit board made of double-sided foil fiberglass with dimensions of 48x30mm. The WA1 antenna is made in the form of a printed conductor:
The entire device is assembled in a housing from a faulty router:
Back view with buttons:
The upper part of the phone, where the antenna is located, is almost closely adjacent to the printed antenna on the control board. If you are using a different phone model, you should clarify where exactly its GSM antenna is located.
The motion sensor module is installed in cut-out slots on the side of the case so that the adjustment controls are located on top:
To camouflage, cover the router case, for example, with a newspaper, pointing the sensor lens at the front door. For the alarm to work correctly, you need to configure your phone. Here is one of the options for a specific Siemens A50. In “Contacts” you should enter the phone number to which you will call in the event of an alarm. This number should be included in a group, for example, “Family”. You can also add phone numbers to this group from which auto-pickup will be allowed. The remaining numbers can be deleted. Next, you should turn off the ringer on your phone (turn on silent mode without sound). To automatically pick up the handset, you can use the appropriate settings in the “Headset” item, if, of course, you have one. Otherwise, the vibration alert is removed from the phone, and an optocoupler, for example TLP126 from Toshiba, is soldered in its place.
A special feature of the TLP126 optocoupler is the presence of two LEDs switched on in both directions, small dimensions and operating current. Functionality was also confirmed with the TLP185 optocoupler, which has one LED. The outputs of the optocoupler transistor (pin 4, 6) are soldered to the call button. In this case, when the phone is turned on, you should determine which of the printed contacts has the “+” button and which has the “-” button. After this, the phone can be assembled. In the "Audio" settings, you must enable the "Family" filter. In this case, calls from other numbers will only be displayed on the phone display without a sound signal and vibration, and auto-pickup from someone else's number will not occur. Now you need to select from “Contacts” the number to which you want to call when the alarm is triggered, and press the call button to remember it. Now, when you press the call button for the first time, this last dialed number will be displayed on the phone screen, and when you press it again, it will be dialed. When the motion sensor is triggered, the control board will transmit two pulses from it, i.e. There will be 2 presses of the phone call button, after which the phone transmitter will start working and the remaining impulses will work, and accordingly, “presses” on the call button will be blocked. If the phone has a monochrome LCD display, it is better to turn off the backlight in the settings to save battery power. If the display is color, then it is better to set the minimum brightness and display dimming time. Now, as for a separate microphone with an amplifier, this, as they say, is not for everyone. In the Siemens A50 phone used by the author, the microphone sensitivity turned out to be extremely low and amounted to 30-40 cm for normal speech. Purely for sport, a separate external amplifier with a microphone was assembled. At first, a circuit with AGC was tested, but due to the peculiarities of the circuit design, such amplifiers create pops at the initial moment when loud sounds appear. The compression circuit with 3 field-field switches and a dual op-amp, the prototype of which was found on the Internet (https://dedclub.blogspot.com/2014/03/blog-post_2.html), showed itself to be much more qualitative. Here is the final version of the modified scheme:
Transistor VT1, according to the current stabilizer circuit, is a dynamic load for the field worker built into the electret microphone. This is followed by a similar cascade on the second pair of field switches VT2, VT3, a low-pass filter on DA1.1 and a final amplifier-limiter on DA1.2. The circuit is assembled on a double-sided printed circuit board with a screen made of white tinned tin from a can of condensed milk:
Trimmer resistor R10 regulates the signal level at the amplifier output. The sensitivity of such an amplifier turned out to be quite high. Whispers can be heard from a distance of several meters. There are no overloads when sudden loud sounds appear. In general, I would recommend this amplifier for use in hearing aids, radio microphones, and transceivers. The screen is necessary to protect against external electromagnetic interference. When the amplifier is located next to a mobile phone transmitting, the interference is practically inaudible. But this is in the absence of a direct connection with the phone. When connecting the amplifier's power to the control board and the output instead of a standard microphone, the audibility of interference from the phone increased significantly. It is possible that the picture will be slightly different with other phones. Currently, the author is still searching for the most optimal match between the microphone amplifier and the telephone to completely eliminate interference from its transmitter. The battery is charged from the phone's standard charger. Despite the almost doubled capacity, charging proceeds normally, only longer. The continuous operation time of such a homemade alarm from one full battery charge is more than 2 weeks. But in each specific case it all depends on the phone’s power consumption and battery capacity. The microphone amplifier turns on only when the phone transmitter is operating, the motion sensor module itself consumes less than 50 μA, and the control board consumes virtually no current in standby mode.
Files:
Files
All questions in the Forum.
| What do you think of this article? | Did this device work for you? | |
| 10 | 24 | 15 |
Where can it be applied?
The scope of GSM signaling is very wide. It can be used not only as security for apartments, private houses, country houses or shops. Even in the simplest version of its manufacture, its functions are sufficient to notify the owner of any physical event.
For example, it is possible to install it on a garden watering system so that signals are sent when the water has run out. Or it can be used as a fire department - when the smoke and fire sensor is triggered, a call is made to the owner. It all depends on the type of sensors.
Various sensors
A GSM alarm is also good for protecting your car from theft or theft. In the first case, a pleasant bonus will be the ability to find the loss using radio direction finding of the phone.
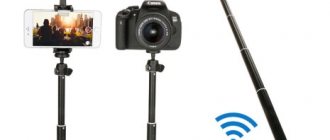
Where can I buy
You can purchase a ready-made wireless system either in a specialized store or online in an online store. In the second case, the budget option for purchasing products on the Aliexpress website deserves special attention. For some products there is an option for shipment from a warehouse in the Russian Federation; they can be received as quickly as possible; to do this, when ordering, select “Delivery from the Russian Federation”:
| Home security alarm system EMASTIFF | GSM security system KERUI | Mini-kit for GSM security system TUGARD |
| GSM alarm system with support for different frequencies | GSM system with touch panel | GSM alarm kit for garage |
How to make a GSM alarm from your phone with your own hands?
The most budget option of all possible for such an alarm will be considered. An alert is triggered when the amount of monitored space changes. It occurs if a large object, person or any movement appears in the sensor’s field of view.
Components and materials
- The main part is any push-button mobile phone, as long as it allows you to remove the auto-lock of the keypad and is relatively easy to disassemble. In this case, old, black and white mobile phones are good. Their design and easy access to the elements are a great help in creating a warning system. But a smartphone won’t work; everything is too dependent on the built-in software.
Push-button mobile phone
- Volume and motion sensors. In the original scheme, Astra was used, but you can use any suitable parameters.
- Connecting wires - the required length is selected depending on the distance to the sensors.
- Chip K561LA7 or its foreign analogue – CD4011A.
- Optocoupler. You can pull it out of an old computer power supply.
- Stabilizer 7805. You can find it in the same place as the optocoupler.
- Two 100n (nanofarad) non-polar capacitors.
- Resistor 3.3 kOhm.
- Thin varnished wire. Useful when soldering in the phone itself; large wires are difficult to work with.
- Soldering iron, flux and tin.
- 12 volt battery or power supply.
Installation and connection instructions
A push-button cell phone is disassembled down to the printed circuit board. Some models allow you to remove the buttons themselves under the screen. To do this, just pry them off from the side with a knife or an iron ruler. The main thing is to get to the contacts of the keyboard group.
Push-button phone board
Contacts required for soldering
The call key is soldered to both contacts using varnished wire. Then the housing is reassembled, in which it is necessary to leave the new lines outside.
Assembling a telephone with a separately displayed call button contact
Next, on a breadboard or using conventional etching, a circuit substrate is made, onto which the necessary elements are soldered. You can design and make a layout on a computer using various specialized software, much of which is available for free.
Schematic diagram of the alarm unit
The finished board is connected to the already described contacts of the phone button and volume sensors. If several sensors are used, they are connected in parallel so that when any of them is triggered, a signal is sent to activate the system.
The circuit is connected to a power supply or 12V battery. Such current characteristics are necessary not only to provide energy to the soldered structure, but also to the sensors themselves.
That's it, the device is ready for use. The logic of its operation is quite simple: a pulse from a motion sensor triggers the generation of a rectangular signal on the K561LA7 microcircuit, with an amplitude frequency of approximately 1 Hz.
Through an optocoupler, with their help, the call button contacts are repeatedly connected, which on most phone models will first call up the history with the last number, and then dial it, informing the owner that the alarm system has been triggered. That is, only the first impulses are involved in triggering the security. The rest will be ignored by the telephone.
Do-it-yourself GSM alarm system with infrared motion sensor for a country house or dacha
The operating principle of this GSM alarm is based on an infrared motion sensor, and not on a reed switch. The infrared motion sensor is triggered when an object is in its field of view and sends a signal to the mobile phone. After the signal reaches the phone, it dials the number previously configured in the speed dial. The circuit itself of an autonomous alarm system using an infrared motion sensor is shown below.
The diagram shows, as in the first example, the motion sensor is connected to the ninth button.
It is worth noting that the motion sensor itself requires a separate 12 V power supply.
You can use the Astra 515 device as a motion sensor itself.
This motion sensor has a range of 10 meters. For example, if any object falls within this range, the alarm will go off and make a call.
Another feature of this motion sensor is the IP41 protection level, which allows it to operate at temperatures from 0 to +50°C.
It is convenient to use such an autonomous GSM alarm, assembled with your own hands, at the dacha and in a country house to protect their territories.
GSM alarm system based on Arduino
One of the options for connecting Arduino to an alarm reed switch.
A more advanced option for making an alarm would be to use an Arduino controller with a GSM module. In this case, the signal sensors are connected to the microcomputer itself, and its program already controls the communication, sending messages or making information calls to the owner of the system.
A big plus of this design is the ability to control the security system via SMS, the main thing is to program the reaction to them in Arduino.
The operating principle of GSM security and its main elements
To make an alarm with your own hands, you need to understand on what principle it functions and what components are included in its composition.
The main functional unit of such systems is the GSM module, which ensures the transmission of warning signals from the object to the owner of the house or garage. The transmission is carried out using high-frequency mobile waves from one of the operators whose services are used.
The alarm signal is given in accordance with the data that the electronic alarm unit receives from sensitive sensors and sensors installed at the facility. These can be devices that respond to the opening of a door, window, glass breaking, or movement in the protected perimeter. Video cameras and microphones can also be used to keep relevant records, and many other functional sensors that respond to increases in temperature, the appearance of smoke, water and gas leaks. Sensing elements are connected to the electronic unit wirelessly using a radio channel or through laid wire lines.
Common errors and ways to solve them
Using a cell phone without a generator to periodically connect the call button contact will do nothing. The mobile phone will display the number on the screen, but will not make a call. The same thing will happen if the contact of the dial key is permanently fixed.
The alarm will not work even if the pads of the assigned shortcut button are connected once (some models of mobile phones allow you to bind a number to a specific numeric key). Confirmation is still required to start communication. This issue, of course, is being resolved, but the signaling circuit will need to be complicated in order to introduce the possibility of sequentially closing two buttons.
Speed dial as it is
Another mistake, usually not taken into account by novice specialists, is ensuring uninterrupted power supply to the alarm system. The price of one that can be turned off is worthless by simply switching the external lighting switch of an apartment or house to the “0” position.
It would be a good idea to be able to block the alarm by the owner so that it does not turn on every time the security sensors react, even in cases when everyone is at home.
We assemble a simple alarm system based on a mobile phone for a summer house or country house
The first DIY alarm based on a mobile phone will be very simple. To assemble it we need the following components:
- old mobile phone;
- reed switch;
- standard battery charger;
- long wire;
- soldering iron;
- solder;
- magnet;
- additional SIM card.
Any old push-button telephone will be suitable for this alarm. You can even use old models such as Nokia 3310. The principle of such an alarm is based on speed dialing from the button to which the sensor is connected. That is, when the sensor is triggered, the phone dials the number configured in the speed dial. Therefore, the first thing we will do is set up our phone to quickly dial the number that will receive a call when the sensor is triggered. In our case, the speed dial button will be the ninth button. You should also turn off the ringer and vibrator on your phone. It’s also worth considering whether we should use a charger for our phone or leave it running on a fully charged battery.
You should only leave your phone on a charged battery if it can hold a charge for about a month.
Below is a diagram of the assembly of such an alarm for a cottage or home.
The figure shows a diagram of connecting a Nokia 6150 phone to a reed switch. To connect the reed switch to the Nokia 6150, you need to disassemble the phone and carefully solder the wires to the contacts of button nine on the printed circuit board (Speed dial button). After this, the magnet and reed switch are attached to the door. The scheme works this way: when the door is opened, a signal is sent from the reed switch to the button, as a result of which the phone dials the specified number in the speed dial. The reed switch itself is a magnetic sensor, somewhat reminiscent of a diode.
In the same way, as shown in the diagram, you can connect a self-assembled GSM alarm system in a country house, cottage or garage.
Advantages and disadvantages of home-made housing and minerals alarm system
The main advantages in cases of making GSM alarms with your own hands are low price and understanding of the operating principle and the factors that drive the system.
The downside is that the higher the requirements for the device and the greater the need for functionality, the more complex the security alarm concept itself will be. Which, however, can be completely solved by using microcontrollers.
Soldering ability is a required skill for making your own alarm system
The most significant disadvantage compared to store-bought ones is that they require knowledge and practice in assembling electronic circuits. Without the ability to solder, it is impossible to create a reliable homemade warning system.
It is worth mentioning the range of action - it is equal to the reliable reception of a cell station signal. In addition, the SIM card installed in the GSM alarm must always have money in its account, otherwise the device will not be able to contact the owner.
How to do it? Option on the Arduino platform
This scheme includes:
- Arduino platform
- GSM modem (SIM900A, SIM800L)
- Power supply, battery.
The system works simply. When a connected sensor (motion, infrared, etc.) detects intrusion indicators, it sends a signal to the system, putting it in standby mode. An alarm notification (predefined SMS message) is sent to the specified mobile number.
Detailed connection diagram is contained in the video
Connection secrets
From the moment of installation, the GSM alarm system stands guard over your car, so every little detail matters. Moreover, there are a number of connection secrets that you need to know about during installation:
- The main task is to provide independent power to the device, which can be turned off and on using a hidden toggle switch (we have already talked about this).
- All wires must be laid in places where moisture never penetrates. This is necessary to avoid possible short circuits and system failure.
- Try to mount the main unit, sensors (if any) and wires as far as possible from heating and vibrating elements of the car. Otherwise, there is a high probability of system damage and failure.
- The device control unit must be kept away from the telephone, car antenna and radio to avoid interference.
- The places where the wires pass from the body to the doors or from the body to the hood must be additionally reinforced with special rubberized tubes to avoid creases and damage.
Installing such an alarm system is a responsible process, so there is no need to rush here. Each connector must be cleaned with special care and carefully insulated to prevent dirt and dust from getting on it.
Installation rules
When installing such a device, you need to consider a few simple recommendations:
- Firstly, before starting work, study the gsm alarm diagram and strictly follow all the recommendations. If you bought a ready-made device in a store, work only according to the instructions;
- secondly, to install and connect the device, it may be necessary to remove the instrument panel and dismantle the protective panels under the steering wheel;
- thirdly, turn off the power (to do this, just remove the terminals from the battery);
- fourthly, install the control unit (mobile phone) in close proximity to the fuses (this will greatly simplify the connection);
- fifthly, install alarms and other sensors (if they are provided for in your circuit);
- sixth, carefully lay out the wires so that they do not interfere with the process of driving the car;
- seventh, connect the device to the on-board network.
Examples of GSM signaling schemes
.
Scheme for creating a homemade simple alarm system
Let's look at one of the simplest car alarms that you can do yourself.
The diagram shows an acoustic alarm, triggered by the closure of limit switches on the hood, trunk or doors, which in active mode blocks the engine from starting after the ignition is turned on. This circuit will work perfectly on cars with a classic contact ignition system (VAZ, Volga, Moskvich and foreign cars of the last century).
Option 2
Here the circuit is a little more complicated, but the functionality is much richer than in the previous case.
Such a device is triggered when at least one input is short-circuited to the negative of the vehicle. Moreover, the alarm system itself has four security inputs: for the driver’s door, for all passenger doors, for the luggage compartment and, accordingly, the hood.
After turning on the power switch, you must quickly get out of the car (no more than 25 seconds). If suddenly the driver does not have time, the control LED will not light up until all the doors, hood and luggage compartment are closed. As soon as the conditions are met, the alarm will go into security mode.
Then, when any of the sensors are triggered, the device informs the owner about an attempt to penetrate. At the same time, the siren turns on and the car ignition is blocked. But that's not all.
When an attempt is made to steal and one of the doors is opened, the headlights turn on, and, if desired, the turn signals.
To turn off the alarm and remove all locks, just turn off the toggle switch hidden in a special place.
In the case where the attacker immediately closed the doors after the alarm went off, the blocking is not removed. At the same time, the car owner still receives an alarm call.
After 40 seconds, the control unit will poll all systems and, if there are no triggered sensors, will go into standard security mode. If, during the test, the opening of one of the doors is confirmed, the device goes into alarm mode.
As in the previous case, to implement such a scheme, you need to buy a mobile phone with the ability to quickly dial. In this case, the call will be made until the subscriber at the other end of the “wire” presses the reset button.
You can use an ATMEL product as a controller, although there are many analogues. Its advantage is its affordable price and reliability. In addition, such a controller can easily be found on the market in your city.
Any 12 V devices can be used as a relay. The toggle switch for turning the alarm on and off is also not difficult to find. In this case, it is advisable to hide it away from prying eyes. The more reliable the place, the better.
The toggle switch is inserted into the alarm power supply circuit from the on-board network.
Features of connecting sensors in cars
Imagine that when you open a door, a certain button is activated, one of the contacts of which is connected to ground. When the door is open, the signal wire will be at ground, and the rest of the time it is not connected to anything.
Electrical diagram of door switches
There are several similar sensors in a car. These include: door unlock sensors, hood sensor, and so on. Let's say that a certain module must be controlled by the activation of any of the signal contacts (logical OR circuit). Then you need to use diodes.
Connecting several heterogeneous sensors
Let's summarize what was said above. In any car circuit, “ground” control is always implemented. That is, the signal cable acquires “zero potential” at the moment of signal transmission. The maximum current transmitted through such a cable can be considered 300 milliamps. You cannot go beyond this limit!