How to make a real papier-mâché balloon with your own hands so that it can then fly? What is required for such a craft, how complicated is the process? In reality, most products of this type do not require a long time or special knowledge.
Thanks to the detailed master class, any beginner can handle it. But the finished craft will amaze everyone around you. You can make bright colorful balls, put them in baskets or paint them to make laughing faces. Whatever you want, you are limited only by your imagination.
Step-by-step master class
To make a papier-mâché ball into an inflatable balloon, you will need the following materials:
- a stack of unnecessary newspapers;
- liquid paste;
- ordinary rubber ball;
- several brushes.
Detailed instructions:
- Prepare the paste by diluting it in some unnecessary container of decent size.
- Tear the newspaper sheets into strips 2.5 cm wide each.
- Inflate the balloon, making sure that it does not exceed the dimensions of the finished craft.
- Carefully cover the finished ball with paper strips previously soaked in paste.
- Important: after wetting the paper, immediately remove all excess liquid by rubbing it with your fingers. This should be done in advance, before gluing.
- When gluing the strips, carefully straighten the folds with your fingertips. It is more convenient to do this with a brush. Proceed step by step, then the toy ball will turn out beautiful and smooth.
- When finished, leave the product to dry. Now carefully pierce the ball inside the newspaper strips and remove it through the small remaining hole at the bottom (this must be left in advance, even before gluing the newspaper).
If you need a white ball, simply paint the dried workpiece with paint of the required color.
Globe or moon made of papier-mâché
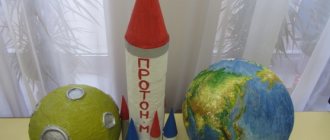
How to make a ball - a planet from papier-mâché? I want to create something special. For example, planet Earth or the Moon. Here the basic principle of making a ball will remain unchanged.
Step-by-step instruction:
- Make a newspaper ball, trying to make it as smooth as possible (without wrinkles) and medium in size. Inflate a regular rubber ball, then gradually cover it with strips of newspaper soaked in glue. Wait until the product is dry, then deflate the balloon. The preparatory part is finished.
- Now for the example you will need a real globe. It is more convenient than flat pictures. To make the globe look as realistic as possible, you need to redraw the outlines of the continents, individual islands and oceans of the Earth onto the finished paper ball. To do this, arm yourself with acrylic paints.
- Is it convenient to color a newspaper or is it worth additionally covering the top of the ball with white paper? You can paint it first with white paint and then apply the outline of the Earth onto it. Or cover it with A4 paper, cutting it into strips as well. The technology seems more complicated, but in practice everyone can cope, even beginners.
INTERESTING: Elephant made of paper (origami)
In this way, you can create any planet from the solar system and then hang them together, creating a composition. It is important to maintain the dimensions, remembering that Jupiter is large, Mars is small, and Earth is medium.
Methods for preparing the mass
How to make papier-mâché from newspapers with your own hands? The mass for making products can be prepared as follows:
- The first method is to use layer-by-layer technology. Small strips or pieces of paper are glued onto a previously prepared plaster or clay base. Paper pieces are glued in a chaotic manner on top of each other, creating up to a hundred layers. It is very important that the parts are coated with glue on both sides, which gives the craft strength. After every 3-4 layers glued, the product must be dried.
- The second way is how to make papier-mâché from newspapers. The mass for the product is made from paper pulp. Newspaper or paper is torn into small pieces and filled with hot water for ten hours. After this, the resulting mass is heated again to completely destroy the fibers. The water is drained through a colander, and the paper mass is beaten using a mixer, obtaining a homogeneous composition. An adhesive mass (glue or paste) is added to the resulting mixture. After this, a plastic mass is obtained that is easy to work with.
- The third method is most often used in industrial settings. Cardboard sheets, coated with glue, are placed on top of each other and pressed tightly. Then the product is cut out, sanded and painted. This technology is used to produce durable elements.
Balloon with basket - master class
Here you can choose the manufacturing technique.
Option number 1. Beautiful ball. If you need to create a craft quickly, then look for a beautiful small colored ball. Preferably round in shape. Weave it from a thick thread or take a ready-made mesh. Make sure that the ball fits comfortably inside and that the edges of the mesh remain free. Trim carefully if necessary.
Creating a cart. You can cut it from a regular plastic cup and paste it on the outside. Or glue it from a sheet of cardboard. If you have a ready-made basket, even better. Tie it using the loose ends of the threads to the ball. Ready.
Option No. 2. Volumetric balloon with a fabric basket. A great New Year's surprise that even a child can make if given some prompting.
Required:
- unnecessary newspapers;
- ordinary rubber ball;
- diluted paste;
- brush;
- pieces of multi-colored fabric (preferably one type);
- cardboard;
- a ball of rope or braid.
Step-by-step instructions:
This papier-mâché balloon will turn out beautiful, large, and can then be hung from the ceiling.
- Making a paper (newspaper) ball. Following the instructions described above, inflate the ball, then sequentially cover it with thin strips of newspaper, dipping them into the paste. Do not tape the space below, around the tail. Leave a hole.
- While the workpiece is drying, you can make a basket. To do this, take cardboard and glue a small basket step by step, focusing on the ball.
- Carefully make 4 small identical holes in the top of the finished basket. Make sure they are symmetrical.
- Decoupage ball. It has dried, now deflate and remove the rubber base (inflated ball). Cover it with strips of fabric/colored paper (whichever is preferable). Carefully make 2 holes on top, placing them close. The papier-mâché ball is ready.
- Measure 2 pieces of rope. You take one, put the tip through one of those holes at the top of the ball, then pull it out through the second. Center so that two identical ends hang down. Tie them by securing them in two opposite holes in the basket. Do the same with the second remaining rope. Tie the ends alternately to two of the four holes (see picture).
- At the top of the children's toy you can make an additional loop through which it can then be hung from the ceiling.
INTERESTING: How to make paper lanterns for holiday decorations
The creativity will be completed with a small doll or man with Lego, ready to fly.
Material selection
Working with mass should begin with preparing the material. Beginners in this business are recommended to use newspaper, since everyone has this raw material on hand at home, it soaks well, and the products are very durable. However, other quick-soaking materials can be used for work, which include the following:
- Toilet paper.
- Paper napkins.
- Plain or corrugated cardboard.
- Egg packaging.
As an adhesive composition, you can use ready-made glue; most often, PVA is used for this, which is diluted in equal parts with plain water . You can also use paste for this creativity, which is made from starch and flour. The correct thickness of such a composition should be selected depending on the type of counterfeit, as well as on existing experience working with it.
To work, you will also need a mold and oil, preferably vegetable oil. They need to lubricate the outer surface so that the mass cannot stick to the base. For external decoration, you can use varnish or acrylic paints. Sometimes, instead of paint, gouache is mixed with PVA glue in equal proportions. The prepared composition will be easily washed off from the craft until it has completely dried, and after drying there will be no erosion even after covering with other layers.
Balloon - Smesharik made of papier mache
It's easy to do. To create a cute Smesharik you will need:
- dye;
- several brushes;
- sheet of cardboard;
- scissors;
- finished picture.
The first step is to make a regular paper ball, pasting it with newspaper strips. Then, when it dries, decorate the product by painting it like a Smesharik. Draw a smiling face in front, and attach the missing parts such as ears, arms and legs separately.
Cut them out of a sheet of cardboard or “blind” them using a napkin soaked in glue. Some people take plasticine. The paper ball is quite dense, so you can attach various parts without fear of its destruction.
Video - how to make a topiary ball
Master class in excellent FullHD 1080p quality on how to make a base for a tree of happiness from newspapers, padding polyester, cotton wool, fur, scraps of cardboard or fabric. Watch and share with your friends in the most practical ways!
Did you like the master class on frames for the tree of happiness? Subscribe to ours and stay tuned for new releases! Write in the comments which topiary ball you use most often?
Useful tips
You can easily decorate your Christmas tree with Christmas balls
made with your own hands.
Involve children in the process
, they will really like it.
Also, colorful New Year's balls can be used as a gift to relatives and friends
. There are many ways to make New Year's balls and we will tell you about some of them.
- How to make a snowflake
- How to make a Christmas tree

