Lift for snowmobile
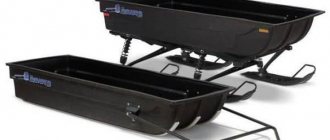
A universal mobile lift (elevator) for domestic and imported snowmobiles is used for loading them into a car, as a stand during repairs or service, and for storing a snowmobile in the summer (during seasonal storage, the main task is to relieve the equipment’s suspension).
For lifting, the design uses a screw jack with a lifting force of 400 kg, which can be used to lift the snowmobile to the desired height manually or by attaching an electric drill. The lift with the snowmobile can be rotated around its own axis and simultaneously moved in any direction. When folded, it easily fits in the trunk of a car and does not take up space in the garage, which makes it an indispensable assistant for on-the-go use, repair or maintenance.
The convenience and reliability of the snowmobile lift design is determined by the following features:
At first glance at the lift, it seems that this design is very simple and even somewhat primitive. The principle of operation is really very simple here. But the design consists of many small components that ensure safety, reliability and ease of use. The peculiarity of the design is its strength, and the manufacture of some parts requires high precision. Therefore, making a lift for a snowmobile with your own hands is a rather labor-intensive task.
For an example of quality construction, consider the Powder Jack snowmobile lift. In case you are stuck in snowdrifts and need to get back “on line” quickly, the company has offered a simple solution to the problem - a lift that is easy to use and will easily allow you to get out of the problem situation. It is easy to assemble and disassemble, which takes very little time. And the structure made of aluminum and steel, coated with a special polymer paint, will serve for quite a long time.
Manufacturers and models
- A review of popular manufacturers should start with the RIVAL 444.0025.1 model. The device, weighing 20 kg, is adjustable to the width of the skis and is suitable for many vehicles. The tool kit includes fasteners for installation.
Device RIVAL 444.0031.1. The tackle is designed to move vehicles under its own power. Eliminates damage to the floor surface and chassis of the snowmobile. The ability to adjust the width of the skis from 17 to 30 cm. The presence of a long handle with a hook implies the use of a tilter for any model. The set consists of two trolleys. The design of each is made of metal 6.5 mm thick.
The model is considered a reinforced trolley and is suitable for transporting heavy snowmobiles.
- Rolling trolley STORM MP 0307 . The reinforced steel ski tilter has additional stiffening ribs, which allows you to move heavy snowmobile models. The long handle is adjustable. Thus, the tackle can be used equally comfortably for different manufacturers.
- Model STORM MP 0285. Convenient device for rolling a snowmobile into a trailer. Wheel diameter - 200 mm. Possibility of adjusting the width of the skis. The model is suitable for snowmobiles with ski widths up to 25 cm.
- Rolling platform STORM 40.2759. The powder-coated steel fixture has a durable design and weighs 13kg. The diameter of the wheels is 5 cm. The set includes three platforms, two of which are intended for skates, one for a caterpillar.
- Rotator STORM 40.1334. The model is considered universal and easy to use. The structure is made of powder coated steel. The wheels are equipped with a rubber rim. The weight of the tackle is 27 kg. Despite this, you can handle the tilter yourself.
- Model STORM 1566. The tilter protects the floor covering from damage. Convenient when rolling a snowmobile into a trailer. The diameter of the rubberized wheels is 20 cm. There is an adjustment for the width of the skis. The maximum width of skis for rolling is 25 cm.
- The Biltema 58468 platform has the form of a platform on rollers for moving ski transport. The platform is installed under the skis and track. The load is 680 kg. The design of the tackle is made of durable metal and equipped with rubber mats to prevent skis from slipping. The wheels rotate on bearings.
- Roll 0.6 tons. The model is suitable for vehicles weighing no more than 0.6 tons. A universal device used to move snowmobiles on a flat surface. The reinforced structure is made of sheet metal and equipped with rubberized wheels. The load-bearing support has a protector, which is designed to protect vehicles from damage.
The folding type trolley is convenient for storage.
- Trolley for snowmobile transport HORD H16/SR/RD. The device has large wheels for moving the snowmobile under its own power. Powder coated steel structure is easy to assemble and operate. When using this tilter, it must be taken into account that the width of the ski should not exceed 17 cm.
- Skidoo trolley 861002600. Convenient and simple design for moving snowmobiles. The steel frame has rubberized metal wheels that protect the skis from slipping. Comfortable movement of vehicles on a specific floor covering, for example, such as tiles, is ensured. The model is suitable for single and double skate skis. The set consists of two platforms for skis and one for track. Also included are 9 wheels.
This model has established itself as a universal device that can be used under heavy loads.
- Arctic Cat Model 2639-059 2639-059. The reinforced design makes it possible to use the trolley for heavy vehicles. The model has additional stiffening ribs and a handle with length adjustment. The structure itself is made of durable powder-coated steel. The tackle is easy to use and easy to store.
Where to buy
You can buy a high-quality snowmobile lift in our company’s store. Manufactured using the best technologies using 3D modeling and high-precision CPU machines, such a mechanism is in no way inferior to famous world brands. To get full advice regarding the lift, contact our manager at any phone number listed on this website.
Add a comment Cancel reply
This site uses Akismet to reduce spam. Find out how your comment data is processed.
Source
Where to order or purchase
A snowmobile lift can be purchased in a variety of ways and is widely available in online and retail stores. However, prices for this product may vary.
You can buy a lift:
- in an online store, where the seller usually pays for delivery in most cases;
- in a specialized store, they usually have pickup;
- from craftsmen who independently make such products in a garage or workshop.
The pricing policy will be individual everywhere, but the last option is usually the most durable and cheapest.
It’s not difficult to make a lift for tracks yourself, but this is only for those who have skills in working with a welding machine and metal. If you are far from this, then it is better to buy a finished product.
Homemade high jack with your own hands
Reliable and relatively simple design of a rack-and-pinion lift, almost completely identical in principle to factory models. As in the original, there is a perforated rail and 2 thrust pins, but there is no automatic load release, and therefore it is necessary to manually remove the upper pin each time the lever is lowered. The lifting force of this homemade device allows you to lift the UAZ-452 (Loaf) by the front bumper. The pick-up and lifting heights correspond to those of classic devices.
You can make a similar high jack jack with your own hands from simple metal elements (pipes, angles, sheets). The most technically complex element is the top latch, consisting of 2 components that are easier to produce on a lathe. The entire manufacturing process consists of cutting, drilling and welding.
The manufacturing process should begin with the preparation of the most complex parts for the upper pin latch. First of all, you should cut an L-shaped groove in a section of thick-walled pipe, into which the bolt connected to the pin will engage.
A washer is welded to the end of the sawn pipe, against which a spring will rest, pushing the finger into the holes of the rack.
Holes are made in the end and side of the pin and threads are cut for M4 screws. The opposite end is ground at an angle of 45° (like on a door handle) so that the finger easily fits into the holes of the rail under spring pressure.
Having prepared the main thrust mechanism, you can proceed to work on the rack. If you cannot find a profile with the following dimensions (60x30x4), you can make it yourself by cutting and welding along 2 corners. Holes Ø 14 mm are drilled in the finished pipe, with an interval of about 10 mm, along the entire length of the narrow side part.
The manufacture of the body and handle with a stop for the lower finger begins with marking, cutting and drilling elements from a sheet of metal. All parts are made in pairs for the left and right sides.
The finished side elements should be combined one by one, first all the parts on one side, then on the other. The joints must be strong, but movable. It is better to use a welded stud, Ø from 20 mm with a flat head. To ensure that the connection moves freely, be sure to place a thin plate of metal or several layers of paper between the workpieces before welding. First we connect the handle to the stop, then to the body.
Manufacturing of structural elements
Before starting to manufacture structural elements, prepare a drawing, required materials and tools. You can take ready-made drawings based on the Bullfinch or Vepr snowmobiles. Tools you will need:
- welding machine;
- pipe bender or finished frame;
- hammer;
- screwdrivers.
Since the design of the mini snowmobile is low, the seat is made of durable waterproof material. The fuel tank is made of metal. Its volume should be from 10 to 15 liters. You can use a motorcycle chain as a drive.
How to make a snowmobile track
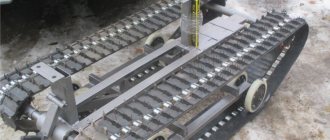
A snowmobile track is created from tires or conveyor belt. The work will be difficult and time-consuming if tires are used as the basis. The sides are cut out of them, so the work requires a sharp shoe knife or an electric jigsaw. To facilitate the process, tires are selected with a suitable tread pattern. Making a homemade caterpillar:
- The sides of the tire are cut out with a knife. If the knife blade is periodically moistened in a soapy solution, the cutting process will become easier. When using an electric jigsaw, install a blade with small teeth and moisten it with water.
- If, when cutting, the track turns out to be hard or extra layers have formed on the wrong side, they are also cut off.
- Cutting a new structure is done when there is a mismatch in the tread pattern. The structure made must cling to the soil, so the structure of the pattern must be correct.
A caterpillar made according to this design is quite reliable due to the fact that it has a closed loop. Its disadvantage is its narrow width. To make a larger size, it is doubled. If the caterpillar is made from a conveyor belt, then it is combined into a single ring. This can be done in 2 ways:
- like a piano hinge (with a hinge);
- ribbon stripes.
You need to choose the appropriate thickness of the tape if it is sewn on. Its thickness should be suitable for the engine power. A homemade snowmobile from an IZH motorcycle requires the use of a 10 mm thick tape. To increase the service life of the snowmobile, the edges of the conveyor belt are stitched with fishing line. The seams are made according to the method of overcasting the edges with an interval of 1 cm.
A trolley is a movable platform that protects the chassis of equipment from unnecessary mechanical loads. The platform is used when it is necessary to drive a snowmobile into a garage. For its manufacture, a metal pipe of medium diameter (6×6 mm), rollers and a bearing system are used. The wheels are installed with rubber coating and metal discs. Their diameter must correspond to the weight of the equipment.
Snowmobile skis consist of a base, a shock-absorbing part, a rod, a fork and bipod, and a link leg. Skis can be made in different designs from different materials. If plastic linings are used for the base, they are supplemented with expanders. The extensions are mounted with fastenings to the snowmobile chassis. The plastic design is suitable for small equipment. For large and medium-sized snowmobiles, you will need metal skis.
- To give the skis a shape, cut out the base from a cardboard stencil. At the same time, a bend is formed in front. The amount of bending is done at your own discretion. A ski track with a large bend glides poorly and collects snow. And this creates unnecessary braking. Therefore, you should not make it too large. The approximate size of the ski track is 2.5 cm wide and 100 cm long.
- A pipe is welded along the edges of each part. This gives additional rigidity to the product and protects it from stones that come along the way.
- Where the bend passes, the pipe is welded along the contour.
- Shock-absorbing parts are fixed to the skis. Bolts are used as fastening elements.
- The platform and the nose of the skis are connected by a hydraulic pipe. The top part is ready.
- For the lower part, the hydraulic pipe is fixed at 4 points and compressed.
- Then the polyethylene pipe is attached with self-tapping screws, having previously cut it. Instead of a polyethylene pipe, you can use polypropylene.
Finished skis must be painted.
Slides are removable guides along which the snowmobile track slides. They prevent the track from sagging between the wheels and protect it from abrasion. Snowmobile slicks can be purchased at a store or made from a water pipe. The thickness of the pipe should be about 10 mm. Strips are made from it and mounted to the runners.
Rollers are the supporting elements of the tracked undercarriage system. They create tight contact between the track and the surface of the ground support. Steel sheets are used as supports.
A variator is a special mechanism that allows you to smoothly regulate speed in mini snowmobiles. Safari is the most popular CVT. It consists of 2 pulleys: driven and driving, therefore it is capable of adjusting 2 parameters. These are revolutions and movement resistance. The pulley will operate like a clutch if the engine speed reaches 2200 rpm. In this case, the engine and the reverse shaft are disconnected.
To make a snowmobile powerful, you need to choose a powerful engine. The best engines for assembling a snowmobile are Lifan type engines with a power of 15 hp. With. This model is equipped with a reduction gearbox and has a centrifugal automatic clutch.
Chassis and suspension
The rear and front suspensions are the shock-absorbing system of the snowmobile. The front suspension creates smooth movement for the chassis. At the same time, the driver does not feel any vibrations on uneven roads.
If you choose a suspension based on the principle of operation, then the telescopic one is the most popular.
Compact lift from a jack GAZ 24 (Volga)
Expanding the standard capabilities of the device by upgrading it allows you to open up new areas of use for it. One of such devices is the standard GAZ 24 jack, the surface equipment of which will allow it to be used for lifting SUVs. The load capacity of such a product is limited to 1 ton, and the stop stroke is 60 cm. This kind of screw high jack is made from a Volgov jack using simple metal components.
First of all, you should prepare the jack for further modernization by sawing off the main rod from the base. A metal pipe of the required length (from 450 mm), with a pre-made slot (≈ 50 mm) for free movement of the stop, is welded into the cut site. A sawed-off lift rod is fixed to the upper edge of the pipe using the same welding.
The fastening screw on the slider is unscrewed and the folding stop is removed. A rectangular profile is installed in this place, through the side holes of which a u-shaped screw is threaded and tightened.
To provide a softer emphasis on the wheel rim, the profile should be equipped with a attachment with an increased pressing surface area. A similar insert can be made from a smaller profile pipe, with a metal plate welded perpendicularly, onto which a piece of thick rubber can be glued.
To increase the stability of the jack and reduce the factor of its getting stuck in the mud, you can simply increase the base area. For such equipment, you can use a strong board or a metal plate (preferably with a stiffening rib). For compactness and ease of transportation, it is not at all necessary to weld the base tightly. It is enough to drill through holes in the elements and tighten them with bolts and nuts.
All that remains is to thread a cable or chain with hooks into the shackle and you can begin to lift the stuck car by the wheel.
For a more complete discussion of the topic of making an off-road jack from a standard Volgov, we present the following video instructions for assembling a similar, but slightly more complex design. The author's sensible comments, coupled with good quality shooting, will convey the general principle as clearly as possible.
Source
DIY jack
DIY wheel chains
A jack is a very useful tool that every car owner should have. With the help of a jack, the most unexpected problems are solved and various breakdowns are quickly eliminated. Not everyone has the opportunity to purchase a high-quality tool, but the great news is that if you want, you can make a jack with your own hands ! You just need to choose a suitable design, prepare the necessary materials and get to work. Not forgetting, of course, that the future device must have the required level of security.
DIY jack
General structure and types of jacks
This tool is typically used to lift a vehicle to change wheels. It is used for both professional repairs and home work. Thanks to the jack, you can also carry out repair work in some compartments under the car.
Every car owner has a jack.
Tellingly, the jack is popular not only in the automotive sector. With its help, various structures are installed, some construction work cannot be done without a tool, and it is used in the repair of various equipment.
Option #1. Simple DIY pipe jack
A fairly primitive design that can be made from scrap materials. In particular, you will need:
Step 1 . The entire manufacturing process is shown in the photo. To begin, take a pipe and cut a piece about 15 cm long from it.
You will need a piece of pipe 15 cm long. The pipe is marked. Cutting the pipe.
Step 2 . Weld a steel plate to the pipe as shown in the photo.
The steel plate is prepared. The plate is welded to the pipe.
Step 3 . Using a grinder, clean the weld seam.
Cleaning the weld seam
Step 4 . After that, take the bolt, washer and nut.
screw
Step 5 . Screw the nut onto the bolt, then put on the washer and insert it into the pipe section.
The bolt is inserted into the pipe
Step 6 . In principle, the homemade jack is ready. When disassembled it will look like this.
Jack disassembled
Step 7 . Test the jack. Place it under the car, take the key and turn the nut, thereby lifting the vehicle.
The nut turns with a wrench
This is what a homemade jack looks like in operation.
Photo of a jack in action
Step 8 . To lower the car, turn the nut in the opposite direction. As you can see, a bolt and a piece of pipe turned into a completely working jack.
Raised car lowered
Snowmobile device
Homemade snowmobiles are built on caterpillar tracks. The tracks are driven by an internal combustion engine mounted on a rigid metal frame. They are supported in working position by wheels and special rollers. Main options:
- With a solid or fracture frame.
- With rigid or shock-absorbed suspension.
- With an engine from a walk-behind tractor or from a stroller.
Short skis are used for steering. Light snowmobiles (weighing up to 100 kg), designed to travel at a maximum speed of up to 15 km/h, do not necessarily require a braking system. They stop easily when engine speed drops. make a homemade snowmobile on tracks using the following algorithm:
- Selection of engine, calculation of frame and chassis.
- Frame assembly by spot welding.
- Steering device.
- Installing the engine in the design position on a temporary mount.
- Checking the structure for resistance to capsizing.
- If the test is successful, the frame is completely welded and the engine is installed.
- Installation of drive system, axles.
- Assembly and installation of tracks.
- Installation of body parts.
After this, final tests are carried out. If the snowmobile drives normally and does not tip over, then it is driven into the garage and disassembled. The frame is cleaned of rust, painted in 2 layers, the remaining elements are finished, and then a homemade snowmobile on tracks is assembled with your own hands.
Option #2. Homemade rolling jack
Hydraulic type design intended for repair/maintenance of passenger cars. For production you will need:
The front part has rollers taken from an old washing machine. A cup was taken from a car bumper.
Rollers from a washing machine are installed on the front. Rear view. Top view.
To make the braces, a 20 mm rod was used.
The braces are made of steel rod Photo of the braces of a homemade jack
And this is a drawing of a homemade rolling jack with dimensions.
Do-it-yourself drawing of a rolling jack
Next you can see the rolling jack in action.
Working with a jack is quite convenient
You can learn more about the operation of such a homemade device from the video below.
Video - Homemade hydraulic rolling jack
Option #3. Another rolling jack
There are many examples of rolling jacks on the Internet, but in this master class the author made this design from an old five-ton truck.
Jack from an old five-ton truck
The jack, as in the previous instructions, is made of channel material. Old hockey pucks were used as stops.
The structure is welded from a channel Another photo of a rolling jack
And below you can see the dimensions of this homemade jack.
Dimensions of a homemade jack Its height Length of the top More dimensions... And more... Width in the area of the stops Photo of the finished structure
In addition, the author installed wheels to make the structure easier to move.
This is where the wheels will be installed. Holes for mounting the wheels. Wheels make it easy to move the jack. This jack is literally made from junk.
As you can see, a simple hydraulic jack can be made from the most unnecessary materials at hand, literally from trash.
Option number 4. DIY rack and pinion jack
In this master class we will look at the process of making a simple rack and pinion jack. This device will help you lift a car or any other heavy object without any problems. The design is extremely simple, and the dimensions will be taken based on the available materials.
There is nothing complicated in the design
For production you will need:
Step 1 . First, take a piece of the “two hundredth” channel (you can take a larger one), the length of which is 60 cm. A similar part can be made from a steel strip.
Such a part can be made from steel strip
Step 2 . Mark future 40x20 mm holes for the profile pipe on the channel shelves, not forgetting the 2-4 mm allowance.
Holes for the profile pipe are marked
Step 3 . Cut these holes using any tool available. If necessary, file the edges.
Holes are cut Filed
Step 4 . It is important that the profile pipe fits freely into these holes (see photo below).
The pipe must fit freely into the holes
Step 5 . Take a piece of water pipe (1/2 inch) with walls 2-3 mm thick. It is necessary that the length of the pipe is about 5-6 mm greater than the width of the channel part.
Half-inch length of pipe Proper pipe length
Step 6 . Weld the pipe to the channel.
The tube is welded to the channel Result of the work
Step 7 . Take a strip 8-10 mm thick and 70x500 mm in size. Mark it: there should be 65-70 mm in the middle, while 200 mm or a little more at the edges.
Marked steel strip
Step 8 . Make cuts on the strip with a grinder in order to bend it (about ½ thickness). Thanks to this, it will bend in a vice without any problems.
The strip is cut with a grinder The strip is bent in a vice Another photo of the process
Step 9 . Boil the bent U-shaped strip along the cuts to increase strength.
The cuts are welded for strength. Finished U-shaped part.
Step 10 . Make holes in this part with a diameter of about 20 mm - you can drill them or, for example, burn them with a torch.
Holes need to be made in this part. Holes are burned with a torch. Finished holes.
Step 11 . When the holes are ready, begin assembling the structure. Using a suitable round piece that fits into the welded tube, make an axle. You can also use a bolt or pin of a suitable size for this.
Calculation and assembly of caterpillars
The caterpillar is a tape, on the outer surface of which tracks are attached. Tracks are rigid lugs installed along the entire length of the tracks. Track options:
- Made from 3mm thick transport tape.
- From a car tire.
- From V-belts.
- Ready-made factory-made tracks.
The conveyor belt must be looped. Its strength is only sufficient for light snowmobiles with engines no more powerful than 10 liters. With. Car tires are stronger than tape and are suitable for powerful engines. Solid tires do not need to be looped, so the likelihood of a rupture is minimal. It is more difficult to choose a tire of the required length than a tape.
Finished tracks are removed from other similar equipment (snowmobiles “Buran”, “Sherkhan”). They are equipped with lugs from the factory. The products are not suitable for use with low-power motors from walk-behind tractors. Homemade snowmobiles made from Buranovsky tracks must have gears from the same “donor”.
The size of the caterpillar is selected according to the required driving characteristics: the larger the width, the lower the handling, but the higher the maneuverability. The minimum area of the contact patch from the snowmobile (skis and tracks) must be such that the pressure from the equipped vehicle does not exceed 0.4 kg/cm2 of surface. Light snowmobiles use a 300 mm wide conveyor belt, cut lengthwise into 2 strips of 150 mm each.
Preparing the Tape
The tracks are attached to homemade tracks with M6 bolts with a wide head. The bolts are fixed with a nut, a washer and a groover are used. Before fastening, leading holes with a diameter of 6 mm are drilled in the tape and tracks. When drilling, use a jig and wood drills with special sharpening.
The conveyor belt is also looped with M6 bolts. To do this, the edges of the tapes are overlapped with an overlap of 3-5 cm, the connection contains 1-2 rows of bolts. For a 150 mm wide track, the following distances are maintained:
- From the edge of the tape 15-20 mm.
- Between bolts on tracks 100-120 mm.
- Between the bolts when banding 25-30 mm.
In total, one track requires 2 bolts, and one belt connection requires 5-10 bolts, depending on the number of rows. When using car tires, only the tread is left, and the sidewalls are removed with a shoe knife.
Homemade lugs
The tracks are made of polyethylene pipe with a diameter of 40 mm with a wall thickness of 5 mm, sawn in half in the longitudinal direction. The entire section of the lug is adjacent to the tape. In light snowmobiles, one track connects the tracked pair. With a track width of 150 mm, the track length is 450-500 mm.
The lugs are cut using a wood circular saw. They use a special machine with two guides (metal and wood), rigidly fixed on a fixed tabletop. The walls of the pipes are sawed one by one.
The distance between the tracks depends on the parameters of the gears on the drive shaft. Typically 5−7 cm. The specified distance is maintained with an error of no more than 3 mm. Otherwise, the operation of the drive is disrupted: the lugs “run” onto the teeth of the drive wheels, the caterpillar begins to slip and fly off the rollers.
Option #5. DIY jack-tipper
With the help of such a jack you can lift a car to a considerable height. The design consists of a conventional factory jack and attachments.
There is another design of the tipper - without a jack at all (see photo below). Only one person is required to lift. The device is quite convenient; when folded, it takes up almost as much space as a pair of skis.
A design that does not require a jack
An example page from the step-by-step PDF instructions below.
Example page
Do-it-yourself jack-tipper for the motorist. PDF download (click link to open in new window).
How to assemble a homemade snowmobile with your own hands on different types of tracks
Fishermen, hunters and winter sports enthusiasts use snowmobiles to travel to the best vacation spots. Even inexpensive models of such equipment cost about a hundred thousand rubles, often more. Those who want to save money can assemble a homemade snowmobile on tracks in a regular garage workshop. The cost of parts for construction does not exceed 40 thousand rubles.
Option No. 7. DIY screw jack
This design consists of the following elements:
The jack is assembled on a base made of a steel sheet with a cross-sectional area of 2.63 cm2. There are 4 holes drilled in the corners, which are necessary for installing fasteners that will secure the base.
The rotation shaft is made of metal rods with a diameter of no more than 12 mm. There should be a lock at one end of the element (with the possibility of attaching a pin), and a thread at the other.
Making a screw jack
The last thing to make is the axis, thanks to which the arms - lower and upper - will rotate. Pins with flat cylindrical heads are additionally placed on the sides. The elements are secured using cotter pins. The last step is installing the retainer.
Example of using a screw jack
Frame and body
Before work, it is recommended to draw up a drawing of the frame. The structure is welded from a square pipe 25 x 25 mm with a wall thickness of 2 mm. For a payload of over 150 kg, the section size is increased to 30 x 25 mm. The loading area and body elements are covered with plywood. The seats are selected with a hydrophobic coating.
In the center of the fracture frame there is a hinge that allows rotation around a vertical axis. The maximum rotation angle is limited by welding metal plates. The front half is used for steering, and the engine is placed on the rear half frame.
The solid frame is welded in the form of a rectangle, inside of which axles and tracks are located. The engine is placed in front on a special platform, rigidly welded to the rest of the frame. In both cases, the motor is installed in the transverse direction (the shaft faces the end).
Option No. 8. DIY electric jack
Our selection is completed by a rather complex lift, which not every home craftsman can handle. The electric jack consists of:
Step 1 . A drive with cables is not required, so everything needs to be unscrewed, leaving only the motor with the gearbox. In addition, you will need a square head with 7 mm edges.
Square head
Step 2 . The author also used a standard jack from the Lancer, but any screw diamond jack can be used instead. For fastenings, you can use strips of metal or, as in our example, furniture corners.
The example uses furniture corners
Step 3 . The corners are trimmed and given the desired configuration. Then they are attached to the gearbox.
The corner is clamped in a vice Bending the corner Another photo of the process
Step 4 . Then the mount and the head, which is mounted on the gearbox, are welded to the jack.
The angle is attached to the gearbox The same, but from a different angle The head and mount are welded
Step 5 . To control the structure, a button from the same electric window will be used.
The design is controlled by a button from the same ESP
On a note! When testing this design, it was powered by a spare battery. Although the jack will turn more vigorously if you connect it to a running car.
Results. Some useful tips
Only the person who made it will be responsible for how the jack works with his own hands. Therefore, no matter how confident you are in your brainchild, be sure to use insurance - another lifting device (if you need to repair engines or pallets under the hull).
Important! A jack is an indispensable tool if you need to lift a car. Therefore, if you decide to make such a device with your own hands, approach the matter with all responsibility!
And in conclusion, another video about making a car jack.


