Screw pumps are used both in everyday life and in production. A screw pump, otherwise called a screw pump, is one of the varieties of rotary gear pumps. Depending on the features of the device in which they are used, there may be several or one screw. You can make such a pump with your own hands from gears by reducing the number of teeth and increasing their inclination. However, it is better to use a device manufactured using technology. They are used for pumping liquids, mixtures, gas and steam. They were used in production in 1936. They work freely even with mechanical impurities with viscous fluids at pressures up to 30 MPa. The reason for this is the simple design. Screw pumps are used in wells for the extraction of methane, water, oil, and also for mixing concrete mortar.
The simplest, powerful, reliable do-it-yourself gas pump
The most expensive element of a homemade product can be considered the engine from a lawn mower. However, we will not break it, so if you wish, you can always turn the pump into a lawn mower again. Motors from chainsaws and similar equipment are also suitable.
Materials and tools used by the author:
List of materials:
— engine from a lawn mower; — steel plate (for the impeller); - wood board (for the base); — steel axle; — plug for pipe 90 (PVC); — adapter 90Х34 (PVC); - a corner and a piece of pipe (PVC); — fitting for the hose (for the pump); — bearing; - Super glue; - epoxy; - copper bushing; — a piece of hose (for the coupling); - screws, screws and other small items.
List of tools:
— drill (buy in Russia); - screwdriver; — welding (buy an inverter in Russia); — grinder (buy in Russia); — dremel; - caliper (the author has a digital one); - drilling bits, screwdrivers, pliers and so on.
Pump manufacturing process:
Step one. Blank for body
You will need a piece 90X34, as well as a corner. Take glue and glue the corner. Let's put this detail aside for now.
Next we need to remove the tube through which the water will flow. We take the plastic fitting and cut it at the desired angle. Drill a hole under the fitting. We temporarily fix all the parts with superglue.
Finally, dilute the epoxy resin and apply it thoroughly to the fastening points. Cover as much area as possible so that the glue holds as securely as possible. Set the piece aside for 24 hours and let the glue dry completely.
Step five. Finishing the other half of the pump
We made this detail in the first step. Now that the glue has dried, take a hacksaw and cut the part as the author did. Install the intake pipe fitting inside using glue.
To secure the axle, you need to make a groove in it for the lock washer; the author uses a Dremel for this. From the inside, under the impeller, you need to put a plastic washer on the axle so that it additionally seals the system and acts as a thrust washer. We cut the axle to the required length and install it in its place. We fix it with a lock washer. When assembling, do not forget to lubricate the bearing well with engine oil, preferably synthetic.
Step seven. Connecting both halves of the pump
We take epoxy glue and glue both halves together. Do not skimp on glue, the structure should hold tightly.
Let's start installing the engine. We remove the gas tank from the engine, which is located below, and secure the engine using self-tapping screws or screws.
Let's move on to installing the pump, first we cut off a piece of the hose and use it to connect the engine axis to the pump axis. The whole thing is fixed using steel clamps. The result is a simple, reliable connection.
Now you can secure the pump. First of all, you will need thin plywood, boards and rubber, using these spacers you need to align the pump flush with the engine axis. We place a rubber gasket under the pump to reduce vibrations, and also thanks to this the pump will not slip.
We secure the pump using two metal clamps and self-tapping screws. The author has two clamps so that they move apart; he additionally installed mounting plates between them.
Step nine. Final assembly stage
Now all you have to do is connect the gas tank. We attach it to the base using a self-tapping screw using one eye. It is advisable, of course, to fasten it more securely, since the plastic here is usually fragile. It is also extremely important for installation to make legs so that it does not move due to vibrations. We make the legs from rubber; a car inner tube, a piece of a bicycle tire, and so on will do.
Don’t forget to install a button on the engine that will allow you to conveniently turn it off.
Source
Blower manufacturing process
The motor from the vacuum cleaner must be removed and placed in a plastic sewer pipe from the socket side.
To mount the motor, you need to cut a round plug from plywood or board equal to the inner diameter of the pipe.
The power wire is connected to the engine via a toggle switch. Then a window is cut in the pipe to install the switch. If the motor brushes protrude too much and do not allow it to enter the pipe, then a cutout will need to be made for them.
The narrow part of the motor is inserted into the pipe before the fan expands. Self-tapping screws are screwed into the pipe on the side opposite the plywood insert. The switch is also fixed in the pipe.
After this, you need to seal the gap between the fan on the motor and the socket with hot glue. If the brushes were in the way, so the pipe had to be cut on the side, then the cutout is wrapped with tape or tape on top. After this, for rigidity, a reduction is pulled over the winding.
A piece of pipe is screwed to it from the end, and the handle itself is attached to the body with rivets through it.
If the walls of the pipe are thin, then for rigidity you should screw the handle to the sections folded in half, so the handle will not bend.
Pipe sections of 110 mm and 50 mm are used as replacement nozzles for the blower. They need to be narrowed at the edge. To do this, they are warmed up and pressed until they harden.
A large nozzle is installed thanks to its own socket, and for a thin one you need to use an adapter.
If the vacuum cleaner motor is weak, then there is no point in making a nozzle from a 110 mm pipe, since the inflation through it will be weak. Using a blower, you can quickly sweep away fallen leaves on the site and blow shavings and sawdust out of the grass. The tool will also help if necessary to clean the workshop and the electrical equipment in it from dust, etc.
How to make a homemade pump or pump for pumping out water and sewerage with your own hands
Often, with the presence of water, opposite situations occur: either it floods the area or base, and the liquid must be pumped out, or water is necessary for plants, and it has to be pumped. In any case, a water pump is required. Sometimes you almost have to pump liquid from a flooded basement or for irrigation from a nearby pond with your own hands due to the high cost of the equipment, its temporary use and the desire to make the unit yourself. Let's explore working options.
Possible errors during assembly
Creating a vacuum pump yourself is a fairly easy and quick process, however, even one small mistake can cause discomfort and pain. In addition, due to improper assembly, such a device may simply not be effective.
The most common mistakes when assembling a pump yourself include:
• Covers made of rigid material. In this case, it is necessary to use a soft, rubber structure; • The seal is too weak; • Small size of the tube – this may cause discomfort in the scrotal area; • Large tube size – will not allow vacuum to form; • The cylinder as a flask is too large; • Pump not suitable for the cylinder; • The tube is too thin and may come off during the procedure.
Varieties of DIY water pumps
It is not at all reasonable to assemble any structure yourself at home due to the high complexity of the unit. On the contrary, many home-made devices for pumping water have been invented that can actually be made on your own, but they are better suited for conducting physical experiments and are not entirely practical in real life.
These can be considered: wave devices operating on the energy of movement of the water surface, units operating on solar energy, “American” pumps pumping liquid from the flow of a fast river, structures using a bicycle and others similar.
Hand-held “rocking chairs” are popular, which are made independently from metal and plastic. A description of several similar structures is in a separate article.
Design and principle of operation
Screw rotors rotating inside the stator displace liquid, increasing its pressure. The liquid is pumped by moving it between the screw grooves located along the axis of the screw and the housing. To improve the quality of the design and reduce the number of leaks, conical and cylindrical elastic casings are used. The spring presses the conical screw quite reliably, and the fluid, due to the pressurized pressure, helps reduce the number of leaks. If it is necessary to withstand heavy loads, metal cases are used instead of elastic ones.
The most commonly used pump is the three-screw pump. Its advantages:
- The substance is supplied evenly;
- It is possible to suck out the liquid;
- The ability to pump liquid with solid additives without causing damage;
- The noise level is quite low;
- The balancing of the mechanism is quite good;
- Unlike other types, in a three-screw there is no need to use multistage to obtain the desired pressure at the outlet of the device.
Due to their compact size, screw pumps do not take up much space.
However, the device also has disadvantages. The cost of such a pump is quite high due to the complexity of its manufacture, it is not possible to regulate the working volume, and idle operation is unacceptable.
Homemade electric pump pump for pumping water
Still, pumping water using electricity is noticeably more pleasant than doing it manually. This decision is prompted by the presence of electricity on the site, as well as a suitable electric motor.
You might like to use a small electric pump to draw water from a nearby body of water. Such a device is also suitable for constructing a waterfall or small fountain on the site.
Let's look at the master class for assembling the product step by step:
Let's check the pump in action. If there are any questions or ambiguities, they can be resolved using the following video. The assembled device will prove indispensable in a critical situation, for example, if the basement of a house is flooded with water. There is no point in purchasing a factory pump for temporary use.
What to make from an old cleaning device: a lawn mower
If you have an old, working motor from a vacuum cleaner, it can be used to make a good lawn mower. For this device, 500 watts of power will be sufficient. No less important spare part than the motor necessary for the operation of the lawn mower will perform its functions - these are the blades. For this part you will need very hard steel that is of excellent quality.
Also, for such a device you need to make or select a suitable model for the handle. An excellent solution would be a handle from an old baby stroller you no longer need. You can also take wheels and even a frame from the stroller. If we talk about the power cord, then the one that has an old vacuum cleaner will work perfectly.
Lawnmower from an old vacuum cleaner
Then you need to attach the wheels and strong, sharp blades. First, special corners with several holes are welded onto the frame. Remember: the blades should be at a height of approximately 5-7 centimeters above the level of the lawn. The average length of the handle should be approximately 90 centimeters.
The final step will be to attach the power cord and secure the mesh, which will not allow the grass to fly in all directions. If a person has at least minor skills in working with equipment, then making a lawn mower from an old working vacuum cleaner will be very simple.
How to make a water pump with your own hands: we look at the 13 best homemade options
Water at their summer cottage is required not only by the owners to comply with sanitary and hygienic standards. It is necessary for watering plants, caring for the territory and pets, refreshing and swimming in the hot summer. Agree that it is difficult to lift the entire required volume from the source manually with buckets.
However, there is a way to alleviate the difficult fate of summer residents - this is a homemade water pump. Even if you don’t have the funds to buy pumping equipment, you can become the happy owner of a useful technical device. To build it, sometimes literally just the power of thought is enough.
We have collected and systematized for you valuable information about making almost free homemade products. The models presented for consideration were tested in practice and deservedly received recognition from the owners. A thorough description of the manufacturing technology is supplemented with diagrams, photographs and video materials.
Design #1 – pump for liquid overflow
This pump will most likely turn out to be the simplest and cheapest, because the starting materials are literally waste, i.e. don't cost anything at all.
To implement the idea of assembling it, the following materials are needed:
First, you need to make a reed valve.
Remove the gasket from the cap of the plastic bottle. We cut it in a circle so that the diameter of the gasket becomes smaller than the neck of the bottle. At the same time, you need to leave a narrow sector untouched, about 15-20 degrees.
Drill a hole in the center of the plastic bottle cap, approximately 8 mm. Insert the gasket and screw on the cut neck.
We insert a plastic pipe into the finished valve. Cut off the top of the second plastic bottle. You should end up with something similar to a funnel. We fix it on top of the plastic pipe.
We put a spout hose on the other end of the plastic pipe. The simplest homemade water pump is ready.
By moving your hand sharply up and down, we force the liquid to rise through the plastic pipe to the spout. Then the liquid will flow by gravity.
There are also other options:
To use a surface or submersible piston pump, you need a tube well - a well, which you can also drill yourself like an Abyssinian well or drill.
What is suitable as materials
Before assembling the vacuum pump with your own hands, prepare all the necessary structural parts in advance. All of them must be safe and made of materials that are suitable for each other. Make sure that each part does not have any sharp parts.
You can use a plastic bottle as a flask - for example, one left over from water, juice, or shampoo or liquid soap; A bottle for feeding children with formula, from an aquarium soil cleaner, as well as a large syringe, which can be purchased in pharmacies and confectionery stores, are perfect.
This cylinder should be comfortable for the genital organ and contain it completely, leaving some reserve. If the cylinder size is incorrectly selected, discomfort and pain will occur. Make sure that the flask is intact and has no sharp parts.
How to enlarge your penis by 3.5 cm
in 14 days without surgery? Reviews from doctors.
More details
To create a vacuum effect, you need to select a seal. For this purpose, you can use a rubber gasket for pipes, especially a pipe for a dropper or a clamp. The main rule is that the size of the sealing ring must correspond to the size of the flask, otherwise the effectiveness of the application will be low, and the use of such a device will cause pain.
Next, you need to select a pump. This could be a pump used to inflate bicycle tires, balls and balls, and other devices. This pump must allow air to be pumped out of the cylinder. For this purpose, you can also choose a syringe plunger.
As a tube for pumping out air, you can try using a hose from a tonometer, or some flexible hose from a technical store; the main thing is to choose the correct diameter.
Design #2 – manual pump with direct spout
A very simple device for pumping water from a barrel or a shaft well. The advantages of this design: speed of assembly, low cost.
We begin the assembly of the entire structure with the manufacture of a check valve.
Construction of a check valve. We prepare a check valve from a Ø 50mm plug. We drill several holes around the perimeter of the plug Ø 5-6mm. In the center we drill a hole of suitable diameter for a screw-nut pair or rivet.
On the inside of the plug we place a rubber disk Ø 50mm. The disc should not rub against the walls of the plug, but should cover all drilled holes. We tighten it in the center with a screw-nut or rivet; a screw will not work. If difficulties arise with materials or manufacturing, you can replace it with a factory-ready check valve.
What a factory-made check valve used to operate a pumping station is is described in detail in the article we recommend.
Preparing the pump sleeve. The length of the sleeve should be commensurate with the depth of the well or container with water. We cut the PVC sewer pipe Ø 50mm to the required length, from the narrow end. We insert the newly made valve into the pipe socket. For reliability, we fasten it on both sides with self-tapping screws.
For the second end we prepare a plug with a pre-drilled hole Ø 25mm. This hole in the plug is made according to the diameter of the PPR pipe Ø 24. Great precision is not required, the plug serves as a sliding support.
Piston assembly procedure. Cut off the spout of an empty silicone container. Next, you need to heat the balloon and insert the sleeve into the PVC so that the diameter of the balloon exactly matches the diameter of the sleeve. Place the silicone can on the valve from the reverse side of the arrow (the arrow on the check valve shows the direction of water movement).
We cut off the excess balloon. We secure it with a union nut no. 15.
Pump rod design. The length of the rod should be 50-60 cm greater than the length of the sleeve. You need to heat one end of the rod and insert a check valve. The arrow on the check valve should point towards the inside of the stem. Until the pipe has completely cooled down, we tighten it with a screw clamp.
Final assembly of the pump. We insert the rod into the sleeve and attach a plug (sliding support) through the coupling on top. To top it off, we attach a 24mm PPR bend to the end of the rod pipe. All you have to do is connect the hose and you can pump water.
The outlet serves as a support for the hand. For convenience, you can take a tee and plug one side of it.
Design #4 – piston well pump
This pump design is suitable for wells no more than 8 meters. The operating principle is based on the vacuum created by the piston inside the cylinder. A useful homemade product can be an excellent alternative to factory-made pumping equipment and will help solve the problems of water extraction for servicing a summer cottage.
The performance of the pump directly depends on the tightness of the entire structure.
You will find a detailed description of the manufacturing process of a piston pump for use in a summer cottage in one of the popular articles on our website.
Step #1: Assembly of the unit sleeve
To make a pump sleeve, you need to pay attention to the inner surface; it must be even and smooth. A good option would be a liner from a truck engine.
From below, a steel bottom needs to be welded to the sleeve along the diameter of the well head. Either a reed valve or a factory valve is installed in the center of the bottom.
A cover is made for the top of the sleeve, although this part is more aesthetic, you can do without it. It is necessary to pay attention to the fact that the hole for the piston rod is made slot-like.
Step #2: Construction of the Pump Piston
For the piston you need to take 2 metal disks. Between them lay not very thick rubber 1 cm, slightly larger in diameter than the disks. Next, we tighten the disks with bolts.
As a result, the rubber disk will be clamped and a sandwich of metal and rubber should be obtained. The idea is to create a rubber rim along the edge of the piston, which will form the necessary piston-liner seal.
All that remains is to install the valve and weld the eye for the stem.
Step #3. Making a petal valve from rubber
The reed valve consists of a rubber disc of not very thick thickness. The disc size should be larger than the inlet holes. A hole is drilled in the center of the rubber. Through this hole and a pressure washer, the rubber disk is secured over the inlet holes.
When sucked, the edges of the rubber rise and water begins to flow. During the reverse stroke, clamping pressure is created: the rubber reliably blocks the inlet holes.
Step #4: Final Assembly and Installation
It is advisable to cut a thread at the head of the well and at the bottom of the pump sleeve. The thread will allow the pump to be easily removed for maintenance and will make the installation sealed.
We install the top cover and attach the handle to the rod. For comfortable work, the end of the handle can be wrapped with electrical tape or rope, laying turn to turn.
The limitation on the depth of the well is due to the theoretical impossibility of creating a vacuum of more than 1 atmosphere. If the well is deeper, you will have to modify the pump to a deep pump.
Scope of application of the screw
At its core, a screw is a solid rod with a solid helical surface located along the longitudinal axis. The auger owes its origin to the great scientist Archimedes, who invented a water-lifting machine, which was called the Archimedes screw.
Before using the screw pump, you must carefully study the instructions.
Nowadays, screws are used everywhere and in a wide variety of industries:
- A meat grinder is one of the simplest and most common devices using an auger;
- Screw conveyors;
- Screw pumps;
- All-terrain vehicle - ShN-1 auger;
- Drilling mechanisms;
- Ice fishing enthusiasts use an auger to drill a hole in the river ice;
- The auger principle is used in drills to remove chips during operation;
- Used in small arms in auger magazines;
- Widely used in presses;
- Often used in combines for various purposes.
The operating principle of the auger is so simple that it can be used everywhere, and examples can be given endlessly. Needless to say, even in science fiction works there are machines that use screw mechanisms. For example, miracle machines that drill through the thickness of mountains or pierce almost right through the bowels of planets.
Design #6 – American or spiral type
The spiral pump uses the energy of the river flow. To operate, the minimum requirements must be met: depth - at least 30 cm, flow speed - at least 1.5 m/s.
Option 1
The main difficulty in such a pump is the pipe reducer. This can be found in decommissioned sewer trucks or obtained from factory equipment.
The flexible hose is attached to the wheel in a spiral using clamps. An intake made of PVC pipe 150mm is connected to one end. The second end of the hose is put on the pipe reducer.
Water is taken in by the water intake and moves in a spiral, creating the necessary pressure in the system. The lifting height depends on the flow speed and the immersion depth of the intake.
Option 2
We cut an intake hole in the bottom of the barrel. Inside the barrel, it is necessary to lay the hose tightly in a spiral and connect it to the sleeve coupling.
To impart buoyancy, foam floats must be glued inside the barrel. Finally, screw on the impeller.
For this design option, the drain hose must be 25 mm. in diameter.
Design #7 – wave energy pump
As the name suggests, such pumps use wave energy. Of course, the waves on the lakes are not that big, but the pump works around the clock and is capable of pumping up to 20 cubic meters per day.
Option 1
The float is a pipe, a log, selected depending on the rigidity of the corrugated pipe, experimentally.
Two valves operating in the same direction are mounted in a corrugated pipe.
As the float moves downwards, the corrugated pipe stretches, resulting in water intake. When the float moves up, the corrugation contracts and pushes the water up. Therefore, the float must be quite heavy and large.
The entire structure is rigidly attached to the mast.
Option 2
This design differs from the first option in that the corrugated pipe is replaced by a brake chamber. This diaphragm-based scheme is very often used in simple DIY water pumps. Such a pump is quite versatile and can receive energy from wind, water, steam, and sun.
The brake chamber should be disassembled and only two holes left for the valves.
Manufacturing suitable valves is a separate task.
For the inlet valve, cut off the tube and drill it out so that the ball sits tightly on the tube. It is necessary to ensure that the ball does not allow water to pass through. To prevent the ball from falling out, solder a wire or strip on top.
The design of the exhaust valve differs from the intake valve in the presence of a spring. The spring must be installed between the ball and the copper strip.
We cut out a diaphragm from rubber to the size of the brake chamber. To drive the diaphragm, you need to drill a hole in the center and stretch the pin. We insert the valves from the bottom of the brake chamber. For sealing, you can use epoxy glue.
It is better to find non-metal balls for valves, so they will not be subject to corrosion.
Option 3
Based on the design of the two previous options, you can think about building a more advanced model.
Advantages of automatic pumps for pumping concrete:
- A special electronic control unit ensures uninterrupted and correct operation of the concrete pump. It is possible to select the desired mode and carry out constant monitoring.
- An autonomous system for washing the concrete pump and concrete pipeline is built in, which reduces the time spent on servicing the unit.
- There is lighting for working in the dark (the concrete pump itself and the working area).
- A sound alarm has been installed - the warning system is working.
- The ability to regulate the concrete distribution unit has been implemented.
- A typical concrete pump kit includes: a concrete pipeline (up to 80 meters long), software, and a flushing system.
- It is possible to add a concrete distribution boom to facilitate delivery of the mixture to the site.
- The engines comply with all international standards (EURO-4 inclusive).
- In the creation of concrete pumps, components from the world's best manufacturers are used, guaranteeing high quality work, reduced repair and maintenance costs, and increased service life.
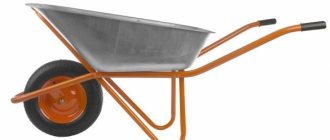
A concrete pump is a very important unit on a construction site, greatly facilitating and speeding up the execution of a lot of labor-intensive tasks. It can be purchased ready-made or assembled yourself from simple parts and mechanisms. Self-assembly of a mini-concrete pump will result in a simple and effective unit that will become an indispensable assistant in construction.
Design #8 – device from a washing machine
Often, parts or even entire units from old things remain on the farm. You can remove a centrifugal pump from a washing machine that is no longer needed. This pump is perfect for pumping water from a depth of up to 2 meters.
If you use a ready-made valve from a washing machine, it needs to be modified. One hole needs to be plugged, for example using a bottle cap.
We connect the petal valve to the hose and lower it into a pit or well. Connect the second end of the hose to the pump. For the system to start working, it is necessary to fill the hose with the valve and the pump itself with water. All that remains is to connect the transformer, and the pump is ready for use.
What is a vacuum pump
This compact device is a device for improving the functions of the male reproductive organ. Typically the pump is used after prostate surgery. But men often use this device to enlarge the penis and enhance erection.
A vacuum pump consists of a transparent cylinder-shaped flask, a short hose and a bulb for pumping air. In other words, it's just a pump for the reproductive organ. The man inserts his penis into the flask and begins to work with the pear, as a result of which he achieves the desired effect. There are two types of this device: a regular pump and a water pump (hydropump). In the second case, the pressure on the penis is exerted not by air, but by water.
Design #9 – water pump from compressor
If you have already drilled a well and have an air compressor, do not rush to purchase a water pump. It will be successfully replaced by a structurally simple airlift device.
The operating principle of the pump is very simple. It is necessary to drill a hole in the spout pipe and place them closer to the bottom. The hole should be 2-2.5 times larger in diameter than the air pipe. All that remains is to insert the air pipe and apply air pressure.
The efficiency of such a pump depends on the height of the water level, the depth of the reservoir, and the compressor power (performance). The efficiency is about 70%.
Creation of an airlift
Pumping water from reservoirs and underground sources can be organized without the help of standard pumping equipment. To do this you will need an original device called an airlift. To make such a simple but quite effective water pump with your own hands, you will need two pipes of different diameters, one of which will supply compressed air, and the second will pump out water, and a regular air compressor.
Operating principle of an airlift pump
The operating principle of the airlift, which was invented 200 years ago, is as follows. If you place two tubes in the water column, one of which will supply compressed air, this will lead to the formation of a mixture of liquid and bubbles. Such a mixture, having a lower density than water, will begin to rise up the second tube.
To see how such a water pump works, you can conduct a simple experiment by placing two tubes in a bottle of water, one of which is connected to an aquarium compressor powered by a low-power motor. When the compressor is turned on, water will begin to pour out of the second tube. The efficiency of such a water pump, usually not exceeding 70%, directly depends on several parameters - air flow, immersion depth and the total height to which the pumped water must be raised.
Design #10 – gear water machine
The heart of this design is gear pumps for pumping oil from agricultural or truck equipment. The power steering power plant from KrAZ has similar characteristics.
If possible, a motor from a washing machine is connected to such a pump. The motor of household appliances has a number of advantages: it runs on a single-phase 220V network and has a starting system (capacitor).
Pulleys and a belt may be required to obtain the required RPM. The advantage of a gear pump is that the gears are able to create the necessary suction force even without first filling it with water.
The only note: after operating the pump, to prevent corrosion of the steel gears, it is necessary to let the pump run idle for about 20 minutes.
What does the pump consist of?
As you probably know, a vacuum pump operates using differential pressure. The effect created for the genital organ by pumping is called hyperemia. It occurs due to the rarefaction of air around the penis using a vacuum. This process allows you to powerfully increase blood circulation, which leads to an increase in the size of the penis, as well as a strengthening of the erection.
Using a vacuum allows you to achieve the following effects:
I enlarged my penis by 5.5 cm
Without shame I share with everyone how I did it
Read more
- Increase the impulse response between the tissues of the genital organ and the brain;
- Normalize the blood circulation process;
- Increase the size of the penis by several centimeters due to the enlargement of blood vessels;
- Help make intimate contact longer;
- Improve the body's endurance, including during sexual intercourse;
- Increase the brightness of sensations during intimacy.
A properly made vacuum pump can handle all of the above tasks. Regular use of the device every day for 20 minutes will restore male strength and cope with the problem of premature ejaculation.
In order to make a pump with your own hands, you will need the following items:
- A transparent cylindrical container in which the penis will be placed;
- A rubber ring acts as a seal, which ensures fixation of the penis;
- A pear or piston acts as a pump, allowing you to pump out air and reduce the pressure in the flask;
- cabin or hose for removing pumped air.
Design #11 – pump from a bicycle wheel
Productive pump based on two wheels.
The operating principle of this pump is similar to that of a dragline.
First you need to build a sleeve from a sewer pipe that will be immersed in water. A drain is placed on the top of the sleeve through which water will flow. Next, install a small pulley on the bottom (a wheel rim from a wheelbarrow will do) and a bicycle wheel on top.
We attach a series of pistons along the entire length of the rope, first passing them through the sleeve. The rope should go around the pulley and the bicycle wheel.
By rotating the bicycle wheel, each piston on the rope captures water and, like an elevator, lifts it upward. The water column pours into the outlet.
Design #12 – “homemade” for a small stream
This pump can operate on an ultra-low amount of energy. Of course it’s good if there is a river or lake. But what to do if the river becomes very shallow in the summer? A swing type pump will help.
The main part of the structure is two buckets rigidly connected to each other through blocks (4). It is necessary to make a drainage system from the stream from galvanized steel (3). In order to reduce wear, a piece of plastic is placed under it. The drainage system is rigidly connected by a leash to a rope (5).
The entire system must be adjusted so that when one bucket is filled, the drainage moves to the second bucket. The energy of the buckets is transmitted through the crank (8) to the pump (10).
Design features
A piston pump is a simple design for manually pumping water. A motor pump is a pump connected to a motor. The function of a motor pump includes both pumping out liquid and supplying it under pressure. The fuel for the engine can be either gasoline mixture or diesel.
Design and principle of operation
The mechanism body is a cylindrical metal part. This module can be made from a sleeve from a diesel engine, as well as from a piece of pipeline fittings. You can also use a hydraulic cylinder body, if one is available.
The piston is made from any available material - wood, plastic or metal. Rubber rings are used to seal the piston. In appearance, this design resembles a regular pump for bicycle tires, only liquid is pumped into it.
Valves are an important part of a water pumping apparatus, since the efficiency of the unit depends on them. They are usually made of elastic and durable rubber.
Design #13 – Shukhov wick pump
The Russian inventor Shukhov became famous for many buildings, including the radio tower in Moscow. Below we will discuss another of his inventions - a water pump.
The pump uses a special rope to operate. This rope consists of woven cotton threads with a total thickness of 5-6 mm, enclosed in a sheath. The thread is passed through the pulleys.
When movement occurs, the rope gets wet and wraps around the pulleys. The pulley (5) with the help of a spring (4) presses the rope against the pulley (3) with force. The squeezed water flows into the tray (7). Figure “c” shows sections of pulleys (3) and (5), respectively.
To operate the entire system, an electric motor of only 5-10 watts is required. Typically, such engines have 1500 rpm.
To reduce speed and increase force, you can use a worm gear, shown in figure “c”. It is quite possible to make it by hand. To do this, you need to find a suitable gear and make a worm from wire. Small forces on the shaft allow manufacturing inaccuracies.
With your own hands you can assemble not only a pump that pumps water for domestic needs, but also a device that can be successfully used in landscaping a site. The following article will present successful options for homemade fountain pumps.
Recommendations
To make a concrete pump with your own hands, it is recommended to adhere to the following recommendations:
- For the cylinder and piston of the unit, pipes and sheets of durable alloy metal are used
- The cord and plug are selected taking into account the engine power and the presence of a ground loop in the network supplying the unit
- Before installing a homemade piston, the inner surface of the cylinder of a homemade unit is ground to a mirror finish
- After completion of concrete work, the cylinder, suction and concrete supply lines are thoroughly washed using a mini-wash
- To reduce the friction force of the piston on the cylinder walls, they are lubricated with machine oil before starting work.
- The petal valves at the inlet and outlet of the cylinder are changed once a season - when working with aggressive concrete, they often fail and stop opening
With careful selection of materials and a responsible approach to the manufacturing process of the main components, a do-it-yourself installation will be little inferior to store-bought small-sized analogues. At the same time, the cost of such a pump will be several times lower than that of the factory model.