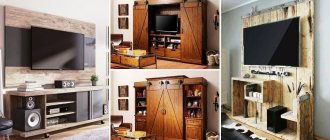
What tools are needed if you are preparing a TV shelf with your own hands?
How to make it out of wood and attach it to the wall? What to consider during manufacturing? Reading time: 23 min Category: Photos and videos
- Homemade shelves in the kitchen, bathroom and other rooms
- TV between cabinets and shelves
- Options for homemade designs: general principles
- Homemade TV mounts
- Model selection
- Types of shelves for TV
- Overview of species
- Types of TV shelves
- Manufacturing
- Corner shelf design
- Recommendations
- Feasibility
- Main types of TV mounts
Homemade shelves in the kitchen, bathroom and other rooms
The use of plasterboard shelves in the kitchen will make it possible to replace the usual furniture, although more often such structures serve as decoration.
GCR is not famous for its durability, so heavy items should still be stored in wooden cabinets.
Video:
But you can make a built-in cabinet for storing spices or a tea set from plasterboard. As a rule, plasterboard shelves are made of small sizes and are located away from the sink.
The design of shelves can be very diverse, so in the kitchen you can place both corner shelves and built-in ones; the manufacture of pull-out shelves and drawers has become especially fashionable.
To do this, make a niche out of drywall into which the retractable mechanism is placed. Such shelves are suitable for storing cereals, vegetables or small utensils.
The retractable design will help save space, and therefore will be useful in small kitchens in Khrushchev.
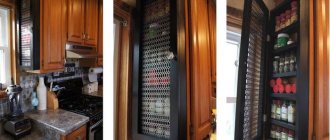
For lovers of good wine, you can place a bottle holder in the kitchen to help store the drink correctly.
With the help of drywall, you can turn an ordinary kitchen into a designer one, just by showing a little imagination.
The use of moisture-resistant drywall will be appropriate in the bathroom, because there is always a large accumulation of moisture there.
In the bathroom you can make the most original devices, even make a sink and a niche for a washing machine, combining them into one continuous element.
Corner structures for a combined bathroom and bathtub will also look beautiful, which will not only help save free space, but will also become a piece of furniture.
You can place household chemicals on the corner shelves, and for plumbing fixtures or other large items it is better to make a built-in structure.
Plasterboard shelves in the bathroom are often made using lighting, which is placed at a certain angle.
You can make a frame for the mirror on the wall, and install additional lamps along the edges - this option will be useful for girls who do their hair.
Not only small shelves are suitable for the bathroom, but also entire niches that span the entire wall.
The main thing that needs to be taken into account is the presence of good ventilation in the room, which will help avoid the formation of condensation, and therefore extend the service life of the units.
The finished structure should be coated with waterproof acrylic paint with high adhesion.
Plasterboard shelves in the living room will be a good addition to the interior. Indoors, you can make a work area with a window for a TV or create a small structure for a library.
Partitions with through windows are often made to accommodate souvenirs and small items.
You can place fresh flowers or other indoor plants on a decorative partition with windows.
If there will be indoor plants on a gypsum board shelf, then it is necessary to use moisture-resistant plasterboard in the construction.
A positive quality of plasterboard products is that the structures can be manufactured after the repairs have been completed.
But if the renovation has just begun, and the walls are leveled using gypsum boards, then you can combine the structure of the wall and built-in shelves - this way you can transform your living room beyond recognition.
Video:
For an experienced person, making various shelves from plaster will be quite simple and will take one or two days, and the result will delight you for years.
TVs in decorative frames
The idea of properly decorating a TV in a baguette lies in the perfection of details. We don’t just put the TV in a frame, but we create a completely finished project that is technologically and visually perfect. So, what do we do to ensure that the framed TV becomes the main piece of furniture: |
We select a molding for your TV based on the requirements for interior design and the color of the television panel. We assemble the frame and make a box, in accordance with the dimensions from the plane of the TV to the wall, which will cover the visible part of the TV at the end. We paint the box in the color of the baguette.
If necessary, we expand a quarter of the baguette so that the frame of the TV is not visible and creates a holistic perception of the design. Then, the television panel is securely fastened in the box. A bracket is screwed to mount the TV to the wall. Now, your TV can be hung on the wall and connected.
We present a new product - decorative niches (portals) with baguette finishing for television panels and peripheral multimedia devices.
This design will not only hide all communications, but will also serve as a convenient piece of furniture for placing players, set-top boxes, remote controls, etc. by placing shelves inside the niche.
Niches are manufactured by our company according to an individual project, which takes into account both technical and design requirements.
It is possible to design both built into a wall niche and as a wall-mounted structure.
Your TV will become a piece of furniture worthy of admiration!
Just a few years ago, it never occurred to anyone that the TV could be decorated with something, refined, making it more sophisticated. In every house, the TV was in the living room and occupied the main place in the room, standing on a special bedside table or fitting into the so-called. "wall".
With the advent of plasma panels and LCDs, the TV now weighs less, it has thinner outlines, and it is also possible not only to place it on a chest of drawers or a shelf, but also to hang it on the wall. During this period, in fact, the design of the TV appeared (namely, a baguette for LCD TVs, frames for a TV, a baguette for a plasma TV, etc.).
The very thought of placing a plasma panel on the wall prompted the idea of framing the TV. After all, paintings were always hung on the walls as decoration! And the LCD panel is no worse. If you put it in a noble wooden frame of bronze, gold or silver color (depending on the color scheme in the room), it will not yield to even the most exquisite details in your interior.
If there is an idea, there is a demand, there will be its implementation! Decorators, designers and interior specialists keep up with the times. Why are frames for TVs made, what kind of material is this baguette and how to decorate the TV in a baguette frame.
Framing it in a TV baguette will help your TV fit correctly and tastefully into the interior and add sophistication to it.
A digital photo frame and a plasma TV panel, no less than paintings and mirrors, need to be framed in TV frames.
A TV baguette will transform any modern technology beyond recognition! Baguette frames for TVs and plasma panels must be made in accordance with the design of the interior of the room.
An LCD TV panel framed with a beautiful baguette frame will fit into any interior, be it an apartment, a cafe, a hotel lobby, a restaurant or an office.
A baguette at a reasonable price when making a frame for a plasma TV panel will allow you to match it to the color of furniture, walls, lamps, and you will thus emphasize certain details in your interior, creating a space in the same style.
Baguette for TV. How to choose a TV frame without losing the warranty on it? The first function of a TV frame is, of course, an aesthetic function. But this is not all of its capabilities. A TV baguette, in addition to creating a visual effect, will protect the TV panel from moisture, dust and external influences.
Therefore, in addition to solving design and design problems when framing LCD TVs, it is also necessary to take into account the technical requirements put forward for the operation of the equipment, namely: the required gap between the LCD panel and the frame, ventilation access and the strength of the frame structure as a whole.
A baguette for a plasma TV must be made exactly to size, taking into account all the features of LCD panels.
This nuance is very important, because positive emotions from proper design can be replaced by disappointment if the baguette for LCD TVs does not allow it to work properly, and the panel begins to overheat or even fails.
It is important to understand that a picture frame and a TV frame, even if they seem identical, are, in fact, completely different designs.
When creating a frame for a photograph, poster or canvas, the main thing is to choose a suitable design, and a frame for a TV, first of all, should still be safe, durable, and suitable specifically for your plasma panel.
In no case should the frame for a plasma TV cover the communication sensors for the remote control; it should fit tightly enough, but at the same time leave a minimum gap to avoid deformation in the future.
Consider how and where the TV will be placed; you may want to hang it on the wall. Consider what kind of fastening will be used. Is the weight of the structure suitable for the type of walls?
Will you need access to the back wall, will you often connect additional equipment (such as sound amplifiers, game consoles, DVD players, etc.). And so on.
A baguette for LCD TVs, despite its apparent simplicity in creation, has a number of the above important details that must be clearly thought out and taken into account by you before choosing the type of baguette, width and its type.
Don’t forget about the correct installation of the framing frame on the TV, which should only be carried out by a qualified specialist, for whom a framing is just one and done. Our framing workshop installs framing frames on the panel body using a special fixation system.
Its advantage is the ability to remove the decorative framing frame without any consequences and at any time. You can always change the frame or remove it altogether if you no longer need it.
The main thing is that the TV frame made by our frame workshop will serve for many years and will bring you only positive emotions.
Source: https://www.raduga-textilja.ru/televizory-v-dekorativnykh-bagetnykh-ramkakh
TV between cabinets and shelves
A screen mounted in furniture is a great idea to make the room not only a comfortable place for an exciting holiday, but also a functional area. For example, a TV can be placed among bookshelves. With this approach, even a three-dimensional monitor will become a secondary accent in the interior. This is an excellent solution for lovers of classic style, when you want the fireplace to be the central place in the living room.
The plasma panel can also be placed between cabinets. This option is suitable for lovers of minimalism. There are fewer shelves, all sorts of details, and only a clear, laconic wall, divided into sections and with doors on a mechanism that relieves the facades of unnecessary handles. A minimum of contrasts and additional elements will make the living room ideal.
Options for homemade designs: general principles
Depending on the distance between your TV receiver and the transmitting antenna of the television center, the signal level will change. Another negative factor affecting the quality of television wave propagation is the presence of obstacles. Ideal reception occurs when there is a direct line of sight between the two antennas. That is, you can see the mast of the television center, even through binoculars. If there are buildings or tall trees in the path of the TV signal, there will be no reliable reception. However, waves reflected from other objects can be received by a TV antenna amplifier. If even weak waves do not “break through” to your house, you will have to make a mast. The network of television and radio broadcasting stations is located in such a way that you can receive a signal in any locality.
- Indoor antenna.
Operates without an amplifier in relative proximity to the transmitting mast. If you can see the television center from your window, some of the channels can be caught literally with a piece of wire. How to make a television antenna with your own hands can be seen in the illustration. The quality of workmanship in such conditions affects only the aesthetic component. But if you live on the 1st–3rd floor, and even surrounded by concrete boxes of a residential neighborhood, a simple design will not work. An indoor antenna, especially one made by yourself, will require a signal amplifier. The advantage of this design is that there is no need for weather protection. - An outdoor TV antenna can look exactly the same as an indoor one. In this case, a prerequisite is high strength (so that the wind does not change the geometry) and protection of the contact group from corrosion. It is usually placed in close proximity to the window (in high-rise buildings) or on the roof of a private household. The connecting cable is relatively short, so an amplifier is not required to reliably receive a digital or analog signal. Except for the case when the transmitting center is far away. The design is accessible for maintenance and repair, this is an undeniable advantage of being located nearby.
- Outdoor antenna for long-range TV. As a rule, this is a rather bulky design with a screen and additional elements that amplify a weak signal. An electronic amplifier is welcome, but with proper design it may not be needed. Perhaps to compensate for a long cable (there will definitely be losses in it). Such devices are mounted on the roofs of high-rise buildings or on masts in private households. The fastening must be strong, otherwise the wind can easily destroy the structure.
- The antenna type is selected based on the reception characteristics and wind load in the region. For example, the Kharchenko antenna (the most popular homemade option) should not have a high windage. It may be necessary to choose another, more complex project.
Next, let's look at examples of making antennas at home using scrap materials, from simple to complex.
How to make an elegant wooden TV frame for the wall
Unlike the bulky TVs of previous generations, modern ultra-thin devices with a flat screen and ascetic black border look very similar to each other, and the clarity of the television picture will not change the situation.
Being a carpenter, I preferred to “dress” the TV using composite profiles.
When making them yourself, you can choose a type of wood, for example, cherry, which is not found among the ready-made profiles sold in shopping centers.
Homemade TV mounts
Even simple brackets for mounting TVs on the wall cost a lot, so it makes sense to save money and make a TV mount for the wall yourself. For this purpose, universal building materials are used. Even simple metal corners allow you to mount the TV on the wall without a special bracket.
Made from aluminum corners
You can make a device for mounting the TV on the wall from corners. It is better to choose aluminum ones, as they are easier to cut and process. Recommended metal thickness – from 3 mm, shelf width – 25 mm, quantity – 4 pcs.
The length of the segments is chosen in such a way that it is possible to make holes for fastening at the top and bottom, that is, the length should be equal to the distance between the mounting holes plus approximately 2-3 cm on each side
It is important to drill the holes so that they match the mounting holes on the back of the TV. Another pair of corners will be attached to the wall. The gap between the elements should be slightly smaller or larger compared to the distance between the corners attached to the back panel of the equipment. Before attaching the TV to the wall, make appropriate markings, checking the vertical installation of each part. Now, in the corners intended for installation on the wall, holes are drilled for fixing fasteners (in those corners that are installed on the back cover of the TV, such holes also need to be made). Then the mount is installed on the wall, the holes are aligned and the homemade bracket is secured by inserting studs or bolts into the contacting holes.
With minimal effort
Using the same principle, a wall mount for a TV is installed, made of metal corners with perforations. Reinforced fasteners are used to secure beams and house frames. They already have holes. They will naturally match on each product. You will need 4 elements for installation on the back wall of the TV and four for the wall. In most cases, such corners are attached to the wall with dowels and self-tapping screws (depending on the wall material), and they are fastened together with bolts.
Swivel pipe bracket
To make fastenings from metal pipes, you will need a welding machine, drill, pipe bender, and grinder. The work will be labor intensive. Prepared from materials:
- Two small metal sheets - one of them will be screwed to the wall, and the other to the TV.
- Two small sections of pipe - one of a smaller diameter but longer, the other of a larger radius and shorter. The first will be welded to a sheet of metal that will be installed on the wall, the second to the plate for the TV. The second pipe must fit over the first.
- 8 bolts.
The individual parts are welded, and then the fasteners are applied and screwed to the wall, which has been previously marked. Fundamentally, the method of mounting a bracket, whether purchased or made with your own hands, is no different.
This is how TV mounts are selected and installed. In order for the fastening itself and the equipment to last longer, you should take into account all the listed installation rules, choose reliable hardware and other components.
Making a shelf
Very often, especially in old apartments, it happens that there is simply no room for the purchased TV. For example, a small kitchen is crammed with household appliances and furniture, so installing a TV here may cause problems. But how to get out of this situation? You can make a corner shelf and attach it to a free wall. These shelves are very easy to make, so you can make them without any experience or special skills.
You can make a hanging shelf yourself
What you need for work
Before you begin the work process, you need to prepare everything you need for this. Take care of purchasing wood for the shelf (boards or plywood). Also, to create a corner shelf you will need the following tools:
- hand saw or jigsaw;
Tools you may need for the job
- drill with a set of drills;
- building level for the correct positioning of the shelf;
- screws with dowels;
- crosshead screwdriver;
- a measuring device, such as a tape measure or ruler;
- decorative self-adhesive tape.
Pine boards
Once everything you need is at hand, you can begin making the corner shelf.
Instructions
Choose a suitable corner in the kitchen and cut a piece of board or durable plywood to its size. If there is a pipe from the battery running there or a window sill is in the way, cut off the excess parts so that the corner fits perfectly into place. You can use a hand saw to trim, but if you have an electric jigsaw it will make the job much easier. Next, you need to follow the step-by-step instructions given below.
Step 1. Sand the surface of the cut board with sandpaper, making it as smooth as possible. Then cover it with self-adhesive tape (choose the color and pattern based on your preferences).
After sanding, apply self-adhesive tape
Step 2 . Screw the mounting angles to the shelf using self-tapping screws. These corners are where the shelf will be attached to the wall, so they must be strong. The length of the screws should be less than the thickness of the shelf, so that when screwing the corners, the screw does not pierce the board right through.
Screwed metal corners
Step 3 . Make marks on the wall where the shelf will be attached and drill holes using an electric drill. In our case, 4 holes are drilled in the wall.
Holes for mounting the shelf
Step 4 . Carefully insert the dowels into the finished holes and press them so that they do not stick out from the wall. If necessary, you can lightly tap the products.
Bolts with which the shelf will be attached
Step 5 . Place the shelf in place and screw it to the wall. The dimensions and weight of the shelf are small, so you can install it yourself.
Shelf installed
Step 6 . Check all fastening points - they should be well clamped. If necessary, raise the right or left side of the shelf so that it is level. Use a building level to measure.
After installation, check the position of the shelf
Step 7 . Once the corner shelf is ready, place the TV on it and hide the wires so they are not obvious. If desired, you can place a small flower next to the TV as a decoration.
TV installed on a shelf
There is no need for additional finishing of the corner shelf, so immediately after installation it can be used for its intended purpose. You can also make a two-story shelf and put some items on the bottom one.
Model selection
Before you make a TV stand with your own hands, you should decide what size it will have, what shape it will have, and what additional elements it will be equipped with. It is decided what material will be used during the work.
When creating a TV stand, wood is usually chosen, since a plasterboard structure for a TV may not withstand significant loads from heavy equipment. If drywall is chosen, the frame must be well reinforced.
The most commonly selected materials are:
- a plasterboard TV structure may have unusual shapes, but needs careful reinforcement, and also requires the ability to work with this material;
- Chipboard is selected in the absence of significant funds that can be allocated for the planned work, and the material is produced in numerous shades and is easy to process;
- MDF is considered an excellent choice for creating a bedside table on which you plan to install a TV, since the material is environmentally friendly, durable, with a uniform structure and light weight;
- natural wood is the best choice, since a do-it-yourself wooden structure is strong, durable, incredibly beautiful and fits well into almost any interior style.
When it is decided what material will be used in the work, you should decide on important questions:
- the shape of the cabinet depends on the preferences of the owners;
- the dimensions are determined depending on the installation location and the dimensions of the TV itself, and it is taken into account whether the design will be used not only for installing this equipment, but also for any other purposes, since if you plan to store various small or large objects on it, then it is advisable make it with special storage elements.
Before the actual work, drawings and diagrams are certainly made, according to which all successive stages of the process will be implemented, otherwise there is a high probability that numerous errors will be made that will be difficult to eliminate.
DIY cabinet assembly technology
The technology for assembling a TV stand is not complicated; the procedure is always the same, regardless of the complexity and functionality of the design. To begin with, individual parts are manufactured and processed, then they are connected to each other, and the legs are mounted.
Assembling a TV stand with your own hands requires meticulousness and a correctly structured step-by-step scheme for installing parts.
At the end, the product is decorated with decorative elements. Let's take a closer look at each of the manufacturing stages.
Preparing materials
First you need to make patterns of the main parts. To do this, concentrating as much as possible, draw them on thick cardboard in accordance with the drawing. Then the finished templates are cut out, applied to the material, contours are drawn on them and cutting is carried out.
This allows you to save materials and accurately manufacture individual parts of the bedside table without errors. The sawn part is subjected to the following processing:
- When working with chipboard, parts are sanded along the edges and taped.
- when working with natural wood, all surfaces are sanded;
- Drywall is not treated, just coated with a primer and painted.
Collecting all the parts
The second step is to assemble the prepared parts. A level is used to level the structure. The legs or sides are attached to the tabletop if necessary with pre-screwed cabinet rails, and then the bottom.
Often, a TV stand can accommodate CDs, magazines, newspapers and decorative items.
After this, the product is supplemented with cabinets, shelves, and drawers.
Installation of legs
The second step is to assemble the prepared parts. A level is used to level the structure. The legs or sides are attached to the tabletop if necessary with pre-screwed cabinet rails, and then the bottom.
By assembling a TV stand with your own hands, you can not only get a unique design, but also save significantly on the purchase of a ready-made model.
After this, the product is supplemented with cabinets, shelves, and drawers. Before finally connecting all the parts, you must once again carefully check the product for evenness of their fit.
Cabinet decor
The bedside table should be decorated depending on the material used.
Often, the decor of TV tables consists of combining different materials and decorating it with glass parts.
The laminate will look beautiful immediately after assembly. Solid wood must be primed and treated with stain; this protects the material from water and dirt. After this, you can apply artistic carvings, varnish or paint.
The variety of materials allows you to make very cheap and simple models, as well as go for the chic.
You can also stick a decorated film onto the finished product or apply images using a stencil. Beautiful handles on cabinets, glass or stained glass doors can become stylish decorative elements.
The TV stand can be decorated to your liking.
Thus, a DIY TV stand is an excellent choice. If you approach the work wisely, it will save money, as well as bring warmth and comfort to the decor of your home and even prevent the purchase of additional furniture, such as a table.
The technology for making furniture is quite simple, and by using your creative abilities and talents, you can make a independently made piece of furniture unique, a kind of “highlight” of the interior.
Types of shelves for TV
Modern flat-panel TVs come with wall brackets. This is convenient, but only when the TV screen has a sufficiently large viewing angle - at least 120 degrees. Opposite a window or other light source, such a mount is not justified - the display glares, and there is no way to rotate the TV. For small “cubes” such shelves are produced, but CRT TVs are becoming a thing of the past along with bulky VCRs.
Factory model for CRT TV
If you set yourself the goal of making a universal TV shelf with your own hands, then nothing simpler than the classic “almost invisible” option has yet been invented. Two purchased furniture boards 500x500 mm, an electric jigsaw and a little fiddling - an ordinary universal shelf can be made in an hour, including installation time.
Classic shelf option
However, in my opinion, the optimal model of a TV shelf should combine the following functional features:
- The ability to rotate the screen, that is, not a rigid mount on the wall, but a classic stand.
- Corner location. In the kitchen and small rooms, it is most convenient to place the TV in the corner.
- Additional shelves for a DVD player (Blu-ray, Transgalactic transmitter, magic ball or whatever else they invent) and all kinds of control panels.
- The possibility of hidden wiring to all this crap, that is, the absence of a back wall.
TV picture, 15 photos and ideas
A TV that forms a single whole with the wall looks very harmonious and gives aesthetic pleasure. Ugly bundles of cables disappear from view, bulky TV furniture does not take up room space. And true perfectionists can turn a TV into a work of art by framing it and making it an integral part of the interior.
Installation of a baguette for a TV
You can make a baguette for the TV yourself or order it from a workshop. The frame fits tightly to the TV, practically forming a single whole with it, and under it you can hide not only wires, but also sockets and a bracket.
White TV frame
The advantage of a TV in a frame is that the safety of the entire space is increased: neither small children nor pets can reach the wires and sockets or knock over the TV itself.
Black wall panel for TV frame
A wall panel can also act as a frame. In the photo above, the black wall panel becomes a contrast, highlighting the TV and attracting attention against the backdrop of a light, light interior.
LED lighting between TV and frame
Proper lighting, without attracting attention, allows you to create interesting effects. LED strips are an excellent option not only for the ceiling, but also for unobtrusively illuminating various objects from behind, including a TV. The frame on which the TV is mounted also has an unusual texture, which is emphasized by the backlight. And you can buy a flat-screen TV in the Expert store https://expert24.com.ua/ru/catalog/18-tv_i_video/.
Box instead of a TV frame
Modern brackets allow you to move the TV in space, installing it at an angle convenient for you. Why deprive yourself of this opportunity? Painted yellow, the box makes a beautiful, modern TV frame.
Metal frame for TV
The gloss of metal always looks noble and fits well into modern style. A metal baguette instead of a wooden one will be an interesting and unusual choice.
The picture TV fits perfectly into the surrounding space
If you are going to furnish a room in an oriental, Japanese, colonial style - in general, in an exotic way - modern technologies will look at least strange in such an environment. But a frame for the TV will allow you to fit this item, which does not correspond to the era, into the decor without disturbing its harmony.
Landhouse style bedroom
The style of the TV frame and the material from which it is made must, of course, match the interior of the entire room. For example, a TV frame for a bedroom decorated in the Landhaus style was made from solid wood.
Idea for small rooms
Small rooms require compact solutions. Instead of space-consuming furniture for the TV, the designers used a baguette frame and a console table on which you can store the remote control and other things related to the TV, as well as decorative elements.
TV as a work of art
It looks beautiful when the TV frame is combined with other furnishings - a door frame, a window frame, a fireplace frame.
TV built into a wall niche
All wires are hidden - neat and tidy
Interior and frame made of natural materials
Large white wall panel
deavita.com
Source: https://homebuilding.ru/televizor-kartina-15-foto-i-idey.html
Overview of species
If the plasma panel is mounted below on the wall, additional electronics elements can be placed on the shelves: a CD player, a satellite TV tuner. When the user bought a TV with an LCD screen, it was time to purchase modern furniture, because it is unlikely to fit into the “grandmother’s” wall, and even if it does, it will look extremely unaesthetic.
Thus, it makes sense to list the main furniture models used as a TV stand:
- TV stand;
- furniture module;
- built-in headset;
- modular section;
- various consoles;
- wall shelf.
Design and functionality should be chosen based on the interior style of the room and the presence of auxiliary electronic devices. If the TV is located in the nursery, it is necessary to consider the issue of environmental safety.
Cabinets
Many users actively use just such a furniture attribute to install a modern TV. Most of the models presented are practical, stylish in design, and inexpensive. Therefore, choosing a cabinet according to the current family budget and for a specific interior direction will not be difficult.
Modern cabinets have many small shelves, opening drawers, and convenient niches. Models come on legs or wheels, are usually made from high-quality materials, come in beautiful finishes in a variety of shades, and are designed to accommodate additional electronic devices.
Racks
Quite an interesting and modern solution that allows you to beautifully position your TV and other accessories. Device stands are more suitable for a minimalist style in the interior. Despite a certain simplicity, they have a number of advantages:
- low cost;
- emphasized restraint;
- brevity.
They also stand out for their great functionality. Racks are made in various sizes, designs, with different numbers of shelves. Exterior finishes come in both dark and light shades. Therefore, every connoisseur of a strict, laconic style in the interior has the opportunity to buy a stand and not only beautifully decorate the wall, but also conveniently place the TV, discs, and remote controls.
Elevators
Relatively new devices designed more for plasma panels. Thanks to the design feature, it will be possible to mount the TV vertically. On the reverse side there is a laconic or rich decor. Using the remote control, you can control the mechanism: raise the structure, lower it, rotate it, tilt it. Such an unusual device differs from all similar solutions for TVs not only in its great functionality, but also in its magnificent, impeccable design.
Cabinets
In spacious rooms, TVs, set-top boxes, audio systems and other attributes of modern electronics are placed separately from elements of massive furniture, but when there is a shortage of free space, wardrobes are installed nearby. In order for them to look good and aesthetically fit into the interior concept, such furniture items must be carefully selected.
If you purchased a chest of drawers with drawers or a wardrobe with a stand and its appearance corresponds to a modern design, it will look justifiable next to the TV. But if the woodworking product is tall, massive, with shelves, and is not original, then it is necessary to choose a special place so that the piece of furniture does not spoil the interior style and does not violate the integrity of the surroundings.
Varieties
Most often, such types of shelves as wall-mounted, corner, with a bracket, and also wall-mounted are suitable for a TV. There are multi-tier shelves, combined, with back and side walls. These structures are fastened using brackets, hinged type fastenings.
A TV shelf fits into the interior of every living space. If you decide to create the design yourself, then study the nuances of this process and choose the type of shelf.
Types of TV shelves
Taking into account current technologies, almost all TVs are small in thickness and weight, so they can be conveniently mounted on the wall using special brackets.
Wall shelf-bracket
The option is good, and can be easily done with your own hands, but there is one big “but” - if the viewing angle is at least 120 degrees
In addition, it is important to take into account light rays, so you cannot place the TV anywhere. There is no provision for turning the TV left or right on such a shelf, and looking at the reflective screen is somehow not interesting. On the other hand, if the design of the room follows a minimalist style, then a wall-mounted shelf-bracket is a good solution for placing a TV
On the other hand, if the design of the room follows a minimalist style, then a wall-mounted shelf-bracket is a good solution for placing a TV.
Standard TV shelf
Well, this is closer to the classics - a shelf-stand for a TV that fits perfectly into the design of the room. There are many options with materials (glass, wood, plastic, metal, etc.), and this shelf is multifunctional. You can store remote controls, discs in it, place a home theater on it (if it has several levels), etc.
Ideal wall shelf
This option falls more into the category of “do what you want with your own hands.” Such a shelf should include the following features and features:
soft mount that allows you to rotate the TV in different directions. This does not mean rigid mounting on the wall, but a shelf made in the form of a stand; location in the corner. In the kitchen or in the children's room, it is best to place the TV in the corner, so you need to make a shelf taking into account third-party parameters (angle of incidence of sunlight, comfortable viewing, tilt angle, etc.); several levels for storing auxiliary items (remotes, DVDs, etc.); supplying power and antenna wires
It is advisable that such a shelf does not have a back wall, so that all the wires can be brought in without any obstruction (it is important to maintain visual appeal, and protruding wires will somewhat spoil the appearance).
How to make a wall shelf with your own hands
So, if you want to try your hand at making furniture (well, at least a wall shelf for a TV), then you should first select the source materials.
You will need several furniture panels (taking into account the desired color), a tool for working with furniture and “straight” hands.
The size of the shields to be used is standard, the preferred thickness is 16 mm. In addition, you need an edging that will give the shelf elegance and uniqueness.
For a two-color shelf, it is best to use the following parameters:
Color #1
Three shields measuring 600x600 mm are future blanks for the levels. Will have to work with an electric jigsaw
By the way, wall-mounted shelves for a TV attract attention precisely by their external form, and only then by their functionality. So the first color needs to be chosen correctly - it is the main one
Color #2
One rear insert with dimensions 450x200 mm and two side panels - 450x400 mm. This color brings a certain contrast, adding originality to the shelf. Cutting out inserts of this size with your own hands is not a problem - the main thing is to know how to use a power tool.
It is especially important, when making furniture for a TV with your own hands, to fix it on the wall. Here you will need large dowel-nails (starting from 6x120), since an insufficiently strong fastening will lead to the fact that all the equipment will fall and break. As for the wires, they can be connected to the TV secretly, hidden in cable channels
As for the wires, they can be connected to the TV secretly, hidden in cable channels
Here you will need large dowel-nails (starting from 6x120), since an insufficiently strong fastening will lead to the fact that all the equipment will fall and break. As for the wires, they can be connected to the TV secretly, hidden in cable channels.
Naturally, it is impossible to put all the variations of making a TV shelf with your own hands in one article, because everything depends on a person’s imagination and his practical skills. We can only say one thing - furniture made independently will last much longer and, naturally, will be doubly pleasing to the eye.
Nuances when choosing a finished frame
First of all, you should know that making a frame for a TV is quite simple, and you can probably do it yourself with a small set of tools. A correctly made frame can be easily removed without causing damage to the TV.
Important! An incorrectly installed TV frame may cause sound rattling. When the frame is installed correctly on the TV panel, a damper gasket is inserted between the body of the LCD TV and the frame, which eliminates the occurrence of chatter even at high sound volume levels.
If the frame is incorrectly selected and installed incorrectly, it can cause the panel to overheat. Therefore, when installing the frame, you must remember that the gap between the back panel of the TV and the wall must be at least 10 cm. Usually this distance is enough for warm air to rise up unhindered.
Frame options:
- A wooden baguette has considerable weight, which must be added to the weight of the TV when choosing mounting fasteners. On average, the weight of the frame does not exceed 3 kg.
Important! Given the increased weight of the structure, before installing it on the wall, you should make sure the strength of the wall itself. If the wall is made of concrete, you can mount it using standard dowels, which usually come with the bracket. If the wall is covered with a thick layer of old plaster, it is safer to use extended anchor bolts when installing the bracket.
- The framing profile can be regular or reverse. If the usual type is something like a funnel, then types with a reverse profile, on the contrary, have the middle protruding forward, and the edges of the frame are adjacent to the wall.
Important! It is better to use a reverse profile if you watch TV not from one place, but from different points in the room. In addition, this profile allows you to more efficiently hide wires in the frame.
Regardless of the type of finished baguette you choose, the purchase price will be high. So why not try decorating your TV yourself and thereby saving money?
Manufacturing
Having prepared everything you need, you can start making a TV stand with your own hands.
First of all, you need to saw off all the parts according to the drawings and carefully fold them. By the way, before you start cutting materials, make a cutting diagram to make sure there is enough material.
If the choice was made in favor of laminated chipboard, then the next step will be gluing the ends. Before this, you will need to sand the ends with sandpaper for better adhesion.
Gluing the edge is quite simple, just apply it and run a hot iron along it through a thin fabric
You should pay attention to the fact that the edge is always wider than the end, so you need to glue it so that it extends beyond the edges, this is necessary so that you can then cut it off with a knife, in which case it will not come off over time
Now we take a set of products and mark the places where we need to drill holes to fasten all the parts into a single whole. Having marked the places where the holes will be, you can begin. Those who have already drilled when hanging something on the wall know that it is difficult to immediately place the drill where it is needed, and it often happens that the hole is drilled in the wrong place. In this case, you need to make a dent; to do this, you need to place a nail in the center of the mark and lightly hit it with a hammer, or use special wood drills with a sharp tip.
Having made all the holes and repeated measurements, you can proceed to the last stage - assembly. It is necessary to assemble the product carefully, because if you assemble and then disassemble it, then all the holes for the screws will increase and will no longer connect the elements of the TV stand tightly.
This particular drawing of a TV stand implies the presence of drawers, which are assembled separately and be careful when installing guides on the walls and on the drawers themselves. Even changes of 1-2 mm can affect the final appearance of the product
Shelves for flowers
It is often seen when people decorate their homes with artificial flowers, but still nothing can replace the freshness of a natural beautiful plant. Many owners, trying to decorate the wall, let climbing plants grow along it, hang flowerpots from the ceiling or place them on shelves of their own design. The advantage of this approach is that it is possible to make something of your own, unique and fitting into the interior of the room. Depending on the type of flowers available and their quantity, a shelf is constructed.
Wooden shelf for flowers in the form of a honeycomb
Of course, you immediately want to make something voluminous and beautiful, which is quite natural, but first you can try your hand at making a simple but neat shelf.
Manufacturing stages
We will need a 120x25 mm board with a length of at least 130 cm. It will be more convenient to sand the board while it is intact.
Take a board of the appropriate size
After this, one edge needs to be cut so that the corner is straight, and markings must be applied every 20 cm clearly at an angle of 90°. A construction corner will help with this, but if you don’t have one, you can use any solid object whose corners are right, for example, ceramic tiles.
We make marks on the board every 20 cm
When cutting a part, you need to hold the hacksaw at an angle relative to it. If you hold the hacksaw straight, it will be difficult to make an even cut.
Now saw it according to our marks
To make a shelf we will need 6 pieces of 20 cm each.
We will need 6 identical planks
Each part must be sanded on all sides. The blade used should not be coarse-grained, otherwise the wood may be scratched.
Each of them needs to be sanded
Since the screws will be screwed close to the edge of the board, in order to prevent it from splitting, you need to drill holes in these places with a thin drill.
In preparation for assembly, we will drill holes for screws
The entire assembly process consists of fastening the parts with self-tapping screws. If PVA glue is available, then the joints must first be smeared with it, and after allowing a minute for the glue to set, the parts must be fastened. When screwing in the screws, you do not need to use excessive force to prevent the board from splitting. It is enough that the head of the screw is flush with the board.
Assembling the shelf
Since our shelf is wall-mounted, we need to screw fasteners to it.
We screw the fastenings
Since the height of the shelves is small and the structure is not very durable, you can place climbing or low plants in small pots on it.
The shelf is ready and there are flowers on it
This product can be used not only for flowers. To prevent the shelf from getting dirty, it is best to open it with varnish.
Corner shelf design
This type of shelves is practical and is used in small rooms, as they take up little space and allow you to decorate a corner in an interesting way. They can be mounted both inside the corner and outside, going around it
They help expand the functionality of the room and increase its ergonomics, which is important for decorating a small room - kitchen, hallway, bathroom
The corner shelf can accommodate a large number of items
They are often used instead of a corner cabinet and small household appliances, dishes, and souvenirs are placed on them.
Since such shelves have three attachment points, they are more reliable and can withstand greater weight. They can be made from various materials: wood, glass, metal, plastic.
An external corner shelf made of wood decorates the corner of the room in an original way.
Country style bedroom
The style and material of the frame should be consistent with the decorative elements. For the bedroom called Grace, for example, a solid wood frame frame was chosen.
Compact solution for small spaces
- As decoration, you can place various jewelry or books on the coffee table.
- TV becomes a work of art
- It would be good if the overall design of the room was combined with a frame for the TV, such as window, door frames and fireplace frames.
Wooden frame with antique effect
Natural materials were used to create a real winter garden - natural fiber carpet, stone in the fireplace surround, rattan furniture, coffee table and wooden TV frame.
Source: German magazine of interior and decor “Deavita” Author of translation: Maria Chvanova. Especially for the site OniOni.ru
Source: https://onioni.ru/idei-dlya-doma/sovety/rama-dlya-ploskogo-televizora/
Recommendations
Before you make your own TV shelf, you need to choose the appropriate model. At home, you can make both hanging, retractable, and rotating models. Shelves that are installed on the floor look beautiful in the interior of living rooms. If the room is small, then it is best to choose a suspended option with brackets; they are attached either to one support beam or to multiple beams to the ceiling. The advantage of hanging shelves is that they are out of reach of children.
Pull-out designs are considered a good choice when the equipment is planned to be installed in an existing cabinet. Such shelves will move on rails, ensuring accessibility to equipment. As for rotating models, it is recommended that they be made in addition to other pieces of furniture to facilitate the location of the screen. Floor shelves are not much different from ordinary TV stands; they are the easiest to make.
When choosing a shelf shape, it is best to choose square and rectangular models; designs with semicircular and curved shapes are rare. To increase the functionality of the shelf, you need to supplement its design with several compartments
When creating a sketch of shelves for a TV, it is also important to take into account the following nuances
- In the living room, it is advisable to install wide and large structures, since the TV in this room acts as the center of the interior. The choice of material and shelf design also plays a huge role; wood products in warm colors are considered a good choice. In the bedroom, it is best to place hanging compact shelves made of plasterboard or chipboard. For children's rooms, you need to make original designs in bright colors.
- It wouldn’t hurt to decorate the finished shelf with decorative elements; this will give it some chic. In a classic style, you need to use a bracket and complement the structure with glass inserts. The brackets can have both strict geometric patterns and floral designs; the same goes for glass elements; they can be beautifully painted. Carvings will also look unusual on wooden shelves; they are usually applied to the end in the form of various patterns. If the shelves have metal inserts, you can engrave them, this will give the product an interesting look.
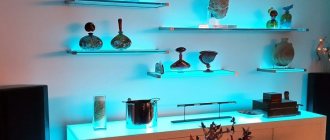
- Any shelf for a TV should be provided with good lighting, which will highlight the corner under the equipment. As a rule, wooden structures are equipped with spotlights; round small lamps are placed on the ceiling above the shelf in such a way that, when turned on, they highlight the cinema area in a special way and relieve the eyes from unnecessary strain. The intensity of such lamps can be adjusted using a special switch.
A combination of a TV shelf with an LED strip would also look good in a modern interior; it should be placed along the edges of the structure. In the dark, such illumination will create a mysterious flickering, changing the intensity and color of the lighting.
It is worth noting that LED strip is best suited for glass structures, giving them an expensive look.
To learn how to make a TV shelf with your own hands, see the following video.
What types of shelves are there?
A TV shelf on the wall can look different and be made from different materials.
There are three main purposes that it can perform in the interior:
- TV placement . Over time, it is becoming less and less relevant - many models are now mounted directly on the wall and do not require any additional support.
- Placement of accessories . If the room has few horizontal storage surfaces, a shelf under the TV can increase the number of storage surfaces. In addition, it can accommodate accessories related to the TV itself - a DVD player, for example, or a collection of discs.
- Addition of decor . The design can be multi-tiered, with walls, with various decorations, lighting and complement the overall style of the room.
Often the appointments can be combined. In some cases, a shelf can serve all three at once.
Convenient TV shelf
When trying to imagine a shelf that will be ideal for your particular TV, you first need to determine what it will look like in terms of design. There are several varieties - each with its own advantages and disadvantages.
- Hanging . Such structures are fastened from above - they are usually suspended from the wall on strong chains. They look impressive, especially if you choose a beautiful fastening and emphasize it, but they require careful calculations, because the chain can break.
- On brackets . The bracket is a supporting part that looks like a triangle. One leg is adjacent to the wall, the other to the bottom surface of the shelf. There are brackets of the most intricate shapes. They are considered a more reliable method of fastening than suspensions.
- Angular _ Such structures are mounted in the corners using hidden brackets and have a triangular shape. They allow you to place the TV without wasting space, and quite reliably.
Suspended structure
- Cast . These are made of glass or metal, giving them an intricate shape - ladders, cubes, smooth lines, similar to sea waves. They cost more than others.
- Frame . They look like a cabinet without doors with a TV built into it. It forms something like a niche around it, allowing it to be distinguished stylistically in the interior.
Next you need to understand what material the shelf will be made of.
After all, design features determine little except the aesthetic impression. But the material from which the shelf is made affects the main performance characteristics.
Bracket - supporting part
Shelves made of chipboard and MDF
Chipboard and MDF are considered synthetic materials, although they are made of wood.
Chipboard contains sawdust and wood chips, which are compressed under high pressure using synthetic resins.
A chipboard shelf will have the following advantages:
- Low price. A sheet of chipboard costs so little that you can’t even count it.
- Sustainability. Chipboard is insensitive to moisture and does not suffer from temperature changes.
- The cons, however, make the pros almost useless.
- Lack of resistance to mechanical damage. Chipboard will easily crack from any impact - or a piece may break off from it.
- Impossibility of complex processing. A chipboard shelf will always have a rectangular shape, because if you try to saw it, it will simply crack. About the same thing will happen if you carelessly drill a hole for the bracket.
Corner design
Chipboard does not look very aesthetically pleasing and, if it was made without complying with technological requirements, it will release fumes that are poisonous to humans.
Advice A chipboard shelf should only be installed as a temporary solution. Or if the entire design of the house is made using the cheapest materials possible.
MDF is a little higher class. It uses wood waste, wood chips and small debris, which are mixed with resin, heated, stirred until smooth and pressed into sheets under high pressure.
Modern style
A shelf made of MDF will have the following advantages:
- Ease of processing. MDF, unlike chipboard, can easily take any shape.
- Safety. Unlike chipboard, MDF does not emit harmful fumes.
- Sustainability. With proper processing (due to which the structure will cost a little more), an MDF shelf will be insensitive to moisture, biological irritants, and fire. It can be washed with aggressive chemicals.
- Long service life. MDF is more reliable than chipboard, lasts longer, does not swell, does not bend, and does not dry out over time.
Not a bulky option
There are only two disadvantages:
- Price . Of course, it cannot be compared with the price of natural wood, but compared to chipboard it seems quite high.
- Softness . It is thanks to the softness of MDF that it is easy to process - but because of it, the shelf will be sensitive to mechanical damage. However, chips and cracks will not appear on it - only dents and abrasions.
MDF with chipboard can be given the look of any natural material - this allows for a protective coating that provides them with stability and can be of any color. Upon closer inspection, the difference will, of course, be noticeable, but if you don’t look closely, you can easily be deceived.
Advice If you want to install a TV in the bedroom, where no one really visits except you, and the air humidity is low, MDF or chipboard will suit you.
Option for a spacious room
Made of wood
If you don't look closely, a shelf made of MDF or chipboard can pass for a wooden shelf. But their performance characteristics are still somewhat different.
Wood has the following advantages:
- Beauty. Of course, other materials can copy the appearance of wood in general terms - but it will still be different from them. The special texture, the presence of unique veins, knots, depressions on the surface, and a faint smell add a special chic to it.
- Ease of processing. The tree can not only be given the desired shape, but also covered with intricate carvings, which will make the end result more interesting.
- Reliability. A wooden shelf can last for many years, especially if you treat it carefully.
Wooden option
Properly processed - and therefore somewhat more expensive - wood is also insensitive to moisture and biological irritants and cannot leave splinters.
But even it has disadvantages:
- Flammability. Wood burns no matter how it is treated.
- Lack of resistance to high humidity and temperature changes. The treated wood can resist them, but the rest will quickly swell or, on the contrary, dry out in unsuitable conditions.
- Price. Natural wood - especially dense, reliable varieties - is expensive.
A wooden shelf can last for many years
Natural wood is a good solution for emphatically natural interiors - eco or country. It is irreplaceable in expensive, noble styles - baroque, art deco. But in the same American style, minimalism, loft, it is better to do without it.
Made of metal
Metal is a very original solution for any interior, especially if you leave it unpainted and shiny. It does not suit all styles; it gives the room a somewhat cold, austere look. Has several advantages:
- Sustainability . Over time, wood dries out or swells, chipboards with MDF crack or break, glass becomes cloudy or may break, but nothing is scary for a metal shelf - it does not burn, does not wear out, does not change color in the sun, and is not afraid of biological hazards such as mold or parasites . Many metals don't even rust - and those that do can always be painted.
High-tech style
- Easy to care for . Metal does not attract dust. You just need to wipe it with a damp cloth to make it shine again, like the first day after purchase.
- Reliability . A thin sheet of metal can withstand much more weight than a wooden board or chipboard sheet of the same thickness, plus it is practically insensitive to mechanical damage. The maximum is that you will be able to leave a dent on it, which can then be easily straightened out.
It also has disadvantages:
- High price . Reliable stainless metal costs comparable to natural wood.
- Specific appearance . A metal shelf will look austere and will make the room somewhat less cozy and much colder. It cannot fit into many styles - most classic ones, for example - and cannot be combined with many materials. For example, with a tree.
Metal and glass
The metal structure fits perfectly into the high-tech style, which consists entirely of combinations of glass and metal. It will look good in minimalism, in futurism, and will take root in a loft . But there is no point in trying to insert it into country style, American style, eco style and others that refer to closeness with nature, country life, and natural materials.
Advice When choosing metal as a material, make sure that it is of high quality. A low price, lack of a certificate, a seller who does not have positive reviews - all this may indicate that the design will very quickly fail. It will rust, bend or simply fall.
Metal does not attract dust
Glass shelves
Glass is no less original material than metal. Fitting it into the interior is just as difficult. It has advantages:
- Aesthetics . This beauty is not like the beauty of wood - more airy, lighter. Glass will not make the room more comfortable, but it will make it colder and seem brighter. In addition, it can be further decorated with painting or laser engraving.
- Sustainability . Glass is not afraid of practically anything - it does not change color in the sun, does not swell from moisture, does not crack from temperature changes, and does not suffer from biological threats. Does not absorb odors, is not afraid of aggressive chemicals.
- Reliability . A thin sheet of glass can support a lot of weight—if it's properly tempered glass. It can serve for decades and does not change shape.
- Variety . There is a wide variety of glass, which differ in performance characteristics and appearance.
Glass - original material
There are also disadvantages:
- Price. Comparable to the price of metal and natural wood.
- Lack of resistance to mechanical damage. Even the strongest glass breaks with a strong impact - the only question is how exactly the fragments will fly apart. Cheap glass will cause a shower of fine crumbs to fall on them. They will fly off from the expensive ones in large pieces with blunt edges that you cannot cut yourself on.
- Slippery surface. It is better not to place anything on the glass that can slip. And under what cannot, you should put a napkin so that there are no scratches.
- Difficulty of care. It is easy to wipe the glass with a cloth. But if it gets dirty, washing it so that there are no streaks left is a non-trivial task, which will require special skill, a special soft cloth, and special chemicals.
A thin sheet of glass can support a lot of weight
Unlike chipboard, metal, and wood, glass comes in very different prices and qualities.
Highlight:
- Leafy . An immortal classic - thin, transparent, broken into many small fragments. Only suitable for a small light TV.
- Tempered . The same sheet, but treated with high temperature. More durable, breaks into large fragments with blunt edges. Suitable for medium TV.
- Triplex . Glass glued in several layers - in the middle there is a special layer that holds the layers together. Triplex does not break, it only cracks. This is what is used to make bulletproof glass. Suitable for large TV.
- Float . Molten glass is poured onto molten metal, and then cooled - as a result, it turns out to be as smooth as possible. Nowadays it is most often used for shelves.
- Reinforced . If you have a very large and heavy old TV, this is the glass that will fit best. Its thickness is made of metal mesh, which provides it with greater strength than all other types. When hit, it does not split, most often it does not even crack. Its texture is usually a small square.
- Acrylic . Not quite glass - thin transparent plastic that imitates glass. It scratches easily and burns, but is much stronger than ordinary glass. It can be drilled, it can be turned, it can be painted, it can be cut. Suitable for a small TV - or for a purely decorative shelf that has no support.
Compact version with metal and glass elements
Triplex costs the most, acrylic and sheet glass cost the least.
Tip Glass goes well with both metal and wood. It will look best in a high-tech style, but can also look good in more classic styles.
Feasibility
To make an “intricate” shelf you need to purchase additional tools
If everything is clear regarding the material of the shelves and other classifications, then some difficulties may arise with the tools. Therefore, to make something extravagant, you will need to visit the construction market to purchase a tool.
The modern construction market is not only about building materials and tools. This is still an extensive service sector. Therefore, if the cost of the service is significantly less than the price of the tool, it is worth thinking about this factor and making the right, appropriate decision.
Another aspect of difficulty lies in personal skills. Of course, you can cut a wooden or plastic shelf with a regular hacksaw without buying a jigsaw. But not every craftsman can make a high-quality radius glass shelf on his own; Even gluing edges to a sheet of chipboard can be difficult.
Based on the feasibility and personal experience in the manufacture of products from selected materials, you should know that the construction market is ready to perform a number of works for little money. These are: cutting sheets of MDF, chipboard, wood, plastic, radius and straight cutting of glass, drilling holes according to customer drawings, cutting metal along the contour and others.
Understanding well what needs to be done, what to make it from, taking into account the interior of the room, you just need to approach this issue expediently and not clutter up the space with unnecessary tools. But further production and additions to the interior can be done independently by purchasing the necessary material.
How to make a dog house with your own hands: arrangement of housing in the yard and in the apartment. Drawings, dimensions and original ideas (55+ Photos & Videos) + Reviews
The most difficult question is what to make a shelf from.
“Classics of the genre” as the main material
If everything is more or less clear with safety precautions, then often when choosing such a variety of materials a difficult situation arises. For greater understanding and practicality, you should consider some of the features of each of them.
- Wood (chipboard, MDF) is the leading material on the market in the manufacture of furniture. Its low cost is a plus. It can be easily processed with any tool and has a long service life at low humidity.
- Metal - manufacturing often requires a welding machine. The material has a lot of weight, but it benefits greatly when combined with other materials.
- Plastic, like wood, is a fairly cheap material and easy to work with. Compared to wood, it has a significant advantage - mold does not form on it in high humidity (loggia, balcony, bathtub, toilet).
- Glass is a very stylish and fashionable material. You can very advantageously play with space in small areas of the room using mirrors. A glass cutter and a diamond drill bit are required to drill holes if necessary.
- GCR is the cheapest of the above materials. Not resistant to high humidity. Often used in the manufacture of niches in the wall, which subsequently serve as shelves.
It is natural that the choice of material for manufacturing should not be determined only by the cost of the material. Both the opportunity and the skills of the master play an important factor. This is the case when unnecessary risk will cost certain unforeseen costs in case of damage to the workpiece.
Do-it-yourself children's playground at the dacha: playground, sports | (100 Original Photo Ideas & Videos)
Main types of TV mounts
Bracket for TV on the wall, rotating, retractable
The tilt-and-slide TV wall mount is the most convenient to use. It provides the maximum number of degrees of freedom for a flat screen.
Thanks to this fastening, the TV panel can be fixed in any position. In addition, the TV itself can:
Tilt-and-swivel type TV bracket
This type of fastening allows you to adjust the angle of the panel and change its position. No matter what room the panel is located in, the tilt-and-swivel TV bracket will make it possible to adjust the image plane vertically or horizontally for comfortable viewing.
Table 2. Advantages and Disadvantages of Pan-Tilt Brackets
| Possibility of comfortable screen adjustment | Difficulties during installation work |
| Quick selection of the most comfortable screen viewing position anywhere in the room | Large distance between wall and panel |
| Allows you to install an LCD panel in a corner and living spaces with a non-standard layout | High selling price. The fastening has different weight restrictions for panels |