There are several basic ways to draw an airplane. You can draw the simplest airplane with a pencil and felt-tip pen. This option is optimal for young children.
You can use gouache and watercolor paints, add various environmental elements to the aircraft, and draw individual design details.
How to make a bird repeller for berries?
It is necessary to make a stuffed animal from two round pieces of foam, glue on huge bright eyes, make wings as in the diagram, and hang it on a high pole above fruit trees and bushes. It will sway in the wind and float, but no one will touch your berries. You can make several of them.
Interesting materials:
What happens if you get a new tattoo wet? What happens if you pour sugar into the engine? What happens if you don’t show up to the employment center? What happens if you don't join the army until you're 27? What happens if you don't take out mortgage insurance? What happens if you don’t pay the fine from the cameras? What happens if you don't wash the meat? What happens if you don't repay the loan? What happens if you don’t sign an employment contract? What happens if you don’t close your sick leave in 2022?
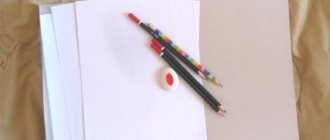
Simple airplane in pencil
You can create a beautiful colored drawing of an airplane using simple and multi-colored pencils or crayons for drawing. This technique is optimal for young children, since it does not involve drawing small and complex details.
Drawing technique:
- Draw a wing. The shape should expand at the top and taper at the bottom. The tip is slightly rounded. The contours of the top of the wing at the junction with the body are connected by an arc. You need to make 2 wings, one closer to the middle, the second at the tail. The rear wing should be smaller.
- Draw a semi-oval tail above the hind wing.
- Create an outline for the bottom of the structure by drawing a slightly curved line from the tail to the front. The nose should have a large rectangular shape with slightly rounded corners.
- Draw the cockpit from above in the form of a semicircle. Located above the central large wing.
- Finish the outline of the hull by drawing a smooth line from the cockpit to the tail. You can draw the pilot's head in the cockpit. For naturalness, you should add large round glasses. Draw a helmet on the head.
- Draw the propeller at the front. It should connect to the nose. Make an elongated oval base to which add teardrop-shaped blades.
- Draw a line between the cockpit and the nose to indicate the engine part. Add dots simulating rivets behind the line closer to the nose.
- Using straight lines draw the flaps on the wings and tail. The line is drawn closer to the right side.
- Decorate the ship. You can use crayons or pencils of any color. For example, the fuselage can be painted yellow, the wings orange, and the propeller red. We paint the cockpit glass blue, the pilot's face light orange, and the helmet brown.
- Since the ship is in flight, it is worth adding clouds and birds. Birds can be depicted using checkmarks, and clouds in any volumetric form.
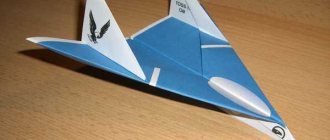
"Smiling" airplane
You can easily and simply draw a funny airplane using felt-tip pens. A child can also easily cope with such work.
Drawing step by step:
- Draw the outlines with a black felt-tip pen. The body has the shape of a wide, elongated drop, widening at the nose and tapering at the tail.
- Draw a horizontal oval in the tail section, imitating the rear wing. Add a rounded nose to the front. The end of the nose needs to be connected to the bottom contour at an acute angle to form a smiling face.
- Form a turbine below the contour. It is enough to make an oval and draw a circle inside it. From the body we draw a rectangular counter wing with rounded ends.
- Add a tail to the back of the boat.
- Add an oval to the rear contour and circles-portholes in the middle of the body.
- Draw the eyes at the top of the nose. We make the eye round, and on top we draw a teardrop-shaped eyebrow located at an angle. Inside the eye we draw a pupil, fill it with black, leaving a white dot.
- Paint with desired colors. To make it more colorful, the hull, tail, wings, windows and turbine should be made in different contrasting shades.
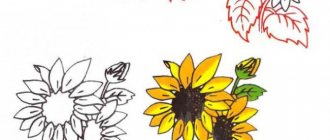
Old plane
Let's work on the older versions of flying birds, namely the corncreeper.
Corn trucks were used absolutely everywhere, in war, for rural purposes, for transporting people. Therefore, by drawing a machine gun on the nose, you will get a military aircraft, and by painting the sprayers on the bottom, an agricultural one.
We will draw the most common one. Let's get started!
First, let's sketch the wings and main body. If you look at it from above, you will get a cross.
Blades, tail and stripe running in front of the wings. Pay attention to this stripe, it is rounded because the body of our corn plant is rounded. This is very important, this way the volume in the drawing is conveyed.
We draw wheels and connect the upper and lower parts of the wings.
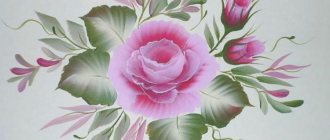
Now we draw the cabin and proceed to the most important thing, the patterns on the body. Bright cornflowers look very beautiful. You can redraw our pattern or come up with your own.
So, we're all set. Now choose brighter colors and paint.
The result was not super complicated in execution, but a beautiful drawing