Quick sewing of clothes for dolls
To sew a dress, you need to take measurements from the doll and prepare a pattern from two rectangles. One part will serve as a bodice, and the other as a skirt. Two pieces of fabric are sewn together, and Velcro is sewn on the back.
To sew a skirt, you need to take measurements from the doll and prepare the fabric of the required length.
It is very easy to make the necessary clothing patterns for dolls yourself; to do this, you need to take the necessary measurements from the baby doll or Barbie. A skirt can be whipped up from two rectangles of fabric; braid or elastic band is used as a belt.
Even a novice seamstress can sew such a skirt, since simplified tailoring is very helpful for those who do not know how to sew at all, but the child asks for new clothes for his pet.
Toilet paper
Toilet paper provides ideal fixation for collars and skirts. You can fasten the parts using either a stationery stapler or sewing thread. It will definitely come in handy on Halloween: it is suitable for a mummy costume, a ghost, along with bandages and a sheet.
There is no point in wearing an evening dress made of toilet paper on Halloween. It's better to save it for a corporate party in honor of the anniversary of the company's founding or the New Year.
Doll life Master class Sewing We sew a circle skirt for a doll Fabric
Good day, residents of SM! I decided to make a circle skirt for dolls. I hope you find it useful.
We will need: scissors, thread, needle, pen (pencil), elastic band 0.5 cm wide and 1 cm longer than the waist circumference, fabric ruler, measuring tape
To sew a skirt, we need to know only two values - the waist circumference (my doll has 8 cm) and the desired length of the skirt (my doll has 7.5 cm). Now we need to divide the OT (waist circumference) by 4. In my case it turned out to be 2.
Now we take the fabric and cut a square from it measuring approximately 25 by 25 cm (more is possible, it all depends on the size of the doll and the length of the skirt)
Fold the fabric in half with the right sides facing in
Once again. It turned out to be a small square. It is advisable to iron it with an iron, because... this will be more convenient for further work.
Now we need to find an angle on the square, on both sides of which there are no cuts, only folds (I am a master at explaining))). From this angle we will plot the length resulting from dividing OT by 4. Like this:
How to make a dress out of paper
Using a paper dress, you can stylishly decorate a postcard for March 8, or use it to decorate a festive table, for example, at a bachelorette party.
To create such decor, it is better to take soft and thin colored paper, because thick paper will be much more difficult to bend, folding in several layers.
In addition, it is desirable that the paper you choose is single-sided, that is, it has only one colored side - this will make it more difficult to confuse them during work.
Paper dress
What materials, besides colored paper, are suitable for creating a dress?
Wrapping paper will also be good, especially if it is of some bright and unusual color. If you will decorate a card or holiday table with a dress, think in advance about combining colors and patterns, and then stock up on material for the production of paper dresses.
What you need to create a dress from paper
Step-by-step instructions for creating a paper dress
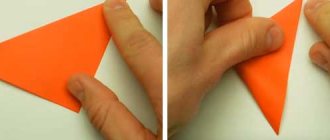
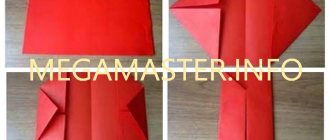
First you need to fold a square sheet of paper into 4 layers, and then unfold it. This will give you the folds. After this, fold the paper square on both sides and turn it over to the other side. The resulting workpiece will need to be folded again to form a narrow strip, the edges of which will then need to be opened.
So, we see the inside of the future dress. Next, bend about 1.5 centimeters from the top, and then bend the folded corners back. So the contours of the future dress are gradually beginning to emerge. The edges that were folded should now be unrolled, after which the workpiece is turned over and the hem of the dress is revealed.
Bend the fold in half, then smooth it and straighten it again.
Making a dress out of paper
Jewelry work
Then, without exaggeration, the “jewelry” work begins. You should fold the “waist” beautifully and extremely carefully, but at the same time, make sure that the folds remain even on both sides and are the same. Then, you should turn the workpiece over, since the dress is already ready. It can be glued onto thick cardboard, then you will have an excellent postcard.
Jewelry work
Dress made from newspapers
Unusual, homemade dresses, made with your own hands not from fabric, but from paper, or rather, from newspapers, are perfect for the role of a Halloween costume or for a party whose theme is related to environmental protection. For this outfit you will need several old newspapers, a belt and thin Velcro, as well as sewing supplies. To make a pattern correctly, you will need a long ruler and a pencil.
Dress made from newspapers
Tulle skirt
How to make a skirt for a doll from tulle? You need to prepare a rectangular piece of fabric you like. It should be three times longer than the doll's waist. And the width is the same as the length of the skirt.
In the upper part, using a needle and thread, you need to collect the tulle into neat assemblies. So the upper part is reduced in length to the size of the waist. You can make several layers in the same way. Then fasten them with a belt and secure the clasp.
Paper dress - 85 photos of the best ideas and tips for choosing a stylish and modern dress
Previously, paper and cardboard were handed over in bundles for recycling. Now they are used to make dresses. Several couturiers presented collections of paper clothing at once. These include Annette Mayer, Zoe Bradley, Emmy M. Phillips and Fairlight Hubbard. It became a sensation. So much attention is paid only to prints.
A must-have item in your wardrobe
The idea seems like a joke and yet it is a fact: couturiers offer fashion fans to acquire such things. When going to a buffet party, perhaps you can wear a paper dress. A man in a strange outfit will not shock anyone; on the contrary, he will charm everyone.
It's easy to make an outfit with your own hands. Durability and durability are a big question. In fact, is this the most important thing in life? Beauty, fantasy, and artistic talent come first.
Having chosen a photo of a dress from paper from one of the couturiers, having come up with something yourself, you need to get started. Absolutely all types of paper are suitable, including banknotes, note sheets, envelopes, and napkins.
Rules for working with newspapers
The rigid texture, fragility, and thinness of the sheet distinguish newsprint from other types. Printing ink can stain your skin. This needs to be taken into account and their quality checked.
The main way to process newspaper sheets is to fold them into several layers. The bend line should be straight. An accordion will replace a fan, and a cap can be worn instead of a hat. No scissors needed.
- Before starting to manufacture parts, fashion designers recommend:
- draw a sketch;
- make a paper pattern in full size.
It will become the basis of the future dress, part of it. Ignoring expert recommendations is also wise. The process will be twice as enjoyable if:
- trust your intuition;
- start creating parts;
- When a heap of sheets is formed, assemble an outfit from them.
Scissors are useful only if you plan to round the edges, as well as when creating a fluffy or boa effect. An openwork pattern is a dubious idea. Text, headings, pictures can break the symmetry and disproportion will appear.
It is recommended to fold the sheets two or three times, at least, because they are translucent. Instead of a needle and thread, it is better to use a stationery stapler. Glue will come in handy.
A4 sheets
A4 writing paper comes in different densities and colors. A crumpled sheet, cut out figures, and an openwork pattern look advantageous.
The easiest way to create a voluminous silhouette is as follows:
- cut a circle out of paper;
- draw two lines from its center to the edge, at an angle of 10-15 degrees;
- cut out the resulting triangle;
- Gently bend the circle and glue the sides.
Using threads and a needle, a stapler and staples, glue, three-dimensional circles of different diameters are attached to the canvas. The dress will be covered with needles, reminiscent of a cloud or fish scales.
Decorative cardboard inserts
A cardboard sheet will help make the dress truly fluffy. This is an excellent material for a skirt with a frame, a corset.
A disaster - in windy weather, a paper outfit. It will fly away all or parts of it. If cardboard was used, there was a greater chance of attending the celebration in clothes.
Chance of rain
How to make a paper dress more wearable? You will need a glossy magazine with thick sheets. The created item will not only be spectacular and shiny, but also practical: wind, dust, and a little rain will not hurt. You can wear it twice.
Paper bags and wallpaper are suitable for creating dresses that are almost as wearable as those made from regular fabric. Fashion designer Ekaterina Rudenko most often uses them.
Toilet paper
Toilet paper provides ideal fixation for collars and skirts. You can fasten the parts using either a stationery stapler or sewing thread. It will definitely come in handy on Halloween: it is suitable for a mummy costume, a ghost, along with bandages and a sheet.
There is no point in wearing an evening dress made of toilet paper on Halloween. It's better to save it for a corporate party in honor of the anniversary of the company's founding or the New Year.
Heavy duty baby paper dress
- It is recommended to make a child's dress from paper multi-layered, but not too voluminous.
- It is better to sew the paper onto the fabric so that in case of accidental damage to the skirt, collar, tie, you can save the situation by removing all the elements.
A hundred reasons not to wear an outfit
Having sewn a paper outfit, you may never risk wearing it. What to do with him? I remember the soundtrack to the movie “Moscow Doesn’t Believe in Tears”, the lines: “Do you think all this will be worn around? “I believe that all this should be sewn.”
When mimes come to the city park, you need to take a risk, put it on, take a photo as a souvenir. You can also take it to the palace of culture, children's and youth creativity, or stick it with tape to the ceiling, wall, or door at home. Dresses for dolls made of paper will complement the interior.
Unsuccessful attempt
Fashion designer Amila Hrustic presented a dress made of paper cubes to the public. Such details are more difficult to make than volumetric circles.
The collection of Alexandra Zakharova and Ilya Plotnikov includes dresses with voluminous bows and rings.
- If you didn’t manage to sew an outfit for yourself on the first try, ideas come to mind that are unlikely to be implemented in practice, you shouldn’t get depressed and give up on this idea.
How to decorate a tulle skirt
The skirt can be decorated, but you can also skip this step. If you still want to decorate the finished product, you can do this in several ways:
- Decorate the clasp with a decorative bow or flower.
- Also decorate the skirt itself with decorative elements. This could be a lace patch or rhinestones. It all depends on individual preferences.
In any case, it’s up to you whether to decorate the skirt or leave it in its original form. Be that as it may, the fitting already looks festive.
Circle skirt: fabric calculation for pattern
What tights to wear with a burgundy dress
Various options
Every Hawaiian girl has fluffy, bright skirts that differ from each other in some individual characteristics. For example, Hawaiian outfits might look like this:
- With side seam and voluminous elastic at the waist;
- Various fastening options;
- Large elastic band in several rows;
- Tightly tied cord.
The advantage of a skirt is that it can not only be easily made, but also be adjusted to any figure. You can control its length, make it more voluminous, tight-fitting or curvy.
To complement your summer themed party look, purchase a matching top, swimsuit bra, or short tank top. Don't forget about the beautiful neck wreath made of synthetic flowers, an exotic hair decoration.
Features of knitting clothes for dolls
Do-it-yourself clothes for dolls using knitting needles and hooks are quite an entertaining and creative activity. An openwork outfit, knitted to match a certain type of doll, looks very cute and quite attractive.
barbie dress stocking
For example, to create the simplest look for Barbie, you only need leftover cotton or wool yarn, a crochet hook and scissors. Since the doll is small, the work is quite painstaking.
Having taken the measurements, you should cast on the number of loops corresponding to the sizes and knit a simple classic English elastic band (the front and back ones constantly alternate with each other). The length of the elastic when finished will be equal to the length of the doll's tight-fitting dress. The finished part should be folded and sewn along the wrong side. The resulting product can be put on the doll. You can also decorate a dress or skirt with lace or small beads.
Baby Bon is the most favorite toy of children. Baby dolls have long conquered the hearts of children and their parents. For such toys, clothes that are typical for newborns are perfect: knitted bodysuits and overalls, openwork pants, tiny stitches with bows, etc. Small decor in the form of straps, ribbons and tiny flowers can also be crocheted with a thin hook.
You may be interested in: Making your own toy felt hedgehog
Baby Bon
Interesting information! For Baby Bon dolls, simple garter stitch is used with a combination of lace details and inserts, which are mainly crocheted.
The Monster High crochet toy skirt is distinguished by its originality. Here you need to think about both the colors and the unusual shapes, since the monster dolls are very bright and original in themselves. An inexperienced craftswoman may not be able to cope with such work, so it is better to start with simple dolls and things for them.
Monster High
Monster High 2
Paper Tools
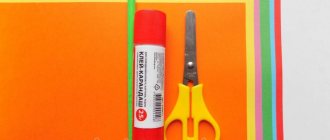
Making a paper dress will be much easier if you use special tools. Let's look at what items we need:
- wooden or metal ruler;
- drawing pencils (simple) with a well-sharpened rod;
- stationery knife or paper scalpel;
- scissors large and small;
- patterns or templates, if you need to cut out several parts with smooth rounded sides; you can use plates of different diameters;
- a set of flat brushes;
- glue pencil or PVA, you can use regular paper glue;
- tape narrow or wide.
Tip: Remember that for children of primary school age there are stationery with rounded tips.
Techniques for working with paper
Paper is a very interesting material for creativity. Thanks to its properties, it is possible to produce objects or clothing parts of various sizes. Let's take a look at some of the most famous handmade techniques:
Crinkling, thanks to which you can get a rich texture. Crumpled paper can take on different shapes.
Folding - this technique allows you to get a variety of folds:
- One-sided (the fold is placed in one direction),
- Counter (the fold of the paper is directed towards butt to another fold)
- Bow folds (fold directed in different directions)
- Corrugation (when paper is folded like an accordion);
- Origami is the folding of various three-dimensional figures from paper, from which you can assemble a large product;
- Cutting - is done using a knife or scissors in order to obtain parts of the dress in the form of patterns, and you can also cut out lace details.
Weaving is made from strips of different widths to create an interesting fabric. Used in creativity for adults or together with children in grades 4-6.
You can weave according to the principle of weaving, but instead of threads you need to take strips of paper, which you cut in advance. This process is quite painstaking and time-consuming, but unique product options are obtained.
Let's look at the main weaving patterns that can be used when working with paper:
- Plain weave (in a checkerboard pattern) is considered the most durable and simplest.
- Satin weave is obtained by alternating strips of paper 3 through 1. Thanks to this pattern, you can get a pattern with diagonal stripes on the front side, especially if you use two colors of paper for weaving.
- The twill weave forms a diagonal pattern, with strips of paper alternating 1 through two strips. In order not to make a mistake, you can peek and repeat the alternations, as in the figure.
Tip: If you want to make a woven detail on your dress, then use two colors of paper to get an interesting design.
Tearing, paper can be torn freely, or you can tear it off by placing a ruler on the sheet. In this case, the edge will be thinner and easier to stick to another sheet of paper.
Dress for a doll
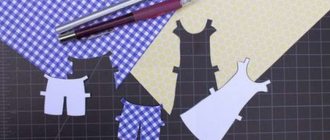
Painted paper dolls appeared in the 17th century. Then the girl could receive a whole set as a gift, which included dresses drawn with a thin outline.
With the help of their mother or governess, the girls painted the outfits, cut them out, and put them on the dolls, folding special strips of paper so that the dress would stay on the figure.
This type of doll remains popular today; they not only bring a lot of joy and pleasure from playing, but also develop taste and fine motor skills.
Creating dresses for dolls is an interesting creative activity that will allow participants to play the role of a real designer, stylist or couturier. A paper dress can be made flat or voluminous:
Planar. This dress may require plain white paper, colored paper, crepe paper, or napkins.
- Draw with a simple pencil, according to the size of the doll, color with colored pencils or paints and cut out along the contour;
Fold the origami dress. To do this, you need to take a sheet of paper and fold it as shown in the video instructions step by step. The main thing in this technique is to be slow, so if some step is not clear to you the first time, then watch the video again.
Making a dress for a doll is quite simple. You need to take paper, preferably corrugated, and form a bodice around the body, and then a skirt, securing it with tape, glue or thread. Lastly, you can make small sleeves like a flashlight.
Dress for girls
Nowadays, holidays are often held where a dress made of paper would be appropriate. For a child, you can use either plain white printer paper or corrugated paper, newspapers or pages of glossy magazines. Depending on the time available, you can create a designer outfit that will bring a lot of joy to the child.
If you are short on time, then you can’t think of anything better than plain paper and adhesive tape. Form the bodice of the dress on the child, thanks to the creasing nature of the paper. Try to crumple the sheets in one direction, creating the texture and shape of the dress. Then fasten a strip of wide tape on the girl with the sticky side on top, for the details of the skirt.
For a skirt, you can use various techniques of folding with a fan, or one-sided and pleated folds. An original and quick option would be paper sheets rolled into a cone and glued to a tape. Several rows create the effect of a tutu or princess dress.
If you have more time, then the dress can be created using more interesting techniques. To get started, look at the ideas for dress styles on the site’s photos; you can take it as a basis from a character from a cartoon fairy tale or from the works of famous designers. Decide on the style, quality of paper and methods of execution of the product. Now follow in order and perform sequentially:
- Take an unnecessary T-shirt or knitted dress for the base of the bodice.
- Use a pencil to draw shaped lines on the front of the T-shirt.
- Take the girl's shirt off.
- Prepare the paper parts and sew them onto the T-shirt, moving from bottom to top. Details can be sewn on by making two punctures with a needle, as when sewing on buttons. Try to work carefully so that the product looks beautiful.
- Now you need to make the skirt. To do this, first we make a frame from thick paper (whatman paper or wallpaper);
- The frame can be in the form of a crinoline, royal hoops, or be floor-length or short. Only imagination can stop this creative activity, since you can use any of the listed techniques, as well as alternate layers of paper according to color or quality.
How to decorate a paper dress
Paper is a very flexible material and allows you to create both simple and complex shapes. It all depends on the desire to spend time creating your outfit. As decoration, you can use voluminous flowers, which can be made soft and voluminous from corrugated paper.
To make them you will need:
- paper of various colors, for petals and leaves;
- PVA glue;
- templates for cutting out rose petals, lilies, daisies or peonies;
- Having cut a sufficient number of petals, collect the inflorescences and glue them together;
- place the finished flowers until the glue is completely dry, it is better if the flowers lie for about two to three hours;
- distribute flower buds and leaves along the hem of the dress, on the shoulders of the product and along the line where the bodice meets the skirt;
Skirt for a big-legged doll
To make a skirt you need to prepare:
- thin denim;
- threads, sewing tools.
Description
We determine the length and width of the skirt panel, taking into account the folds. Mark on fabric folded in two layers.
We cut out blanks for the panel and belt. Don't forget to take into account seam allowances.
Sew the side seams, leaving an open section at the top 2-2.5 cm long along the left seam. We process all cuts with an overlocker.
We make one turn along the bottom edge and stitch along the front side.
Next, we will consider two options for making a skirt - removable and non-removable.
Fluffy skirt with hair elastic
Typically, hair ties are sold in sets; 2-3 pieces are usually used per hair. In addition to hair, you can also make a belt for a skirt from an elastic band! We tell you in detail on the website.
We take a hair elastic, put it on the doll and measure the doll’s hips.
Cut off the excess. We sew the ends together and it becomes an elastic band again.
The fabric was rectangular, approximately 20 cm. Fold it in half. We start stitching and tighten the thread.
When they sewed it, this is what the skirt looked like.
Sew on the side parts. We make a hem, because such fabric is difficult to sew. We don't stitch it all the way through.
We sew the elastic to the skirt and put it on our model. If you wish, you can make a beautiful bow and sew it to the elastic band at the back for beauty, and also make a hair clip.
Patterns
You can find ready-made options, but it’s better to do it yourself. It's easy to create a template for a doll. With its help you can develop any style.
Do-it-yourself dress patterns for dolls will help you quickly complete the task. For the template you need to take measurements. Then you should draw the main pattern. Based on it, different models are created.
Skirts for Monster High dolls
Fluffy skirt with bow
For this model you will need:
- textile;
- beads of two colors for decoration;
- floss threads;
- wide elastic band;
- threads, sewing tools.
Description
Using the proposed pattern, we cut out the details of the panel and bow.
Sew the skirt along one side seam. We process the cuts of the side seams, the top and bottom edges with an overlocker. Fold the bottom edge of the hem and stitch.
By stretching the elastic, we attach it to the upper edge of the panel. Fold it right side inward and sew the second side seam.
We fold the blank for the bow in half along the long side, sew along three sides, and turn it inside out. We tuck the seam allowances of the fourth side inward and stitch. We sew the bow into place by hand - see photo.
Double layer mini skirt
To make it you need:
- fabric for the skirt - satin, silk are suitable;
- fabric for a petticoat - guipure, lace, mesh are suitable;
- Velcro tape (Velcro), narrow, small piece;
- contrasting threads for stitching and threads to match the color of the fabric.
How to do
For the top layer, cut out a strip of fabric with room for frills. For the bottom layer, cut out a piece of longer length. We also need to cut out a belt - a strip of the required length. Since this model has a low rise, we determine the length of the blank for the belt by measuring the volume of the doll’s hips.
We process the cuts of all parts (except the petticoat) with an overlocker. We fold the bottom edge of the panel and stitch it with contrasting threads. We tuck and sew the top edge of the belt with contrasting threads. We gather and baste the lower and upper skirt to the waistband. We process the cuts with an overlocker. We attach the details to the belt with contrasting threads. Sew Velcro tape to the corresponding sides of the seam.
The skirt is ready.
Step by step lesson #2
If you want to spice up the decoration a little, try using a suitable photograph or drawn image of a real ballerina as the base:
Print two mirror copies of the same picture (you can rotate it 180 degrees around the vertical axis using almost any graphics editor). Cut and glue them together so that the finished figure is double-sided. We used this vintage image (clicking on the image will open the photo in full size, which you can use in your work):
While the base dries, cut out two identical rectangles from thick paper. Fold them like an accordion, then bend the resulting workpiece in half:
Glue the edges of the paper to each other on the inside of the folded accordion. When opened, the resulting “fans” should completely cover the hem of the drawn ballerina. Now you need to glue the blanks to the figure. Slightly unscrew the outer edges of the accordion and give the pack a curved shape. Apply a little glue to the edges and press them to the edges of the base. Glue the second “fan” on the other side of the figure.
To give the pack even more volume, you can attach another thin tissue paper on top of the first skirt:
To make a pendant, poke a small hole in the top of the figurine and thread gold or silver thread through it.
Ballerina made from napkins
And finally, the most unusual lesson! If you have a piece of thin wire and a napkin on hand, you can make a model like this:
To begin, twist the wire into a basic silhouette of a man with his arms raised.
Next, divide a regular table napkin into layers (usually there are 2 or 3). If there was a bright design on the front side, use this layer for something else, it will not work for our project.
Set aside a few intact layers of paper and tear the rest into strips about 3cm wide. It is very important to do this by hand and not with scissors. Take the wire “skeleton” and start wrapping it with strips of paper. As the paper covers the figure, apply colorless office glue diluted with water over it.
Basic pattern of a new straight skirt for Barbie
Using this pattern, you can model various styles of skirts for your favorite doll.
Straight skirt with blind vent
For this model, you will need to cut out one piece with a fold for the front panel and two halves of the back panel. In addition, you will need to cut a strip for the belt.
Straight skirt with slit
For this model, you will also need to cut out one piece with a fold for the front panel and two halves of the back panel. In addition, you will need to cut a strip for the belt.
Flared skirt
In this model, the front panel is made one-piece, and the rear panel consists of two parts. There is a clasp in the center of the back panel.
Outfit for a girl from newspapers
Newspapers can be found in every home. Excess waste paper is usually thrown away or donated. This is not necessary. The material can be useful for creating an original outfit. A dress whose skirt consists of cone-shaped horns will help you stand out from other guys.
Tools
To work you will need a minimum set of tools:
- textile;
- newspapers;
- scissors;
- glue;
- stapler;
- threads;
- needle.
The fabric is necessary for sewing the base of the suit. When working, you can follow the method described above.
The first stage will be the design of the top. To do this, wrap the top in newspaper and try it on. Carefully sew the paper edition to the base. Newspaper is quite fragile, so be careful when sewing and do not pull the stitching too tight.
Tip : the newspaper top can be folded tightly like an accordion and then slightly straightened. This will help create a full top.
In order to make horns, the working material should be wrapped and formed into a kind of cone. We secure the edges with a stapler. Such a horn is attached to the lining with a corner using glue. Here you can show your imagination by making several layers for pomp. You will get an unusual tutu skirt.
Pleated skirt
To work you need:
- thick fabric for a skirt;
- thin fabric for bias tape;
- threads, sewing accessories.
Description
We cut out the blank for the skirt panel according to the doll’s measurements. For us it is 13 by 80 cm. It is better to take the length with a margin, since it takes a lot of fabric to form folds.
We lay one-sided folds 10-15 mm wide and secure them with pins.
Iron the folds.
At a distance of 5 mm from the top cut, we machine stitch, fixing the folds.
We perform the second line, retreating 2 cm from the top cut.
We overlock all cuts except the cut along the waist line. We stitch the panel along the side seam, leaving an open area at the top 4 cm long. We make a line at a distance of 10 mm from the edge.
In the open area under the fastener, we turn back the allowances on the panels and fix them with a stitch, retreating 5 mm from the edge.
We make a 7 mm turn along the bottom edge, stitching at a distance of 5 mm from the fold.
On the bias binding we make two counter turns and iron it. We sew at a length of 25 cm. Then, without removing the part from the machine, we put the skirt with the top cut into the bias tape and sew further through both parts.
We finish by stitching the free end of the binding.
A4 sheets
A4 writing paper comes in different densities and colors. A crumpled sheet, cut out figures, and an openwork pattern look advantageous.
The easiest way to create a voluminous silhouette is as follows:
- cut a circle out of paper;
- draw two lines from its center to the edge, at an angle of 10-15 degrees;
- cut out the resulting triangle;
- Gently bend the circle and glue the sides.
Using threads and a needle, a stapler and staples, glue, three-dimensional circles of different diameters are attached to the canvas. The dress will be covered with needles, reminiscent of a cloud or fish scales.
Skirts for Barbie dolls
How to sew a skirt for a doll without a pattern
We need to prepare:
- fabric - rectangle 11.5 cm by 19.5 cm. If desired, you can sew a skirt from two types of fabric, then divide the total size into the necessary parts;
- elastic band, width 5 mm - 10 cm;
- threads, sewing tools.
Description - how to sew a skirt
Let's consider making a skirt from two types of fabric.
Place the strips of fabric right sides together and stitch them together. The stitching can be done either on a sewing machine or by hand. We sew the edges of the allowances with a zigzag stitch or use an overlocker.
Iron the seam. Stitch the top and bottom edges. We fold the bottom edge and stitch it.
We retreat 15 mm from the top cut and attach the elastic, stretching it.
We first sew the seam in the direction coinciding with the direction of tension of the elastic.
Then we sew the stitch in the opposite direction.
It is very important to stretch the elastic evenly so that the fabric is gathered along its entire length.
We fold the top cut, covering the elastic band with it. Sew to form a belt.
How the doll's skirt looks at this stage on the front side is shown in the photo below.
And the next photo is a view from the reverse side.
Fold the skirt in half, inside out, and secure the edges with basting or pins.
We sew at a distance of 15 mm from the edge.
We sew the cuts and iron the seam. The skirt is ready!
The many faces of boho
The style is so diverse that the designers had to highlight several separate “branches”, each of which has its own characteristics. Tildomans believe that their boho or boho-chic doll has a soul. Therefore, when starting sewing, it is worth determining the style in advance:
- Classic. Traditional boho is a classic combination of velvet and corduroy, wool and knitwear, decor in the form of antique lace, beads, and wooden buttons.
Classic boho tilde Tilde in a boho outfit
- Glamor. This branch contradicts classic boho, but has a right to exist. He is impressed by lightness, luxury, and contrasting combinations. When sewing glamorous tildes, furs, bright floral prints, satin or chiffon, a lot of guipure and lace can be used.
Tilda in glamorous style
- Eco - naturalness, naturalness in every detail. Linen and cotton, natural shades, vintage decorative elements, decorations for dolls made of leather, suede or wood.
Doll in eco style Eco - naturalness and naturalness in every detail
- Hippie. The most original and striking phenomenon in fashion, which is characterized by ethnic elements and prints, embroidery, knitted details, fringe and even burlap.
Tilda in boho-hippie style
Tip:
Tilda snail Tilde bears Yes, there is a ranking of directions, but no one can forbid combining, imagining, and creating. It is through experimentation that completely new design ideas for do-it-yourself clothing for dolls are born.
A must-have item in your wardrobe
The idea seems like a joke and yet it is a fact: couturiers offer fashion fans to acquire such things. When going to a buffet party, perhaps you can wear a paper dress. A man in a strange outfit will not shock anyone; on the contrary, he will charm everyone.
We also recommend looking at decent options on this website: https://gidrukodeliya.ru/
It's easy to make an outfit with your own hands. Durability and durability are a big question. In fact, is this the most important thing in life? Beauty, fantasy, and artistic talent come first.
Having chosen a photo of a dress from paper from one of the couturiers, having come up with something yourself, you need to get started. Absolutely all types of paper are suitable, including banknotes, note sheets, envelopes, and napkins.
Fixed skirt
We fold the top cut and secure it with a basting stitch.
We outline the centers of the front and back panels, and the places of the side seams. Then I sew it myself like this: I put the skirt on the doll and, having placed the marks, I fix the four points of the upper cut. Then I lay down the folds and secure them with pins or stitches directly on the doll. Folds can be made either counter or one-sided.
Skirt for a doll made from leftover fabric: video master class
Description
You can make a petticoat for a doll from tulle or use such a skirt as an independent piece of clothing.
This is a very simple option for making a fluffy skirt. The given material consumption sizes are approximate. You can change them according to your wishes, varying the length and splendor of the product.
For the skirt you will need:
- tulle – 60 cm;
- elastic band – 32 cm.
Description
Cut a piece of tulle into strips 5 cm wide and 30 cm long.
Fold the strip in half and place it as shown in the next photo.
We pass the free ends of the strip through the loop - see photo.
We do the same with the rest of the ribbons.
When the required splendor is achieved, tie an elastic band and cut off unnecessary tails.
The tulle skirt is ready!
Required materials
To create such an original skirt, we will need:
- Garbage bags of different colors;
- Gift ribbons for packaging;
- Fatin;
- Green grass, which can be found in a florist shop;
- Colored satin ribbons;
- A roll of brightly colored corrugated paper;
- Catchy serpentine.
A Hawaii-style party skirt can be made from fabric with an exotic print - palm trees, large flowers, parrots; the length of the future product is determined according to individual measurements. The main thing is that the created masterpiece does not hinder movement during the rhythmic dance.
