Storing bulk grains in special containers is a great way to keep your kitchen drawers clutter-free and to be able to easily find what you need. Stores offer a huge variety of boxes that differ in material, design, and, as a result, cost. However, it is very easy to make such jars for cereals quickly and easily with your own hands; you don’t even need special materials. Any container and various decorative elements that are likely to be found on everyone’s shelves will do.
Step-by-step master classes on making such useful kitchen appliances can be found in this article.
Rack with pull-out shelves
A small narrow cabinet with pull-out shelves will also look original.
You can see these in the supermarket. Make several large drawers for cereals and pasta, a couple of smaller ones for coffee and tea, and very tiny ones for spices. Such a cabinet, especially if it is designed to match a kitchen set, will look organic. Pull-out shelves make it easier to find the products you need and organize the arrangement of products.
If you are not a fan of large stocks, you can make such a rack in the form of a small decorative cabinet placed on the kitchen panel or built into the set. In any case, such shelves are convenient and easy to implement.
Types of shelves for storing spices
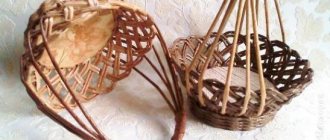
In the kitchen space, jars are placed on separate shelves and special built-in structures. Modern railing systems allow you to beautifully and functionally fit any container for nutritional supplements into the interior - from a set of test tubes to wicker baskets. In such designs, both glass and wooden coasters look equally good.
A common solution is a separate drawer for storing cans or a small cabinet. Cardboard organizers and boxes woven from paper tubes keep flavors separate and easy to find.
Introduction to decoupage
Let's present a master class on making cereal jars using the decoupage technique.
Let's start decorating. At the bottom of the can we draw a semicircle. This is done for convenience - through such a window the contents of the jar will be visible.
We glue the rest of the jar with white napkins and PVA glue. After drying, you can cover the top of the napkins with white gouache or acrylic paint. This is done so that in the future the applied pattern will not be translucent.
From the napkins with a pattern that were selected and prepared, we cut out the necessary fragments. Carefully remove the two bottom balls of napkins from them.
You can begin the decorating process only after the prepared jar has completely dried. Lubricate the area where the fragment will be glued generously with PVA glue and carefully glue the pattern. Smooth it with a brush liberally moistened with PVA glue.
Using these sequential steps we cover the entire prepared surface of the jar.
We decorate the window. To do this, lubricate the border line with Moment glue and glue the tape.
Let the work dry completely. Of course, you can complete the decorating process here, but we suggest continuing. Using acrylic paints we give the drawing more “life” - we draw the petals and centers of the flowers, as in the photo below.
Again, wait until the jar is completely dry. We finish the work - open it with varnish, preferably acrylic, but construction grade can also be used. After the varnish has completely dried, the jar is ready for use! The lid can be chosen to match the color of the picture! We leave it unchanged, but using imagination, it can also be decorated.
You can also use tin cans of coffee or, for example, baby food for decoupage.
But in this case there is one drawback - there is no way to leave a “window” so that the contents of the jar can be seen. However, there is a way out! You can buy stickers and sign the contents. Or simply print them from the Internet. Below we provide several templates.
The simplest decor for a jar with a metal lid can be simply a beautiful decor with ribbon, braid or fabric around the neck. It will be most effective if the jar is glass. Then we paint the lid with acrylic paint. And the jar is ready!
Decoupage glass jar
In the kitchen, the housewife uses jars and jars to store bulk products and spices. It’s boring to store food in simple glass containers, so try to create a decoupage glass jar that will support the style of the entire room and become a functional and attractive decorative item.
To work you will need:
- any jars you want to transform;
- acrylic primer;
- napkins with a pattern;
- PVA glue or special decoupage glue;
How to apply
In order for the jar to be bright, beautiful and original, it should be designed correctly. Ideas:
- decoupage style;
- hand painted;
- sackcloth.
If you decide to use the first method, then you can use any style. Cut out a beautiful pattern from a napkin or card and then attach it to the jar.
It is best to choose an opaque container for this technique. But transparent fragments will also work. This way the contents of the jar will be visible.
Handmade painting will make the jars original and unique. You can draw simple geometric patterns or complex ones, depict your favorite animals, people, or draw flowers.
There is also a simple and quick decoration option - burlap.
It will fit into the interior of the kitchen and give it a country style. Burlap itself is a bit rough, so it's better to use lace, buttons or small shells.
You can decorate the whole jar or part of it with burlap.
It is worth remembering the disadvantage
: such containers are difficult to wash on an ongoing basis, so you will have to frequently update the interior. Despite the correct storage, it is important to remember that any cereal has an expiration date. Its appearance may remain unchanged, but the smell changes.
It is recommended to attach a label to each container indicating the time of purchase of the cereal.
Storing bulk grains in special containers is a great way to keep your kitchen drawers clutter-free and to be able to easily find what you need. Stores offer a huge variety of boxes that differ in material, design, and, as a result, cost. However, it is very easy to make such jars for cereals with your own hands; you don’t even need special materials. Any container and various decorative elements that are likely to be found on everyone’s shelves will do.
Step-by-step master classes on making such useful kitchen appliances can be found in this article.
Materials for making spice sets
When decorating a kitchen island, spice sets are often used.
Such kits contain from two to eight containers. Traditionally these are jars for salt and pepper. The set includes jars for aromatic herbs and pepper.
Containers for spices can have small holes or have a fully opening lid. Such containers are equipped with a teaspoon.
Beautiful containers are made from the following materials:
- Glass can be transparent or colored and with ornaments.
- Ceramic material is environmentally friendly.
- Metal products are suitable, but only moisture-resistant ones.
- Wood makes lightweight containers.
Cleanliness Assistants
“Little” helpers will help maintain cleanliness and order, which can be placed on the internal or external surfaces of the cabinets:
- plastic hanger-holder for waffle towels, which will look ergonomic and stylish in any kitchen. The accessory just needs to be hung on the door handle;
- clip for a washcloth washing dishes. The mechanism is attached with a magnetic holder to the surface of the sink, and the sponge is always at hand, without interfering with washing dishes;
- plastic container stand for storing washcloths and detergent;
- spice bag holder, which is great for organizing spice packs of any size;
- silicone pocket for brushes and washcloths, which is attached to the faucet and does not interfere with its operation;
- hanging shelves that will help tidy up and fill empty space in the closet;
- clip holders for towels and napkins, thanks to which you can place items on the cabinet without drilling holes;
- a wall-mounted liquid soap dispenser, thanks to which the walls and surfaces of cabinets will not get dirty when washing your hands.
An audit of cabinets and kitchen shelves should be carried out at least once every month and a half. And ideas for order in the kitchen with videos can be found on the pages of many sites.
A high-quality dining table simply must…
Withstand two 80%
Withstand an electrician with a new chandelier 20%
Voted: 5
How to make a shelf
Modern furniture showrooms offer a huge range of shelves for every taste. However, it is not always possible to find the right size and appropriate style design. A DIY spice rack will solve the problem and add comfort and coziness.
All you need are simple skills acquired in craft lessons at school, a small set of tools and a desire to make an original shelf yourself.
From plywood or furniture board
The material can be used from old unnecessary furniture or purchased at a hardware store. The tools you will need are a hacksaw and a screwdriver.
- Decide on the dimensions - study the location for the future structure, draw the shape and design.
- Choose a material - preferably a soft wood, the thickness of the board is about 18 mm, the length and width - so that there is as little waste as possible.
- Mark the contours of the blanks on the shield and cut with a hacksaw.
- Sand the edges with sandpaper - first coarse, then fine.
- Coat the parts with varnish.
- Assemble the structure using self-tapping screws.
Buy reliable metal loops for fastening. The product can be decorated to your taste, for example, decoupage in the same style as jars will allow the stand to fit perfectly into the kitchen interior.
Magnetic holder
This method will help out when there are very few free horizontal surfaces in the kitchen. Placing seasonings on a vertical wall or refrigerator door will make it much easier to find the right spice if you have more than a dozen items in your collection.
How to assemble such a structure:
- Find the required number of jars with a volume of about 120 ml.
- Buy powerful neodymium magnets measuring 6x1.5 mm at the rate of 3 pieces per container.
- Clean the bottoms with sandpaper.
- Using epoxy glue, glue 3 magnets to the convex part of the bottom of each jar, distributing them evenly across the diameter.
- Write names or stick labels on the lids.
Neat rows of spices can be placed on a free space of the wall by attaching a metal screen of the required size to it.
Simple wooden shelf
Do not rush to throw away the wooden boards left over from the renovation. It is easy to build an original hanging structure in ethnic style from them.
Instructions for action:
- Determine the dimensions of the workpiece and draw the markings.
- Cut along the contours.
- Drill holes with a diameter of 10 mm in each corner.
- Sand the workpiece with sandpaper.
- Cover with varnish.
- Pass two pieces of rope with a diameter of 8 mm and a length of 1 m into the holes - each on one side of the board.
- Tie large decorative knots at the ends of the ropes.
Hang the product on strong hooks previously screwed into the wall. In this way, you can assemble an entire rack using several identical parts.
Condiment cabinet
To make a wall organizer, you can use an unnecessary drawer from an old chest of drawers. You will need a piece of plywood, ingenuity and patience.
- Remove the handles from the drawer and cover the holes with putty.
- Paint the workpiece.
- Cover the bottom with wallpaper from the inside.
- Draw the outlines of the dividers on the plywood, carefully taking measurements from the inside.
- Cut out the elements along the contour.
- Paint the details.
- Install partitions using wood glue or liquid nails.
- Cover the craft with varnish.
- Screw the metal hinges onto the self-tapping screws.
The cell sizes are determined based on the size of the jars. The main requirement is the ability to freely remove the containers and put them back in place.
Screw-on cans
Space saving and functionality are the motto of the option with the location of condiments at the bottom of the shelf or cabinet. This way you can place containers of impressive size without taking up free surfaces.
How to do it:
- Choose jars with screw-on metal lids.
- Attach the covers to the screws so that the threads are on the bottom.
- Screw the containers into the lids until they stop, having first filled them.
- If two rows are planned, then longer jars are selected for the farthest one to make them easier to get out.
You can stick bright labels on the containers, and paint the lids in one shade for a harmonious composition.
Alchemy laboratory
Probably, almost everyone dreamed of becoming a wizard in childhood. Now you can at least partially realize your dreams! Small narrow test tubes with spices and wide flasks with cereals and pasta will look very impressive on a hanging shelf.
You can also add mystery bottles of vinegar and vegetable oils. This design looks very interesting and mysterious. However, be careful not to hang it over the stove, even if your beakers are heat-resistant: constant heating does not improve the properties of the food.
An interesting technique: Containers with glass of different colors can add originality to an already interesting idea. If you decide to place vegetable oils on this shelf, make them aromatic - add herbs or berries to them. This will make your shelf look even more like the shelf of a wise wizard.
As a decor for the kitchen
Love a rustic-style space? Then place beautiful jars for spices, cereals, tea and coffee on small open shelves. Choose cute lids for them - for example, wrapped in fabric. It is not necessary to buy them identical: on the contrary, different ones, but decorated in the same style, will look better.
Do not place more than two or three containers on one shelf - this creates an overloaded effect and does not look as impressive as five or six shelves with several cans.
When it comes to sizes, also be creative - choose containers of different sizes, but of the same shape. In this case, the kitchen will not look boring, but you will be able to avoid clumsiness.
Interesting addition: Don't try to place the spices like this. Small, lightweight jars are difficult to keep organized on an open shelf. It's better to place them in a small wall basket. Alternatively, it can be hung from one of the shelves. Just make sure the fasteners are strong enough.
Solid storage options
To say that there are many ideas for storing spices in the kitchen is an understatement. It all depends on the volume of spices, the space available in the kitchen and the frequency of their use. If they are used very often, and there are always a lot of spices in stock, it is worth taking care of a thorough, spacious storage. You will have to spend time and not a lot of money to create it, but you will be able to create a system for storing spices in the kitchen with your own hands.
Niche in the wall
To create it, you can use a wall near the stove, but not too close, so that the spices do not overheat. The depth of the niche corresponds to the size of the jars used for storage. The height is a multiple of the height of the cans plus 4-5 cm on each shelf to make it convenient to reach.
Jars for storing spices in the kitchen using this method should be chosen from tinted glass or plastic, since there will be no doors in the niche. Those spices that are used most often can be stored in any jars, since they simply will not have time to spoil.
Arranging storage if you already have a niche is not difficult. To do this, you need to install the shelves at the correct height. If the depth of the niche is slightly less than the diameter of the can, then you can stretch a rope, an elastic band, or nail thin strips of wood with a small indentation (up to 2 cm). If this option does not fit into the style of the kitchen, then metal strips will do. You can buy them in the store.
If the depth matches the size of the cans, then no limiters need to be installed.
Stylish spice storage option for modern kitchens
Boxes
You can create convenient storage space using drawers and baskets. Moreover, both horizontal and vertical ones are suitable.
The first option is horizontal, that is, ordinary kitchen drawers. In order for spices to be conveniently placed in them, the drawers must be deep enough. Storage options:
In order for the jars to be placed comfortably “lying down”, you need to make steps for them, but not at a right angle, but at a sharp angle. This way the contents of the jars will be easy to see. Use special plastic boxes with handles that fit into the kitchen drawer. If the jars are small, then they can be placed in a box. And for easy identification of the seasoning, stick a sticker with a signature on the lid.
One drawer can store spices in jars and open ones.
Vertical drawers are often included in modern kitchens; they are also convenient for storing spices. Such a box looks like a long, deep storage without side walls. Sides or metal strips prevent cans from falling. This box moves along guides located at the bottom, so there is no need to overload it.
The same type of box, although it will most likely be a pull-out wall, can be made behind the refrigerator if there is a distance of 15-20 cm between the wall and the household appliance. It will have certain modifications:
One wall is covered with fiberboard and plywood. It is necessary to have low sides, approximately 1/3 of the height of the shelf. Pulls out on wheels.
IKEA spice drawer design
Non-standard version of a spice box
Advice! In this spacious storage you can store not only spices, but also canned goods, sauces, and useful kitchen utensils.
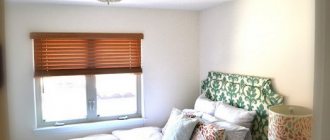
Hanging shelves for refrigerator
If you have easy access to the side wall of the refrigerator, a wall-mounted structure that can accommodate sealed jars for bulk products can be a great solution for a small kitchen.
This way they won’t take up precious space on the shelves, but will always be in order and in sight. This method is a kind of organizer that will greatly facilitate the search for the necessary ingredients for cooking.
Tip: For a white refrigerator, choose shelves that match the color scheme in the kitchen. If you bought a more original colored unit, choose a suspended structure in a contrasting shade.
Rack with pull-out shelves
A small narrow cabinet with pull-out shelves will also look original. You can see these in the supermarket. Make several large drawers for cereals and pasta, a couple of smaller ones for coffee and tea, and very tiny ones for spices.
Such a cabinet, especially if it is designed to match a kitchen set, will look organic. Pull-out shelves make it easier to find the products you need and organize the arrangement of products.
If you are not a fan of large stocks, you can make such a rack in the form of a small decorative cabinet placed on the kitchen panel or built into the set. In any case, such shelves are convenient and easy to implement.
DIY spice jars. Stage two: craquelure
The second stage is a little more unusual than the first. I give regular plastic jars an aged look. I use sandpaper to smooth out any irregularities in the glued drawings (if any) and smooth out the transition from paper to jar on the inscriptions.
Then I proceed to the most important thing - two-step craquelure
. Using a brush, I apply three layers of shellac - this is the first step. Shellac dries very quickly, so I didn't have to wait long.
Since there were three jars, as soon as I finished covering the third jar, I immediately moved on to the next coating of the first and so on. Shellac causes jars to age and turn yellow right before our eyes.
After applying the third layer there is almost no wait. The second step in this craquelure is gum arabic ESPRIMO
(see photo below). It must be applied immediately to the still sticky shellac. I applied it with a piece of regular sponge, and then carefully smeared it with my finger so that the layer of gum arabic was not too thick. I did not apply gum arabic to the napkin fragments of the drawings so that the drawings would remain without cracks.
I left the jars for 6 hours for the gum arabic to dry naturally, and then dried it thoroughly with a hairdryer. Under the influence of a stream of warm air, cracks are very clearly visible and fixed.
But so far the cracks are not visible. Gum arabic is almost transparent. We need to make these cracks noticeable - this is how the “patina of antiquity” will appear on the jars.
To highlight the cracks, I rubbed them with gold oil paint using a cotton swab to remove makeup. I thoroughly wiped off the remaining paint with the same swab so that the gold remained only in the cracks.
This is the antiquity effect I got.
Three jars are decorated in the same style.
I did not age the lids using craquelure, and so that the lids did not stand out with their whiteness, I covered them with POLYCOLOR acrylic paint in the color “Ivory.”
Then I picked up a little gold paint with a dry brush and lightly walked over the lids, imitating “peeling” gilding.
To secure all the layers of craquelure, I covered the top of the jars using the second step with a layer of shellac and left it to dry. She applied shellac carelessly and did not wipe away small stains so that the appearance of aging would be as natural as possible.
After the shellac dried, I decided to focus on the inscriptions. I applied dots around the printed inscriptions using a golden acrylic outline - this technique is also called point-to-point
. I left it for 20 minutes until the dots completely hardened.
Only after this I applied two finishing coats of shellac to the jars and lids.
These are the “aged and cracked with time” spice jars I made with my own hands. They will look great on a wooden shelf or stand in a rustic or retro style.
I came across a jar of an interesting shape. And I wanted to decorate it, emphasizing the rounded edges. I chose several different techniques: decoupage, crackle on eggshells, frill and bow, sewn by machine
I also paid attention to the “glamorous” color
In the style of minimalism
This decor will allow you to view the contents of the jar in full. If this is not necessary, they can be decorated in any color. This decor does not require much effort and does not imply any skills or abilities.
If you couldn’t find slate paint, there is no need to despair. You can make it yourself by simply mixing black paint and tile grout. For a glass of paint you need 2 tablespoons of grout and a little PVA glue. Stir the mixture thoroughly. If everything is ready, let's start decorating.
Turn clean and dry jars upside down during the day. This needs to be done on old newspapers or unnecessary paper. Then we cover them completely in one tone with spray paint. In our case, white. This way the can will look most impressive in combination with a black sticker. If you decided to leave the jar transparent, skip this point.
Another example of a simple decor for spice jars can be prepared jars with inscriptions on the ropes. But the inscription needs to be processed. This can be done using construction or acrylic varnish, or pasted over with wide tape on both sides.
Another beautiful and original solution could be decorating a jar with decoupage.
The manufacturing process is very simple. Using PVA glue, glue several balls of napkins onto a clean jar. Let it dry. Meanwhile, remove the 2 inner balls from the decorative napkins and cut out the decorative elements. Carefully cover the jar with elements and smooth it with a brush with glue. Let the jar dry completely and cover it with glue. The spice jar using the decoupage technique is ready.
There are many decor options. From simple painting of lids, gluing stickers to decorating with textiles, artificial flowers, polymer clay, strands, ropes, beads, pearls and everything you can imagine.
We will provide several examples of varying complexity for inspiration.
It’s very easy to create beauty and comfort with your own hands from simple materials! The main thing is not to be afraid of experiments. Everything will definitely work out!
Requirements for jars for cereals
When considering containers when purchasing, you need them to meet certain requirements:
- the lid should fit tightly to the jar;
- you need to take into account the number of family members: for a large family you will need large containers, and for a small family – small capacity containers;
- when choosing a material, you need to know that low-quality plastic has its own unpleasant odor, which can easily be transferred to cereals; Containers made of wood and metal retain the odors of the previous product for a long time;
- containers for cereals do not have an expiration date;
- the container should have a wide neck so that it is convenient to wash;
- preference should be given to tall containers, since wide cans take up all the space below, and you can’t put a container on top, since it, like the bag you want to put on top, will constantly fall;
- In addition to the height of the container, you also need to choose its shape: the ideal option is a rectangular product.
What materials are best to use
There are no special restrictions on the choice of material. Perfect for:
Cereals must be immediately poured into a jar and not left in plastic bags. Otherwise, mold may appear, which can lead to the appearance of toxic microorganisms and simply an unpleasant odor. The product can no longer be eaten.
Before you pour the cereal into a jar, be sure to check it for the presence of insects (especially flour). There may be a Surinamese flour beetle living there, which not only eats the product, but also contaminates it. Eating such cereals can lead to poisoning.
If you choose a plastic jar, make sure it is of good quality. Otherwise, an unpleasant odor may arise, which over time will be transferred to the cereals. It is also worth remembering that metal containers retain the same odors for a long time.
Drawers
Probably, almost everyone has seen racks for selling tea and coffee - a large number of small sealed boxes with transparent side doors.
You can allocate a separate area in the kitchen for such tanks, or you can order an original kitchen set, where such tanks are installed in any order. This will add originality to the kitchen and will look like an original design technique.
The price for such a set will be high, but the final result will please any lover of original furniture.
However, there is one caveat. If you are not particularly careful, you will have to refuse this option. You will have to be careful to keep the clear doors clean and the containers full. Half-empty, they will not look so aesthetically pleasing.
As you can see, there are many ideas that completely refute the standard ideas about how you can store spices and bulk products in the kitchen. We tried to collect the most original solutions for you, but this does not mean that you should limit yourself exclusively to them.
You can use one of our ideas for storing cereals and dried herbs, or you can come up with your own based on them. Don’t be afraid to experiment with interior design – perhaps you will be the one who can say a new word in kitchen design.
Where should you not store cereals and spices?
It is impossible to begin deciding on the placement of bulk products without understanding which places are best to avoid.
- First of all, you need to remember that storage in bags and cardboard boxes is strictly prohibited. Avoid this if you don't want . Please note: Spices also do not tolerate such storage conditions well - they quickly lose their aroma. And in general, the taste of products deteriorates if they are not stored.
- Drawers and shelves above the kitchen sink are a bad choice. High humidity promotes the formation of dampness and, as a result, mold. And if cheese with it can be considered a delicacy, then hardly anyone would consider moldy buckwheat a gourmet delicacy.
- Storing cereals in the refrigerator is not the best option. Firstly, condensation may form there and they will become damp. Secondly, they will simply take up space there - bulk products do not need to be kept cold for preservation, just a dry place and sealed containers are enough.
Having figured out where it is better not to place cereals and spices, let's choose the nine best options that will help organize them in a small kitchen.
There are many interesting ideas for storing cereals and spices that are easy to implement with your own hands. Let's see the most original and convenient ones?
Cap characteristics
Since the main task of containers for bulk products is to protect the contents, the specific design of the lid itself is no less important. At the moment there are several options.
- A design that simply rests on the container is a simple method and not very reliable, since it is not airtight, and if it falls, the contents can easily spill out.
- The model with a latch is an option typical for containers with plastic lids. This alternative is reliable, but with frequent use the structure may simply become loose.
- Screw ones are an equally lightweight type of covering system. The main disadvantage is that you need to use both hands, which is not very convenient when cooking.
- Bamboo lids with a seal - seal the hole like a cork, securely fastened thanks to a rubber or silicone gasket. These options are typical for models made of glass or ceramic. Equipped with a yoke lock, they are securely fixed in any condition using a hinged loop. Similar to the previous option, such systems are equipped with a soft seal.
Tips on what to look for
According to buyers, in 2022, more and more preference is given to original series of similar jars. They are distinguished by their unusual design and specific focus. And yet, an aesthetic appearance does not guarantee high-quality storage and ease of use of products, which may simply lose their original properties. Therefore, when choosing, it is better to consider the following recommendations.
- Basis for manufacturing. Some materials, such as wood, are not suitable for storing fragrances. It has pores and absorbs any odors, such as aromatic coffee; there is simply no point in using the dishes for anything else after it.
- The next selection criterion is the density of the lid. Because the kitchen is a place where different smells are constantly hovering, which are actively absorbed into the product, not disappearing even after cooking. This is not the least important thing that should be taken into account in order to avoid mistakes when choosing. Otherwise, even the penetration of bugs, including food moths, cannot be ruled out. This also prevents the appearance of dampness. The best containers are those with a hinged lid and a seal.
- Inability to let in light. Options that do not transmit ultraviolet radiation are more appropriate if cereals are stored not in a closet, but on open shelves.
- Form factor. When there is a small buffet in the kitchen, you should choose rectangular or square jars; they will fit more compactly on the shelf, unlike their cylindrical counterparts. Narrow long jars, almost equal to the height of the shelf, will also fit. But larger analogues will be appropriate for preserving popular products.
In the case of sets, it is better to make the arrangement much more compact on a special stand.
VIDEO ON THE TOPIC ARTICLE
This article described how to make containers for cereals from glass containers. However, they can be made from almost any available materials, be it plastic bottles, tin cans or even cardboard. Master classes on performing such work are presented in the selection of videos below.
Do-it-yourself containers for bulk goods using decoupage technique. Master class with step-by-step photos.
Dymskaya Nadezhda, 7th grade student of the Nizhnekuryatskaya Secondary School of the Karatuz district of the Krasnoyarsk Territory.
Head: Ksenia Alekseevna Kruglova, technology teacher at the Nizhnekuryatsk Secondary School, Karatuz district, Krasnoyarsk Territory.
Description of work:
this work was performed by a student with disabilities.
This school year we finally moved to a new school! Therefore, bulk jars are necessary not only for decorating the new “Cooking” cabinet, but also for storing cereals, sugar, and salt. Our MK, we hope, will be of interest to teachers of technology, additional education, creative students, and parents. Purpose:
bulk jars are in demand in any kitchen.
You can make them not only for yourself, but also as a gift, for example, for housewarming, birthday, mothers for Mother's Day or March 8th. Purpose:
making containers for bulk products.
Objectives:
– learn to create containers for bulk materials;
– master the decoupage technique; – instill aesthetic taste; – develop hand motor skills; – develop perseverance, hard work, accuracy. Materials and tools:
– glass jar;
– white napkins or toilet paper; – decoupage napkins; – PVA glue, “Moment”; – gouache, brushes; – decorative zigzag tape; - scissors. Sequence of work:
1. We use a liter jar as a container for bulk materials. Wash it well, dry it and cover it with a lid.
necessary materials
yellow
Decorating your home is easy using scrap materials. Glass and tin jars that are thrown away as unnecessary can become the basis for creating attractive decorative items. Just look at the photo of decoupage cans to understand that in this way you can make the kitchen cozy, while the costs will be minimal.
Making containers using wine bottles
If you don’t find unnecessary jars, you can get by with bottles. The result will be unusual kitchen devices that do not allow ultraviolet rays to pass through and will protect cereals.
You will need:
1) Wine bottles;
2) Cork sheet;
3) Glass cutter.
Stages of work:
1) Using a glass cutter or grinder with a special disc, we saw off the neck of the bottle, obtaining an even container. Sand the edges.
2) Cut out even circles from a cork sheet, the diameter of which will be equal to the size of the resulting bottle holes. We insert the improvised lids into the container, tightly closing the hole.
The cereal jar is ready! During production, you can use bottles of unusual shape or with a pattern, which will give the finished product even more originality and beauty.
Below are photos that will demonstrate decor options for cereal jars and inspire you to create your own original helpers in the kitchen.
DIY spice jars
Making your own set for seasonings allows you to solve the problem of accumulated empty containers and save on the purchase of household utensils. This is also a great opportunity to bring your idea to life, to create things that cannot be bought. For creative people, the process itself will bring a lot of pleasure, and the results will delight loved ones.
Decorating glass jars
Good use in the household can be found for containers of sour cream, yoghurt, and baby food. The main thing is that the containers have tight-fitting lids. Before turning a collection of glass jars into a beautiful set, they must be thoroughly washed and the paper labels removed.
You need to prepare:
- PVA glue;
- tassels;
- scissors;
- paper napkins with a beautiful image;
- thin file;
- putty;
- acrylic paints;
- small plastic bag;
- varnish
When the workplace is prepared and everything you need is at hand, start decorating.
Step-by-step description of the process:
Degrease jars with alcohol or acetone. On a napkin, separate the white layer from the colored one and cut out a motif of a suitable size. Carefully apply PVA to the application site. Pour a puddle of water onto the file. Place the cut out silhouette face down in the liquid. Carefully smooth out all wrinkles and folds with your fingers. Slowly drain excess liquid from the file. Attach the file with a napkin to the area coated with glue and smooth out all errors through the cellophane, remove bubbles. Remove the file and coat the top with PVA applique. Mix the putty with PVA (ratio 1: 1) and put the mixture in the corner of a durable plastic bag, secure with a knot for convenience. Just cut off the corner just a little and, squeezing out the putty, draw a convex ornament or floral patterns around the image. Dry and tint in the desired color with acrylic enamel, leaving a transparent window to see the contents. Apply varnish when everything is completely dry.
Decoupage will help out when there is an indelible design on the can, and putty decor will mask unnecessary raised inscriptions well.
Artificially aged food-grade plastic containers
The master class will help those whose kitchen in the Provence or Shabby chic style is so difficult to find suitable decorative utensils. Vintage spice boxes made from a regular store-bought plastic set will fit well into the interior.
For this you will need:
- PVA glue;
- brushes;
- acrylic paint and contours on glass;
- labels with the name of spices, printed on a printer;
- hair dryer;
- varnish
To ensure that the glue adheres well to plastic products, they are degreased and treated with fine sandpaper.
Instructions:
- Using a wide brush, apply a dense, uniform layer of glue over the entire surface.
- When the PVA sets into a thin but strong film, cover the jar with a layer of paint.
- Dry with warm air using a hairdryer until cracks appear.
- Using a piece of rag, rub paint of a contrasting or metallic shade into the completely dry cracks, trying not to go into the main tone.
- Labels are applied using decoupage method.
- The stained glass contour is used to decorate the borders of the application with lines or dots.
- Cover with varnish.
Antique craquelure can be made using eggshells, gluing them like a mosaic. The scuffed effect is created with bitumen varnish; it can be found in an art store.
Stained glass painting
A great idea to add color to a minimalist modern kitchen design. Only clear glass jars will do. Decorated tall narrow vessels look good; they take up little space, but hold a large volume and make it convenient to store spices in the kitchen.
For stained glass decor you will need:
- brush with natural bristles;
- stained glass paints and contours;
- napkins or cotton pads for correcting errors, alcohol;
- a sheet of paper with a printed pattern or image.
The containers are first thoroughly degreased. Then the sheet is placed inside with the pattern facing outward to make it easier to navigate. You can first make a sketch with a thin marker.
The following actions:
- The silhouettes of the details are drawn with contours, maintaining the continuity of the line and the closedness of the outlines.
- The elements are poured gradually, being careful not to smear the already applied layers.
- Dry in the oven at 150° for about half an hour.
- Varnish the product.
To hide the inscriptions on the lids, they are wiped with alcohol and covered with aerosol paint of any suitable shade.