What is a frog
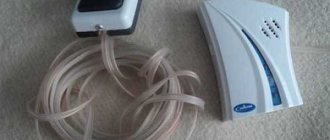
A frog (or “toad,” as these devices are also called) is easily recognized by two springy wires on the top cover, which are moved apart to the required distance - thanks to this, they can be docked with various batteries.
It is these contacts that should be connected to the battery, which was previously removed from the phone. That is, the device is only suitable for removable batteries (which means this device is useless for owners of the iPhone and many other modern models from other manufacturers).
The frog is able to transfer energy to lithium batteries in the simplest possible way. Moreover, in some cases it can charge even faster than the included charger.
General information about the device
The frog is a simple device designed to charge the batteries of mobile phones of various models and manufacturers. Read more about how to charge your phone battery without a phone →
In addition, the “toad” can charge a lithium battery from cameras and other small equipment.
Outwardly, it looks simple and is a plastic box with a plug on one side and a special clamp for contact with the battery on the other side. The “toad” design allows it to be used for batteries with connectors of different sizes thanks to movable contact terminals.
The universal device does not require any special technical knowledge or skills. To use the frog, there is no need to think about how to correctly insert the battery into it. She herself will determine its polarity.
Types of universal phone chargers
Now in stores you can find the following options for universal chargers:
- car (connects to the cigarette lighter);
- with a USB port (has a corresponding USB connector);
- with a plug for power supply from a household electrical outlet (standard).
In addition, recently models have appeared on the market that simultaneously have both a USB port and a plug.
Also, all modern frogs can be divided into automatic and semi-automatic. The main difference between the first and second types is the number of LEDs: the “automatic” has three, the “semi-automatic” has four. The fact is that automatic models are able to independently determine the polarity, and therefore the polarity reversal button (usually it is labeled CO) is absent on them.
Types of devices
In addition to the standard (most popular) device, there are two more types that differ in connection capabilities, namely:
- Devices connected to a car battery.
- Devices via USB port. Can work from a computer.
In terms of the set of functions, in addition to the simplest charger discussed above, there are those with a USB connector on the body and capable of working like a regular charger. In this case, you do not need to remove the battery.
Some models are equipped with other ports or adapters, making it possible to charge devices with other types of connectors.
In semi-automatic frogs, indicators and buttons are usually equipped with instructions, the meaning of which you will definitely need to know:
- TE (large button on the left) - when pressed, the device will test the correct connection of the contacts;
- CON If the connection is correct, this indicator will light up, indicating that the device is ready for operation;
- PW—network connection indicator;
- CH - flashing indicator indicating that the battery is charging;
- FUL - turns on when the battery is fully charged;
- CO (large button on the right) is a polarity switch, which may be required if the battery cannot be reversed (for example, in Nokia and Motorola mobile phones).
What is inside?
This question will be of more interest to radio amateurs. If you wish, you can even find an approximate diagram of the device.
Frog charger circuit
The concept of a classic frog is quite simple. The two moving contacts connected to the battery come from the controller. The role of the controller is performed by microcircuits of a certain complexity. The controller's task, in particular, is to compare the voltage on the battery with the internal reference one. When these two indicators become identical, the controller will turn off the power supply.
Another significant part of universal charging is a bridge AC/DC converter with a built-in key for connecting the battery to the power source (mains). It is located at the very beginning, in front of the controller and contacts. The purpose of this unit is to convert alternating voltage to direct voltage.
Repair instructions for the frog charger
As for a completely non-functional charger, just look for a burnt part. But sometimes you come across low-quality chargers, when when you connect the battery to the frog, the charge current is less than specified. Not 200 ± 50 mA, but several times less. Thus, the battery is simply undercharged. As the charging current at the output decreases, the final voltage on a “fully charged” battery also decreases. Hence the short battery life when installed in a phone. When the charger light signaled the end of the charge, the battery voltage was only 3.9V. Why is this happening? Most likely it's a matter of variation in parameters. A slight deviation in resistor values will result in a change in the overall characteristics of the device.
When is it recommended to use a frog?
Theoretically, the frog can be used with the same intensity as regular exercise. But in practice, it often serves as a spare charger. If the original charger is lost, then universal charging will allow you to stay in touch.
Sometimes, after losing the charger that came with the kit, it turns out that finding the right analogue is very difficult. This is true primarily for old models of mobile phones that are no longer produced, but remain in use. A frog in this case can save the situation. And if for some reason the battery connector is broken, the toad can also help out.
A universal charger will certainly come in handy for those who have two or more phones of different models. When you go on a trip, you don’t have to take a bunch of power supplies with you, but get by with this one device.
Important! It is the frog that is used “to bring back to life” completely discharged lithium batteries of mobile devices. The universal charger controller is not capable of blocking the supply of voltage to a severely discharged battery, and in this particular case this is an advantage, not a disadvantage.
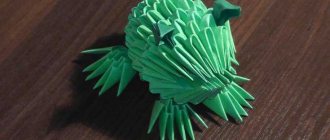
DIY paper frog
Paper frog - DIY craft for children
This option is very light, it is made on the basis of a sleeve, so it can be considered a version for kindergarten. We recommend repeating this creative lesson with preschoolers who really love paper experiments.
To create a craft - paper frogs, prepare:
- Sleeve;
- Green leaf;
- Scissors;
- Drawing pencil;
- Glue;
- White and black paper to create eyes or ready-made large eyes;
- Black marker.
How to make a frog from a paper roll with your own hands
This will be the simplest version of the craft. The basis of the frog will be a cylindrical roll; crafts made from this material are very popular for children. If you don’t have a roll, then just use green cardboard, fastening it with a stapler or glue in the shape of a cylinder. Or a tube of shower gel or foam, a bottle of a suitable shape - any waste material will do.
In any case, the finished roll or other bottle needs to be covered with green paper or painted with green gouache. So cook what you have on hand. A green leaf is a prerequisite, because we are used to seeing a frog of exactly this color. It is advisable that the sheets be double-sided. Also prepare everything for the big bulging eyes of the swamp dweller. For accurate work, it is better to take glue in a pencil - it sets quickly and does not spread.
Cut out additional details of the craft: back and front legs. These will be simple stripes with flippers at the ends or larger hind limbs with curved knees. Make circles for the frog's eyes. You will need only 6 additional pieces of paper.
Next, assemble the paper frog. Firstly, the prepared roll needs to be made green. Place a piece of paper on top, carefully smoothing the surface so that it does not wrinkle. Glue the paws at the back, spread them symmetrically to the sides. In front, glue (close to each other) the second legs. So the amphibian sits on the sand, basking in the sun.
Glue the eyes at the top. Preliminarily outline the eyes and pupils with a black marker to make them more expressive. Using a marker, also design the nose and mouth so that the frog not only looks at us, but also smiles at us. The frog looks around with huge eyes.
Our paper frog is ready. The figurine we received is a positive character. Simple master classes on creating products from rolls will definitely delight your child.
How does a frog charger work?
One of the obvious advantages of this device is its small dimensions. This allows you to easily carry it in a backpack, bag or pocket and plug it into any suitable outlet. The classic frog runs on 110–220 Volt power. In this case, the output voltage is much lower (for example, 4.2 Volts). As for the output current, it is equal to several hundred milliamps.
The charge occurs in the device automatically and is controlled by the microcircuit. When the maximum possible charge level is reached, the device turns off itself. That is, nothing bad will happen if, instead of the required three hours, the battery is in universal charging for a couple of hours longer. In general, the time to fully charge a battery (digital camera, smartphone, player, etc.) depends on the capacity. As a rule, we are talking about a period of 1.5 to 5 hours.
Volumetric frog from A4 sheet
You can make a voluminous frog out of paper, which will not only croak, but also perform other functions: be a bookmark in a book, decorate a table setting, or be a stand for light objects.
For this craft you will need a simple sheet of A4 paper, preferably green, glue, scissors and pencils for the face.
Instructions for folding the frog:
- Fold one corner all the way diagonally and cut off the excess. You will get a square. You need to leave the strip - it will come in handy later.
- Fold all 4 corners of the square towards the center so that a pancake-envelope comes out.
- Turn the workpiece over and bend two corners at the top.
- Turn it over again and now fold the sides to src=”https://propletenie.ru/images/wp-content/uploads/2021/07/3_1_obem4.jpg” class=”aligncenter” width=”660″ height=”440 ″[/img]
- Slightly unfold the sides and make a small triangular cutout at the bottom.
- Fold the prepared strip of paper into 4 layers and insert it into the cut. Then fold the edges back.
- On the reverse side of the workpiece, straighten the folded squares. This will create the eyes.
- Decorate the animal's face.
As the strip moves up and down, the frog will open and close its mouth. You can also install it on any surface and create many tasks for it.
Volumetric frog
If you are tired of primitive works based on paper, and you don’t know what to make from paper with your own hands, we can offer to make a three-dimensional frog. During construction you will also need some materials and tools. If production takes place with a child, then it is better to adhere to all sequences of actions.
For this craft you need to have the following materials and tools:
- colored cardboard in red and green, preferably double-sided;
- ruler, scissors and a regular pencil;
- gel pen and marker;
- glue.
Megamaster.info will tell you in detail how to make a three-dimensional frog out of paper. First, the body is made, for which it is necessary:
Volume frog (step 1)
- cut out 2 pieces of green double-sided cardboard, but keep in mind that one should be slightly larger than the second;
- now it is necessary to obtain rings from them;
- to get rings, glue them together;
- Next, we cut out a small rectangle from the same green cardboard and make a blank in the shape of frog legs from it;
- it would be great if the width of the rectangle is 20 mm and the length is 40 mm;
- We glue the edges of the cut blanks, they now need to be corrected with scissors;
- After adjustment, you need to draw small details on the legs with a marker so that the workpiece looks like frog legs; (step 2)
- now they need to be glued to the bottom of the large ring;
- after completing the production of the hind legs, you need to cut out the front ones from the same green cardboard, they should have three fingers;
- the cut out front legs must be glued to the middle of the ring;
- then, after the legs, we glue a second ring to the body, which acts as the frog’s head;
- we make eyes that you can make yourself or attach yourself;
- if you make the eyes yourself, then you need to cut off two small strips and draw eyes on them, for this you use a marker or felt-tip pen;
- So, we drew the eyes, now to make them convex, stripes, you need to glue them together and attach them with glue to the head of the craft;
- Cut out the tongue and mouth from red cardboard and carefully glue these parts to the frog's head.
Having carried out such actions, you will get a beautiful three-dimensional frog. Having made such a design, many will be convinced that making paper crafts with their own hands is not as difficult as it might seem at first glance. The main thing when designing is to adhere to the order of actions.
How to use a frog to charge your battery
Of course, a device such as a frog is accompanied by instructions from the manufacturer. But it is often written in a foreign language (in particular, Chinese), and therefore the user has to figure it out on his own.
The battery must be inserted into the frog so that the contacts of the universal charger are located on the plus and minus terminals of the battery. If the battery has three or four terminals, you should use the two outermost ones.
If the polarity was chosen correctly, then when you press the TE (test) button, the green CON LED will light up. After this, you can safely insert the entire structure into the outlet. As a result, the PW (network) indicator should light up, and then the CH (Charge) indicator. And when charging is complete, the corresponding FUL LED will light up (full charge).
If the CON diode does not want to light up, then most likely you have a very low battery. A battery with a nominal voltage of 3.6 Volts may well discharge below 3.2 Volts, and in such a situation the mobile phone will not show any signs of life even when connecting the “native” charger.
The solution is simple: the battery must be connected randomly, in any polarity, to the frog and plugged into the network for five minutes - the CH diode should blink. The purpose of universal charging is to give a strong boost to the battery. And then it can be charged in the usual way.
Attention! Sometimes, with a damaged battery, the frog may show a full charge of FUL, even if this is not true. It is unlikely that you will be able to fix this on your own; you will need to call a professional technician or simply throw away the battery.
Homemade “toad”
For production you will need:
- spring (suitable from a regular clothespin);
- a piece of plastic;
- wire – 2 pieces;
- probes for contact with the battery – 2 pcs. You can use stationery
- paperclip;
- stationery knife;
- hacksaw;
- glue gun and soldering iron;
- sandpaper;
- Super glue.
Three holes are made on the plastic for installing springs, having previously marked the locations for the holes with a marker. To make the pressure stronger, we glue two “stumps” that work on the principle of a swing.
Having inserted the lower part of the spring into the hole, we secure it to the base using ordinary wire, twisting it with pliers from below.
We cut out a pressure plate from plastic according to size: we make cutout 1 for the spring, 2 for the probes.
For better clamping, we glue the plastic from below.
We also make holes for two wires.
We bring the soldered wires out.
To prevent the probes from bending when lowering, we make a window in the charging housing.
Both paper clips and copper wire are suitable for probes.
Having secured the plate in place and pressed it with a spring, we remove the wires. The probes can be secured with a glue gun. Now we solder the wires.
All that remains is to drill a hole to view the charge indication.
The battery charging frog is ready to go!
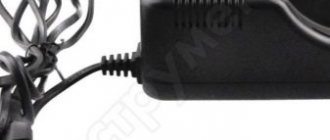
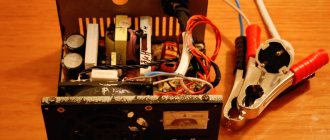
Hi all. Today I would like to tell you how to make a universal charger for mobile phone batteries using available materials. People call it a frog. You can see what it looks like below.
It serves to charge batteries that can be removed from the phone. Of course, you can buy it in a store, but such devices do not work for long. A couple of months, six months maximum. Then you need to buy again. They are inexpensive. It has probably happened to you that you didn’t have a suitable charger at home to charge your mobile phone battery. But there were plenty of chargers for other phones. They lie idle, in some distant corner. It is still unknown when they will come in handy. At best, they will remain unnecessary. At worst, you just throw them away. It is this kind of charging that will help us.
To make it, we don’t have to buy anything in the store. You probably have all the components at home. The design of my universal charger is very simple.
All we need:
- any old charger from an unnecessary phone.
Tools for manufacturing you will need:
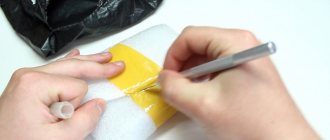
Manufacturing: on a wooden block we mark the location of the elements; on it you need to place: a clothespin and two pins. The clothespin can be glued to a wooden block using hot glue. Or using superglue.
The ears of the pins need to be bitten off. The point of each pin is driven into the block by about half a centimeter; pliers will help you with this. It will be much more difficult with your hands. The distance between the pins is approximately half a centimeter. The other end of the pin, on which the eye was located, which was already bitten off, is slightly bent forward.
Cut off the plug from the charger. We determine where is plus and where is minus. The wires are soldered to the pins. Plus and minus marks are made on the block. This is necessary so as not to confuse the polarity. The base of the pins and some of the wire are also fixed into the block using hot glue. So that the pins do not become loose and the wire does not come off.
Usage: take the battery out of the phone, connect its contacts to the contacts (pins) of the charger, plus to plus, and minus to minus. To fix it in this position, we clamp it with a clothespin. Ready! Congratulations! Now you will have a trouble-free universal charger in your home called a frog. Made by hand.
Pros of this device:
-Can charge any mobile phone batteries.
-We didn’t spend any money on buying it; we did everything using improvised means.
There is no charge controller, but this is not a minus because any modern battery has protection against complete discharge and overcharging, there is nothing to worry about. Just don't leave your phone battery charging for more than an hour.
Anyone interested can watch the video in which I talked about this device.
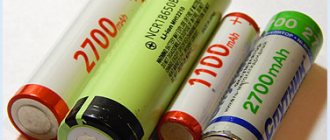
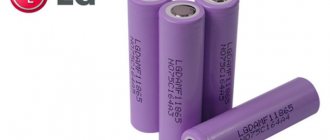
The recently introduced charger, popularly called the frog, has become very popular due to its versatility. It can charge the batteries of almost all mobile devices: phones, tablets, smartphones, pocket computers, cameras, video cameras. The main condition is that the batteries must be lithium, others will be damaged.
Precautions
- Always insert a lithium battery between the terminals first. And only then can the device be plugged into the outlet. If you do the opposite, you can get a noticeable electric shock.
- There should be no flammable materials near the universal charger plugged into the outlet.
- The frog is designed for lithium batteries only and should not be used to charge other types of batteries.
- After the battery is charged, it is advisable to unplug the universal device from the network.
Do you have any questions about the Frog or something to add? Then write to us about it in the comments, this will make the material more useful, complete and accurate.
A simple paper frog for beginners
A simple jumping frog will probably appeal to beginners. The result is a rather “tame” model that confidently moves forward without turning over, which is suitable for children. To make a light toy we need a piece of colored paper measuring 8x13 cm. Step-by-step instructions:
- We use light green paper.
- First, bend the right edge diagonally and iron it.
- Expand the sheet.
- Then we bend the left edge diagonally and iron it.
- Expand the sheet.
- Now we turn the top edge back to the point where the bends intersect.
- We unfold the sheet again and get markings of bends along the diagonals and in the center.
- Along the marked lines, bend the paper at the top in the form of a triangle.
- Carefully iron the bend lines.
- Now bend the left triangle up.
- Then we also bend the right triangle.
- We bend the lower part of the workpiece towards the center to the middle of the sheet.
- Then we also bend the right side.
- We bend the lower part of the workpiece to the diagonal of the diamond at the top.
- Divide the folded part in half and bend it down.
- Turn the craft over and the frog is ready! We straighten the paws and glue on the eyes. Press from behind with your finger so that it slides off. Hooray! The frog made its first jump.
If you have any questions, you can watch the following video.
How the device works
Externally, the device actually looks a bit like the amphibian of the same name: the body, made of plastic, has a characteristic rounded-elongated shape. At the top of the device there is a battery holder equipped with a contact group responsible for recharging the battery. Depending on the model, the device may be equipped with an electronic screen on which technical parameters will be displayed. LED indicators with corresponding inscriptions can play the same role.
How to take a photo or record a video on a webcam
What is the advantage of the device
Universal multi charger (English name for “frogs”) enjoys customer loyalty for a reason. Let us briefly list the main “advantages” of the device:
- used for charging voltage sources of various small-sized equipment;
- significantly saves the user's money by eliminating the need to purchase a separate charger for each device;
- small size ensures portability (ease of movement) of the device;
- technically easy to use .
Charging options
As an alternative to the standard charger for Samsung, Xiaomi, Rilmi, and other smartphones, you can consider several options that do not require serious manipulation or soldering.
USB cable
If the user does not have a USB cable with a compatible connector, it is suggested that you make one yourself at home. In this case, there are two ways to recharge the phone:
- Use a charging adapter from an old device that is no longer in use. First, the plug is cut off and the wires are stripped of insulation. Next, the polarity is determined with a multimeter. The next step is to connect the cord to the battery, observing polarity.
- Using the whole adapter. If another charger is still needed, the connection can be made through a standard connector using ultra-thin wire. It is important to know where the positive and negative current terminals are located on the connector. As a rule, the first is located inside the plug, the second outside. Wires with pre-stripped contacts are secured with tape. The other ends of the cord are fed to the ACU, observing polarity.
When charging using this method, keep in mind that the battery may heat up. As a result of heating, the microcontroller may operate. The element protects against overdischarge and overheating. In this case, you should disconnect the battery from the power supply; you can recharge it after 15-20 minutes.
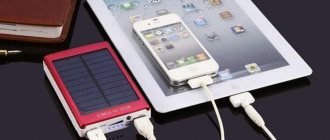
External battery
Charging the phone with a power bank.
A popular way to extend the battery life of a smartphone is Powerbank. This is a portable battery that can store and release current. The device is offered in a compact form factor and is designed to fully charge a smartphone 2-3 times. There are also high-capacity portable batteries with a capacity of 20,000 mAh or more. To charge, you just need to have a USB cable (some models are equipped with an integrated cord with several connectors) and connect the phone to the Power Bank. The disadvantage of this method is that the Powerbank is heavy.
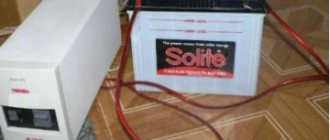
Power supply "Frog"
The frog is a universal adapter, compatible with most models of removable batteries. The method is not suitable for devices with integrated batteries, since the frog is not able to cling to the USB port. The adapter got its name because of the peculiarity of its structure: current leads are hidden in a special compartment, which move, thus ensuring their connection to the battery terminals, regardless of their location. The frog is sold in an electronics store, it is safe to use on a regular basis, for example, when the phone is discontinued, and has a non-standard charging connector.
Algorithm for using the Frog:
Charging the battery with a frog.
- Turn off the phone's power.
- Remove the back cover.
- Remove the battery from the standard slot.
- Determine the polarity of the current leads. As a rule, the terminals are marked with appropriate marks. If there are no inscriptions, use a multimeter.
- Reveal the frog. Under the protective cover there are terminals, which also indicate polarity.
- Install the battery into the frog by spreading the sliders. Make sure that the battery is correctly connected to the universal charger and that the polarity is observed.
- Close the lid.
- Connect the device to the network. If the red light on the frog lights up, the battery is installed correctly.
- Wait until the indicator lights up green. Thus, the “Toad” signals that the battery is fully charged and can be removed and used for its intended purpose.
The frog is an effective, safe way to charge batteries. If the user accidentally reverses the polarity, the battery simply will not charge.
Direct charging via bare wires
Direct connections using bare wires are not considered safe. In this case, to avoid electric shock, it is important that all contacts are insulated. Connecting the current terminals of the charging unit cord to the battery must comply with polarity, which can be determined using a universal measuring device.
Charging must be carried out under the constant supervision of the user. If a non-standard power supply with increased power is used, the battery may overheat, which can cause smoke, fire, or fire in the battery, especially if it does not have a controller. If the battery case has heated up to more than 40 degrees Celsius, the procedure should be stopped immediately and wait until the battery has completely cooled down.
Solar battery
Charging from a solar battery.
An alternative charging method using renewable energy sources. You can assemble a portable solar power station with your own hands, or buy it on the Internet (there are models attached to a backpack, they allow you to charge your phone during the day while hiking). Some Powerbanks are also equipped with photocells that can store solar energy. Charging in this way is effective during the day, in clear sunny weather.
Dynamos
Another way to charge your phone is by using the potential of kinetic energy. A dynamo machine is used to transform it. There are versions with an integrated USB port, specifically designed for recharging modern gadgets. The portable handheld accessory charges the phone slowly; the user will need to crank the handle for at least 20 minutes to accumulate enough charge for one short call.
Regular AA batteries
There are adapters available on marketplaces that allow you to charge your phone using standard AA batteries. The advantage is that you can find batteries in any store. The disadvantage is the cost of charging. To use, just insert AA batteries into the charger slot, observing the correct polarity, connect it via a USB cable to the phone, and move the slider to the “On” position.
Adapter for charging from AA batteries.
Checking functionality
On the side surface of the classic “frog” type there is a button marked with the inscription TE , i.e. "testing". It is used to check the polarity of the connected battery. Pressing this button once turns on the CON diode to turn green, confirming that everything was done correctly.
What to look for when choosing an action camera
If the CO N does not light up , press the button on the right, which changes the polarity.
If no buttons are found on the side panels of the device, most likely the model tests polarity automatically .
Also, the indicators may not light up if the battery has moved to the side and its contacts no longer interact with the charger terminals.
We charge the phone in extreme conditions
A dead gadget isn't that big of a deal if you're outside within the city limits, and there are plenty of options for charging your device. It’s another matter when the battery percentage is melting before your eyes, and you are in the forest, for example. Of course, if this “thicket” is a small landing not far from the city, then it’s okay, but in the case when the phone was used as a navigator and suddenly stopped working, a real problem will arise.
Here are a few methods that will help in cases where you are far from home and civilization in general:
- we use a knife and fire - heat the knife blade over an open fire and apply it to the battery. Then we return it to the mobile phone and get the opportunity to make a 5-minute call, which in extreme conditions is worth its weight in gold;
- for physics lovers - 2-3 metal plates are wrapped with copper wire and buried in the ground, this structure is watered with salt water and connected to the gadget using wires from the charger.
Of course, it is far from a fact that every hiking backpack always has such a set. But if you have to go outdoors, it’s better to take all these things in case your mobile phone runs out.
You cannot bring the knife to a red-hot state, because if exposed to too high a temperature, the battery will simply swell and may even explode.
In practice, this method may not last long: it is just a way to squeeze all its charge out of the battery by heating
These and other “wild” methods of charging mobile devices are best seen in action.
Video: how to charge your phone in the field
Still, the most convenient way to keep your gadget charged in the forest is to take with you an external battery with photocells that can absorb the energy of sunlight and transfer it to any device.
Even in the forest, where there is not much sun, such a battery can be fully charged