How to make an LED lamp with your own hands?
Incandescent lamps have long outlived their usefulness, and they have been replaced by various energy-saving technologies. Even at the state level, since 2009, a restriction has been introduced on the maximum permissible power of Ilyich lamps - no more than 100 W, in order to reduce energy consumption in the household segment. The only stumbling block in the mass use of energy-saving lamps is their price. Therefore, as an alternative, we will look at how to make an LED lamp with your own hands from available funds.
Terrarium
This miniature terrarium will become a real decoration for your workplace. After all, real plants will grow in it.
Pour sand or small pebbles into the disassembled light bulb (see above). You can use multi-colored sand arranged in layers. This is easily done with a straw and a small funnel. Place a small layer of soil on top. We plant plants using tweezers.
Mini terrarium made from a light bulb
Moss, succulents and any other plants that do not grow very tall are perfect for us as plants. Well, don’t forget to water your terrarium.
Idea N1 – Halogen to the rescue
The simplest option is not to reinvent the wheel from scratch, but to use an old or burnt-out lighting lamp as a base. Among the wide variety of lighting equipment, halogen light bulbs are quite common. In everyday life, their models with G and GU pin bases are especially popular, so we will look at the manufacture of an LED lamp using the example of such a lamp.
To work you will need the following elements:
When choosing the number of LEDs in a lamp, initially draw up a layout diagram on the plate, then choose the method of connecting them - serial or series-parallel. A parallel circuit for a homemade LED lamp can only be selected if each part is designed for 12 V or you limit the voltage for each of them using a resistor.
You can come up with a layout diagram for the future lamp yourself, or you can use the standard form:
Rice. 1: LED layout
The manufacturing process of an LED light bulb will consist of the following steps:
It is important not to overdo it so as not to break the body.
Glue it around the perimeter to secure it to the reflector. Now you have a ready-made assembled device in your hands, do not forget to mark the terminals.
However, please note that you cannot connect the lamp directly to a 220 Volt network, since the device will be designed for 12 V.
What you need to convert an LED light bulb into an eternal one
To work you must have:
- holder;
- glue;
- knife;
- soldering iron with a thin tip;
- new diodes (if replacement is made);
- higher resistance resistor;
- posistor for smooth switching;
- tweezers;
- capacitor.
Capacitor.
The last element of the assembly is necessary to remove heat, the excess of which shortens the service life of all lamp components. The capacitor is installed between the plate with LEDs and the base, and is selected depending on the power of the light bulb.
Related article: How to disassemble and repair an LED light bulb
Idea N2 – From an energy-saving light bulb
Fluorescent lamps also belong to the energy-saving category, but they contain toxic mercury, the vapors of which are dangerous to humans. Unfortunately, it is the bulb that is the weak point of these energy-saving light bulbs. As a result of depressurization of the tube, the gas mixture comes out, and the lighting device of the fluorescent lamp becomes unusable. However, even a novice electrician can convert it into a diode light bulb.
To do this, you will need a compact fluorescent lamp that has failed, several LEDs and a driver for them. The easiest way is to take a driver from an LED lamp, but if you don’t have one on hand, you can make it yourself. The simplest way to make a driver is to assemble a circuit from an input capacitor, resistors and a bridge, shown in the diagram below:
Rice. 7. Lamp driver circuit
The process will consist of the following steps:
Many models are made cast, so they will have to be sawed.
You can already connect this version of the LED lamp directly to a 220 V network.
Idea N3 – Using LED strip
Another way to obtain an LED light bulb at home is to assemble a lamp from LED strips. By its design, the LED strip is a universal lighting device - it can be mounted on almost any surface. Therefore, the role of an LED chandelier with such bulbs can be played by any design.
However, diode strips also have a significant drawback - to power indoor models, a safe voltage of 12 V is used, which meets the requirements of clause 1.7.50 of the PUE . To implement such power supply, it is necessary to install a separate power supply. The dimensions of such a converter are quite impressive, so this idea is relevant to implement in those places where it can be hidden, for example, in a niche in a suspended ceiling.
So you have received an assembled lamp from an LED strip, which will fully replace a store lamp. However, note that there are bare contacts on it, so when installing the lamp in a lamp or niche, the circuit must be de-energized.
Some tips
When installing, some points are taken into account:
- When installed on a desktop, the fact with which hand the person writes is taken into account (whether he is left-handed or right-handed). The lamp is installed so that the shadow of the hand does not interfere with writing.
- The height of the lamp should be within 35–40 cm.
- If a computer or laptop monitor is installed on the table, then the device should be higher than the top edge.
- The light should not shine into the eyes.
When assembling, you need to consider the following tips:
- the wire must be taken round, in a double insulating layer;
- current-carrying conductors must be flexible and consist of a large number of wires;
- areas through which the cable is laid must be protected with dielectric bushings;
- Unacceptably high tension on the wire.
Idea N4 – From LEDs
This method is suitable if you have a ready-made lighting device or at least a frame for it. As an example, you can take a table lamp, sconce or ceiling chandelier. To make it, you will need an LED or an assembly of several units, a cooling radiator and a power supply for a mobile phone.
Rice. 16. LED module and heatsink
It should be noted that the LED elements are selected according to the power of the power supply, if one power supply is not enough, take two.
The LED lamp manufacturing process will consist of the following steps:
If there is enough space, leave the housing in place, it will act as the main insulation.
In some models, fixation can be done using a bolted connection.
The homemade LED lamp is ready and can be connected directly to the power circuit.
Lampshade with fringe
Using two metal hoops (you can take a hoop) and a fringed braid, you can construct a two-tiered lush chandelier.
To fix the hoops, use a strong fishing line, and it is better to secure the fringe with a glue gun.
Photo: justpick.ru
Photo: pinterest.com
Photo: thesweetestoccasion.com
How to make a moon lamp out of paper with your own hands
What do you need
How to do
Separate napkins, towels or toilet paper into single-layer pieces. Start gluing them to the ball by coating it with glue lightly mixed with water. Place the pieces of paper on top of each other and also coat the top with glue.
Shot: @Crafts Junction / YouTube
Thus, glue the entire ball in several layers. Dry the paper completely.
Shot: @Crafts Junction / YouTube
Cover the figure with white paint and let dry. Mix white paint with a little black to create a gray color. Use a sponge to make gray spots on the ball.
Shot: @Crafts Junction / YouTube
Glue the lamp base to the back of the cover using hot glue. Cut a large hole in the bottom of the bucket. Connect the lid and bucket and screw in the light bulb.
How to make a lamp from cotton wool in the shape of a cloud
What do you need
How to do
Cover one lantern with a large amount of cotton wool.
Shot: @TiffyQuake / YouTube
Hang a wooden stick from hooks in the ceiling. This can be done using fishing line or thin rope. Tie another piece of fishing line to the base of the flashlight.
Shot: @TiffyQuake / YouTube
Hang the flashlight by a fishing line from a stick.
Shot: @TiffyQuake / YouTube
Cover the rest of the lanterns with cotton. Hang them from a stick to form a cloud. Fasten the parts together with glue.
Shot: @TiffyQuake / YouTube
Insert a garland into the lanterns. You can make it hang down from the cloud.
What other options are there?
You can also use cotton wool to cover plastic bottles with garlands:
Or balloons:
How to make a lamp from cardboard with your own hands
What do you need
How to do
Draw a large five-pointed star on the cardboard. Cut out the shape along the contour.
Shot: @Sunny Lin / YouTube
From each corner, draw a line with scissors using a ruler to the center. Do not cut all the way through the cardboard.
Shot: @Sunny Lin / YouTube
Bend the figure inward along the marked lines.
Shot: @Sunny Lin / YouTube
Turn the star over and bend the edges towards the center as shown in the picture.
Shot: @Sunny Lin / YouTube
Use dots to mark the corners of the folded figure on another sheet of cardboard.
Shot: @Sunny Lin / YouTube
Then connect these points with straight lines and cut out the second star.
Shot: @Sunny Lin / YouTube
Make many holes in the large star with scissors, equal to the number of almost all the bulbs on the garland. Paint the outside of the figure gold.
Shot: @Sunny Lin / YouTube
Insert one light bulb into each hole from the inside.
Shot: @Sunny Lin / YouTube
Glue the second star to the back of the bent star, smearing the edges of the figure with glue.
What other options are there?
Here's how to make a similar lamp in the shape of a unicorn:
Interesting lamp with stars:
Another unusual cardboard lamp:
You can even make a table lamp from cardboard that looks just like an ordinary one:
: Drill bit with hardened steel tip
- Place the sheet of glass on a stable and absolutely flat surface.
- We mark the centers of future holes (keeping in mind that the minimum distance of the hole from the edge should not be less than 12-15 mm for thin glass, and 20-25 mm for thicker glass).
- We choose a drill (it can be either electric or manual) and a hardened drill bit.
- We make and firmly attach a ring with a diameter of 4-5 cm and a height of 1 cm around the drilling site from putty or plasticine.
- Pour a little vinegar or turpentine into the resulting “pool”.
- We begin the drilling process with light pressure at low speeds (for an electric drill - no more than 300-330 rpm).
- For thick glass, drill only half the hole, then remove the putty and carefully turn the sheet over.
- Next, to obtain a full-fledged through hole, we repeat the process on the other side - fixing the desired center point, again pressing the ring to the glass and pouring turpentine or vinegar before drilling.
- We select a plastic tube with a diameter slightly smaller than the drilled hole, wrap it with fine-grain sandpaper and clean the inner surface.
How to make a lamp from a can
What do you need
How to do
Glue one pebble to the jar.
Shot: @5‑Minute Crafts PLAY / YouTube
Continue gluing the remaining stones in rows in a circle.
Shot: @5‑Minute Crafts PLAY / YouTube
Decorate the entire jar in this manner.
Shot: @5‑Minute Crafts PLAY / YouTube
Glue a candle to the inside of the lid. If using a garland, place it in a jar.
Shot: @5‑Minute Crafts PLAY / YouTube
What other options are there?
This is the kind of non-standard glass lamp you can get if you glue a jar with a garland onto a high base:
Source
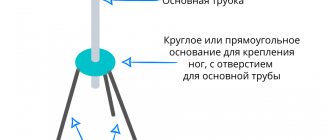
Basic elements of any table lamp
First, let's look at what elements the lamp includes.
The electrical part is usually hidden, so decoration issues do not apply to it. But the other two parts are quite amenable to flights of fancy and can be made from a variety of materials.
But electrical elements are key in terms of safety. Remember that working with electricity requires a certain set of knowledge (at least minimal) and experience. Otherwise, you should not experiment with devices that are hazardous to health.
You can secure the wires in the socket with a soldering iron (non-separable method), screws, terminals or clamps.
The fastening of the wire in the socket must be reliable
The wires for a homemade lamp must also be electrically safe. The simplest option is a round cable with a core cross-section of at least 0.35 m2 and double-layer insulation. (A good option is SHVVP 3x0.5, approximate price is 15 rubles per sq.m.). Places of connections, twists, and areas with the possibility of dampness are additionally wrapped with electrical tape. Mount the cable so that it is not strained in any position of the luminaire.
Christmas tree decoration
To implement this idea, it is better to use light bulbs of an original shape. For example, candles. There is no need to disassemble them, just solder a ring to the central contact of the base.
Christmas decorations made from lamps
We coat the lamps with PVA glue, sprinkle them with multi-colored sparkles and the Christmas tree decoration is ready. But for the New Year's holiday, ordinary light bulbs are also suitable. Here's what you can make from them, if only you had some imagination and gouache:
Here's a penguin and a snowman
Santa? No, Santa Claus is better
Where are you, reindeer?
