DIY paper deer
Paper is the simplest material from which you can create a New Year's deer. For crafts, plain white paper is suitable, preferably thick. Separate animal parts are made from colored paper or used to cut out parts, which are then glued onto cardboard or foam plastic.
Stencil for the window
For the New Year, you can do without decorations on the windows, which must have snowflakes and Santa Claus, but also animals. For example, a deer. It is made as an independent figurine or in composition with other New Year's characters. The deer stencil is made from paper using a template that can be found on the Internet. It must be printed on a white sheet of paper, transferred to a harder surface, and cut out.
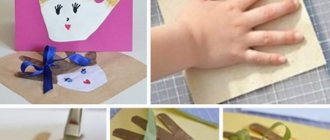
Simple deer made from handprints
A very simple, but at the same time original way to make a deer is to use a palm print.
Or this option. Here, in addition to the palm print, a foot print is used.
Volumetric paper deer
To make a more voluminous figurine of a deer for the New Year, you need to use a ready-made template. According to it, the product is assembled from individual parts or bent along contour lines. Even a child can cope with such a craft if his parents print out the blank, help him cut it out and show him how to correctly bend each element of the deer. The figures will look great on your desktop or on a Christmas tree.
You can make a three-dimensional deer from strips of colored paper. We fold the strips into a “snowflake” shape, securing them in the center with glue or double-sided tape. Then we bend the strips into a cylinder and also fix them in the center. The result is a ball. Add horns, eyes and nose. The New Year's deer is ready!
You can make a deer like this out of paper.
Or this option.
And another craft option for kids. The nose is a miniature pompom, the horns are fluffy wire, the scarf is strips of felt.
Origami deer
Another way to get a three-dimensional figurine of a deer is the origami technique. The color of the paper depends on the idea, but to make a New Year's deer it is better to take a square sheet of white or brown paper.
To make a deer correctly, it is enough to correctly follow the instructions for creating origami and bending the parts. It is recommended to bend the fold lines using a ruler or the blunt side of scissors.
Deer Papercraft
Papercraft is a special type of modeling, the essence of which is to connect paper parts according to a pattern or development. This technique allows you to get a three-dimensional craft from paper or cardboard.
Scan
For this type of modeling, you need to choose paper with a density of 200 g/m2 or take hard, thick cardboard. If you use regular office paper, the model will turn out flimsy.
Scan
All parts of the development are cut out carefully using a stationery knife; the template must be placed on a hard surface. For example, on a cutting board or plywood. The cutting edges should be smooth. To do this, you need to apply a ruler or regular scissors to them.
The dashed-dotted lines indicate internal angles, i.e. bend “TOward yourself”, and the dotted lines are external (bend “AWAY”).
Not quite a polygonal model, but still a cool craft. For little modelers. Scan
After cutting, all the parts must be pressed and only then can bending begin. All parts are numbered, or rather the numbers indicate the gluing areas; the edges of two parts with the same numbers are glued together.
Which glue to choose? Experienced craftsmen prefer PVA, Moment Crystal or UHU.
Origami is always welcome
A wonderful children's craft deer can be made from the most ordinary paper, without scissors and glue.
Yes. You heard correctly - this is an origami technique! It’s very easy to find a ready-made template on the Internet on how to make a deer - a simple diagram, with step-by-step instructions in the picture. Prepare a piece of paper of the desired color - for example, orange, brown or yellow. Follow the instructions and everything will work out!
New Year's deer made of cardboard
This is a denser material that allows you to create deer figurines that can be hung on a Christmas tree, placed on a table, or used to decorate, say, a photo zone.
Cardboard deer for Christmas tree
The easiest way to make a deer from cardboard is to draw its silhouette on cardboard and then cut it out. Sew along the edge with contrasting threads, preferably white, then the figure will look like a gingerbread cookie. All that remains is to glue the ribbon and you can hang it on the Christmas tree.
You will get two separate parts that are connected to each other using glue. After the glue has dried, you need to make a hole in the head or body of the animal and make a loop from the braid.
You can make such a handsome man for the Christmas tree. Instead of fluffy wire for the antlers, you can use clothespins.
You can make a garland from Santa Claus's harness. Print the template, cut out the elements and connect them together with string.
Cardboard sleeve deer
A toilet paper roll is suitable as a material for this craft. Additionally, you will need colored paper and glue; other decorative elements - optional.
Cutting template
Cardboard is great for making a large deer, which will be used as a decorative element, for example, for a photo zone. We have prepared several template options.
It is better to make a template from fairly thick cardboard that will not wear out or tear after constant use. Having found it on the Internet or drawn a figurine of a deer yourself, you need to print it out on plain white paper. The workpiece is cut strictly according to the silhouette, carefully cutting through the individual elements. Only then the template is applied to the cardboard and outlined with a simple pencil to cut out the deer using a stationery knife.
Volume
You can make a three-dimensional deer from cardboard using different techniques. The simplest option is to cut out the silhouette of the body and “paste” it into the legs. To work, you only need cardboard and scissors. Decorative elements - optional.
You can make these handsome deer. Print the template, cut out and connect the parts as in the photo below. Cardboard parts can be painted or covered with colored paper.
Or this option.
And .
And this: a template.
A trophy deer head made from cardboard looks great. The craft will fit perfectly into a Scandinavian interior.
Download the template, transfer it to cardboard, cut out and connect the parts. By the way, the deer’s nose can be decorated with sparkles or a pompom.
You can make a trophy deer head from cardboard. To do this, print the template, transfer the parts onto cardboard, cut and connect, as in the photo instructions below.
From cups
A great option for a children's party or party. You will need brown cardboard cups, without drawings, patterns or inscriptions. You also need to get a sheet of beautiful textured cardboard - for example, with glitter, or velvet. Color - to your taste.
Cut out horns and a round nose from cardboard. We glue the horns to the top edge of the cup, and the nose to the cup itself. Draw in the eyes with a black marker.
You can draw rosy, round cheeks with a red pencil or paint. And glue a red and white New Year's ribbon or a strip of red shiny paper to the top side of the glass. Five minutes - and the New Year's glass is ready!
Be bolder in your creative processes, don’t try to copy crafts - add something of your own. And have fun creating!
Felt deer - patterns
Felt material is suitable for ordinary appliqués, creating voluminous Christmas tree decorations and sewing deer according to patterns. Beginners will be able to draw a New Year's deer on felt, cut it out and attach a loop to it.
Children really enjoy cutting out individual animal elements from felt and then gluing them onto paper or fabric to make a card or picture.
Needlewomen who are familiar with the art of sewing can try making a three-dimensional deer. Cut out all the parts from the material, you need to sew them and fill the middle with padding polyester.
Recommendations from experienced professionals
When making crafts in the form of a deer from pine cones, it is better to adhere to the following recommendations:
- It is better to collect natural material in dry, warm weather;
- Preference should be given to the cleanest specimens possible, since contaminated material may contain resin, which greatly stains hands and clothes;
- if closed specimens are required to make the figurine, then they should be collected in the fall, you can also resort to soaking them and then fixing the scales with glue;
- To make the craft more colorful, the base can be painted any color you wish.
New Year's deer Tilda made of fabric
Fabric, like felt, is used to make New Year's toys using appliqué or sewing. The latter option is more popular, but it is only suitable for people who know how to handle a thread and needle or a sewing machine. To obtain such crafts, only natural fabric is used, from which a deer is sewn and then the middle is filled with holofiber, cotton wool or padding polyester.
How else can you work on a craft?
Here you will need to acquire the following materials:
- a pair of cones of different sizes, one of which should be closed;
- rowan bunches;
- plasticine;
- a few autumn leaves for decoration.
It is best to make a head from a cone with closed scales. A deer made from cones must have eyes that can be easily molded from plasticine. It is recommended to leave sharp corners. The pupils are made black. You can finish the design of the eyes with eyelashes, for which rowan leaves are perfect. They need to be cut into thin strips.
For the mouth you will also need a piece of plasticine; it is attached to the top of the cone, and the eyes take their rightful place on the sides of the craft.
At the next stage you need to make horns with hooves. Rowan berry clusters would be an excellent decoration for pine cones, but not exactly in the form in which they are prepared. You need to pick off the berries, and the remaining branches will become horns. This part is secured with a piece of plasticine.
After the head is ready, all that remains is to fasten the two parts of the craft together. It turned out to be a wonderful forest dweller. Legs, if the cone will stand without them, are not necessary. In another case, branches of sufficient thickness are used as legs that can support the weight of the craft.
All that remains for the craft from natural material - a deer made of pine cones - is to make a stand, for which thick cardboard is quite suitable. For greater ambience, you can use autumn leaves, which are laid out on cardboard.
How to make a deer from foam plastic
If there are sheets of polystyrene foam lying around on the balcony or in the pantry, which are usually left over from packaging for household appliances, there is no need to rush to throw them away. This is an excellent material from which you can quickly make an original deer and hang it on the Christmas tree.
First, you need to cut out the silhouette of a deer from paper, transfer it to polystyrene foam and cut it out with a knife. To prevent individual elements or the animal figurine from crumbling during work, it is necessary to place a sheet of plywood or a regular kitchen board under the foam. The eyes, mouth, hooves and tail are decorated with acrylic paints or a marker.
Finished goods
Of course, some craftsmen can try to make a sculpture on their own, but not everyone is naturally given the ability to delicately wield the architect’s tools - a stack, a gravel, a scraper, a scraper, and maybe even the most ordinary chisel.
In this case, you should turn to the services of online stores, many of which offer various types of figurines of the beautiful animal. Moreover, buyers have the opportunity to choose both northern, sika, and red deer.
Prices for the products offered are suitable for any budget. There are garden sculptures at very high prices, but you can buy cute little deer at very reasonable prices.
Deer made of plywood - drawings in good quality
The wooden craft will serve as a New Year's decoration for a long time, but small children will not be able to make it themselves. They will definitely need their parents' help in cutting out individual parts or burning them using a special tool.
After the deer template is transferred to the plywood, you need to start cutting. You can make the task easier if you make separate squares for each element and cut them out separately.
Creating a solid figure takes longer, because with the help of a jigsaw you need to cut out not only the outline, but also other details. Sandpaper will help to give the final shape and eliminate roughness, unevenness, and burrs.
For plywood crafts that will be hung on the Christmas tree, you need to burn a hole in its body and tie a ribbon, making a loop out of it. Also, such figures are placed on separate stands and decorate work tables.
Useful secrets when constructing crafts from pine cones
Note! To create a unique and cute craft from pine cones with your own hands, both blossoming and not fully ripened fruits are suitable, it all ultimately depends on what is planned (on the idea).
To glue the cones together, as well as other auxiliary elements for them, materials such as ordinary PVA glue or simple children's plasticine can be used. For very small children, when creating crafts from pine cones, plasticine is more suitable, and for older children - preschool or primary school age - you can use glue when constructing crafts.
crafts made from natural materials
Before you start making crafts from pine cones with your own hands, you need to familiarize yourself with some of the nuances when working with them, namely:
- To give the cone the desired shape, you just need to soak it in water and then use a rope (tying it around) to give it the shape that is needed. After all these procedures, in the end, the modified cone will just need to be thoroughly dried and the intended product will be made.
- Since cones tend to open up when warm, before starting work with it, it must be dipped in a warm solution of wood glue. Soaking the pine cone in the solution will take about 30 seconds. Next, drying will be required and, as a result, the finished product will no longer be deformed.
Having familiarized yourself with and taken advantage of all these nuances in your work, you can create quite neat, memorable and beautiful collectible crafts from pine cones with your own hands.
Knitted deer amigurumi
An unusual New Year's toy will be made from yarn. Knitted deer will come out large and voluminous, making a wonderful New Year's gift for adults and children. It is better to crochet a deer, starting the process of creating a toy 3-4 weeks before the New Year.
MK author: Svetlana Bozhko
Each part - head, horns, body, hooves and tail - is knitted separately and then connected using threads of yarn. A padding polyester or other filler is placed in the middle to give the deer volume.
Author MK: Oksana
Eyes, ears and a nose are sewn onto such a toy. They must be attached to the deer's head before the product is fully assembled.
MK author: Natalya Morozova
What types of crafts can we make?
In fact, sources of inspiration surround us everywhere: from New Year's advertising to pre-holiday posters. You can come up with dozens of your own ideas to bring them to life in the future. We will present to your attention step-by-step instructions for creating the most famous crafts.
So, today our list is represented by such models as:
- Deer made of cardboard and colored paper. Such crafts can be safely given to people you know as a New Year's souvenir, and they are incredibly easy to make.
- Plastic deer figurines. It’s enough to have a few old plastic bottles on hand, and your child’s school craft is ready.
- Felt figures. Small but graceful deer will decorate your bag or your little ones' backpacks. The work won't take up much of your time, but cute toys will remind you of a pleasant holiday weekend ahead.
- Lightweight toy decoration for the Christmas tree. Manufacturers have long moved away from producing heavy Christmas tree decorations, and we will not lag behind them. Today we will create a decoration for the holiday using polystyrene foam.
- Wire frame deer. The most difficult moment in this technique is making the frame itself. And you can supplement it with film, garland, fabric (at the discretion of the master).
Reindeer made from salt dough or plasticine
Figures of deer are made from salt dough in the form of cookies or other sweets that will decorate the New Year's table. This material is suitable for making a deer and decorating it with acrylic paints.
Landscape decoration
Owners of dacha plots care not only about obtaining vegetables and fruits on “hard-earned” acres, but also about decorating their estate. And what better way to decorate a plot than a garden craft in the shape of a red deer?
Imagination and the availability of the necessary materials will help you create something original that not a single guest at your summer cottage will pass by.
Deer made from scrap materials
Wine corks
You can make a cool craft from wooden corks. For one deer you will need: 2 corks, twigs, glue. You can use a miniature pompom for the nose, and hang a small bell around your neck.
Twigs
By collecting small twigs on the street or buying wooden sticks in a store, you can quickly build a deer head with antlers. A triangle is glued from sticks, buttons are glued to two sides, which will serve as eyes. At the intersection of these sides, a spout is made, and horns are attached to the base of the triangle. They can be made from polystyrene foam or thick cardboard.
Paper plate
Cone
Knitting
Popsicle sticks
Plastic bottle cap
clothespin
Walnut
How to prepare natural material
Cones are a very common and accessible natural material, but they require preliminary preparation, especially if children will work with them.
Attention! If specimens with unopened scales are needed, then it is advisable to collect them in September-October.
After removing the cones from the tree, they are soaked in water, slightly dried and varnished.
In any other case, the collected natural material is soaked in a vinegar solution (take 2 tablespoons of acid per 1 liter of water) for approximately 20 minutes. Then dry in the oven at a temperature of 95-105 degrees for 30-40 minutes. Afterwards they are coated with varnish or molar glue. If the weather and time permit, you can dry the raw materials in natural conditions outside, but this will take from three to five days.
Soft toy
Knowing the basics of sewing, you can make a felt or fabric toy for your child for the holidays. A deer craft, cut and sewn with your own hands, retains the warmth and love of its creators. Experience shows that such little things are never forgotten.
To work you will need:
- Felt in beige, light brown and dark brown;
- Fabric, felt or a large red bead for the nose;
- Thick yarn in brown, black or orange;
- Two black beads or a pair of ready-made eyes;
- Decorative bells or scarf (optional).
Patterns and location of parts are posted in the photo of the craft. The deer can be sewn by hand, with a tight overcast stitch, or by machine. Natural or synthetic wool, holofiber, synthetic padding polyester, and granulate are suitable for stuffing.
Trees made of autumn leaves
You just have to direct your imagination in the right direction, and ideas will begin to appear one by one, and all that is required is to arm yourself with glue, scissors, and capture the invented images. You can make a real little autumn forest from cardboard rolls and natural materials.
Autumn forest
Leaves can be secured to cardboard rolls using paper strips.
Trees made from leaves and cardboard rolls
You can make a very interesting “forestry” craft from autumn leaves and branches.
Forester made of leaves and branches
Seabed made of leaves and petals
Using autumn leaves, you can create an entire underwater world. To begin, tint a white album sheet with blue paint. You can also take blue paper, but then it will not have the stains characteristic of the water surface.
We tint the sheet with paint
Unfold the sheet in a way that is convenient for you, and cover the bottom part with dried autumn leaves. Use leaves of different shapes and colors to create a beautiful seascape.
Leaves for the seabed
The leaves of some plants and dry grass can be turned into algae.
Algae from paratnik
White birch bark will become a shell.
Bark shell
And from other leaves and dry flower petals you can make fish.
Fish made from petals and leaves
Dry twigs will turn into a variety of algae.
Algae from twigs
This unusual picture can be made from ordinary autumn material!
Autumn painting "sea bottom"
