Many have heard from experienced drivers that instead of expensive store-bought products, you can use toothpaste to polish headlights. Despite the seeming absurdity of this idea, toothpaste actually shows good results when polishing glass and plastic products. Let's figure out what this method is based on and how to properly clean the headlights.
Why periodically polish
Optics in a car are very important, but headlights are constantly exposed to various influences - sand, gravel, dirt, stones flying out from under the wheels of other cars. In addition, various insects affect the optics. All this, sooner or later, can lead to the light losing its brightness and directionality. In addition, the car loses its appearance, presentability and attractiveness.
Why do car headlights lose their attractive appearance?
No matter how well a car enthusiast cares for and protects headlight lenses, they can often be damaged by abrasive substances such as sand and small objects. This happens especially often when the car is moving at high speed.
The appearance of microscopic scratches gradually reduces the transparency of the glass. Its recovery when using rags or by washing is not observed.
If you wipe the surfaces of the car with rough and dry types of cloth, the damage may only increase, and the headlights will not perform their functions of illuminating the road efficiently.
Tools and materials
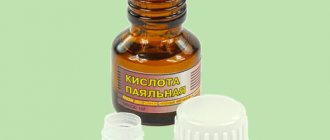
The standard polishing arsenal must include tools that can be used to remove the caps. You should also stock up on masking tape. To sand deep scratches, you need sandpaper with different grits. The maximum grit range should be from 600 to 4000. To complete this job as quickly as possible, a sander or any other power tool will come in handy. Naturally, polishing a headlight with toothpaste will not work without the toothpaste itself. Moisten the surface to be sanded with clean water and rinse it.
Before starting work, the optics must be removed, having previously taken care of electrical safety, and the headlights must be fixed in a convenient position. Only then can you start working.
What headlight updating technologies exist?
The ideal option for caring for any part of the car is to turn to professionals. This also applies to cleaning the headlights from plaque and small scratches that have appeared on them. However, this method does not suit every car enthusiast.
This procedure is quite expensive, and good specialists are not always nearby. For this reason, many car owners do their own headlight cleaning and polishing. In order to carry out this work efficiently, you should know what methods exist to bring the surface of the headlights into proper shape. On the videos available on the Internet in sufficient quantities, you can see the operating procedure for each of the technologies. It mostly depends on the materials used.
We recommend: Protecting the car interior from UV rays
Polishing process
The technology includes several stages:
- Metal parts and rubber seals are closed.
- Preliminary cleaning of dust or dirt.
- Polishing headlights with toothpaste.
- Cleaning.
At the first stage, it is necessary to prepare the field for work.
When all the preparatory work is completed, you can proceed to the rubbing process. Polishing headlights with your own hands with toothpaste involves applying the substance directly to the surface or to felt or any other soft cloth. To polish the surface, you need to make vigorous and very fast circular movements.
For greater efficiency and high results, it is recommended to use electric tools. It can be either a grinder, a hammer drill, or a drill. Power tools must be equipped with special polishing devices or grinding wheels on which toothpaste or any other material is applied. Polishing car headlights can also be performed using a specially designed composition based on diamond dust.
If it is necessary to process a glass or plastic headlight, it is important that the surface is not overheated. Otherwise, this may lead to cracks, and the plastic may become deformed at high temperatures. To prevent this, the temperature is constantly monitored during the process. This is done with one hand - if you can hold on to the glass, then everything is in order. It is important to pause during the process. If you have certain skills, you can easily achieve excellent results.
Restoring headlight glass from the outside - algorithm of actions
To polish the surface of the headlights yourself, you need to prepare the following materials:
- toothpaste (you can use the most inexpensive, domestically produced one);
- an electric drill with a polishing pad; if you polish with your own hands, you will need microfiber or a piece of felt;
- masking tape;
- glass varnish of the “Delta Kits” type.
You can polish the outside of the headlights without removing them. It is enough just to seal the seals and all surfaces adjacent to the glass with masking tape so as not to damage them during the polishing process. Also, be sure to wash your headlights first with detergent so that not a single grain of sand remains on the surface. Otherwise, the surface of the headlights will simply deteriorate completely, and it is unlikely to be restored.
When all the preparatory steps have been completed, you can begin polishing. It is done quite simply: a small amount of toothpaste is applied to the surface of the headlight or felt, after which the glass is polished with an electric drill or an angle grinder. The polishing pad should be used in circular and crosswise movements. At the same time, it is extremely important to ensure that the surface of the headlights does not overheat; to do this, periodically turn off the tool and check the temperature of the glass with your hand.
We recommend: How to increase the power of a car engine?
You can use regular toothpaste as the main polishing material.
If you don't have a power tool, you can sand the glass by hand using fairly fast and vigorous movements. Of course, the procedure in this case will take you much more time and effort. Polishing should be done until the surface of the headlights begins to shine. Then the surface is cleaned from residual paste, after which the glass is polished for some time with clean felt or a polishing pad, i.e. without paste.
Polishing headlights using toothpaste makes sense if you do not have the opportunity to use a special polish; for example, you decide to do this work in the country where there are no car shops nearby. Otherwise, there is no point in saving, since special means will give better results and with less loss of time.
Then the surface needs to be coated with varnish, which will improve the light transmittance of the headlights, i.e. will make them more transparent, and also create a film that protects the glass from scratches and other mechanical damage. Before applying varnish, the headlights must be thoroughly washed and treated with a degreaser. You can even use dishwashing detergent as the latter.
Since the varnish is two-component, it must be mixed in a 1:1 ratio. Then dip a clean, lint-free cloth into the container with the varnish and use it to apply the composition to the surface of the glass. You have 10 minutes to complete this procedure, after which the varnish will begin to set.
Try to apply the coating evenly, moving the napkin from top to bottom. After this, the varnish should be allowed to dry for an hour. Please note that complete curing occurs only after a day, so during this time the headlights should not be washed or subjected to other mechanical stress.
Features of glass polishing
Polishing a headlight with toothpaste, if the surface of the optical device is glass, is virtually no different from polishing plastic. But the process itself requires extreme accuracy. It should also be taken into account that the same work at a service station will cost much more. It is recommended to use brushes with a medium degree of hardness. The process is carried out until there are no scratches on the surface. Then sanding is carried out with felt or a towel, but without toothpaste. The entire process from start to finish will take from 30 minutes to a couple of hours. The total time depends on several factors:
- Size of scratches.
- The product used.
- Manual or automated polishing.
- Optics material.
If the scratch is quite deep, you can apply sandpaper treatment, but only for a rough draft. And after the scratch is destroyed, you can move on to the process of polishing and grinding the glass. There are situations when, after work, the headlight is still cloudy. In this case, the optics are completely disassembled and all actions are carried out, but from the reverse, inner side.
Can you polish headlights with toothpaste?
Headlight polishing
Headlights play an important role, but they are constantly exposed to mechanical stress, that is, they suffer from gravel, pebbles and other debris that fly out from under the wheels of cars. Over time, this leads to a decrease in the brightness of the headlights, and it also looks unsightly. Damage cannot be avoided, so regular polishing of plastic headlights with toothpaste is necessary. You can go to a salon, but it’s cheaper to do it yourself.
So, for work you will need: • water; • scotch; • degreaser; • towels; • brush; • pasta. It would be a good idea to have a piece of felt or felt on hand. An electric drill with attachments may also come in handy.
Polishing headlights with toothpaste with your own hands is carried out in the following sequence:
- First, you need to protect all metal parts and seals from the effects of abrasives.
- Clean the headlights from dust and dirt.
- Apply toothpaste to the headlights and begin to rub it using felt, felt or a brush. This must be done until the scratches disappear, adding paste if necessary. An electric drill with special attachments will make your work easier.
- Clean the polished surface from any remaining paste.
How to polish headlights made of different materials with toothpaste?
Polishing plastic headlights
The process of processing plastic and glass surfaces is no different. True, you need to work with glass more carefully, using brushes of medium hardness.
The entire procedure can take from 30 minutes to several hours, and the duration depends on factors such as:
- scratch depth;
- what product is used;
- polishing method (manual or automated);
- the material from which the headlight is made.
Drivers leave quite good reviews about polishing headlights with toothpaste, which indicates the effectiveness of the method. The main advantage is low cost, quick results, usually no special tools or equipment are needed, and you can polish headlights anywhere (even on the road).
Polishing headlights with toothpaste gives short-term results
To be fair, it is worth mentioning the shortcomings. The most important thing is that the results are short-lived, so the procedure will have to be repeated often. It is also possible to easily damage a glass headlight if you do not exercise due care and attention. In general, polishing headlights at home with toothpaste is the best way to quickly return them to their original appearance and eliminate minor damage.
Minuses
With all the advantages, there are also disadvantages. The main disadvantage is that the effect is short-term, and the process itself must be repeated with sufficient regularity. In addition, if due care is not taken during the process, the glass can easily be damaged.
But in general, despite the shortcomings, home polishing of headlights is the best option when you need to quickly and inexpensively return your optics to their excellent appearance and performance characteristics. Owner reviews say that for greater effect you should purchase a special polish.
Baking soda
Another household product that can make life easier for drivers is baking soda. It can be used as an adhesive and as a cleaning agent.
If you take a little soda and mix it with Moment glue in a 50/50 ratio, you will get an excellent polymer for joining damaged parts. The soda dissolves in the glue to form a white slurry. This substance repairs cracks in plastic body parts or fills cavities formed as a result of mechanical action. When dry, this mixture turns into something like strong plastic that can bear loads.
Article on the topic
Motorist reserve. What items can't you live without in the fall?
In addition, soda dissolved in water is used to clean the body from stains, as well as to rub rubber wheels until they shine.
To do this, dissolve 1 part of soda in 10 parts of water; the solution can be applied to the surface of the body or to the rubber of tires and then wiped with a microfiber cloth. You can also clean car windows, especially in winter, when they lose transparency due to the abundance of chemicals.
Pros and cons of polishing
Any product (Colgate pastes are most often used for polishing) includes soft abrasive particles designed to remove plaque. Processing the glass cover will not reduce scratches more than 3 mm deep, and it will also not be possible to sand the chips.
Polishing plastic headlights gives a greater effect. Soft plastic, after being hit by gravel, becomes covered with a fine web of shallow cracks, which are easier to polish with a soft abrasive. Among the advantages of this method are the following:
- the ability to carry out work anywhere independently;
- cost - the price of a tube of paste;
- low time investment (from 30 minutes).
The disadvantage of this method is the lack of long-term effect. Polishing with toothpaste only brightens the headlight for a few months. Cosmetic polishing will have to be done constantly.
For a long-lasting effect after polishing, it is recommended to protect the headlight housing with armored film.
Branded pastes
Let's make a small rating of the most popular and common polishing pastes that can be used to process plastic and glass surfaces of headlights. Some of them also polish windshields, but here you should take a more careful approach to the issue of choice, studying the purpose and capabilities of a particular paste.
- Runway. Their product is called Headlight Polish. Silicone-free paste for easy application. You can process it by hand or with a sander. Costs about 350 rubles, the effect lasts 2-3 weeks;
- Lavr. Russian company offering the product Polish Restorer. Sold as a set costing 250 rubles. The composition contains a spatula, polish and several sanding papers. In addition to grinding, it creates a protective film due to wax and silicone in the composition;
- Abro. The paste is called HR230. Suitable for plastic optics only. A tube will cost 300 rubles. Excellently restores transparency and protects the surface. But you need to use it at least once every 3 months;
- Saphire. Good manufacturer of head lamp polish. It literally costs 160 rubles. It is recommended to order only through an authorized dealer. Restores transparency, does not require the use of a grinder;
- Sonax. Removes scratches well and is suitable for treating surfaces made of plexiglass. Can also be used for glass optics. Excellent German quality.
We recommend: When should you change brake fluid?
What good pastes for working with automotive optics do you know? What else would you include on this list, or what tools would you cross off from it, based on personal experience? Be sure to write, it will be interesting and useful.
Of course, the list of good pastas does not end there. The market range is huge. I have named only those that are popular and that I have encountered personally and received a positive impression.
How to polish
Tools and devices that will be needed for work:
- degreaser for glass and plastic surfaces (alcohol-based);
- construction tape (you can use soft mounting tape);
- felt napkins (clean lint-free rags, soft cotton fabric will do, but not calico);
- cleaning brush.
Do-it-yourself surface treatment can be made faster and easier if you use a drill with a soft polishing attachment or a polishing machine.
Polish the headlights with toothpaste step by step:
- Wash and dry the headlight thoroughly.
- Wipe the caps with degreaser.
- If polishing is carried out on a car, seal the body parts adjacent to the headlight with masking tape so as not to scratch the paintwork.
- Squeeze the cleaning product onto the felt roller.
- Rub the surface in a circular motion.
- If a disc is used, the paste is applied to it.
- Wash off the paste from the polished surface and wipe the headlight.
To ensure that the result lasts more than 2 months, it is recommended to apply a protective varnish.
Plastic case
Plastic is the most pliable material for grinding. Polishing your headlights yourself eliminates significant (deep and long) scratches. The paste is useless if you try to remove significant chips.
The plastic is sanded in the standard way, without using a polishing machine, if there is no significant damage. You can remove yellowness in 30-50 minutes.
Before work, plastic headlights must be degreased, and after the procedure, open the housing with protective varnish.
Glass body
The process is no different from the standard one, but in the case of glass, preliminary work is required. Polishing glass headlights with your own hands in stages:
- Wash and dry the block.
- Degreaser may not be used.
- Take some fine grit sandpaper (more than 2500 grit) and rub each headlight several times.
- Apply cleaning agent to the sanding disc.
- Rub the glass until the yellowness disappears.
This method will not work to remove deep scratches from glass.
When cleaning car headlights, it is recommended to use a grinder or hand drill. Wrap a strong felt around the end of the drill and grind the headlight without pressing the head tightly to the surface.
Windshield
Surface scratches can be removed from the windshield using the same method used to polish headlights with toothpaste.
You cannot use even the least abrasive sandpaper to polish the glass to its original appearance. The process goes through the following stages:
- Choose a product with a whitening effect (such pastes contain more abrasive particles).
- Apply a small amount onto a felt disc.
- Rub in circular movements.
- Rinse the surface with clean water and wipe dry.
Unlike glass car headlights, you can polish your windshields yourself without using a grinding machine. The device is used for polishing glass with polishes by placing a soft felt disc on the head. The disc rotation speed is within 1600 rpm.
When cleaning the windshield, it is not recommended to rub the paste or polish with a felt rag; use either special attachments for a grinding machine or thick felt.
Discs
Car rims, if they are covered with scratches, cannot be polished in the same way as headlights. An alloy is not plastic or glass. You will first need to remove the paint (many manufacturers paint standard wheels). For sanding, you will need a coarse-grain Goya cleaning agent and a set of necessary tools:
- paint remover;
- grinding machine (required);
- protective kit for eyes and hands (gloves, respirator);
- sandpaper with abrasiveness up to 400 grit;
- machine (fastener for disk);
- polish.
Beautiful rims only affect the aesthetics of the car and do not play any role for safe driving. Optics are always related to the parameters of road lighting at night and require systematic monitoring. Grinding discs yourself is a labor-intensive and costly process. It is preferable to use car service equipment and the skills of a professional craftsman.
Plastic
Polishing the plastic lighting element of the machine will bring maximum results if the procedure is carried out systematically. Polishing gels are good for preventing cloudy caps. If chips and small cracks appear, use Goi paste or toothpaste with a whitening effect.
What will you need for work?
In order for any work to take a minimum of time and give good results, it is necessary to prepare the necessary tools before starting active actions.
To polish car headlights you will need:
- tool for removing glass: screwdriver, knife;
- masking tape;
- brush with a comfortable handle;
- glass cleaner, white spirit;
- clean rag;
- sponge.
Since the glass headlight cover has a small area, polishing can be done manually. But using a power tool will significantly speed up the process. It’s good if you have a drill with a polishing attachment or a grinder on hand. But if there is no such tool (and nowhere to borrow it for a while), you will have to cope without it.
How to polish plastic from scratches
Polymer materials are distinguished by their lightness, beauty and plasticity. The range of their applications covers all types of industry, housing and communal services and the service sector. People deal with plastic in the form of housings for small, medium and large household appliances, finishing materials and cladding of vehicles. During operation, products are subject to damage that spoils their appearance. Polishing plastic yourself is a way to return a scratched surface to its original smoothness and presentability with minimal investment and effort.
Dealing with minor damage
Small cracks can be easily polished with a special paste. Polishing agents are divided into two groups:
- coarse abrasive compounds;
- finishing light consistency.
For household plastic products, only finishing polishing pastes are used. Abrasives can further damage items.
How to work with polish:
- Clean the surface.
- Apply a small amount of product to a piece of fabric (flannel or any soft material will do).
- Rub lightly, rinse and dry.
Preparation for the process
Before starting work, you need to inspect the object to identify the extent and nature of its damage. This is necessary in order to choose the optimal method of repair to achieve the desired effect.
In order to get rid of external defects, you can use one of the following methods:
- Thermal. It consists of a thermal effect on the material, as a result of which it loses its hardness and becomes viscous.
- Mechanical. To polish plastic from scratches at home, abrasive agents are used to grind off uneven surfaces.
- Chemical. Substances are used that change the structure of the plastic or fill all the cavities on its surface. After the end of the action of the drugs, the surface becomes one with them.
After choosing a repair method, you should prepare the workplace and the damaged object. It should be restored on a table covered with oilcloth or cellophane. The product itself is cleaned of dirt and washed. To do this, it is better to use dishwashing detergent and a soft brush. After the surface is cleaned, it should be wiped dry with a natural cloth. If the polymer is enclosed in a metal or wooden frame, then it must be covered with mounting tape to prevent damage by a reagent or abrasive.
For safety reasons, polishing plastic with your own hands should be carried out wearing skin, vision and respiratory protection. It is necessary to prepare rubber or fabric gloves, assembly glasses and a gauze bandage.
Differences between grinding and polishing
Car owners need to know the clear difference between the polishing and grinding process.
Sanding is a rough method that involves exposing the surface to abrasive materials that level the surface by removing a certain layer.
Sanding is used to clean deep cracks and scratches that cannot be masked by polishing. After rough sanding, the surface will look matte. To level it, you need to use a fine-grained abrasive after a coarse abrasive.
Sanding plastic from deep scratches
Deep scratches are difficult to repair with putty, as burrs and the elasticity of the grout itself interfere with this. In addition, it is not always possible to choose a material of the desired color, which will not be visible after hardening. It should be taken into account that polymer plastic is soft and easily grinds off. The main condition is to maintain a low surface temperature of the product during the restoration process. Strong friction with a high amplitude of movement causes heating and melting of the synthetic mass.
To work you will need the following tools and equipment:
- sandpaper of different grain sizes;
- handmade grater;
- grinding machine of any operating principle;
- soft brush;
- soap;
- rags.
It is recommended to grind plastic using the following method:
- Secure the product to a solid and stable base. You can use a vice, clamps and self-tapping screws.
- Attach the coarsest sandpaper to a hand or power tool.
- Moisten the surface to be treated with soapy water. This will reduce friction and prevent it from overheating.
- Using gentle pressure, use circular movements to treat the damaged area, covering 1-2 cm of the clean area.
- As the polymer grinds down, change the nozzles, gradually reducing the grain size. Perform the final stage with zero.
- Rinse off the liquid and check the quality of the work performed. If necessary, repeat the procedure.
The result should be a smooth matte surface with a uniform texture. After this, the material is brought to the desired state using more delicate means.
Special means
To save yourself the hassle, use special products to restore plastic items:
- scratch removal pencils;
- abrasive gels;
- polishing pastes for filling;
- restorative towels and napkins.
When choosing these products, you must act strictly according to the instructions. Some compositions are coloring. Colored substances are suitable for filling deep scratches.
Advice! Choose pastes only for soft plastic; this should be indicated on the packaging. Products cannot be used on paint surfaces.
How to polish plastic from scratches yourself
If abrasions and scratches appear on the surface of the plastic, it is not necessary to throw away the old one and buy a new product. There are several effective techniques that can be used to polish glossy plastic to a mirror finish. To do this, you can use factory-made and home-made preparations, and various improvised means.
The effort spent will pay off, since the services of repairmen or replacement of a product can cost a considerable amount. The right approach will provide good savings and the acquisition of precious experience that will come in handy more than once.
Hand polishing
This procedure is carried out in cases where the surface has shallow cracks, abrasions, or has been subjected to a primary sandpaper treatment. The material is exposed to an abrasive with microscopic grains, traces of which can only be seen with a magnifying glass. Similar services are provided by auto repair shops and cleaning companies, but their price is comparable to purchasing a new product. It is cheaper to restore plastic yourself and for free.
The abrasives used are GOI paste, tooth powder, ash and fine volcanic dust, which can be purchased at pet stores. Felt, felt, wool and batting are best suited for the nozzle. The fabric is moistened with alcohol or water, after which an abrasive is applied to it. To polish the plastic to its original state, you need to wipe the products with smooth movements and even, gentle pressure.
The advantages of this method, compared to the mechanical one, are that there is no chance of the material melting or being damaged by careless movement. In addition, the sense of touch ensures high processing accuracy.
Polishing
If you don’t have the necessary improvised and factory equipment in your home, you should remember about polish. This is a product consisting of an emulsion and tiny particles that grind down irregularities on the surface of plastic and glass products. Thanks to the thoughtful composition and proportion of components, a high-quality final result is achieved.
This paste for polishing plastic is used according to the following method:
- The substance is applied to the surface and distributed over it in an even layer.
- The object is wiped with a sponge or terry cloth. The degree of pressure is determined based on the hardness of the material and the depth of its damage.
- The product is rinsed under running cold water. If defects remain, the procedure must be repeated until the desired result is achieved.
A special feature of the polish is that it can be safely used when using mechanical brushes. The presence of lubricant prevents overheating, even when processing is carried out at high speeds.
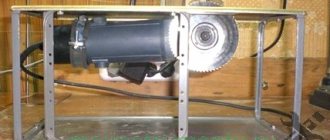
Using a polishing machine
The tool belongs to the category of professional equipment, but has an affordable price for purchase in a home workshop. The device is characterized by ease of use and high performance, which is achieved by the high speed of rotation of the nozzles. Designed for the restoration of car plastic over a large area; it can also be used for other purposes when restoring housings of household appliances, window sills and worn glass.
During the polishing process, the following rules must be observed:
- Before starting work, clean the area from dirt, dust, grease and oil deposits. To do this, use a tile and glaze cleaner.
- Start processing with the coarsest nozzle, which will remove the thin top layer of material. Then change attachments as you get closer to finishing the job.
- Finish the procedure with a foam nozzle, which will bring the final shine to the plastic, eliminating all the smallest abrasions.
The machine has proven itself well in the restoration of plumbing fixtures, window glass, window sills and even furniture varnish.
Depending on the area of the damaged surface and its characteristics, a household or construction hair dryer is used. The principle of this method is that when heated, the transparent plastic becomes viscous. In this state, like water, it fills all the depressions, forming a flat plane.
The rules for using a hair dryer are as follows:
- No dirt or dust on the plastic.
- Checking the reaction of the material to heating in an inconspicuous area.
- Gradual warming up with a slow increase in power.
- Smooth movement of a jet of hot air over the area so as not to burn the polymer plate.
- If cracks persist, do not increase power to maximum as this may cause a fire.
If the work is done correctly, the result will be no worse than after lengthy and labor-intensive grinding. All abrasions will disappear, and in their place a shiny gloss will appear.
Toothpaste
As practice shows, polishing plastic with toothpaste, when done skillfully, can give results that are not inferior to patented products. For work, you should choose neutral compounds without acids and alkalis. You should pay attention to the size of the abrasive particles. The smaller they are, the better the surface will be leveled. If there is a large amount of work to be done, then it is advisable to purchase an inexpensive tube that can be used only for technical purposes. You can enhance the abrasive properties with fine dispersion dental cleaning powder.
Cleaning is done in this way:
- The product is prepared for processing.
- The paste is applied to felt or thick fabric.
- Polishing is carried out by making circular movements.
- As the composition becomes contaminated, it is removed and replaced with a fresh one.
- At the end of the treatment, the surface is washed under running water and wiped dry to avoid the formation of a white coating.
If you are going to restore transparent plastic, it is advisable to use a gel for sensitive teeth.
Methods for polishing plexiglass at home
You can give plexiglass products their original appearance without resorting to complex tools or expensive materials.
There are several effective methods of dealing with the “non-commercial” type of plexiglass:
- Felt + GOI paste.
- Use of dichloroethane.
- Using polishes.
- Homemade recipes (wine vinegar, toothpaste, etc.)
Using GOI paste, sandpaper and felt (with detailed video)
This method is the most common and has proven itself to be the best among craftsmen restoring plexiglass surfaces.
You should know that there are coarse, medium and fine types of GOI paste
- Isolation of plexiglass from other structures and elements. If possible, separate the plexiglass from other structures (seal adjacent areas with tape, disconnect the plexiglass parts, etc.)
- Using sandpaper with a grain of 2000, process the organic glass, periodically wetting the surface with water (under running water or using a spray bottle). Uniformity and slowness are the main characteristics when performing this work. A matte, uniform surface should be the result of this labor-intensive step.
- The part, wiped dry, is polished using felt with GOI paste applied to it. This should be done slowly, achieving the highest quality result.
This method of restoring plexiglass is suitable for plexiglass if there are large scratches on it.
By following the step-by-step instructions in the video, you can easily cope with the task of eliminating plexiglass defects.
Types of pastes for polishing plastic
Commercially available polishing pastes for plastic vary in color, composition and purpose. According to these indicators, they can be used for processing hard and soft, matte and glossy surfaces. Based on this, before making a purchase you need to know exactly the characteristics of the object that will be processed.
Factory-made polishes are divided into the following categories:
- orange - rough, preparatory;
- yellow - pre-treatment;
- white – final polishing;
- blue - superfinish composition for hard materials;
- green – super finish for medium density materials;
- gray - intermediate for high-density plastic;
- black - super finish for delicate materials;
- red - super finish for transparent plastic.
To achieve the desired goal, the compositions can be mixed, which leads to the weakening of some properties and the strengthening of others.
The best recommendations from users were earned by such polishes as DIALUX VORNEX, Turtle Wax, SINTEC Cockpit Polish, Plak Super Mat, Nanox, GRASS.