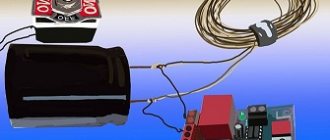
Today, the security systems market segment offers many devices aimed at effective property protection. Installing such devices helps reduce the likelihood of penetration into objects that need protection. The latter are garages, apartments, small country houses and country cottages.
Alarm systems that use lasers are ahead of similar developments in terms of the difficulty of hacking and bypassing the system. Such alarms are classified as expensive. The minimum price exceeds the cost of traditional security systems several times.
As an alternative, it may be suggested to install laser alarms on your own. With this approach, it is possible to acquire an effective security system based on the use of lasers at a relatively low cost. Costs are limited to the cost of multiple devices and additional components.
Below you will learn how to make a laser alarm with your own hands according to the diagram and what components you will need for it.
Scope of application
Laser alarms are usually installed directly in the premises or along the perimeter of the protected object. Complexes of this category are in demand when there is a need for protection:
- enterprises;
- apartments;
- company offices;
- cottages, houses;
- bank branches.
Installation of a laser type of alarm is recommended for objects that are also a place for storing valuables, significant amounts of money or jewelry.
DIY mobile phone alarm
If you have an old mobile phone lying around, then you can make a simple alarm out of it to protect premises, cars, etc. It will send a signal to your mobile phone when any sensor in the system is triggered. This alarm system works simply - the sensor acts on the auto-dial button and you receive a call.
Mobile phone alarm circuit, necessary parts
The circuit is based on the PIC12F509 controller and the K561KT3 microcircuit.
Operating principles of laser signaling
The main components of the security device are a source transmitting laser radiation and a photodetector. The main function of the latter is the reception of the specified radiation. At the moment the laser beam hits the surface of the photocell, the electrical resistance does not exceed several ohms. If the laser beam is interrupted, a rapid increase in the value of the photocell resistance is recorded. Then, through the relay, external executive-type devices are switched on, resulting in an alarm.
Strengths of laser alarms
Laser security systems have a number of advantages:
- high mobility, allowing you to move individual modules and place them in places designated for these purposes;
- the possibility of placing lasers in secluded corners, as a result of which uninvited guests may not realize that the alarm has been activated until the security company’s employees arrive at the site;
- compatibility of laser security system elements with a variety of interior solutions without loss of appearance;
- the possibility of triggering both with and without sound signals (in addition, there is an option to notify an employee on duty at the central control panel of the security agency);
- the ability to assemble a laser alarm on your own, involving the use of improvised means.
Disadvantages of laser signaling
The disadvantages of laser security systems are limited to two positions:
- high cost;
- complexity of installation/configuration.
How to operate a receiver detector for a laser level
Before starting work, secure the detector to the rail. It is not necessary to use it, but it is very convenient to work on the markings on the rail. A standard leveling staff has markings on both sides – millimeter and for levels.
- Place the level on a tripod, floor or any flat surface. It is important that the device is leveled and that the level compensator does not operate. Tripods with an elevation platform are convenient for working with the detector. They allow you to adjust the beam with an accuracy of a few mm.
- Turn on the receiver and move the mount on the rail to the desired height.
- Direct the beams of the laser plotter towards the detector.
- After the detector has emitted a sound signal, you can focus on its frequency and move the laser beam up or down.
- When the beam exactly hits “zero”, a mark is made, markings are made and the staff with the detector is shifted a certain distance. After catching the beam, you need to make the following mark.
All marks are made by analogy.
Without a laser beam receiver, it is difficult to work with a level outdoors. The line will no longer be visible from a distance of 3-5 meters. And with a detector, the operating range can reach 100 meters in simple laser levels and up to 800 and higher in rotary ones. 12, total, today
Set of components for assembling laser signaling
Deciding to build your own laser alarm system involves purchasing certain components. At the stage of creating a simple security complex, it will not be possible to do without the following components:
- laser pointers;
- a photocell, the peculiarity of which is a change in resistance at the moment the surface is exposed to a stream of light;
- a relay responsible for switching with external devices (due to which sound signals are triggered, etc.);
- body parts;
- switching conductors;
- installation tools;
- materials/tools required for soldering.
The above components can be purchased at specialized retail outlets or on the radio market. Individual elements are components for household appliances, and as a result may be in stock. In this case, you will be able to save on purchasing the necessary parts.
On video: How to make a laser alarm with your own hands?
Remote control with laser pointer
The laser pointer is designed to form a small but very bright “beam of light” on the teaching board or other surface. In fact, it is a pocket flashlight that has a semiconductor laser (laser LED) inside instead of a light bulb or LED.
The ability to form a narrow and bright beam allows you to use a laser pointer for remote control. Here is a simple proven circuit for remote control of a laser pointer. The receiver circuit of the signals supplied by the laser pointer is shown in Figure 1. The element receiving the signal is a conventional photoresistor FR1. This photoresistor, together with the tuning resistor R1, forms a voltage divider supplied to the input “C” of the trigger of the D1 chip.
This photoresistor is quite sensitive; it was taken from a faulty photorelay of the light switch. To prevent the photoresistor from reacting to ordinary light or the light of lighting devices, the infrared signal of remote controls, a resistor R1 of relatively low resistance is connected in series with it. In the process of setting up the circuit, using this trimmer resistor, you can adjust the sensitivity of the photoresistor.
And install it in such a way that the circuit reacts to the “bunny” of a laser pointer from a distance of 5-8 meters, but does not respond to daylight or the light of lighting fixtures, as well as to remote controls of the equipment. And so, until the laser pointer is shined on the photoresistor FR1, the resistance of FR1 is significantly higher than that set when setting up the resistance R1, and at the point of their connection the voltage is low, and the level corresponds to the logical zero of the K561TM2 microcircuit.
The trigger of the K561TM2 microcircuit, when the circuit is powered up by the circuit C1-R2, is set to a logical zero state at the direct output. The key transistor VT1 is closed, and the load connected to the output (to its drain) is turned off. When photoresistor FR1 is illuminated by a laser pointer beam, its resistance decreases sharply and becomes significantly less than the resistance R1 set when setting up. And at the point of their connection, the voltage increases, and the level corresponds to the logical unit of the K561TM2 microcircuit.
That is, the logical level at the input “C” of the trigger changes from zero to one. This causes the flip-flop to be set to the state that occurs at its “D” input. That is, it is set to a logical one state at the direct output. At the same time, the key transistor VT1 opens, and the load connected to the output (to its drain) is turned on. At the same time, the input “D” of the trigger receives a logical zero voltage from the inverse output of the trigger. Therefore, the next time the photoresistor is illuminated with a laser pointer, the trigger will return to the zero state and the load will be turned off.
Circuit R3-C2 is needed to delay the level change at the “D” input of the trigger. This delay is needed in case the laser pointer shakes and its beam periodically moves away from the photoresistor (for example, if a person’s hands shake). Resistor R3 is needed in order to limit the current pulse for charging the gate of the field-effect transistor. The gate capacitance of the IRF840 transistor is significant and when the voltage changes sharply, a short but significant current pulse appears on it, which can lead to arbitrary reset of the trigger.
To prevent this from happening, there is a resistor R3 that limits the output current of the microcircuit. In addition, there are also diodes VD1 and VD2, which limit voltage surges on the gate capacitance of the field-effect transistor. You can make a switch in a similar way. Figure 2 shows a two load switch. Here is another exactly the same switch on transistor VT2.
Now, depending on the position of the trigger of the D1 chip, the key either VT1 or VT2 is open. IRF840 field-effect transistors allow you to control a load with a current of up to 8 A and a voltage of up to 500V. If the load current is no more than 1.5A, the transistor does not need a radiator. If the current is more than 1.5A, a radiator is required. If you need to control a powerful low-voltage load, you can use another transistor, for example. The APM2556NU allows 50A current.
Simple diagram of a laser alarm system
To implement the circuit below, you will need a laser pointer and an NE555 timer.
A photoresistor irradiated by a laser has a low resistance. When there is no laser beam, the electrical resistance increases rapidly. If this condition is met, a command is received from the microcircuit that turns on the external device. Triggering is confirmed by the sound of a siren.
Laser diode module KY-008
The KY-008 laser transmitter module for Arduino emits a red laser beam in the shape of a dot. The module consists of a 650 nm laser diode head and a resistor. Handle with care and do not look directly into the laser head.
Module KY-008
KY-008 Laser Transmitter Module Specification:
- Operating voltage: 5 V
- Output power - 5 mW
- Wavelength - 650 nm
- Operating current: less than 40 mA
- Operating temperature -10°C to 40°C [14°F to 104°F]
- Dimensions – 18.5 mm x 15 mm [0.728 in x 0.591 in]
Assembly instructions
For a laser alarm that you assemble yourself, the simplest model of a laser emitter is suitable. You can get by with either a laser pointer or a toy laser borrowed from a child. The power source for such emitters is three compact batteries that are not designed for long-term operation. As a result, it is necessary to provide the laser with an operating voltage, the supply of which will be supplied by a power supply of a suitable rating. If there is no suitable element, you will have to work on the low-voltage unit. Adding a resistor to the circuit will reduce the output voltage to the required value.
The three-contact relay system is responsible for turning off the laser beam and turning on the siren. You can buy a ready-made sample or make a relay yourself. In the latter case, you will have to remake the relay node of the device that has become unusable.
The relay contacts must be connected to a wired communication line that ensures interaction between the photocell and the sound siren. In this way, it will be possible to achieve the relay operation in the event of an increase in the resistance of the photocell. In addition to the siren, it is advisable to turn on the laser power line through the relay. This step is intended to ensure that the siren sounds until the alarm is turned off by pressing a special button. Otherwise, the sound signal will turn off after an object that has blocked the passage of the laser beam leaves the overlap area.
In the video: Self-assembly of a laser alarm with components ordered from Aliexpress.
Basic blocks
The laser detector consists of the following elements:
- generator;
- power supply;
- laser;
- relay;
- digital microcircuits;
- photocell;
- sound detector (an LED light can also be used for greater effect).
I usually install such a unit closer to the floor at a distance of 25-35 cm, so that particularly inattentive robbers either do not notice it or cannot freely crawl under it or jump over it.
The laser, power supply and relay are mounted on one side, and the photocell is mounted on the other wall so that the beam hits the lens.
When this type of security alarm is activated, the beam travels in a straight line to the photocell. Since a beam of light travels a long distance and does not scatter, it can be reflected an indefinite number of times using ordinary mirror surfaces directed at a certain angle to each other. This helps create a tangled labyrinth, which is almost impossible to pass without hitting such a “tripwire.”
If an unfortunate thief crosses the beam, the signal does not reach the photocell, resistance arises and the relay is blocked. Thus, the relay transmits the signal to the resistor, and the latter to the detector.
Immediately after a violation in the activation zone, the laser also stops working so as not to activate the photocell again, otherwise the alarm signal will be interrupted. You can completely turn off the alarm only by turning off the power.
To prevent the alarm from being triggered by ordinary sunlight or other light sources, the photoresistor has special insulation.
Features of installation at home
If you need to protect your own home, it is advisable to install laser alarms in places that are most vulnerable to penetration. For one-story buildings and apartments located on the ground floor, balcony and entrance doors are identified as problem areas.
The diagram according to which the laser alarm is mounted must be geometrically correct. Compliance with this requirement guarantees the safety of the facility.
When placing the laser emitter and photodetector, it is important to remember that they must be in line opposite each other. The laser beam must hit the central part of the photocell. It is recommended to place the component that reacts to light in a black tube in order to exclude the influence of external light sources.
The button responsible for activating and disabling the alarm should not be conspicuous. It is advisable to place it in a secluded place. It is also better to lay alarm wiring hidden. This approach makes it difficult for an intruder who has entered the facility to independently disable the security system.
If you have several mirrors, you can arrange a laser stretcher that can cover a large space. Mirrors must be installed between the photodetector and the emitter, observing a certain geometry.
Principle of operation
A laser motion sensor consists of an emitter and a photocell. The emitter generates a laser beam directed at a photocell placed opposite it.
"Important!
When the laser beam does not hit the photodetector, it has a high resistance, and after irradiation with a light beam, its resistance decreases.”
While a beam of light hits the photocell, the electrical circuit of the protective system is closed and the relay system does not supply power to external protection and warning devices. After the beam stops reaching the photocell, its resistance quickly increases, as a result of which the electrical circuit opens and the relay system turns on protective and warning devices. The operating principle is the same for “factory” and homemade sensors.
Beam laser sensors for perimeter and territory protection
Beam laser motion sensors, perimeter and territory protection are based on the action of a laser beam to be reflected from an obstacle, determine its size, direction and speed of movement.
Laser sensors are quite expensive compared to other types of sensors. Internal sensors can be used as an additional security alarm system in banks, in separate rooms where valuables are stored.
In the RLS-2020i model, for example, an angle is created that deploys the sensor 90 degrees with a range of 20x20 meters. In another plane, the beam is several centimeters wide.
In this way, the sensor forms a laser “wall”, upon the intersection of which a person or any object will trigger an alarm, that is, the sensor will send a signal to the control panel. This model is also available in an outdoor version, having an increased class of protection against precipitation, temperature and humidity.
In addition to “dry contacts”, the sensor has an Ethernet output, which can be adapted to the operation of IP video surveillance and control the operation of PTZ video cameras.
The sensor can be installed on the wall, cutting off the passage to the place where something is stored with a vertical plane (“wall”).
If the sensor is installed at a different angle, turning it 90 degrees, you can cut off the passage through the ceiling. In this case, a protective “wall” is created in the horizontal plane.
The sensors can be configured not only for a person, but also for an object, upon crossing which the laser sensor will “trigger”, opening its dry contacts and sending information via Ethernet.
Outdoor versions of laser perimeter security sensors can protect the approaches to a building in any area. There is a street model of the laser perimeter security sensor RLS-3060SH.
Its fundamental difference is that the angle created by the laser is 180 degrees, and the range is 30 meters. By installing such a sensor in the center of the fence, you can protect it up to 60 meters in length.
The installation height is determined, for example, 1 meter from the ground, taking into account grass and snowdrifts. This way we get a horizontal protective plane. If this laser sensor is placed on a pole, for example 5 meters high, then we get a vertical “obstacle”.
Of course, the list of laser sensors is not limited to these two models. They began to be manufactured from the very moment lasers appeared. Here are the models that can be purchased in Russia, installed, and which I have technical support.
The cost of the RLS-2020i model is in the indoor version: $3000 The cost of the RLS-2020s model is in the outdoor version: $4000 The cost of the RLS-3060SH model, it comes only in the outdoor version, is $8000
Only the estimated cost of the sensors is indicated, not counting the work of installing them, the control panel and materials.
Laying TPP-20 cable under a perimeter alarm system
Installation of street security detectors
Duplication of the perimeter security system with a video surveillance system
Article. Security of the perimeter of the site is the most important part of the overall security of your home. This is understandable, because vandals and robbers first of all set foot on your green lawn, which means that the invulnerability of property boundaries in Moscow is the first obstacle on the way of robbers to your property. Their reliability and effectiveness are very important for the early detection of thieves.
All territory security devices operate on the principle of detecting changes in certain physical parameters, which, if violated, are recorded by special devices and an alarm is generated. The emergence of digital processing methods makes it possible to create “intelligent” notification elements with such functions as recognition of typical intrusion sounds, localization of the intruder within the protection zone, remote diagnostics and others. And there is no need to prioritize price when purchasing warning equipment. The cost is not comparable to the damage that thieves can cause.
To save energy, it is possible to create terrain monitoring devices with an independent power supply. And tiny radio transmitters of security systems, combined with other security measures, are an excellent solution for creating wireless security concepts. Covering the circumference can be done using radio-controlled equipment. It is equipped with a signal receiver and transmitter that operate in the area of the extended ellipsoid. The distance between the receiver and transmitter can vary from one to several meters. Radio property line security systems are often used to secure a small area of land.
GPS alarm
This type of security system is based on the principles of operation of global positioning systems, or satellites. The accuracy of determining the location of an object ranges from 3 to 20 meters.
The device itself is quite compact; it is often used to monitor living objects: children, elderly relatives, pets. You can also use it to protect against theft of valuables - a painting, furniture, a book.
It has become widespread in the development of security systems to protect cars from opening and theft.
To protect the premises, the kit includes a video camera and a video transmission channel to a mobile phone, there is also the possibility of voice communication and the presence of infrared illumination for shooting in the dark.
This type of security alarm does not require cable laying, and is also ahead of other systems in terms of speed of notification to the owner
, which makes her very attractive. The disadvantages include dependence on uninterrupted cellular communication and high cost.


