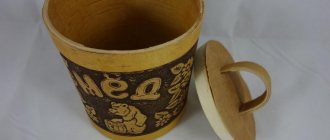
Styrofoam Easter eggs
Polystyrene foam is easy to process and does not require large expenses.
Progress:
- An egg is cut out of foam plastic, which can be either voluminous or flat.
- For further work with it, the egg is put on a skewer.
- Next you need to color it. Gouache, acrylic paints or felt-tip pens can be used here.
- You can decorate the egg with beads or sparkles. To do this, you need to coat it with PVA glue using a brush, and then sprinkle it with sparkles or sequins.
- The place where the skewer went must also be coated with glue and sprinkled with glitter, but first the egg must dry. Excess glitter must be removed.
Easter tree
This craft is also not very difficult. To make it you will need branches of willow or any other tree, decorative elements, and a vase.
The branches are beautifully decorated with ribbons, beads, artificial flowers, and eggs cut out of paper are tied with threads.
All this beauty is placed in a vase with water. In the warmth, the buds that have not yet opened will quickly open and cover the branches with delicate greenery.
Easter crafts made from cardboard
Egg garland
- Here you will need regular cardboard, as well as paper - white or colored.
- Small eggs are cut out of cardboard and decorated with applique or ornament.
- Then a hole is pierced in each workpiece through which the eggs are strung on a thread or thin braid.
- The length of the garland depends on the number of eggs.
Easter wreath
A wreath is not only a symbol of Christmas, but also of Easter. And it can be done in completely different ways. The easiest way to make a wreath is presented below.
- From cardboard - white or colored - cut out a circle.
- Then eggs of different colors are cut out of colored paper and glued to the wreath around the circumference.
- For decoration, you can glue beautiful ribbons or butterflies between the testicles. The craft is ready!
This wreath can also be knitted or made using the quilling technique. It all depends on the flight of imagination and possibilities.
DIY Easter crafts: 33 ideas
Napkins with Easter bunnies
Photo: countryliving.com Decorate simple white napkins with symbolic images of rabbits using fabric paint and a stencil, and sew fringed braid along the edge.
Painted jars with “grass”
Photo: masonjarcraftslove.com These jars can be used as table decorations or placed on a shelf. For them you will need the jars themselves, acrylic paint of several pastel colors and paper “shavings” (filler for gift wrapping, you can buy it at a flower or gift store or make it yourself by cutting colored paper into thin strips). First, paint each jar a different color and let the paint dry. Then we apply patterns and dry again. Add “grass” and you’re done!
Gold vases from jars
Photo: masonjarcraftslove.com By the way, the same jars can be painted with gold paint and made into elegant flower vases. For even painting, it is better to take paint in a spray can, and if you don’t mind texture, regular metallic decorative acrylic and a brush or sponge will do.
Headband with bunny ears
Photo: countryliving.com You can dress a child in such a headband for Easter - he will probably be delighted. You will need a regular headband, fabric and wire. “Ears” are made from strips of fabric sewn along the length, through which wire is threaded. The headband must be covered with the same fabric and “ears” attached to it.
Easter bunny made from paper ball
Photo: francesjanisch.com Another craft option that will delight children is a rabbit made from a paper ball. The ball can be purchased at a craft store or where gifts are wrapped. Add ears made of colored cardboard, paper mustaches, eyes and a nose made of pompoms - the rabbit is ready.
Easter egg pendants
Photo: thelifeofjenniferdawn.com For these pendants you will need colored cardboard with different types of patterns, glue, thick colored threads and several beads for decoration. First make an egg-shaped pattern. Then cut out blanks from cardboard; each pendant requires 4 blanks. Fold each one in half lengthwise, with the picture inside, and glue them together, placing a thread in the middle. Decorate with beads on the bottom and top.
Garland of white rabbits
Photo: cleanandscentsible.com For such a garland you will need paper, glue and thread. Make several pompoms of the same size from threads. Cut out the rabbit image according to the template. Glue them to the base thread and attach a pompom tail to each.
Garland of colorful rabbits
Photo: makeityelloh.com A garland with rabbits made of multi-colored paper is made in the same way as the previous one, but looks different.
Garland of pompoms
Photo: makeityelloh.com You can make a garland only from multi-colored pompoms, large or small.
Garland with tassels
Photo: diycandy.com For such a garland you need multi-colored threads for tassels, beads and letters for the inscription - you can cut them out of colored paper yourself.
Wrapping paper garland
Photo: livelaughrowe.com A garland can also be made from wrapping paper. Take several sheets with a delicate spring print, cut out the parts according to the template and simply stitch them on a machine.
Tulips in a wooden box
Photo: crazylittleprojects.com This original way of “serving” can complement or replace a traditional bouquet in a vase.
"Lace" Easter eggs
Photo: alittlepinchofperfect.com To make these decorations, you will need sheets of colored cardboard, lace tissue paper, glue and watercolors. However, instead of it, you can use the same food colorings that you use to color real eggs for Easter. First, we make a template in the shape of an egg and cut out blanks from cardboard and paper napkins using it. We spray the napkin blanks with water from a spray bottle and immediately drip multi-colored paints onto them. When the napkins are dry, glue them to the cardboard blanks.
DIY Easter egg decor: master class
Chickens from egg cartons
Photo: typicallysimple.com You will need egg cartons, a breadboard knife, glue, paints and colored paper. Cut out the convex parts of the packaging, glue them in two and paint them. Once the paint is dry, add construction paper details.
Eggshell flower stands
Photo: craftberrybush.com All you need to do is carefully open the shell, rid the raw eggs of the contents and wash the shell. Flowers in such “vases” can be placed on the table in ordinary egg cups.
"Flower garden" in an egg carton
Photo: lerobinsnest.blogspot.com Another version of the “flower garden” in an eggshell. This composition can please you for a long time, because the plant is placed in each shell along with the soil.
Gift bags with “ears”
Photo: evermine.com You can put Easter gifts, such as treats, in this bag. You will need simple rectangular craft bags, threads, and pom-poms for the tails. Cut out “ears” from the top of each bag. Glue the tails. Put the gift in a bag, tie it, add a label - you can draw it yourself.
Fabric gift bags
Photo: alittlecraftinyourday.com Gift bags can also be sewn from fabric and decorated with Easter symbols.
Bunny-shaped bag for Easter eggs: master class
Gift bags with painting and embroidery
Photo: aliceandlois.com It is better to first cut and decorate such bags, and then sew them. The design is applied with acrylic paint for fabric. When the paint has dried, you can decorate it with embroidery along the edge.
Gift bag with applique
Photo: northstory. ca Such a handbag can be made either from a paper bag or from a bag made of fabric. The trim ribbons and egg applique can be sewn or glued on.
DIY Easter boxes: master class
Painted paper gift bags
Photo: andweplay.com Another option for Easter gift wrapping: simple paper bags hand-painted with felt-tip pens or markers.
Button painting
Photo: acultivatednest.com Here the buttons are glued to the paper, but you could take fabric and sew buttons onto it, then stretch it onto cardboard and frame it.
Embroidered picture
Photo: dosmallthingswithlove.com A small picture, cross-stitched and left in a hoop, can become both a decoration for your home and a wonderful gift.
Easter bouquet of twigs
Photo: craftysisters-nc.blogspot.com To create such a bouquet you need twigs and small plastic or foam multi-colored eggs (you can buy them in craft stores). The eggs are glued to the ends of the branches using a glue gun.
Easter bouquet decorated with feathers
Photo: auntpeaches.com An Easter bouquet can be made very bright - for example, by decorating it with multi-colored feathers.
Easter bouquet with paper decorations
Photo: thehousethatlarsbuilt.com Feathers for decorating a bouquet can be cut out of paper, choosing, for example, a pastel color.
Easter bouquet of branches braided with threads
Photo: morningcreativity.com Your Easter bouquet can be the height of simplicity when it comes to branch hangings. You can decorate the branches themselves by carefully wrapping each one with colored thread.
Easter bouquet with decorations from bags
Photo: YouTube/Southern Living You can put treats in these bags, such as candy or cookies. The main thing is to make sure that the branches can support their weight.
Easter cards with applique
Photo: northstory. ca Make blanks from craft paper and decorate them with appliques made of colored paper and textured fabric.
Easter card with drawing
Photo: luloveshandmade.com You can also draw an Easter card - for example, repeat this drawing or come up with your own.
Easter card with basket
Photo: YouTube/Lum Planet The basket for this card must first be woven from strips of paper, and then, “filled” with paper eggs, glued to the base. The pen is made from a rolled strip of paper and decorated with a bow.
Postcard with an inscription of multi-colored letters
Photo: interestingcornerofme. blogspot If you are not entirely confident in your calligraphy abilities, the inscription on the card can be made from letters cut out from a stencil. Prepare several sheets of paper, colored or patterned. Trace the letters on paper and then carefully cut them out with scissors. All that remains is to glue the letters to the postcard.
Postcard from a coloring book
Photo: muminthemadhouse.com
You can also use one of the coloring templates: print it on a sheet of paper, paint it, cut it out and glue it onto a cardboard base for a postcard.
Easter egg made of thread
Required:
- Preparing eggs from foam plastic
- Polyethylene film
- Silk or regular thread or floss. Thin yarn will also work.
- Invisible pins or needles
- PVA glue
- Hot glue or glue gun
Progress:
- Wrap polyethylene around the foam piece. Then insert pins in two rows: one row around the perimeter of the workpiece, the second in the place of the future window.
- The threads are generously moistened with glue. Then the first half of the workpiece (window) is wrapped with a zigzag pattern.
- Then, after drying, the second half of the egg (oval) is wrapped. After wrapping, the workpiece is coated with glue again.
- After the first half has dried, remove all the needles and carefully remove the threads from the workpiece.
- Do the same with your other half. Then both halves of the egg are glued together using a glue gun (hot glue).
Easter baskets
A basket decorated for Easter looks very elegant. It is decorated with eggs, flowers, rabbits, and ribbons. Now in stores it is not difficult to find baskets for every taste. There is also always the opportunity to make baskets yourself from newspaper tubes or jute.
We invite you to watch a master class on making a basket with your own hands from a simple rope.
We suggest you make a basket from a craft bag. To make it you will need:
- craft bag (or any paper);
- scissors;
- ruler;
- pen or pencil;
- glue gun or moment crystal;
- wire.
To begin, line the bag into strips along the longest side, approximately 2 cm wide and at least 20 cm long. Cut into strips, and then begin to weave a basket by alternately applying strips of paper horizontally and vertically as shown in the photo. Intertwine the strips with each other; it is better to place the pattern inside the basket. When you have woven a square of approximately 10 by 10 cm, fold the strips upward and weave horizontal strips. Go all the way up and then fold the topmost strip of the basket inward. Secure it with glue. Then wrap the wire with paper and attach it like a handle to the basket. Decorate the basket as you wish.
Check out these Easter basket decorating ideas.
Easter eggs made from soap
Soap figurines are very interesting crafts for Easter and beyond. Soap making has become quite a popular hobby these days. Not only adults, but also children can master it.
The main thing is to give the product the desired shape. In this case, the egg can be either voluminous or flat.
How to decorate a table for Easter - 20 inspiring photos
Of course, the center of any celebration is a table where all household members, neighbors, friends, and generally dear people can gather. Needless to say, it is he who should be given special attention!
Since we are talking about a spring and highly revered celebration, decorations should also add a fresh touch and at the same time maintain a pleasant modesty and unobtrusiveness.
The symbolism of Easter moves, so to speak, in three main coordinates - eggs, Easter cakes and a bunny. Well, you can also name the fourth point of attraction - flowers that look appropriate on any table.
Easter is, of course, a family holiday, like New Year or a birthday. Therefore, there will definitely be a place at the table for the most important people in the world - the very flowers of our lives. And if so, then some decorative elements must certainly radiate a childish wave.
And here's what's interesting. Toys, emoticons, flowers and other elements of “children’s” design create a little wonder and quirk that will surely enliven adults too.
This style of DIY Easter decorations brings a special wave of spontaneity and serene childhood - even photos convey similar feelings. And what can we say about the real table!
Eggs and flowers are symbols of spring and life itself. According to legend, it was the egg that turned red in the hands of the incredulous Roman emperor when Mary Magdalene informed him of the resurrection of Christ. This is actually why people have been painting eggs for Easter for two thousand years.
Intuitively, it seems that there should be a lot of greenery on the Easter table - live or artificial, it is no longer so important. The main thing is that it fits well into the design.
Candles and fire are not only a symbol of romance, but also an image of home comfort, that very hearth. Therefore, the presence of aromatic warming candles at Easter can ignite a pleasant atmosphere, literally and figuratively.
Decorations you can eat
DIY Easter decorations can be “eaten up” not only with joyful glances, but also in the literal sense. The idea of decorating the table with festive dishes is so obvious that it seems to just be in the Easter air.
Moreover, there are an unimaginably many ways of such delicious design. And most importantly, we have an excellent opportunity to work with eggs, which themselves serve as a beautiful decoration in any form.
And ordinary edible greens, as always, guarantee a pleasant aesthetic effect.
And in combination with stuffed tomatoes, this effect only becomes tastier.
Well, in this photo, jelly eggs are a real masterpiece of culinary art! A striking example of the fact that we all love not only to eat a hearty meal, but also to enjoy the aesthetics of the dish.
Jelly eggs are prepared on the basis of broth, which is boiled as jellied meat, and gelatin is added to it for good measure (by the way, you can also use chicken broth, which is cooked for only an hour and a half). If you think that this Easter decoration cannot be made with your own hands without using a mold, you are in for a pleasant surprise.
In fact, the mold will be the shell of an ordinary egg, from which you first need to blow out the yolk and white. Then they put peas, corn, crab sticks, greens - in a word, all products of bright colors. Pour in broth with gelatin and after a few hours everything will be ready!
Baskets as Easter table decoration
Painted eggs need to be put somewhere. There are many ideas with stands that you can also make yourself. For example, charming baskets that create a cozy family atmosphere.
Stylizing a basket as a nest is a wonderful design move that enlivens the table and sets guests up for a relaxed, peaceful wave of a bright holiday.
The idea with a basket is generally a win-win, because in essence it is not just packaging, but an original design for a gift. For example, giving such a set for Easter to dear people and respected colleagues is more than pleasant.
And again - greenery and flowers, flowers and greenery. This is certainly a decoration for all times - this design element has, without exaggeration, an international character.
Egg "Mosaic"
This technique can be used to depict more than just an egg. But also a chicken, a flower or a bunny.
- For the mosaic you will need eggshells of different sizes, cardboard and PVA glue.
- An egg or a hare is depicted on cardboard, and then it is pasted over with pre-prepared shells.
Preparing shells for mosaics
The shells of peeled eggs should be collected, washed, dried and the thin inner film removed. Give the desired shape to the shell already in the drawing, using an ice cream stick.
If the mosaic was made from white shells, you can paint it with watercolors or gouache.
Easter wreath
Many needlewomen make wreaths. You can make the most interesting and original crafts for Easter 2022 with your own hands. The photo shows an unusual composition that will not go unnoticed at the exhibition. The work will require a minimum of materials and a little free time. Once all the tools are at hand, you can start working. Separate decorations collected into one composition will look great.
What you will need:
- scissors;
- cardboard;
- pencil;
- leg-split;
- threads;
- egg shells;
- glue gun;
- lace braid;
- feathers;
- linen fabric.
Master class step by step:
- Draw a circle 8 cm wide on cardboard. Cut out the blank and tie a thread on top.
- Prepare the egg shells in advance by making holes on the side.
- Glue the eggs to the cardboard.
- We place the parts in 2 rows.
- Glue another layer of eggs between the rows and press them with your palm.
- Decorate the wreath with feathers.
- We make a bow from linen fabric. To do this, cut a small strip from the material and attach braid to it.
- From the resulting blank we tie a bow and make a larger loop. We fix it in the center with twine.
- Attach the bow to the wreath.
- The souvenir is ready, all that remains is to find a place for it in the house. This wreath looks quite festive, and it’s not difficult to make such a craft.
The only thing is that you need to work with eggshells carefully. It may crack during the process and additional parts will be required. Otherwise there will be no difficulties.
Egg - soft toy
You can sew such an egg from absolutely any fabric and stuff it with cotton wool or padding polyester. It can also be crocheted or sewn from an old knitted item. Then everything depends on the imagination of the master: you can sew on eyes, buttons, arms, legs, etc.
A large egg can serve as a decorative pillow.
DIY Easter Bunny made from fabric
Cute bunnies have long become symbols of the bright holiday of Easter. Therefore, they can be found as decoration, or you can make a whole Easter bunny craft with your own hands. Fabric makes not just crafts, but real soft toys.
Patterns for Easter bunnies made of fabric can be different. You choose according to your desire or level of difficulty.
You can make such a cute bunny without any special sewing skills.
To do this, you need to print out the bunny template and cut it out, transfer it to the fabric. The brighter the material, the more fun the bunny will be.
You can cut the fabric according to the template by folding it in half at once. Be sure to allow seam allowances.
On one part we embroider eyes, a nose and a mouth; you can sew on beads instead of eyes.
Sew both pieces together, leaving a small hole for stuffing. The hole is then closed with a hidden stitch.
To make the bunny stable, we make a seam at the bottom with side folds.
You can decorate as desired - with ribbons or other decorative elements.
You can make wonderful Easter bunnies from a simple sock.
Materials:
- Needle
- Sock
- Threads
- Filler
- Decor
- Pomade
The place of the heel will be the front side, on which we will cross-stitch the eyes and nose with black threads.
To do this, first cut the socks in half to make ears. Turn it over and sew it up carefully.
You can also stitch on a machine.
Fill with cotton wool or padding polyester, helping yourself push it into the narrow parts with a stick.
Sew it up with thick thread.
We embroider the eyes and nose.
Another option is to make a bunny out of a sock.
Materials:
- Socks
- Scissors
- Felt pen
- Threads
- Sintepon
On one sock, cut out a rectangle in the middle about 2.5 cm.
We sew up the ears with white thread.
Fill with padding polyester and sew up the ears.
Using a felt-tip pen, draw a smile where the heel should be.
We embroider the nose with red threads in the form of a triangle.
Eyes can be drawn or embroidered with black thread.
Cereal eggs
The technique for preparing crafts from cereals is very simple and does not require much time. You will need any cereal and PVA glue.
Manufacturing technology:
- Hard boil the egg, let cool. Then coat it with PVA glue and paste it with cereal.
- You can stick the cereal randomly, or in the form of a pattern or ornament.
- Other Easter crafts are also popular, but egg crafts are especially common.
Egg
The simplest craft will be an ordinary chicken egg. Most often it is colored in onion skins or using special food coloring. This is not a bad gift idea, but it is very familiar to everyone.
Testicles painted in the color-blocking style, when several colors are applied to one surface at once, look much more effective.
To achieve this effect, you will need food coloring, vinegar, water and white eggs. Dyes are diluted in water, and vinegar is added to it. Eggs are placed in a quarter, third or half of the dye. When the coloring process is completed, you need to take out the egg, let it dry and repeat the operation on the other side, but with a different color. Or leave the unpainted part white.
To give the marble effect, the eggs are first colored in the usual way, and then immersed in a more saturated dye of the same color, but with the addition of vegetable oil.
Unusual colors can be obtained by wrapping white eggs in silk shreds and boiling them in this form in water with the addition of acetic acid. This interesting method of coloring will allow you to create the most unusual patterns on the shell.
You can also use ribbons, beads, artificial flowers, and beads for decoration.
Easter chicks made of threads
You will need: a balloon, any thread and glue.
Manufacturing technology:
- Inflate the balloon to a small size. Wrap threads pre-soaked in glue around the ball and let dry. Pierce the ball and remove it.
- Decorative parts of the chicken (comb, legs, tail) can be made from felt, colored paper or cardboard and glued to the base.
- To make Easter bunnies, you will also need paper, cardboard, scraps of fabric of different textures, and yarn (for those who know how to knit).
- Bunnies can be made from plastic bottles, yogurt cups or juice boxes!
Table decoration: egg cups
If we talk about how to decorate the table for Easter with your own hands, the thought of painted eggs will probably come to mind. It’s not surprising - after all, they are beautiful in themselves. Another thing is that every dish should be on the dishes, but here you can be original.
Here are some photos and instructions for creating interesting egg cups that can be made from improvised materials.
Ship = stand?
Let's start with the simplest. As children, we all made paper boats and sailed them through the endless spring puddles. Perhaps someone played these fun games on Easter - fortunately, it always falls on a weekend. And it was hardly thought then that from such a boat (or rather, from two boats) you could make a very beautiful and stable stand for Easter eggs with your own hands.
Step-by-step instructions for those who have forgotten how to make this toy:
The tongue can be bent well or carefully cut, but not to the very base, but a little higher, so that the craft does not “creep”. Of course, you need to draw circles, flowers and other decorative elements on paper. Or write "HB". In general, this task can be entrusted to the kids - they definitely won’t get confused.
Or you can simply buy paper with artistic design - preferably in light colors. Then the Easter table will sparkle with special spring colors: all household members will unconsciously feel this pleasant freshness.
Flower stand
Now let's move on to a slightly more complex paper egg stand, which, however, is also quite possible to make with your own hands. We will need colored paper, as well as a cardboard tube, on which cling film and other similar materials are usually wound.
We will act like this:
- First, we cut out the part of the tube we need - about 7-8 cm (we base it on the size of the egg).
- We cover it on both sides with beautiful paper (you can use double-sided paper).
- And with the other sheet we do this: cut out a strip with a width corresponding to the tube, and cut it into a “fence”, with wide teeth that need to be bent (it’s convenient to use a pencil for winding).
- We glue our “fence” onto the base, after which we make the next layer - it will go a little lower. By the way, it is better for the teeth to point in the other direction - you will get a pronounced volume effect.
- Well, the lower part will consist of large petals - 4-5 in a row.
- It turns out to be such a flower.
- All that remains is to revive it and make a green base. We cut out a circle with a diameter slightly larger than the tube - the part that protrudes will turn into leaves when we cut them into strips.
- All that remains is to glue this part to the craft - the result is such beauty.
CREATIVE ADVICE
Of course, fantasy can go further, because that’s what fantasy is for. For example, an egg can be decorated with a butterfly, and the petals can be cut approximately the same to make a rose.
The result is a composition with which you can even paint a still life. Here is an original do-it-yourself egg stand - by the way, it will certainly become a source of special joy for children.
And here is another version of the craft in the same style.
And one more piece of advice. If you make all the petals from corrugated paper, you will get a very cozy, visually soft and warm craft. Yes, and it looks more natural.
Application "Hare" from plastic caps
You will need:
- Cardboard (white or colored) with a face or a figure of a hare drawn on it;
- Plastic covers;
- PVA glue.
The finished drawing is pasted over the contour with plastic caps, bottom up. The combination of lids of different colors will give the craft an even more original look.
Go for it! Create! And offer your ideas for Easter crafts with photos!
What Easter decor to choose for your home for Easter?
The Easter holiday comes to us every year in the spring, when the first buds awaken on the trees, and the first sprouts of spring flowers push out from under the frozen ground. Awakening in nature is inextricably linked with the awakening of something bright and beautiful. Therefore, we will start decorating our house from the windows.
- To allow light and warmth to penetrate into your home, you should remove the heavy curtains and hang elegant tulle in their place.
- If desired, you can hang brightly colored curtains with a delicate floral pattern. It doesn't hurt to decorate the windows themselves.
- For this purpose, you can use Easter garlands, self-adhesive colored films in the form of moths, flowers, Easter bunnies or eggs. The flight of fancy is limitless
Photos of crafts for Easter
How to decorate an Easter egg for the bright holiday of Easter? Photo
Easter eggs made of beads look beautiful on a tree. This is a troublesome task, but if you have experience in beading, then it will not be difficult for you. We invite you to familiarize yourself with the step-by-step video instructions, following which you can teach this fascinating process even to your children.
Easter cards
Easter cards with embroidery
The cross stitch patterns you are already familiar with can be used to make your own postcards.
Easter card, cross-stitched
Easter card embroidered with ribbons
Easter cards-appliques
From paper card blanks, fabric, braid and ribbons you can make some pretty cute Easter cards. It won't take much of your time.
Easter cards using scrapbooking technique
There is nothing stopping you from making a card using the Scrapbooking technique. As already mentioned, the main subjects are Easter eggs, Orthodox churches, Easter cakes and flowers.
Easter napkins
Classics of the genre! However, you can start making them now, because such embroidery requires a lot of time. There are a lot of patterns that you will use to embroider. Assess your skill level and choose:
Easter napkin with embroidery
Easter towel with embroidery
Easter tablecloth with embroidery
You can see other patterns for Easter towels and napkins on our forum, in the topic: “Easter patterns”
Easter candles
Egg-shaped candles are an original souvenir for Easter. Our master class “Easter candles and their protective properties” will not leave any questions on the topic “how to make them.”
By the way, the same egg shells can become the best candlesticks: