It is impossible to do without glue in many types of needlework, when repairing and repairing, and, of course, when carrying out various construction work.
Usually, for each type of activity there is a specific type or grade of glue, which can be purchased at a specialized store, or you can make it yourself. Often, a home-made compound turns out to be even more effective and reliable than a factory-made one. Is it difficult to make glue for certain types of materials? The individual required ingredients can sometimes be quite difficult to find, but, one way or another, the product you make yourself will be of quite high quality.
[contents]
Homemade tile adhesive
Homemade adhesives are still produced today, with a huge selection of various chemical compounds for attaching tile products from different materials with different weights.
This is caused by the need to use existing houses, previously purchased and unused building materials. You can make tile adhesive yourself to save money.
The result will be no worse than when using expensive mixtures, if we are talking about ordinary wall tiles of a standard size for interior decoration.
If you need to attach tiles (to the ceiling, drywall), or heavier porcelain tiles, you shouldn’t skimp on glue. Such materials were not used before.
Special glue is needed in rooms with high humidity and significant temperature changes (for example, a bathroom).
External finishing work requires frost-resistant, water-repellent mixtures that can also withstand strong temperature changes. There are special products for such conditions, and they need to be used.
Recipe for the most powerful all-purpose solvent and foam adhesive
This adhesive composition is used when the house does not have the required consistency or it runs out at the most necessary moment. The substance is suitable for sudden cracks in the roof. Some people prefer to use such an adhesive composition to fasten objects in the interior or to install a cornice on the ceiling.
Solvent and foam glue can be called the most reliable, so using it, you don’t have to be afraid that the fastened parts will begin to fall off over time.
The adhesive gained popularity due to its reliable fastening of materials such as gas-filled polystyrene, baseboards and furniture elements.
Styrofoam
Foam glue recipe
In order to create the required adhesive consistency, it is enough to perform a number of simple steps:
- Pour the solvent into the container. Acetone or solvent No. 646, 647 is suitable. The volume depends on the required amount of glue after creation.
- Pour foam into the solvent and keep the material in it until a viscous substance begins to form.
The resulting glue is used to fasten different planes. When the consistency hardens, it reliably holds the surfaces being treated for a long time.
You can use a brush to apply the material. This is an ideal option if you need to repair your roof. When the material hardens, it resembles glass.
Ready-made foam glue
We looked at the first method, which described how to make glue at home from polystyrene foam and solvent. To create a bonding composition, you can simply apply crushed foam to the desired location and pour a solvent over it. During the reaction, the material begins to melt, expand and fill all the cracks. Thanks to this, high-quality sealing occurs.
As an example, we can consider the process of sealing cracks on the roof (slate). The composition can be applied and reliably fasten the joints of roofing felt. Please note that if it has a liquid consistency, it will be unusable.
Features of the composition
As in any other process, when working with chemistry, you need to adhere to specific rules. Mixing work should be carried out away from sources of fire. The resulting mixture not only ignites quickly, but also burns for a long time.
It should be taken into account that it is better to prepare in the fresh air; this will not cause harm to health, since mixing in a room can lead to poisoning by chemical fumes.
In addition, we must not forget about this. That the mixed consistency can be used only after a day, and with increasing layer thickness, the hardening time increases.
A similar adhesive composition is used if the necessary glue is not available or it runs out at the most inopportune moment.
Dissolving the foam
To ensure that the resulting consistency dries faster, it is recommended to choose solvents that contain acetone. If the preparation was done correctly, the result can withstand almost any temperature change. For this reason, this glue is used on the roof and in cracks on the house.
Which foam is suitable
We looked at the question of how to make glue at home from polystyrene foam. Now you need to familiarize yourself with exactly what components can be used to create.
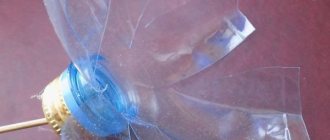
Polystyrene foam is a material made from foam masses. It is very often used to insulate living spaces. Depending on the production process, polystyrene foam is divided into 3 categories:
- No pressing required. In the final version, this material looks like balls that are interlocked. If you rub several elements of this foam against each other, it will begin to crumble and the balls will separate. The option is used to obtain the glue in question. It can easily be dissolved in acetone and turned into a mass of the required consistency.
- Using pressing. The material has an increased strength coefficient in contrast to the previous option under consideration.
- Extrusion. This is foam plastic with a homogeneous structure, since elevated temperatures are used during its manufacturing process.
In addition to the options listed, you can also use granulated foam. However, before using it, you need to check its solubility. It would be appropriate to say that this version of foam is considered the most convenient for creating glue.
Thus, with a solvent and foam at your disposal, you can get an adhesive that is reliable and can last for a long time.
Features of modern tile adhesive compositions
However, there are different situations. During repairs, many people face financial problems, since not always everything can be foreseen in advance:
- The price of building materials is rising,
- Errors are allowed in calculating what is needed,
- Unforeseen expenses arise due to breakdowns,
- Hidden defects that need to be eliminated.
All this leads to the fact that there is not enough money or time to buy new equipment, but work needs to be done. Sometimes this is beneficial, strength and knowledge are mobilized and available means are used. This saves space (since they no longer need to be stored), time and money.
Homemade adhesive can be quite high quality. When making it, it is important to strictly observe the required proportions, work quickly, and prepare everything possible in advance to avoid premature hardening of the mixture.
Making a vulcanization device
Each vulcanizer has two main elements: a heating part and a locking device. Such rubber processing equipment may be based on:
- iron;
- electric stove “Bazaar”;
- piston from the engine.
In a device with an iron, the heating part is the surface that is ironed in everyday life. If we plan to use an electric stove, then the coil should be covered with a metal sheet, and during operation it is necessary to put paper between the rubber and the metal. This device must be equipped with a thermostat to avoid overheating of the material.
The locking part of the vulcanizer is easier to make from a clamp. The simplest device to make is one consisting of an iron and a clamp. Since they are both metal, joining them using arc welding is easy. The iron also has a thermostat.
The piston vulcanizer also uses a metal plate. A rubber chamber is placed on it. The piston, with its smooth part in contact with the explosive mixture in the engine, presses the lining using a homemade clamp. Paper is also inserted between the plunger and the patch. After this, gasoline is poured into the piston and ignited.
Such a piston device is especially relevant on the road, when there is no way to connect to the electrical network. However, such a device does not have a thermostat and the temperature will have to be adjusted manually.
How to choose the best tile adhesive composition
The most common "homemade" tile adhesive can be prepared with:
- By adding PVA (polyvinyl acetate) or wallpaper glue based on CMC (carboxymethylcellulose);
- Liquid soap or washing powder;
- Paints.
In all cases, the above products are added to a mixture of cement and sand, in which one part cement and three sands (1:3). It is important to create a well-mixed substance with the consistency of thick sour cream.
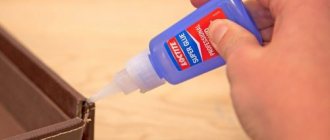
When adding PVA, the glue must be diluted with water in a ratio of 2:1 - add one part of water to two parts of PVA. This compound is gradually poured into a pre-prepared container with dry cement and sand, stirring thoroughly.
When using liquid soap, you also need to prepare a solution: use 50 to 100 g of liquid soap per bucket of water. More than 100 grams of soap should not be dissolved, as efflorescence may form.
Carefully, stirring constantly, pour the resulting liquid into a container with a mixture of sand and cement, diluting it to the consistency of thick sour cream.
- You can add old, but still intact, paint to the mixture of sand and cement.
- You will have to be careful when working with paint-based glue.
- If it does not match the color of the tile, the tile must be laid without joints, avoiding paint showing through.
- Also, the work must be done quickly, avoiding premature hardening of the adhesive. The paint-based glue will be quite strong.
- In most cases, oil paint is used, but enamel is also acceptable.
- The latter dries out faster. This must be taken into account during work and speed it up as much as possible.
Using such simple recipes, you can make your own tile adhesive for laying tiles, saving money, as well as using unnecessary materials available at home, which would soon lose their qualities and would have to be thrown away.
How to make paste from flour with your own hands
It is important that the paste does not tolerate moisture well. Again, if you know what the paste is made of and what components need to be added to it, this drawback is guaranteed to be eliminated. Naturally, mixing the resulting mixture turns out to be somewhat more difficult than diluting store-bought glue, but a little persistence and simple desire will also help you cope with this task.
We have already dealt with all the advantages and disadvantages that an adhesive composition made from flour or starch has. Next, let's look at the nuances of preparing one of the simplest ways to weld glue. A standard paste is made from only three components:
- flour, you can take it of any kind;
- water (boiled or not – it doesn’t matter);
- spoon of starch.
When choosing flour, be guided by the specific wallpaper on which the glue itself will be applied. If gluing light-colored surfaces is necessary, it is recommended to use exclusively wheat flour. For dark wallpaper, both wheat, rye and corn are suitable. The fact is that dark types of flour can leave corresponding shades on light types of wallpaper.
Tips for making thick paste
The type of flour really doesn't matter. So, it would be much more rational to use a solution made from third or second grade flour. The fact is that it is quite cheap and has improved viscosity. In order for wallpaper to be glued correctly, the paste must have the consistency of liquid dough. Before starting the actual preparation of the paste, you will need to decide exactly how much of it you will need for your purposes.
Let's begin the step-by-step preparation of a high-quality adhesive mixture:
- First, prepare a cooking vessel. An enamel bucket or a large saucepan of appropriate capacity is most suitable.
- Pour a glass of cold water and add 200 grams of flour.
- Stir the mixture quickly and thoroughly, breaking up any lumps in the pan.
- Take another pan and boil about 800 milliliters of water in it.
- Pour boiled water into a container with flour and water, then stir thoroughly.
- Cook the mixture until it boils, then remove the container from the heat.
- Strain through cheesecloth and let the mixture cool slightly.
- To add stickiness to the finished mixture, add wood glue to the batter.
- After complete cooling, this material can be used to glue glass wallpaper, heavy paper wallpaper, and generally be used for various purposes during construction.
Required qualities of tile adhesive
Ceramic tiles are quite heavy items. The glue for it must be good at gluing surfaces, which are often completely heterogeneous. In most cases they are vertical, which makes the work more difficult.
- The glue must have high adhesion, that is, quickly bond two surfaces.
- Tiles with high-quality adhesive do not move or fall.
- It has low fluidity and is resistant to slipping: the tile remains in the place where it was attached, there are no unwanted displacements.
The glue provides elasticity if it adheres well to the surfaces being glued. It should not dry out for a reasonable period of time so that slightly misaligned tiles can be straightened.
Sometimes you need to quickly spread a little more glue to finish the job. At the same time, it should be possible to correct the tiles laid last, which may slide slightly.
Most common mistakes
Quite often, when you plan to quickly lay tiles, a number of mistakes are made when preparing the mortar:
- Often you come across low quality sand, not sifted and not dried, and in a hurry this is what is used.
- It is also an unacceptable mistake to use old cement, which often loses its properties.
- Only clean water should be used; in no case should sea water or dirty, settled water be used.
- The mixture must be thoroughly mixed so that no lumps remain, which entails a loss of quality.
- It is also a mistake to lay tiles with increased requirements (for example, porcelain stoneware) using a standard adhesive mixture or cement mortar.
This was a series of mistakes when using cement mortar, now let’s look at the use of ready-made compositions:
- The use of cold or hot water is strictly prohibited.
- You cannot add the mixture first and then add water, otherwise lumps will form.
- Do not soak the tiles or wet the base.
- Containers for preparation must be clean, after each batch they must be cleaned and washed.
- The mixture must be stirred at a low speed of rotation of the mixer. At high speed the mixture will foam, at low speed there will be lumps.
And finally, a little advice, if you plan to lay tiles on tiles, our article on this topic will help you decide which adhesive to use.
Profitable use of existing materials
Preparing tile adhesive is simple; it is only important to carefully observe the required proportions. As a result, you will be able to get the job done while saving money.
Making your own adhesive is also beneficial in cases where the tiles need to be installed on a not very flat surface. It is known that there is a thick-layer cement adhesive and a thin-layer one.
Thick-layer is also used to level the surface under the tiles. Its consumption is greater, so it is more profitable to dilute it from existing materials.
Knowing how to make your own tile adhesive is useful. This powerful product can be used for cosmetic repairs of premises, as well as for gluing other objects, without turning to specialists for help. At a small cost, everything in the house will remain beautiful and well-groomed.
Useful tips
Recommendations from experts will help you glue surfaces together efficiently:
- Some formulations thicken during long-term storage. There is no universal means for dilution. To avoid difficulties, check the expiration date when purchasing.
- The temperature in the room where the work is carried out should not be lower than +5° C.
- Before gluing, the surfaces must be cleaned of dust, dirt, degreased and thoroughly dried.
- The adhesive properties of the material will increase significantly if you sand them with sandpaper before applying the mixture.
- First you need to sand the surface (treat it with sandpaper) and only then degrease it.
- The best option for degreasing would be an easily evaporating solvent, such as gasoline or acetone.
- The composition should be applied with a brush, and if it is thick, then with a spatula.
- The minimum thickness of the adhesive layer is 2 mm.
- When repairing shoes and boats, a layer of 1 mm thick should be applied to the previously sanded surface. After this, put a piece of gauze, press it with a spatula and apply glue again, and only then firmly press the surfaces to be connected to each other.
- Any stains or excess product must be removed immediately using a spatula or knife.
- Keep the area to be glued under pressure (load) for at least several hours.
Low indoor humidity slows down the drying of the glue. A high-quality product sets within 30 minutes, and final hardening occurs after approximately 48 hours.